ProModeler 1/48Ju-52/3m
| KIT #: | 5944 |
| PRICE: | An extravagant $40.00 when new |
| DECALS: | Two options |
| REVIEWER: | John Summerford |
| NOTES: |
| HISTORY |
 The original
1930 design of the Ju 52 was for a single engine airliner. The following year,
an engine was added to each wing and the designation changed to Ju 52/3m,
meaning Dreimotoren
for a three-engine platform. The new airplane first took to the sky in April,
1932. (It was outclassed in May of 1934 by the DC-2 and Junkers converted to
stressed-skinned construction with the Ju-88 two years after that.) Its rugged
design and performance flying from semi-prepared airstrips opened air travel to
the Canadian north, the Eurasian Steppe, and over inland South America, placing
the Ju 52 amongst the most important commercial aircraft types in history.
The original
1930 design of the Ju 52 was for a single engine airliner. The following year,
an engine was added to each wing and the designation changed to Ju 52/3m,
meaning Dreimotoren
for a three-engine platform. The new airplane first took to the sky in April,
1932. (It was outclassed in May of 1934 by the DC-2 and Junkers converted to
stressed-skinned construction with the Ju-88 two years after that.) Its rugged
design and performance flying from semi-prepared airstrips opened air travel to
the Canadian north, the Eurasian Steppe, and over inland South America, placing
the Ju 52 amongst the most important commercial aircraft types in history.
Germany supplied 20 Ju 52s to the Spanish Nationalist forces in 1936 and eventually were taken over by the Condor Legion, but it was Tante Ju’s World War II service that came to define the aircraft’s legacy.
In addition to the type’s more famous roles as a cargo and paratroop transport, Ju 52s also towed gliders for aerial assault missions against fortified Allied positions in the opening nine months of WWII. Furthermore, some Ju 52s, with their 3,300lb payload capacity, even served as bombers early in the war. However, the type’s lack of speed and maneuverability brought a swift end to that futile endeavor.
| THE KIT |
 1999 is the
copyright of this kit and that is when it was purchased by yours truly. A
cardboard lid covers a sturdy corrugated box that contains two bags of gray
sprues, two sprues per bag. Clear parts are bagged separately inside one of the
bags. The decal sheet rests at the bottom of the box. The number of parts in the
kit is 162 of gray, including parts for four paratrooper figures, and 12 clear.
1999 is the
copyright of this kit and that is when it was purchased by yours truly. A
cardboard lid covers a sturdy corrugated box that contains two bags of gray
sprues, two sprues per bag. Clear parts are bagged separately inside one of the
bags. The decal sheet rests at the bottom of the box. The number of parts in the
kit is 162 of gray, including parts for four paratrooper figures, and 12 clear.
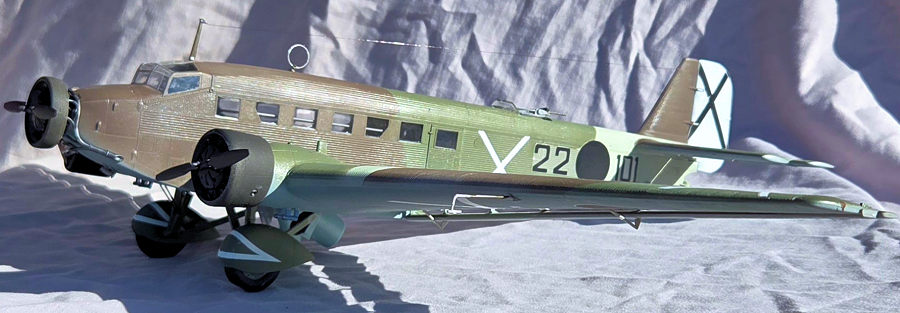
Options are a Spanish Civil War version with a ventral “dust bin” gunner position, either retracted or extended, or a Luftwaffe aircraft the participated in the invasion of Crete.
History, color call-outs (most referring to FS equivalents), paint and marking diagrams, and 10-step assembly sequence (each with sub steps) are included in a 16-page booklet. Helpful tips plus black and white detail photos are included.
| CONSTRUCTION |
Construction starts predrilling the cabin floor, then moves to cockpit subassemblies. Before gluing any parts, the interior pieces were painted while on the sprues. The gray styrene is nearly an exact match for RLM 02 gray, so the interior cabin parts were installed unpainted. The seats were dispensed with also.
After the cockpit,
gunner’s compartment, floor, and bulkheads added to the right fuselage side, the
left side was mated to it. Holes in the underside fuselage piece need to be
drilled for the version being built before being offered up to the sides. Six
detail parts are called for in the interior surface of t he
fuselage top and, again, these were left off. The fit of the fuselage seams is
very good and required little clean up.
he
fuselage top and, again, these were left off. The fit of the fuselage seams is
very good and required little clean up.
Masking was applied to the windshield and, it fit perfectly when it was installed.
Assembly of the wings and tail surfaces is straight forward. One VERY helpful note is to be cautious handling the model so that the hinge arms of the ailerons are not damaged. Bitter experience showed to attach temporary cardboard shields to the wings to preserve them. Again, little work was needed on the seams.
With the basic airframe assembled, it was time for paint.
| COLORS & MARKINGS |
 As is my
usual practice, a rattle can of automotive primer was the first coat. The
underside was painted with Mr. Hobby Aqueous #67 that was on hand and left
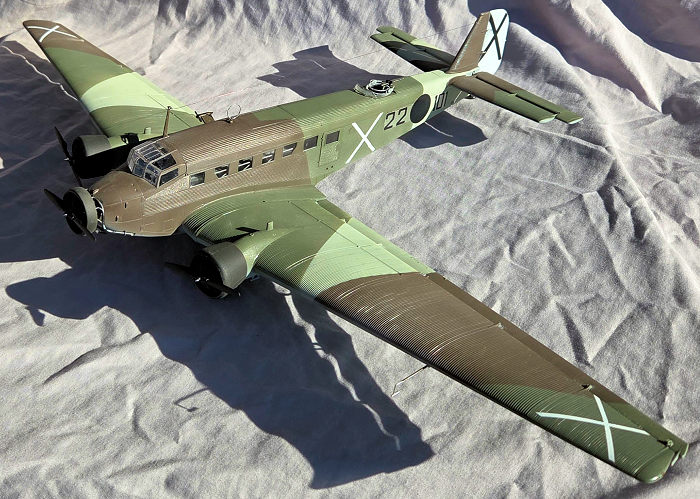
unmasked. The top side was airbrushed with AK Air series RLM 63, RLM81/61, and
RLM82/62. This was my first time using these paints and I found that they did
very well. The cowls were painted rubber black instead of flat black.
As is my
usual practice, a rattle can of automotive primer was the first coat. The
underside was painted with Mr. Hobby Aqueous #67 that was on hand and left
unmasked. The top side was airbrushed with AK Air series RLM 63, RLM81/61, and
RLM82/62. This was my first time using these paints and I found that they did
very well. The cowls were painted rubber black instead of flat black.
A couple of coats of clear gloss were laid down before applying the Spanish marklings. Despite their age, the decals behaved well, although the “X” s were hard to maneuver over the corrugations. It proved easier to cut the “X” s into three pieces; one long leg and two short cross-legs.
A clear coat of flat finish sealed the decals.
| FINAL CONSTRUCTION |
I failed to notice that, prior to painting, some of the masking of the windshield had lifted and their panes were etched. (Siiiigh!) I buffed out as much as I could and, in the right light, it is not noticeable.
At this point, the
instructions call for installation of the landing gear and lower gunner’s “dust
bin,” if it is included. This was deferred until after the engines were
installed. Even though the engines are composed of six parts, they are fiddly.
The nacelles for the wing engines are so deep, that there is no re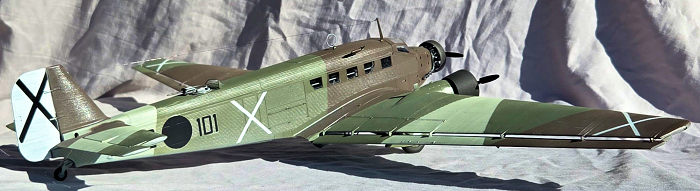 ason
to add the exhaust manifolds. The instructions are clear regarding how to keep
everything aligned.
ason
to add the exhaust manifolds. The instructions are clear regarding how to keep
everything aligned.
Once the engines were installed, the ailerons were added, letting the glue set overnight. Starting in the middle of the underside, the “dust bin” and ventral radio mast were glued into place, followed by the landing gear. Addition of the push rods and oil coolers complete that step.
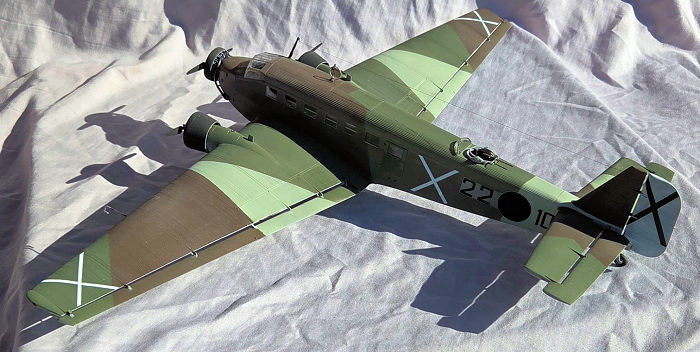
Topside details to add were the dorsal gunner’s ring and windshield, loop antenna, wind-driven generator, and radio mast. When the glue cured for those parts, the radio aerial was rigged. The final four pieces were the pitot and propellers.
| CONCLUSIONS |
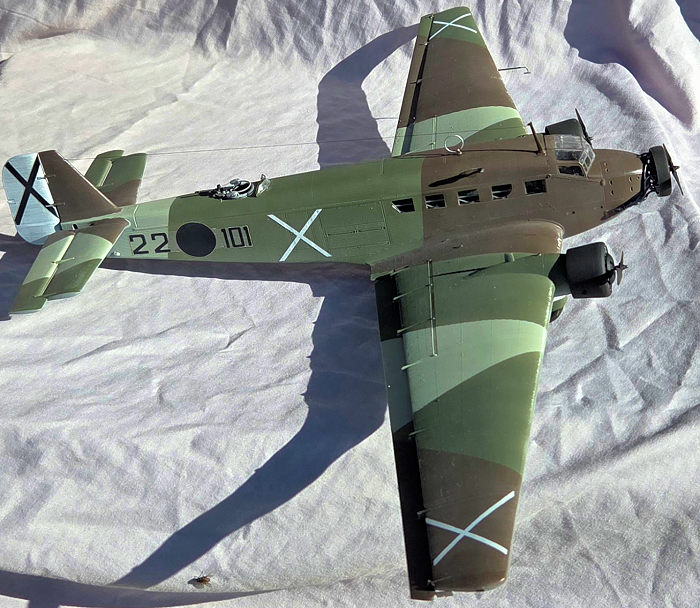
This is a big model! The wingspan is nearly 25 inches, versus a DC-3’s 24 inches. The kit builds easily and has good detail. The trickiest step is attaching the ailerons, and that has more to do with the subject that the kit engineering. Small spring clams proved very helpful. Masking for the upper colors was easier than I thought it would be. There was no need to press the tape into the valleys of the corrugations.
Given that the Ju-52’s significance is more important to airliner history than its military history, it would be nice to see a new airliner kit produced. I’m sure 72nd scale would be the best scale for such a kit.
I’m glad to have the large box out of my stash, but now I have to figure out where to put the model.
John Summerford
9 October 2025
Copyright ModelingMadness.com. All rights reserved. No reproduction in part or in whole without express permission.
If you would like your product reviewed fairly and fairly quickly, please contact the editor or see other details in the Note to Contributors.