| KIT #: | SH 48089 |
| PRICE: | $44.00 NZ |
| DECALS: | Two options |
| REVIEWER: | Michael Rohde |
| NOTES: |
| HISTORY |
 In January 1936 the He 51 B
was introduced on the production line and differed from the previous A-1 variant
in being structurally strengthened. A He 51 A-1 was initially converted to carry
twin aluminium float landing gear and tested successfully for aero and
hydrodynamic performance. This prototype was the forerunner for a series of 38
He 51 B-2 floatplane fighters equipped for catapult launching from Kriegsmarine
cruisers and other large warships.
In January 1936 the He 51 B
was introduced on the production line and differed from the previous A-1 variant
in being structurally strengthened. A He 51 A-1 was initially converted to carry
twin aluminium float landing gear and tested successfully for aero and
hydrodynamic performance. This prototype was the forerunner for a series of 38
He 51 B-2 floatplane fighters equipped for catapult launching from Kriegsmarine
cruisers and other large warships.
Racks could be fitted to carry up to six 10 kg bombs.Otherwise the standart armament of two Rheinmetall MG 17 machine guns ( cal 7.9 mm) remained unchanged. The He 51 B-2 (W) served mainly in the Baltic Sea area in so called Kuestenjagdstaffeln( Coastal fighter squadrons) -Kujasta 136- up to the beginning of WW 2.
| THE KIT |
 The kit comes in a sturdy
box with typical Special Hobby style artwork on the lid. Inside we find three
frames molded in light grey plastic holding 71 parts and one clear plastic
windshield. Separately bagged are 3 resin parts consisting of the pilots seat
with a complete seat harness and 2 control levers.
The kit comes in a sturdy
box with typical Special Hobby style artwork on the lid. Inside we find three
frames molded in light grey plastic holding 71 parts and one clear plastic
windshield. Separately bagged are 3 resin parts consisting of the pilots seat
with a complete seat harness and 2 control levers.
The decal sheet offers 2 options. The decals themselves are of excellent quality. Instructions contain a parts list, brief history, drawings for painting and marking options, a paint guide reference for Gunze paints and a 9 step sequence of drawings on how to assemble and rig the aircraft.
| CONSTRUCTION |
Being a limited run kit it is essential to check and prepare all parts and remove any mold seams , flash and sinkmarks first before we can start.
Step 1 and 2: Begins with building the cockpit.The interior was painted with Tamiya cockpit green. The instrument panels , throttle quadrants and stick were done in Tamiya flat black and drybrushed with flat aluminium .Weathering was applied with Accent panel liner black and brown.
 Step 3: As always with
Special Hobby kits, you have to make sure that sub assemblies like the cockpit
do not interfere dimensionally with the fuselage shells. So I did and
-indeed-had to remove a bit of material from the cockpit floor and rear bulkhead
to fit accurately before I glued the fuselage halfes together.
Step 3: As always with
Special Hobby kits, you have to make sure that sub assemblies like the cockpit
do not interfere dimensionally with the fuselage shells. So I did and
-indeed-had to remove a bit of material from the cockpit floor and rear bulkhead
to fit accurately before I glued the fuselage halfes together.
With this being out of the way I moved on to attaching the lower wing, horizontal tailplanes and rudder. By dry fitting and adjusting these parts beforehand I was able to reduce any gaps to a minimum which I filled with CA glue .
The lower wing ailerons are dimensionally not quite correct and do not line up with the wing's surface.( that problem re occurred later on with the ailerons on the upper wing) To fix that would be rather time consuming and so I left it as is.
The engine cover was a tat too big and had to be sanded back to match the fuselage.In this case a bit of putty was needed to get an even surface before I was able to rescribe panel lines.
Step 4: here it is getting interesting. Attaching the exhaust stacks was easy enough. The radiator assembly was a bit too short in the side walls and I had to us 0'4 mm Evergreen strips to rectify that. After glueing these into place I carefully scraped the inside edge in an angle to fit snug onto the fuselage. Having made sure that everything's good I painted the radiator interior and glued the whole lot into place. Now came the tricky part: the cabanes!
First of all I had to measure the distance between the attachment points on the upper wing to get the correct angle in which the cabanes had to sit on the fuselage . So far so good ( or so I thought).
After the glue had set , I checked the alignment of the cabanes in relation to the upper wing and found that the wing is actually rocking diagonally. The reason for that was that the cabanes looked allright but were a bit different in length as far as the front struts were concerned. What to do now?
 I figured that it would be
best to rummage through my spares boxes and see if I can find a part which I
could use to replace one of the short struts. I was lucky to find a good piece
and fixed that problem.
I figured that it would be
best to rummage through my spares boxes and see if I can find a part which I
could use to replace one of the short struts. I was lucky to find a good piece
and fixed that problem.
To make sure that I had a
good positive seat and a good wing balance I widened and deepened the holes a
bit. I left the wing as is because I wanted to paint that first before final
assembly. Now was the time to glue the windshield into place.
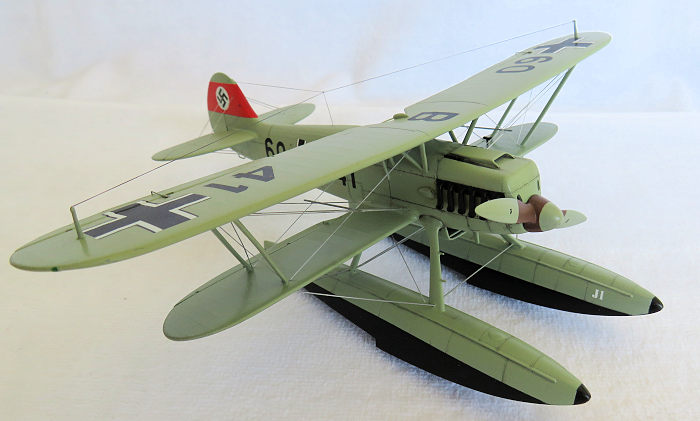
Step 7 and 8: That brings us to the floats and their supporting struts. First of
all-- being pre-warned about dimensional problems- I carefully measured the
float supports first. .--Not bad--
I put the floats together , sanded and cleaned up the seams and did a full rivet line engraving job on them. The kit parts show only the main panel lines but that does look a bit bland. It was time to drill the holes for the bracing wires now due to good accessibility.
With that out of the way I decided to install one set of struts and one float first and do the other lot after the glue had set. With both floats in place I did the bracing using thin piano wire. That also gave increased stability to the float assembly.
Stage 9: Before I undertook the final step ( ie fitting the upper wing) I painted the upper wing and the model. The exhausts were handpainted and red brown pastel was rubbed on to give the appearance of burnt metal. The gun barrels were glued into place as well.
| COLORS & MARKINGS |
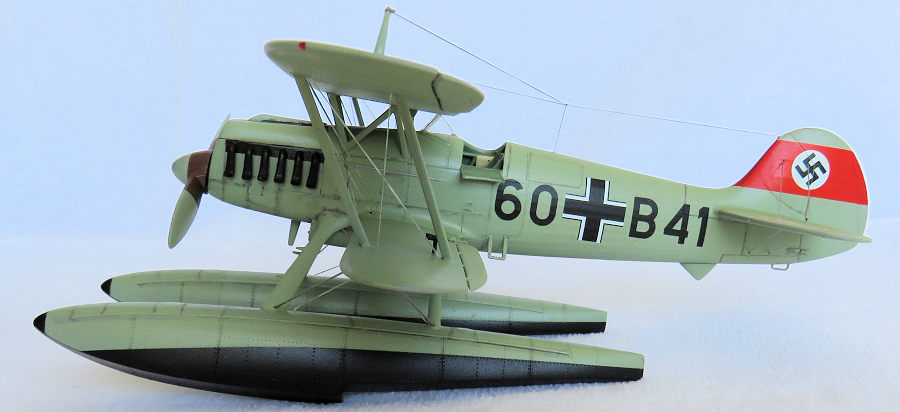
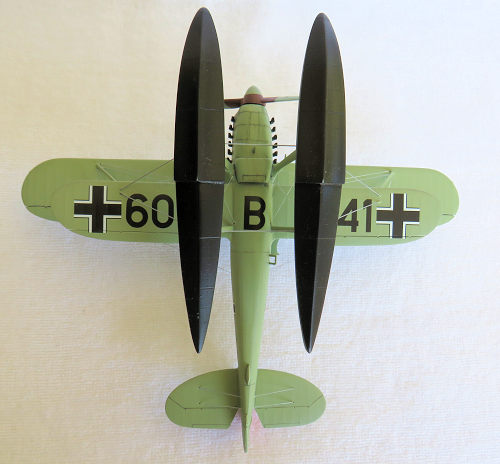
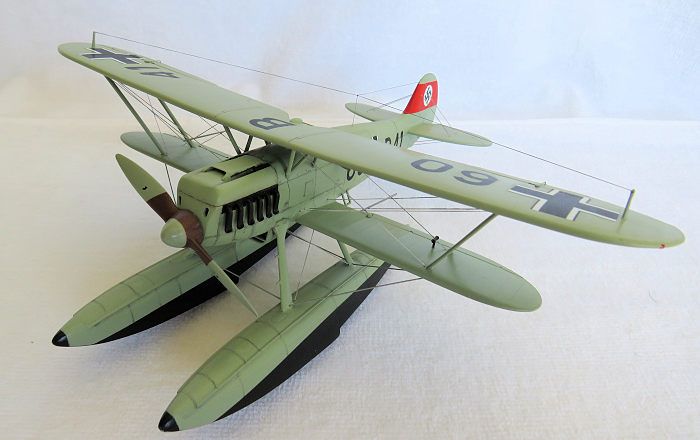
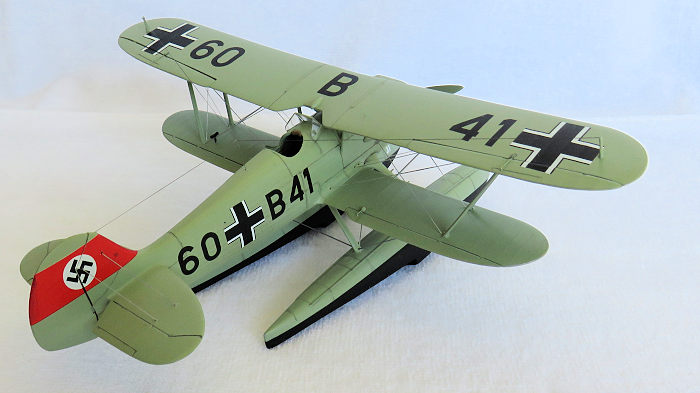
The general colour scheme is rather simple. An overall coat of Tamiya JA grey offset by partially black floats. The propeller boss and blade base was painted with Humbrol 160 ( German camo red brown) the rest in JA grey.
 As usual a overall coat of
Tamiya clear gloss was applied as a base for the decals. The model was left to
dry for a day before I commenced with the rigging. Tamiya accent panel liner
black was used to enhance panel lines and some oil streaking.
As usual a overall coat of
Tamiya clear gloss was applied as a base for the decals. The model was left to
dry for a day before I commenced with the rigging. Tamiya accent panel liner
black was used to enhance panel lines and some oil streaking.
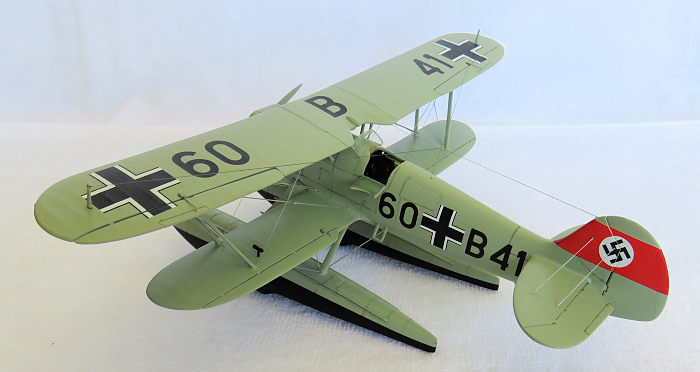
I went about fitting the upper wing carefully and found that I had to do some more small corrections ' ( ie widen the holes for the cabanes a bit more to get additional space for the parallel alignment of the upper wing in relation to the lower wing. When I was happy with that a bit of CA glue helped to secure the wing. Luckily the outer struts slotted into place fairly easy. What a relief that was!!
Finally the decals . In this case I preferred the letter code which helps to enhance the otherwise uniform colour scheme. As I said -the decals are very good and went on like a dream.
The very last thing I did was to add the antenna masts ( for which I drilled recesses into the wings surface at the prep stage) and used EZ line for the antenna wires. The venturi tube was glued into place on the lower wing.
| CONCLUSIONS |
I was worth it despite the problems I encountered. After all --the He 51 float plane was as rare as hen's teeth with only 38 put into service.
Can only be recommended to the more experienced modeller.
November 2019
Copyright ModelingMadness.com If you would like your product reviewed fairly and fairly quickly, please
contact
the editor or see other details in the
Note to
Contributors. Back to the Main Page
Back to the Review
Index Page
Back to the Previews Index Page