Matchbox 1/72 Hawker Fury
| KIT #: | PK-1 |
| PRICE: | about £5 |
| DECALS: | Two options |
| REVIEWER: | Stephen Foster |
| NOTES: |
| HISTORY |
 spring of 1931 with
three squadrons and quickly became well-known for its aerobatic displays,
especially with 25 Squadron. In 1933 its aircraft performed the entire
display joined together with elastic ropes: not a single rope was broken! In
1936 the Fury I was replaced by the Fury II and the older machines were
relegated to training purposes. At the time of the Munich crisis in
September and October 1938 it still equipped three front-line squadrons, but
was replaced in 1939 with Spitfires and Hurricanes, so that the only
machines in service by the outbreak of the war were used as trainers. Some
aircraft were sold to other countries including Yugoslavia (6), Persia (16)
and Portugal (3) and some of these were fitted with radial engines. This
aircraft represented the ability of designers to produce a neat fast biplane
which was an advanced machine for its time.
spring of 1931 with
three squadrons and quickly became well-known for its aerobatic displays,
especially with 25 Squadron. In 1933 its aircraft performed the entire
display joined together with elastic ropes: not a single rope was broken! In
1936 the Fury I was replaced by the Fury II and the older machines were
relegated to training purposes. At the time of the Munich crisis in
September and October 1938 it still equipped three front-line squadrons, but
was replaced in 1939 with Spitfires and Hurricanes, so that the only
machines in service by the outbreak of the war were used as trainers. Some
aircraft were sold to other countries including Yugoslavia (6), Persia (16)
and Portugal (3) and some of these were fitted with radial engines. This
aircraft represented the ability of designers to produce a neat fast biplane
which was an advanced machine for its time.
| THE KIT |
 This kit was built from the Matchbox version as I bought it over thirty
years ago and it has been in store ever since! It has been re-issued by
Revell with different transfers but I have not seen one of these later kits.
It was a good kit for its time and although it is lacking a little by
today’s standards it is still a good basic model which is straightforward to
build, even though it is a biplane. It was the second kit I built after a
break from modelling of over 30 years and was intended to give me an easy
start, which I am pleased to record, it did.
This kit was built from the Matchbox version as I bought it over thirty
years ago and it has been in store ever since! It has been re-issued by
Revell with different transfers but I have not seen one of these later kits.
It was a good kit for its time and although it is lacking a little by
today’s standards it is still a good basic model which is straightforward to
build, even though it is a biplane. It was the second kit I built after a
break from modelling of over 30 years and was intended to give me an easy
start, which I am pleased to record, it did.
| CONSTRUCTION |
The Matchbox kit was moulded in two colours, blue and beige, and had
approximately 30 parts. The instruction sheet had three sides and was very
clear and easy to follow. Two different colour schemes are shown on
the box and these provide an accurate guide.
 As was usual for kits of this time the cockpit is rather bare, just a floor,
seat and an instrument panel moulded into the fuselage halves, so I added a
new instrument panel from five thou plastic sheet and a control column,
rudder bar, etc. Not much can be seen when the fuselage is joined so this is
not a big problem area. Naturally paint all parts before joining the
fuselage together.
As was usual for kits of this time the cockpit is rather bare, just a floor,
seat and an instrument panel moulded into the fuselage halves, so I added a
new instrument panel from five thou plastic sheet and a control column,
rudder bar, etc. Not much can be seen when the fuselage is joined so this is
not a big problem area. Naturally paint all parts before joining the
fuselage together.
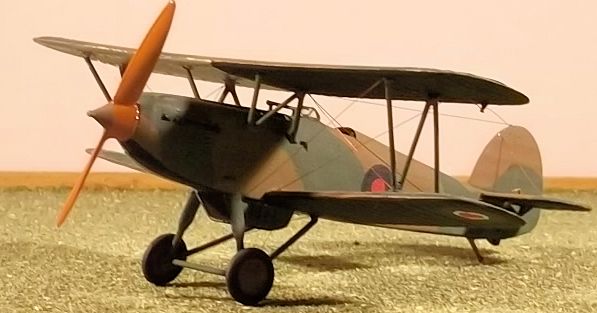
The centre section struts are fixed to the upper fuselage in such a way that
their angle is automatically correct and you get a good strong joint: this
has made biplane assembly as easy as it will ever get. The tail unit, upper
fuselage and lower wing fit well: only a small amount of filler was needed
around these parts. The engine front and propeller are a separate
subassembly but fit to the fuselage well, as does the radiator and
undercarriage. The propeller needs some careful filing to remove mould marks
around the blades and spinner but this was not difficult to rectify.
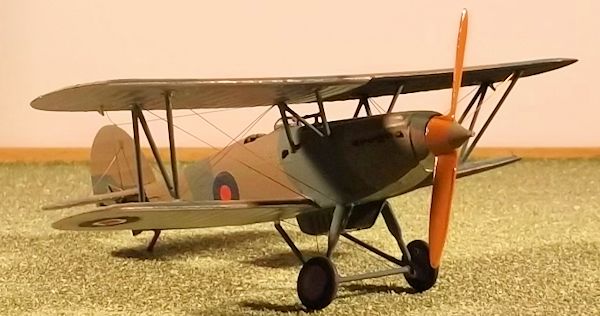
Unless you model an all-silver machine you should paint your model before
fixing the top wing. The wing struts are a bit of a fiddle as they are
angled outwards but a little care is all that is needed to align them
correctly and complete the model. This was not difficult to assemble: it
only took three or four evenings of work, but was a pleasure to make.
| COLORS & MARKINGS |
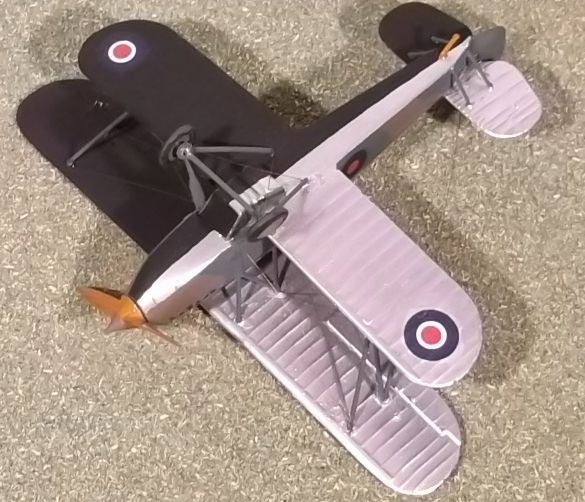
 Markings are provided for two machines: one from 43 Squadron in pre-war
markings and one for the Royal Yugoslav Air Force, both of which are in
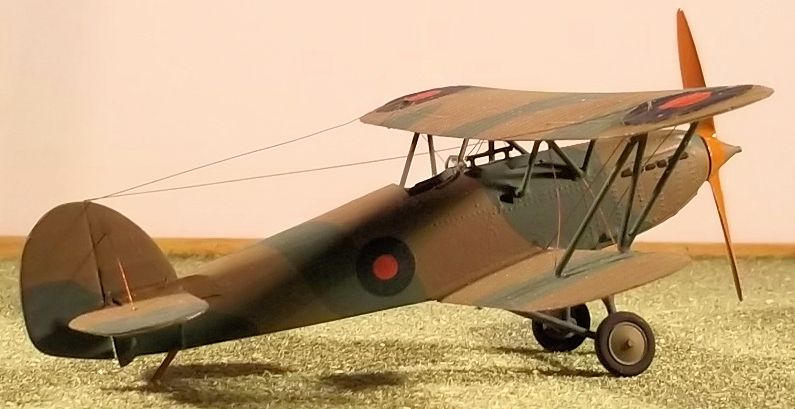
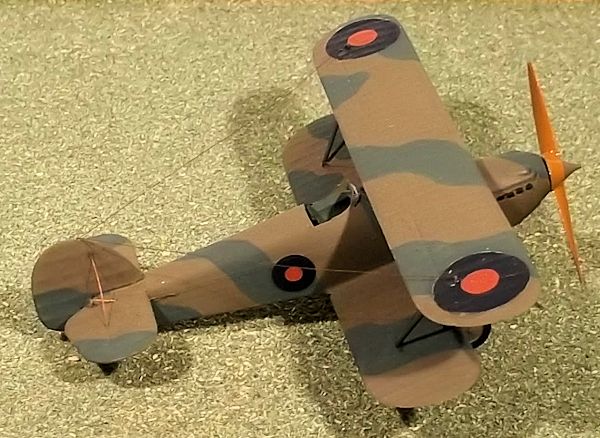
silver finish. However I chose to model a camouflaged RAF machine at the
time of the Munich crisis where the serial had been painted out. The
undersides of these machines were silver dope on the port side and black on
the starboard, with dark earth and dark green on the fuselage and upper
surfaces. Roundels came from an old set of Almarks transfers which received
a coat of matt varnish when they were dry.
Markings are provided for two machines: one from 43 Squadron in pre-war
markings and one for the Royal Yugoslav Air Force, both of which are in
silver finish. However I chose to model a camouflaged RAF machine at the
time of the Munich crisis where the serial had been painted out. The
undersides of these machines were silver dope on the port side and black on
the starboard, with dark earth and dark green on the fuselage and upper
surfaces. Roundels came from an old set of Almarks transfers which received
a coat of matt varnish when they were dry.
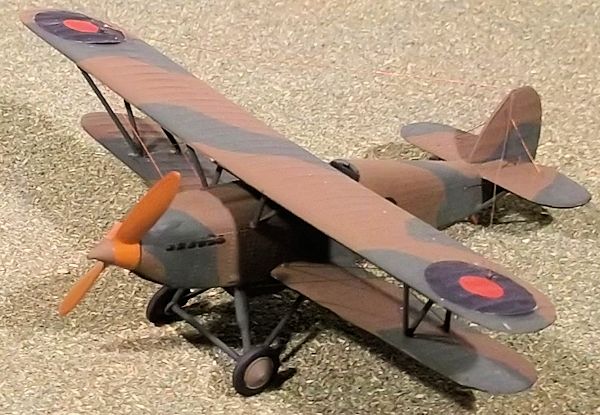
I glued the top wing to the model after all the painting was complete, and
then rigged it using 44 SWG copper wire and superglue. Rigging is very
straightforward but you will need to add control horns to the ailerons,
elevators and rudder from thin plastic card. Use the box art as a guide to
rigging as it is clear and accurate.
| CONCLUSIONS |
Overall the kit is reasonably accurate in terms of dimensions as far as I
could work out. This is a simple model to build for those who have not made
a biplane before as the method of construction is almost idiot-proof, and it
is relatively easy to rig. There are lots of bright colour schemes and
variants that can be modelled on the silver doped machines, and as the Fury
was sold to a number of countries there are also a wide variety of national
markings which could be used on this model. In all highly recommended.
| REFERENCES |
 Profile number 15 is a
very useful source of reference and pictures and can be found by some
searching on-line.
Profile number 15 is a
very useful source of reference and pictures and can be found by some
searching on-line.
There are also several good threads on various modelling websites.
November 2013
If you would like your product reviewed fairly and fairly quickly, please contact the editor or see other details in the Note to Contributors.