Merit 1/48 Gladiator I
| KIT #: | 64803 |
| PRICE: | NZ$26.50 |
| DECALS: | Three options |
| REVIEWER: | Michael Rohde |
| NOTES: |
| HISTORY |
The first prototype was built as a private venture under the company designation SS. 37 and took to the air for the first time in September 1934.
The SS. 37 was a direct development from the Gloster Gauntlet with improvements being made in redesigning the wings as single- bay units with stronger main spars,the landing gear was replaced by internally sprung wheel assemblies mounted on cantilever struts. These changes resulted in reduced drag and increased top speed by up to 24km/h.
 A
uprated Bristol Mercury radial was developed at that time promising to
achieve the target of 402 km/ h top speed. Other improvements were made in
up gunning the SS.37 with two .303 cal. Lewis guns carried in underwing pods
in addition to the two fuselage mounted Vickers MK 3 machine guns. In this
configuration the SS 37 was flown to Martlesham Heath early in 1935 for
official evaluation.
A
uprated Bristol Mercury radial was developed at that time promising to
achieve the target of 402 km/ h top speed. Other improvements were made in
up gunning the SS.37 with two .303 cal. Lewis guns carried in underwing pods
in addition to the two fuselage mounted Vickers MK 3 machine guns. In this
configuration the SS 37 was flown to Martlesham Heath early in 1935 for
official evaluation.
Gloster's design was submitted to the Air Ministry in June 1935, A Spec.F.14/35 was issued and accompanied by an order for 23 aircraft. The type was named Gladiator and as such officially announced on 1st July. The 840hp Bristol Mercury IX was specified and other changes included a enclosed cockpit, minor landing gear modifications, a revised tail unit and the fitting of improved Vickers MK 5 machine guns.
From February 1937 onwards until 1938 a total of 231 Gladiator MK 1's were delivered to the RAF.
| THE KIT |
 This
kitset comes in a sturdy box containing 5 frames holding 42 parts in light
grey plastic and one frame in clear plastic for the canopy.
This
kitset comes in a sturdy box containing 5 frames holding 42 parts in light
grey plastic and one frame in clear plastic for the canopy.
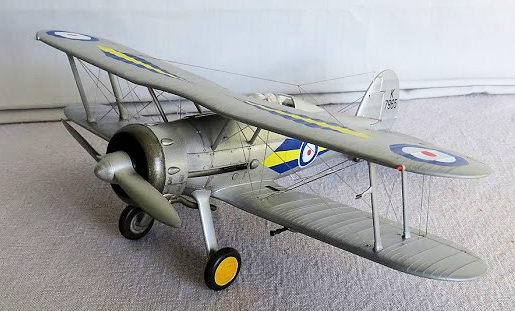
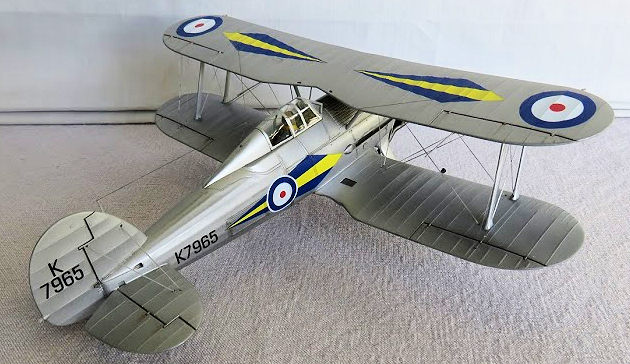
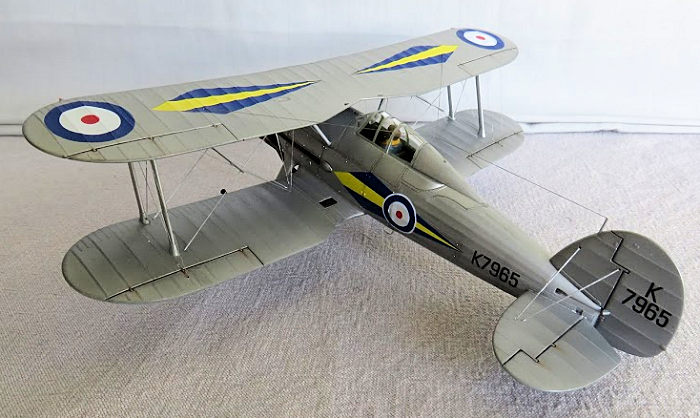
The decal sheet offers 3 options; No 72 Sq Church Fenton, No 73 Sq. Debden, National Chinese Air Force ( unit not specified). There are no stencils on the decal sheet.
Simple instructions ( 5 major steps) are provided on a single A4 fold up sheet and a one sheet colour print with painting and decal instructions.
| CONSTRUCTION |
Step 1: As usual I checked and cleaned up all the parts before I started assembly. The interior is quite simple. There are only 12 parts to complete the cockpit. Painting was done using Tamiya XF 71 cockpit green , highlighting details by dry brushing using Tamiya flat aluminium.
Since we have only the closed cockpit option available , I decided to place a pilot figure ( an older Airfix one) inside the cockpit to fill the space. The fuselage halves went together really well and there was only a absolute minimum of filler necessary to clean up the seams.
 Step2: The
radial engine consists of only 6 parts. Overall detail is quite nice and
drybrushing brought out the details sufficiently. I did reduce the wall
thickness on the rear of the cowling quite a bit. That was a tat too substantial
for my taste. The exhaust pipes and the carburettor air intakes were drilled out
to make these bits look more realistic. The completed radial engine fitted well
into the cowling and was secured with a bit of superglue.
Step2: The
radial engine consists of only 6 parts. Overall detail is quite nice and
drybrushing brought out the details sufficiently. I did reduce the wall
thickness on the rear of the cowling quite a bit. That was a tat too substantial
for my taste. The exhaust pipes and the carburettor air intakes were drilled out
to make these bits look more realistic. The completed radial engine fitted well
into the cowling and was secured with a bit of superglue.
Step 3: The control cables for the rudder are molded into the fuselage and that did not look right. I carefully removed these and opened up the recesses so I could EZ line to rig the control cables later on. Next in line was fitting the lower wing , the horizontal tailplanes and fin. Dry fitting was going well and at this stage I also checked the fit of the outer struts and cabanes. Merit has made that job really easy.
The struts fit snug into recesses in the upper and lower wing and fuselage respectively.All what was necessary was to remove a tiny bit of material off the insides to achieve a lighter press fit.That went so well that I was able to literally assemble struts and upper wing and attach these to the lower wing and fuselage without glue to check overall alignment of the wings.
There are no reference points for the rigging and a bit of research on the net was necessary to establish the exact location of the rigging wires and control cables. I drilled all the holes with a .10 mm drill.
With all these steps out of the way I glued the lower
wing and the complete tail plane onto the fuselage. The joints were easily
filled with a bit of superglue. Not even sanding was necessary !! And that is
something 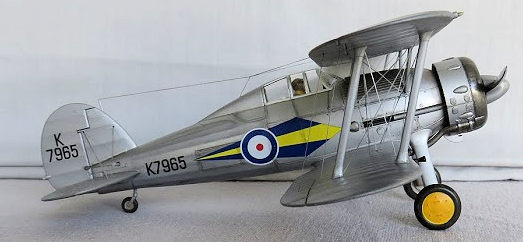 which
does not happen very often at all!! ( Literally--- a first for me)
which
does not happen very often at all!! ( Literally--- a first for me)
Another small refinement I want to mention here: The position lights on the upper wing and rudder are solid plastic. I removed these and replaced them with bits of stretched clear sprue which I rounded off at the tips before glueing these into the recesses which I created with a small drill.
Step 4: The landing gear struts were dry fitted and sure enough-- no problem there- and so these went on in no time. The wheels are a bit funny though. Merit did not bother to refine the inner part of the hubs at all ! To fix that I masked off a circle and painted around the edges using undiluted black paint – and that in several layers. After the paint had dried I removed the masking tape and there was a dicernable rim to be seen. This in return made it easy to paint the 'hub' with flat aluminium.That took care of that little problem.
The gunpods were dry fitted and after a bit of scraping the insides of the recesses in the lower wing these slotted in nicely. The pods were painted separately and inserted later. By the way, all four gun barrels were drilled hollow to make them look more realistic.
| COLORS & MARKINGS |
Step 5: It was pretty much time to start airbrushing the model. The canopy was dry fitted and – again- that went really well. The canopy frame was painted by hand and put aside to dry. The cockpit area was masked off and great care was taken to make sure that my pilot figure was well protected too.
Being a interwar period standart RAF colour scheme ,
only two paints were used: Tamiya flat aluminium for all the fabric covered
surfaces and Tamiya chrome silver for all the panels and struts with a layer of
Tamiya gloss clear over everything. The upper wing and the struts were painted
separately. I left all the b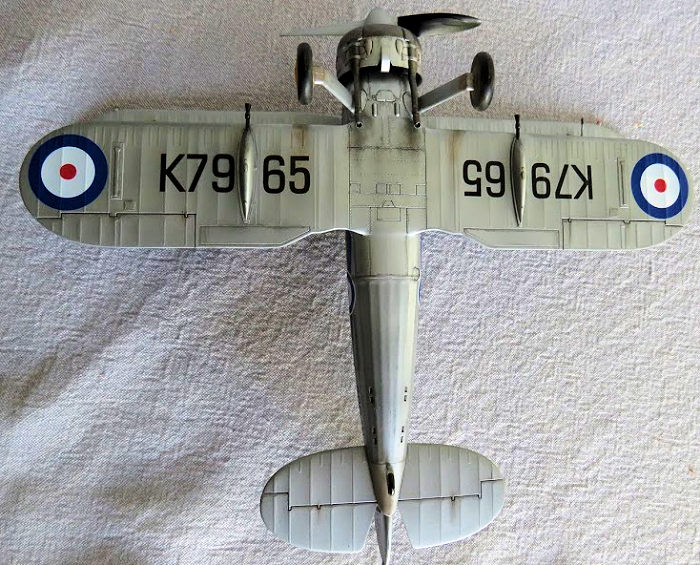 its
to dry for a couple of days and did a pre-rigging session before attaching the
upper wing.
its
to dry for a couple of days and did a pre-rigging session before attaching the
upper wing.
Since I made sure that the struts fitted well beforehand it was a breeze to fit the upper wing. In order to determine the length of the individual pieces of rigging, I attached the upper wing with the struts in place before I started painting and secured the lot with a bit of masking tape.
Then I measured the distance between the attachment points and made a diagram with a description of the location on a piece of paper . That was very helpful to pre cut the rigging and in return made the job so much easier.
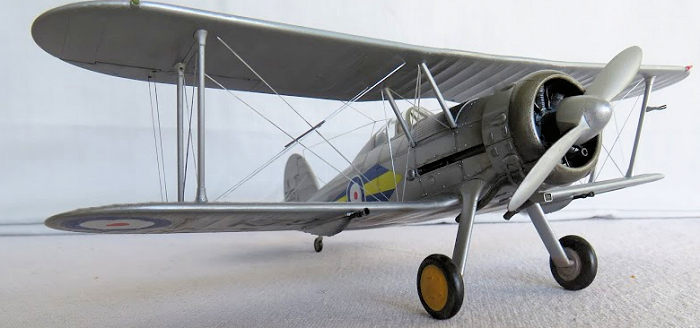
The last bit to do before decalling was to attach the engine and propeller. I decided to go for the markings of No 73 Sq. stationed at Debden airfield. The decals settled well and after sealing these with a final coat of Tamiya gloss clear a bit of weathering was applied using Tamiya panel liner black and pastels.
| CONCLUSIONS |
Well ,I'd say this is a good and easy to build bi plane kit for all these modellers out there who have so far not dared to give it a try with a bi plane kit.. If you follow my lead there is nothing what could go wrong .
The surface detail is not as elaborate as what you might get from a Roden or Special Hobby kit but the essentials are all there and the end result is a presentable model of the RAF's last bi plane fighter.
20 September 2019
Copyright ModelingMadness.com
If you would like your product reviewed fairly and fairly quickly, please
contact
the editor
or see other details in the
Note to
Contributors. Back to the Main Page
Back to the Review
Index Page
Back to the Previews Index Page