Lindberg 1/48 Fairey Flycatcher
| KIT #: | 919 |
| PRICE: | $15-20 on the bay |
| DECALS: | One option |
| REVIEWER: | Dave Cummings |
| NOTES: |
| HISTORY |
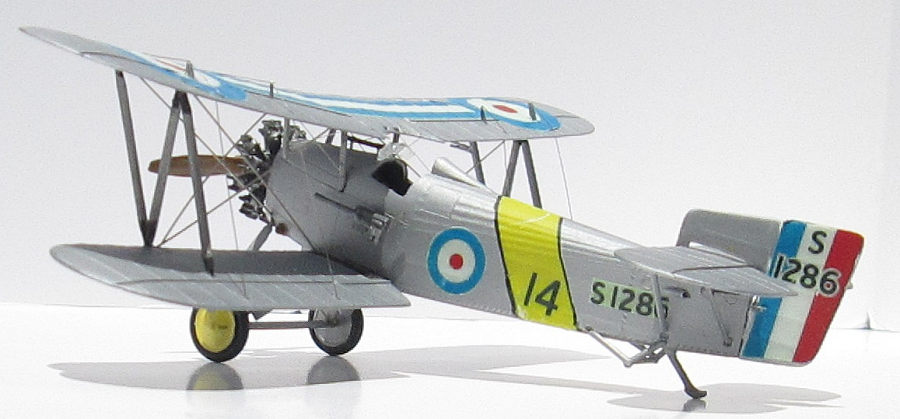
The Flycatcher was designed in 1922 to a Fleet Air Arm requirement for a single seat carrier fighter. An incremental improvement of WWI technology, it was powered by a 400hp Armstrong Siddeley Jaguar IV. Top speed was 133mph and it was a highly aerobatic airplane. Full span flaperons allowed a landing speed of just 47 mph. Wide chord wings allowed a short, 29 ft wing span, which facilitated shipboard operation.
| THE KIT |
 Released
before many of you were born. Lindberg produced a line of interwar aircraft that
were nicely done for the times. Though somewhat crude by today’s standards, they
none-the-less make into a fairly accurate depiction of some classic Golden Age
aircraft. So, where else are you going to find a Fairey Flycatcher? I obtained
the kit second hand and previously opened. It is a pretty simple kit comprising
44 parts. Molding is actually not too bad though there was some flash. The upper
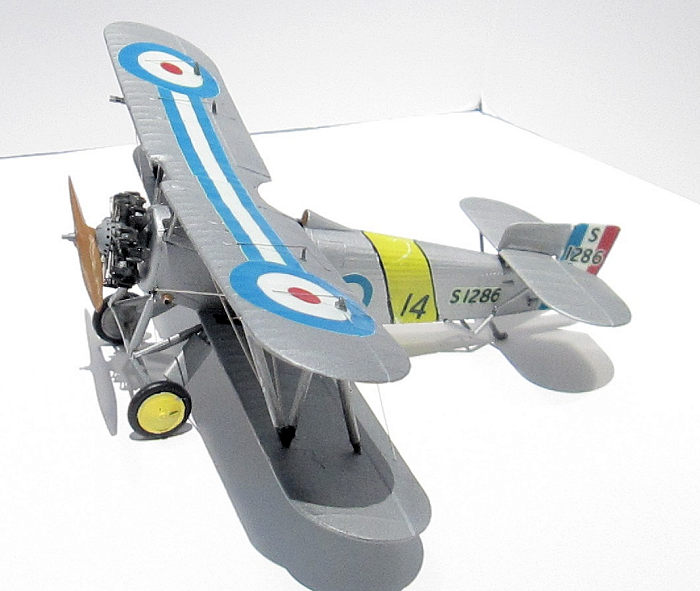
wing is 3 pieces with instructions to obtain the correct dihedral. The fabric
over frame effect is pretty restrained for the times and looks convincing. The
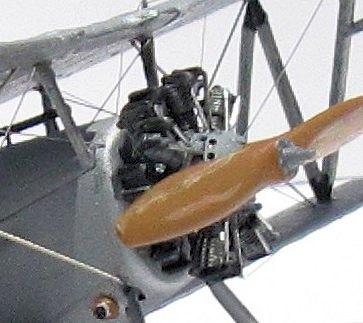
engine is well done with separate pushrod tubes. Interior is sparse consisting
of floor, seat, instrument panel, and stick. Location of wing struts is positive
easing upper wing attachment. Fit is just OK requiring some filler. Instructions
are adequate and include a rigging diagram. Decals are the dry transfer type and
depict an aircraft from HMS Glorious. They are well printed, but given the age
of the opened box, mine were useless.
Released
before many of you were born. Lindberg produced a line of interwar aircraft that
were nicely done for the times. Though somewhat crude by today’s standards, they
none-the-less make into a fairly accurate depiction of some classic Golden Age
aircraft. So, where else are you going to find a Fairey Flycatcher? I obtained
the kit second hand and previously opened. It is a pretty simple kit comprising
44 parts. Molding is actually not too bad though there was some flash. The upper
wing is 3 pieces with instructions to obtain the correct dihedral. The fabric
over frame effect is pretty restrained for the times and looks convincing. The
engine is well done with separate pushrod tubes. Interior is sparse consisting
of floor, seat, instrument panel, and stick. Location of wing struts is positive
easing upper wing attachment. Fit is just OK requiring some filler. Instructions
are adequate and include a rigging diagram. Decals are the dry transfer type and
depict an aircraft from HMS Glorious. They are well printed, but given the age
of the opened box, mine were useless.
| CONSTRUCTION |
 I built
the kit out-of-the-box. Construction was straight forward with no surprises,
except that my second hand kit was missing the pushrods. Holes for the rigging
are molded as shallow dimples so required some drilling out to accommodate my
particular rigging method. I painted the interior aluminum and assembled.
Instrument panel black with dials picked out with a toothpick dipped in white.
Nothing fancy. Then the fuselage halves glued together. Some filler was needed
in dealing with the seam but it wasn’t bad and no panel lines to reconstruct.
Lower wings attached, a lot of filler needed here. Note when attaching the
horizontal stabilizer that it floats above the fuselage on struts. The
undercarriage was a bit fiddly and needed filler where attached. Cabane and wing
struts glued on the lowers then placed upside down on the upper wing for strut
alignment and allowed to dry. Finished gluing on all the little bits except
upper wing, guns, wheels, and windshield and the airframe was ready for paint
and decals.
I built
the kit out-of-the-box. Construction was straight forward with no surprises,
except that my second hand kit was missing the pushrods. Holes for the rigging
are molded as shallow dimples so required some drilling out to accommodate my
particular rigging method. I painted the interior aluminum and assembled.
Instrument panel black with dials picked out with a toothpick dipped in white.
Nothing fancy. Then the fuselage halves glued together. Some filler was needed
in dealing with the seam but it wasn’t bad and no panel lines to reconstruct.
Lower wings attached, a lot of filler needed here. Note when attaching the
horizontal stabilizer that it floats above the fuselage on struts. The
undercarriage was a bit fiddly and needed filler where attached. Cabane and wing
struts glued on the lowers then placed upside down on the upper wing for strut
alignment and allowed to dry. Finished gluing on all the little bits except
upper wing, guns, wheels, and windshield and the airframe was ready for paint
and decals.
| COLORS & MARKINGS |
 These
aircraft were in overall silver dope. For this I sprayed mine Model Master
Aluminum. When dry I clear coated with Testor’s Satin Clear Acrylic. The decal
sheet still looked good but any attempt to use one would see it disintegrate
instantly. So I copied the sheet onto white decal paper using the Testor’s Decal
System on a photo copier. They are not great decals being a little fuzzy and
pixelated, but better than nothing. The result is one big decal so each marking
must be individually cut and trimmed from the sheet. One good thing about it, if
you mess one up you can just print another. Then a coat of clear was sprayed to
seal the decals.
These
aircraft were in overall silver dope. For this I sprayed mine Model Master
Aluminum. When dry I clear coated with Testor’s Satin Clear Acrylic. The decal
sheet still looked good but any attempt to use one would see it disintegrate
instantly. So I copied the sheet onto white decal paper using the Testor’s Decal
System on a photo copier. They are not great decals being a little fuzzy and
pixelated, but better than nothing. The result is one big decal so each marking
must be individually cut and trimmed from the sheet. One good thing about it, if
you mess one up you can just print another. Then a coat of clear was sprayed to
seal the decals.
| FINAL CONSTRUCTION |
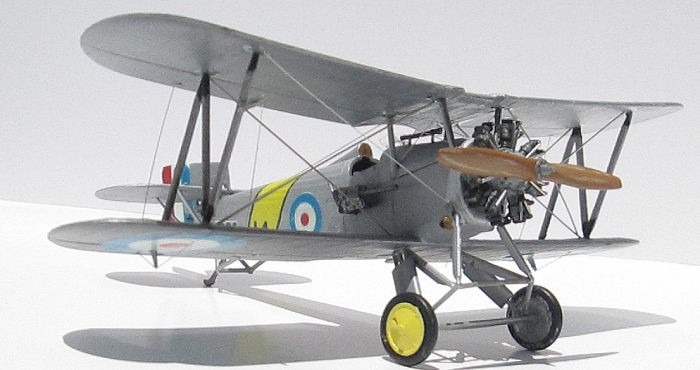
 Wheels
were painted with the hubs a decal matching yellow, then attached. Guns were
painted and attached as was the windscreen. The upper wing was glued in
place. After allowing the glue to dry overnight I rigged the model with
guitar string wire cut to length. The engine was painted. The missing
pushrods were cut from wire and superglued in place. The prop was painted
with browns and tans to simulate wood. The engine was assembled and
attached. Done.
Wheels
were painted with the hubs a decal matching yellow, then attached. Guns were
painted and attached as was the windscreen. The upper wing was glued in
place. After allowing the glue to dry overnight I rigged the model with
guitar string wire cut to length. The engine was painted. The missing
pushrods were cut from wire and superglued in place. The prop was painted
with browns and tans to simulate wood. The engine was assembled and
attached. Done.
| CONCLUSIONS |
The Lindberg Flycatcher done right out of the box it is not contest material. But it is a neat little bipe for the display case. Rigging was a wee bit challenging, but overall an easy build. Recommended for those looking to build their first biplane.
| REFERENCES |
Internet surfing.
Dave Cummings
May 2019
Copyright ModelingMadness.com
If you would like your product reviewed fairly and fairly quickly, please contact the editor or see other details in the Note to Contributors.
Back to the Main Page Back to the Review Index Page Back to the Previews Index Page