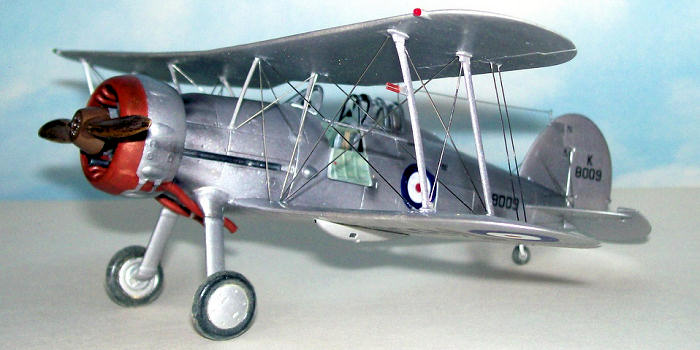
Roden 1/48 Gloster Gladiator
| KIT #: | 408 |
| PRICE: | CAN$30.00 |
| DECALS: | Two options |
| REVIEWER: | Pablo Calcaterra |
| NOTES: | Airwaves photo etch set |

| HISTORY |
Marmaduke St. John Pattle was born in
As an example on July 28th
1938 Pat was testing his flaps in a flight close to their base in Ismalia when
suddenly the engine coughed, died and the low flying Gladiator hit the sand and
bounced back into the air. The engine started again with the impact and Pat
decided to land as soon as possible before the engine failed again. But upon
approaching to land everyone on the ground was gesticulating. He knew something
was wrong with his plane. Gaining height he contacted the control tower from
where Blockey, the Commanding Officer, informed him that the port wheel was
missing! He was instructed to keep on flying until the fuel was exhausted. He
flew circuits for an hour while everything was being readied on the ground. His
friends were confident that he was going to be able to pull it out.
Finally the engine died and he switched it off, dove to the ground not to loose
airspeed and stall and did a perfect landing using his skill to control the
plane. The Gladiator run on the tail and starboard wheels and at last, when it
had practically stopped, she fell on the port oleo leg.
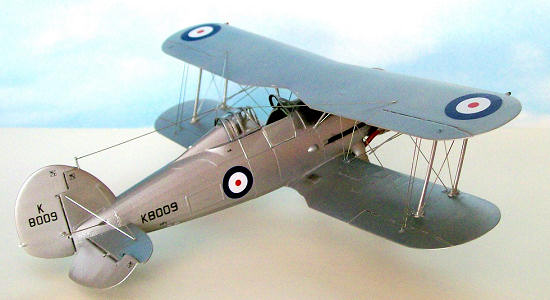 Everyone
admired the feat. The only damage to the plane was the fabric torn off from the
tip of the bottom port main plane and the missing tips of the propeller blades.
K8009
was repaired, checked and it was flying again that very same afternoon with the
South African at the controls.
In
February, with 15 kills awarded, Pattle received his first
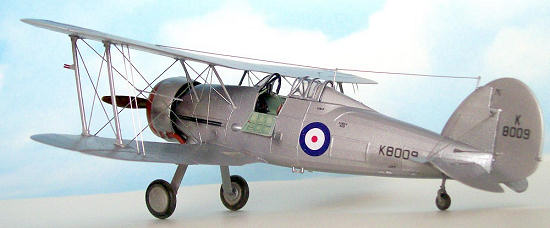
One of his friends and
fellow ace, Timber Woods, climbed to attack some Me110s from a disadvantage
position and was jumped by a Messerschmitt (other sources claim that he was low
on fuel and while returning to his base he was shot down). Pat went to his aid,
while a couple of 110s swiftly jumped him to protect their mate. Another British
pilot (Flight Lieutenant Kettelwell) rushed to Pattle’s help. And yet another
German latched to Kettelwell’s tail! So a train of a Hurricane, a Me110, another
Hurricane, 2 Me110s, a Hurricane, and a last Me110 was formed like it happened
in other theatres (i.e.: Saburo Sakai’s combat over Iwo Jima). At the moment
that Woods was being shot down in flames, Pattle was claiming Woods victor. A
fraction of a moment later, his
 plane was
caught by the fire of the 110s on his tail, and crashed in flames in the bay
with the pilot slumped over the controls. Kettelwell, who in turn was shot down
by the last 110, claimed one of these 110s. He saved his life by parachute and
was able (along with Canadian ace Vernon Woodward who had taken off with Pattle)
to tell us the last moments of the RAF pilot. Five German pilots claimed
victories during this combat (Rossiwall, Baggoe, Schonthier, Muller and
Pietchsmann) so one of these is the final victor of Pattle and it would seem to
show that Kettelwell actually did not avenge his leader.
The
Hurricanes of Pattle and Woods fell on the east coast of the island of Psitallea,
outside the harbor of Piraeus and not in Eleusis Bay as originally believed.
The
official website of the British Ministry of Defence considers Pattle the
unofficial top scoring Allied
pilot of
the war in article devoted to him published for the 60th
anniversary of this death.
| THE KIT |
There are a couple of
articles in MM regarding this kit so I won’t add a lot. The only thing that I
don’t like about this kit when compared to the Lindbergh one is that the
attachment points for the rigging are not holes that help you to attach the
wires easily. I could have drilled them…but I was not that fast if you
understand what I mean…!
The filter for the air
intake does not have the proper shape but it can be improved with not a lot of
work.
The cockpit is better
than the Lindbergh one but would need of some aftermarket products to live it
up.
Nevertheless it is good
to have this offer and with a superb box art. The first one I believe that
recognizes Pattle as the top scoring ace.
| CONSTRUCTION |
I started by the
cockpit. Straightforward build. Painted everything in RAF Interior Green (Model
Master Acryl). The panel was painted black with red edges around some gauges per
pictures available. The glass of the gauges was made with drops of Future.
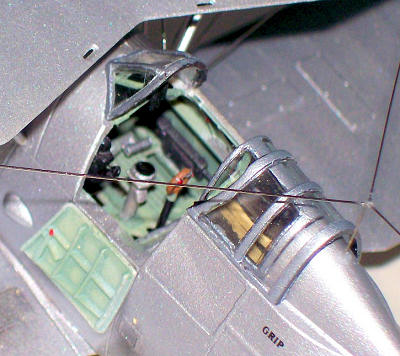 For
the straps I used the Airwaves set for RAF fighters. The Gladiator straps go all
the way behind the seat to an attachment point way behind it.
I painted the fuselage
machine guns in a mix of aluminium and black.
The control column has
some buttons painted in red. I dry brushed with aluminium paint some areas to
show some wear.
Fuselage halves were
closed. I really had a hard time keeping the instrument panel in place and
perpendicular to the walls. Fit is not good at all. It looks like it is
oversized…or the interior of the fuselage halves are too thick.
Some putty and sanding
(plus re scribing of panel lines in the nose area) were required.
I attached the bottom
wings and the horizontal surfaces of the tail. From them, in dropped position,
the elevators.
To the wings I attached
the flaps (x4). To the top portions I glued the main struts.
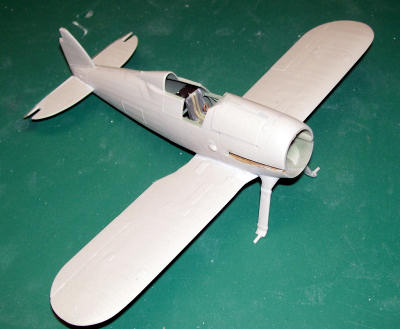 The
plug to attach the landing gear to the fuselage has the wrong shape but it is
not that hard to modify it with a knife and sand paper. Once done the fit is
really good and only a little bit of putty or acrylic base paste are required to
blend them properly with the fuselage.
The engine: lots of
parts, good fit. I painted the cylinders in black and drybrushed them with
aluminium. Most of the other parts were painted in this last colour. The exhaust
pipes were painted in rust and attached to the engine. More about this later…
I took the rudder and
attached it thru frontal area to a block of wood using Blue Tac. The idea was to
paint it in white as I had seen in many pictures.
The halves of the
engine cowling were glued together and some work was required to hide the union.
The back of the interior I painted in RAF interior green and the internal front
(collector ring) in rust.
I decided to put the
engine inside the cowling so it would be easier to paint it. And here I found
that the cylinders don’t fit inside it. And having all the other parts already
glued made it very difficult to sand their head so they could slide inside the
cowling. I managed to do it but not without snapping some of the exhaust pipes.
OK, so now I have glued the engine and I realized that not only some of the
pipes have come off but also many are loose and are about to fall. So I pulled
them out and one by one I re attached them carefully. Then I covered the front
of the engine/cowling and this part was ready for the paint.
I covered with Blue Tac
the front of the fuselage (not to have any spayed silver getting inside the
cockpit and damaging the finish). Masking tape and wet tissue paper filled the
cockpit before the painting session.
All the little bits (small
struts, doors, machine gun pods, canopy and windshield, wheel hubs) were
attached to the same wooden block using Blue Tac.
And now I was ready to paint the plane.
| COLORS & MARKINGS |
I gave the plane a coat
of light grey to check for imperfections but none were found.
Then several layers of
Model Master Acryl aluminium were used for the whole plane. At this point and
after double-checking some pictures from books I realized that the white rudder
was not white paint but actually the reflection of the sun! So I sanded the
rudder with a very fine sandpaper to improve the adhesion of the paint and gave
it some coats of aluminium.
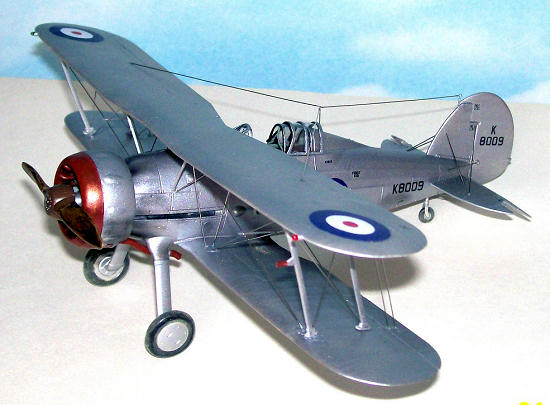 Satisfied
with the finish I painted the front of the cowling and the main exhaust pipes in
rust.
With black pastel dust
and a brush I highlighted some areas (like the radiator) and made some other
dirty. This is the way that I made the stains on the fuselage just behind the
cylinders.
The plane was given a
nice coat of Future. Careful handling of the top wing/main struts prevented any
sticky accident.
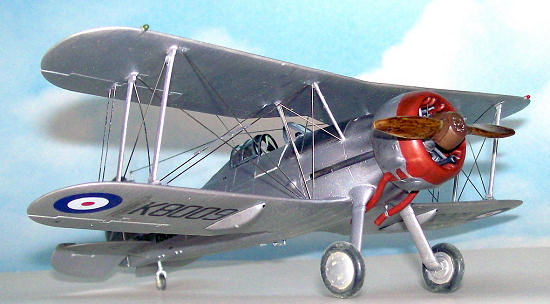
I have never tried to
paint a propeller trying to create a wood effect. I followed some directions
from some friends and made some search in Internet. This is what I practiced
with some blades that I took from the spares box and then repeated on the Glad’s
ones: they were given a coat of very light tan (almost radome tan) with a brush
and set aside to dry for a couple of days. Then I applied a light coat of oil
varnish (the one you use to retouch or paint your furniture at home) over the
paint. After one hour I took a piece of cotton and moved it very gently over the
varnish, giving it strokes from the centre to the tip of the blades. Sometimes I
over did it so I had to add more
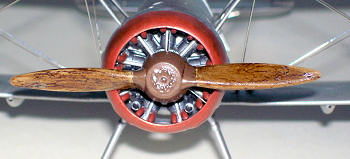 varnish.
But after a couple of sessions I believe I have achieved a decent (but not too
good) effect.
I mainly used the Roden
decals.
I read some criticism here and there about them not conforming to the shapes and
panels, silvering and printing errors but I did not find such problems.
The main thing is that I
had to combine some of them to have the proper serial number. I scanned them
from the decal sheet and played with them with some basic picture-editing
program. Then I printed them in clear decal paper, gave them a coat of Testors
sealer and allowed them to dry. They were cut from the decal paper and placed in
position with no problem.
| FINAL CONSTRUCTION |
Nightmare Part I: the
fit of the top wing and struts was not good at all. The main ones were bent, the
small ones in the fuselage seemed to be too long (because the main ones were
bent!) After a lot of fight here and there and snapping the small and main
struts many times I succeeded in having a firm fit: I glued firmly all the
struts that had a good fit and then I pressed or straighten out the troublesome
ones. I put some light weight things just on top of the top wing in the area of
the troublesome struts and left it like that for a day waiting for the glue to
cure.
I glued the rudder and
went to...
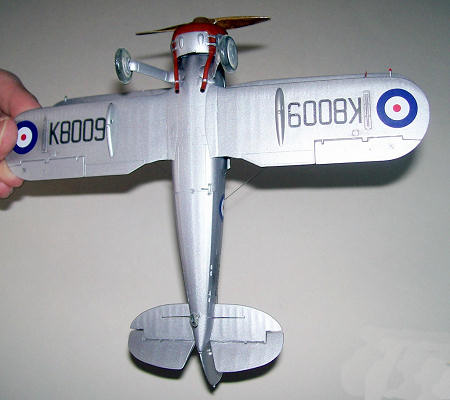 Nightmare
Part II: I bought stainless steel wire of 12 thou and 10 thou. The thicker one I
used for the main rigging and the thinner one for the actionable controls and
antenna. As stated above, it is clear where the rigging should be glued but the
lack of any locating hole (too late by now!) made it really hard to get them to
stay put. I scratched the paint in those places to obtain a better adhesion
surface.
Well, after one full
week of 2+ hours per night I managed to put all the rigging. It was not
surprising to hear a tingling noise from time to time when turning the kit
upside down to glue a new rigging: a previous one had come loose and was hanging
by only one extreme…sometimes they would fall off…teeth grinding!
I glued the gun
gondolas under the wings.
With all the rigging
done I tried to attach the engine. The guides behind the firewall are not right.
They are too wide. So carefully I cut them out (I was running out of patience)
and glued the engine to the fuselage.
Finally I completed the
straps using tan painted Tamiya paint, glued the windshield and the fixed
portion of the canopy.
Then I checked the
pictures about Pattle’s incident with this plane and unless they have been
censored out, his plane did not have any guns in the gondolas. So I cut them out
and painted a black dot where the guns where.
With more stainless
wire I made the 3 supports in front of the engine inside the cowling.
I added the 2 doors,
right one closed (after some extra sanding to make it fit) and right one open.
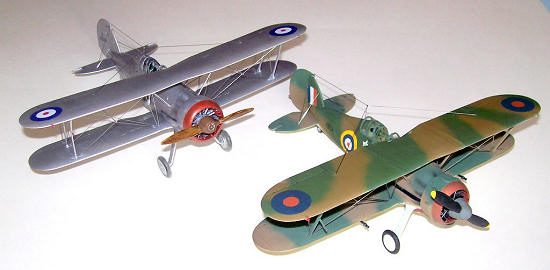 With the
propeller hub painted in RAF dark brown, the propeller was attached to the
engine. Now I was ready to add the 2 main exhaust pipes. I had to add some
acrylic paste to improve the unions. These were later retouched with rust.
Collector ring and
exhausts were drybrushed with Humbrol copper.
The formation light on
the tail was painted in white and the position ones in red and green.
The last tricky part
was to make the antennas using stainless (10 thou) wire. I first glued the
vertical portion behind the cockpit, then the one from the tail to the vertical
one and finally the two segments from the vertical to the wings.
The final detail was to
add some “sand” to the wheels and it was made with drybrushed ochre pastel dust.
| CONCLUSIONS |
I think I put a good
effort on this kit. This is my tribute to Pat Pattle, the greatest of them all,
and his band of brothers who fought for the freedom of Greece against the
Germans in such terrible conditions. Always too little, too late…
| REFERENCES |
1.
Pattle Pattle.
Ace of aces - ECR Baker
2.
Gloster Gladiator - Alex Crawford
3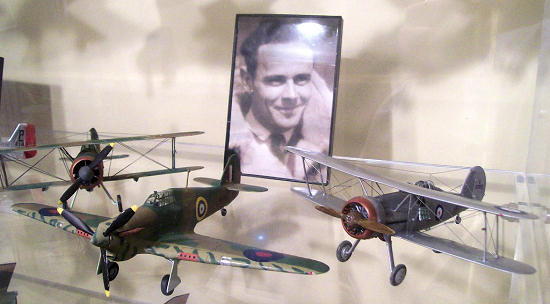 .
Military History Journal Vol 1, No3 - The South African Military History
Society - Douglas Tidy
4.
Aces high volume 2 - Christopher Shores
5.
Commonwealth biplane fighter aces - Intenet (www.dalnet.se)
6.
Going solo - Roald Dahl
7.
Pictorial History of the Mediterranean Air War Volume One, RAF 1940-1943
- Christopher Shores
8.
Met.open.ac.uk/group/jwl/glad.htm (detailed picture of the engine)
9.
Hurricane aces 1939-40 - Chris Holmes
10.
Me 110 aces of WWII - John Weal
11.
Gladiator Aces – Andrew Thomas
12.
Spitfire - J.A. Guerrero
13.
Air war for Yugoslavia,
Greece and Crete – Shores, Cull, Malizza
14.
Hurricane aces 1941-1945 –
Andrew Thomas
15.
http://news.mod.uk/stories/2001/apr/010419a1.htm (MoD
website)
16.
Wikipedia
April 2011
If you would like your product reviewed fairly and fairly quickly, please contact the editor or see other details in the Note to Contributors.