
Hit Kit 1/72 Schreck FBA-17 Floatplane
| KIT #: | HMT-2 |
| PRICE: | $Out of production, on evilbay for about 15-30 USD. |
| DECALS: | options |
| REVIEWER: | Greg Ewald |
| NOTES: | Short run kit, be prepared for psr up the whazoo, as well as some scratchbuilding. |
| HISTORY |
 The
plane was an interesting concept, but of mediocre value. Short range and
limited crew space meant that the Schreck was unable to carry many of the
newer weapons that the navies of the world wanted to use.
It did , however, manage to help usher in a new
stage in seaplane development that lead to more successful designs.
The
plane was an interesting concept, but of mediocre value. Short range and
limited crew space meant that the Schreck was unable to carry many of the
newer weapons that the navies of the world wanted to use.
It did , however, manage to help usher in a new
stage in seaplane development that lead to more successful designs.
The best use of the 17 was probably as a trainer for the more
sophisticated floatplanes that were being produced in the 30’s. Some of the
FBA-17’s
were also modified for use as passenger planes, but the cabin
would have been rather cramped, and the noise from the pusher engine above
could not have been pleasant.
Several were purchased by the United States and tested out, becoming spotting planes for use by the Coast Guard. By the outbreak of WW2, they were obsolete.
| THE KIT |
 Mostly molded in flash, the semi-rigid styrene is quite tough to cut and
sand. The white plastic is extremely thick. The photo etch is very thin and
brittle, and will need to be annealed to keep it from breaking. Decals are
all in register, and look quite nice.
Mostly molded in flash, the semi-rigid styrene is quite tough to cut and
sand. The white plastic is extremely thick. The photo etch is very thin and
brittle, and will need to be annealed to keep it from breaking. Decals are
all in register, and look quite nice.
There are markings for six aircraft, five Polish and one Chinese. It
is interesting to note that the Polish markings are in reverse, but this is
because the airplanes were painted in France, and they got the squares
backwards. Go figure.
The instructions are sort of puzzling. Photocopied onto white paper, there are a number of steps that are hard to make out. Test fitting absolutely everything is a must.
| CONSTRUCTION |
 You
start right off with the photo-etch fret, building the sidewalls of the
cockpit tub. I heavily recommend annealing the fret before you start to try
to bend the small (read: microscopic) bits and pieces. Frank may be able to
manipulate these dinky things, but my ham hands have a hard time with this
sort of thing. While there are seats included in the kit, they aren’t
mentioned in the instructions, you have to love a model that requires so
much free thought ! I scratchbuilt mine, as the kit versions were short
shot.
You
start right off with the photo-etch fret, building the sidewalls of the
cockpit tub. I heavily recommend annealing the fret before you start to try
to bend the small (read: microscopic) bits and pieces. Frank may be able to
manipulate these dinky things, but my ham hands have a hard time with this
sort of thing. While there are seats included in the kit, they aren’t
mentioned in the instructions, you have to love a model that requires so
much free thought ! I scratchbuilt mine, as the kit versions were short
shot.
With the interior of the tub finished and painted, it is time to
insert the cockpit floor, and glue the two fuselage halves together. No,
they don’t match up too well. Break out the putty and a lot of sandpaper,
grit your teeth (pardon the pun), and begin the laborious psr process.
Part of the instructions call out for you to make a jig for the
lower wing, which is attached directly to the fuselage. I used a piece of
pvc core board that I had laying around, you could also use heavy cardboard
or foamcore. Let this assembly completely cure before you proceed to the
next step. I let mine cure for over a year, mostly due to frustration.
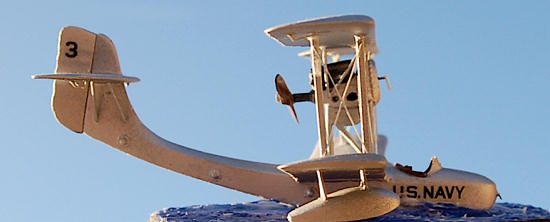
The engine is a complete nightmare. I didn’t care for the exhaust
vents, and put on headers instead, as it would have fit better with the USN
version (fictional). You will need to scratch build the vents if you want to
stick to the kit version, out of wire or rod. The front intake vent area
needs a massive amount of cleanup, prior to attach ing
the pristine PE grill. Use a spare bit of rod for the crank starter handle
attachment point.
ing
the pristine PE grill. Use a spare bit of rod for the crank starter handle
attachment point.
The propeller will need to be sanded down quite a lot, and has to
have a scratched up main hub. I didn’t attach mine until the plane was
almost finished. The engine also required a rod to attach the propeller to
the block.
The wing struts were so malformed that I used styrene stock to make
new ones, as well as the “N” braces on each side of the fuselage.
In the directions, they want to have the builder
glue a number of photo-etch pieces together to form each brace, like
building a sandwich. Sorry, but I don’t have the time for this nonsense, and
just used styrene rod.
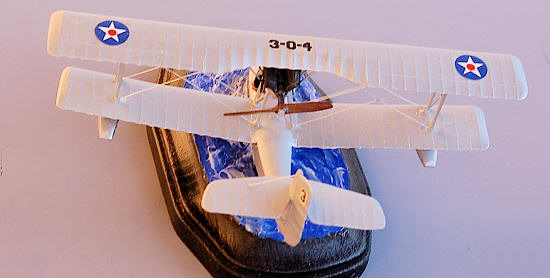
After looking at that nightmare, I also decided to repeat the same
process when it came time to attach the floats to the bottom wing.
Oddly enough, the upper wing fits into place rather
easily !
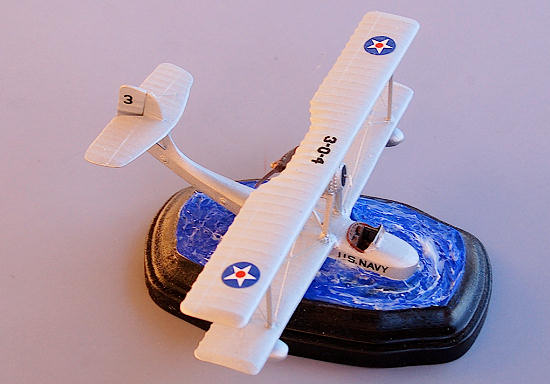
Since I was building this plane for use in a water diorama, I did not add on the removable wheels , tail skid, or hull strakes. I did have to scratch up the struts for the tail, as they are not included with the kit. The PE windscreen goes into place easily after being bent according to the fold lines. The photo etched control rods for the stabilizer and aleorons went on without a hitch. If you are going to install the wheel carriage, you may need to do some cutting and filling, completely rebuilding it would probably be the best way to go.
| COLORS & MARKINGS |
I did a fair amount of research on this plane over the years,
and ran across a photo of one in Coast Guard service, and decided that an
easy leap of faith would be that it might have been tested by the Navy also.
I’ve always loved those old aluminium doped airframes, anyway.
The instructions call for a gray plane, with olive green upper
surfaces and blue float areas. It appears that no matter what the service in
the Polish Air Force, they were all finished in the same way.
After all of the sanding, I primed the whole kit with Krylon
automotive spray primer and set it aside to cure. It cured for another six
months.
Alclad aluminium and Testor’s Model Master paints rounded out the
rest of the finish. I like using both, as the tints of aluminium are
somewhat different and lend a bit more depth to such a small project.
Decals came from an ancient MPC F4U Corsair, and settled down well with some razor work and Micro-sol/set.
| FINAL CONSTRUCTION |
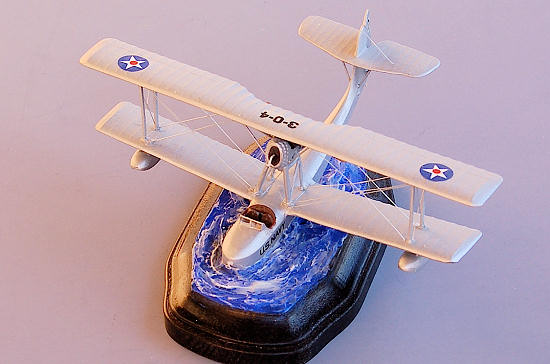 Once the main parts of the plane were in place, I
hollowed out a small diorama base enough to hold the hull as if it was
waterborne. The plane was affixed to the base with epoxy and set aside to
dry.
Once the main parts of the plane were in place, I
hollowed out a small diorama base enough to hold the hull as if it was
waterborne. The plane was affixed to the base with epoxy and set aside to
dry.
The water was made from my standard white glue and tissue paper.
Once this was dry, I painted it blue using Winsor/Newton Cobalt acrylic. The
white crests were sculpted on with acrylic gel medium (heavy).
For the rigging, I used 30 gauge steel memory wire, available at most craft stores, near where they sell beading supplies. Using a set of draftsmen’s calipers, it is easy enough to measure the length of wire you need, and cut them to fit. For this small of a plane, I think this is easier than doing the “through the wing” rigging method.
| CONCLUSIONS |
This is an interesting little plane, but hardly worth all of the
effort that the kit requires.
It would be just as easy to scratchbuild a 1/48th
version, honestly. A year and a half of time?
Ridiculous, mostly due to my working on other kits
that were actually fun to make.
Unless you really, really, really want to have a 72nd Schreck, I
would avoid this like the plague, or H1N1.
| REFERENCES |
Greg Ewald
December 2009
Copyright ModelingMadness.com. All rights reserved. No reproduction in any form without express permission from the editor.
If you would like your product reviewed fairly and fairly quickly, please contact the editor or see other details in the Note to Contributors.