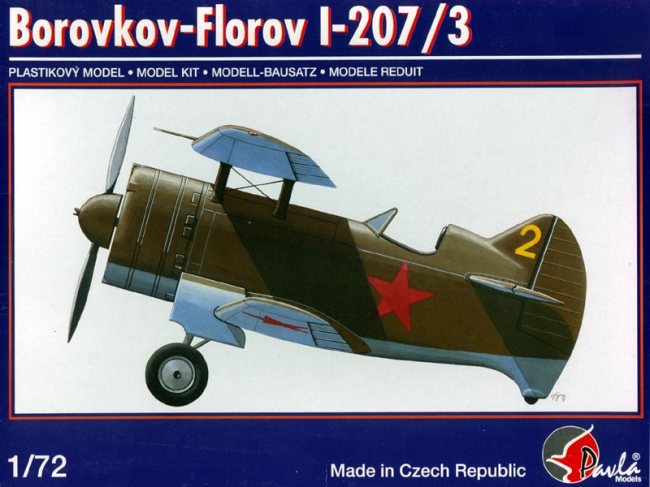
Pavla 1/72 Borokov-Florov I-207
|
KIT # |
72024 |
|
PRICE: |
$16.98 |
|
DECALS: |
See Review |
|
REVIEW : |
|
|
NOTES: |
|
РЕДКИЙ
РУССКИЙ
МЕДВЕЖОНОК
|
HISTORY |
In 1935, two young engineers for Polikarpov, Alexey Borokov and Ilya Florov, drew up plans for a unique biplane fighter, that would incorporate the smallest possible aircraft with the most powerful engine then used by the Soviet Union, the 850 hp Mikulin M-85 14-cylinder radial, a licensed-built Gnome-Rhone K14 Mistral Major. It was an open cockpit fighter featuring a close fitting fluted cowl, streamlined fixed landing gear with wheel spats, and cantilever wings, which had no interplane struts nor landing and flying rods.
With the design, Borovkov and Florov were given their own small design bureau, OKB-7, and the first aircraft; designated 'Type 7211' was produced and first flown in 1937. The tests proved so inspiring that OKB-7 was given the okay to produce four more production prototypes bearing the designation I -207 (I-Istrebital, Fighter or literally Destroyer).
 The first production
prototype (I-207/1) was powered by the 900 hp Shvetsov M-62 radial, which was a
license-built Wright Cyclone 9-cylinder. Also retaining the open cockpit, it
featured a smooth close fitting cowl; the same fixed landing gear, and was fully
armed with four ShKAS 7.62-mm machine guns in the forward fuselage. It was first
flown in April 1939 and lead to improvements on the second production prototype.
The second aircraft (I-207/2) still featured the fixed gear, but had the
improved Shvetsov M-63 radial of 1,000 hp and the lower wing were strengthened
to accept either two FAB-250 bombs or ramjets for a rapid climb on takeoff. This
aircraft was ready and first flown in late April or early May 1939.
The first production
prototype (I-207/1) was powered by the 900 hp Shvetsov M-62 radial, which was a
license-built Wright Cyclone 9-cylinder. Also retaining the open cockpit, it
featured a smooth close fitting cowl; the same fixed landing gear, and was fully
armed with four ShKAS 7.62-mm machine guns in the forward fuselage. It was first
flown in April 1939 and lead to improvements on the second production prototype.
The second aircraft (I-207/2) still featured the fixed gear, but had the
improved Shvetsov M-63 radial of 1,000 hp and the lower wing were strengthened
to accept either two FAB-250 bombs or ramjets for a rapid climb on takeoff. This
aircraft was ready and first flown in late April or early May 1939.
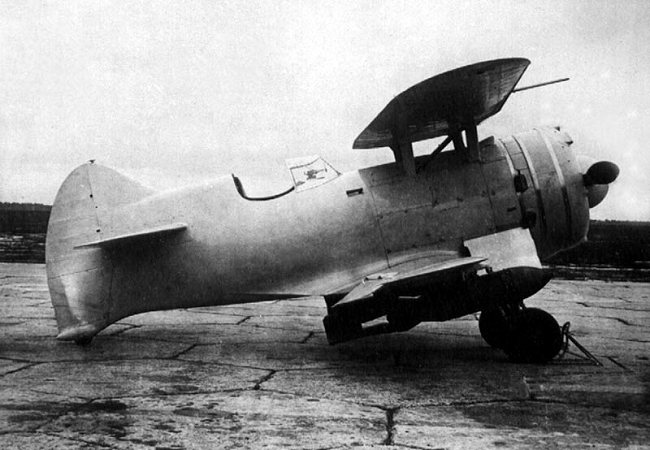
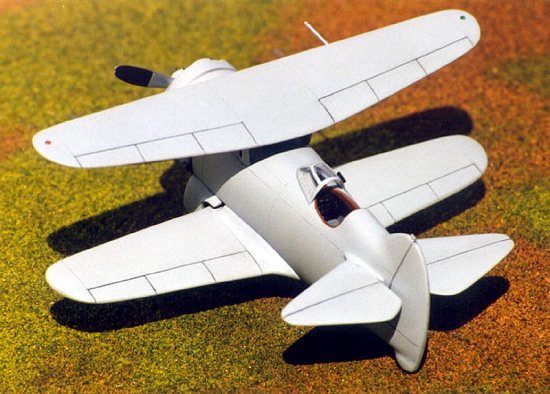
Further design improvements came with the third production prototype (I-207/3), which featured a retractable landing gear that rotated to lie flat in a small land gear bay under the fuselage. This improved the top speed over the fixed gear version by 20 mph (32.5 km/h), 285 mph for the I-207/2 and 305 for the I-207/3). Both this and I-207/2 have been rumored to have seen combat in Finland during the Winter War, but it is yet unfounded. The model represents this production prototype.
The fourth production prototype featured a fully enclosed cockpit, a geared M-63 engine and a large smooth spinner that gave the little airplane a dart-like look. Though the geared engine gave the pilot more control, the top speed was less at 301 mph. Since new Russian monoplanes (Mig-1 and LaGG-3) were on the drawing boards, the I-207 was cancelled, as the Soviet Union realized the day of the fighter biplane was over. Even though the little fighter flew rings around I-153s, it still lacked the speed to engage an I-16.
The Cyrillic title РЕДКИЙ РУССКИЙ МЕДВЕЖОНОК is transliterated as REDKIY RUSSIY MEDVEZHONOK and means RARE RUSSIAN BABY BEAR.
|
CONSTRUCTION |
Cockpit:
 The cockpit comprises only
two resin parts, a complete floor with seat (belts and harnesses molded on
seat), control stick, and rudder controls already molded and an instrument
panel. No sidewall detail is on the rather thick injected plastic fuselage
halves, but truth be known, not much could be seen in the cockpit opening. I
scratch built the PV-1 gunsight from white and clear styrene sheet and fine
wire. It was painted semi-gloss black and set aside for final assembly.
The cockpit comprises only
two resin parts, a complete floor with seat (belts and harnesses molded on
seat), control stick, and rudder controls already molded and an instrument
panel. No sidewall detail is on the rather thick injected plastic fuselage
halves, but truth be known, not much could be seen in the cockpit opening. I
scratch built the PV-1 gunsight from white and clear styrene sheet and fine
wire. It was painted semi-gloss black and set aside for final assembly.
All cockpit interior pieces were painted in medium gray, with exception of the instrument panel, which was paint semi-gloss black. The belts and harnesses were bushed dirty white, with the buckles pick out in bright aluminum. The control loop handle was painted in flat black. An ink wash was given in all recesses. The instrument gauges were first given a drop of white and followed by the application of Reheat Models instrument panel decals. The headrest was painted leather. It was a simple easy modeling task and the fuselage halves can be cemented right away, with the two cockpit assemblies attached after seam clean up. Nice going Pavla.
Engine and cowling:
No engine was included in the kit and the instructions would have one attach the resin inner slat cover to the cowling in the closed position. That would not do and I had a spare Engine 'n' Things resin Shvetsov M-62, so why not use it. All I had to do to adapt the engine was to drill the cooling slat and cowling with the proper sized hole to accept the engine tube front. I didn't even have to cut out any of the resin cowling or sand away any of the engine cylinder ends. It was like the engine was made for the kit. The engine was first painted engine gray, the cylinders picked out in oxidized aluminum, and the push rods painted black. A clear gloss was applied and black washes were done after all paint had dried. I lastly brushed a little clear flat to the cylinders.
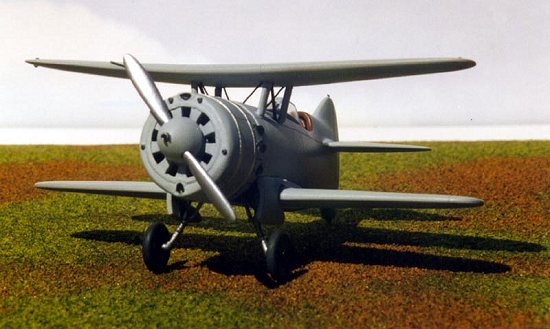 The cowling piece is resin
and it is perhaps the worst molded piece in the kit. Lots of pinholes and raised
dust specks, poorly molded intake orifices, and almost indistinguishable gun
barrels. I cut away the gun barrels and replaced them with sections from a
25-gauge hypodermic needle. Using the Dremel tool and an engraving bit, I
cleaned out the intakes a little, but had to keep that to a minimum. I filled
all the pinholes with Dupont 30S auto primer, as I find it works better that
super glue. The cowling was lastly sanded, but it still is the one drawback to
this kit.
The cowling piece is resin
and it is perhaps the worst molded piece in the kit. Lots of pinholes and raised
dust specks, poorly molded intake orifices, and almost indistinguishable gun
barrels. I cut away the gun barrels and replaced them with sections from a
25-gauge hypodermic needle. Using the Dremel tool and an engraving bit, I
cleaned out the intakes a little, but had to keep that to a minimum. I filled
all the pinholes with Dupont 30S auto primer, as I find it works better that
super glue. The cowling was lastly sanded, but it still is the one drawback to
this kit.
Exterior:
The exterior was nicely molded, but the recesses were a bit shallow for my liking. I rescribed all recessed lines a little deeper to prevent any sand through. The entire kit was a snap to assemble, I only had to apply filler to the lower wing/fuselage mount and even here I only used Krystal Kleer, which is a very god way to achieve a smooth filling without sanding.
The gear bays were painted medium gray and the gear struts graphite. I had to scratch build the retraction arm from styrene rod and it too was painted graphite. The wheels were painted RLM 66 and the tires brushed in tire black. The wheel centers received a coat of semi-gloss clear. The rear wheel was cut from the fuselage and a new one build from a Waldron-punched disk of styrene. A mounting slot was first drilled and then cleaned up with a Dremel motor tools and an engraving cutting bit. The gear door rods were done with fine wire painted black.
A set of resin FAB-250 bombs are included with the kit, but they are very poorly molded and also too long. I tossed them into the spares box, but doubt I shall ever use them
If someone knows what the tiny device on the vertical tail is, I would appreciate it. I replicated it on the model from the actual photo, but I have no idea as to its function. The starboard Venturi tube was scratch-built from 0.025-inch styrene rod and fine wire for the attachment. The front and rear were lightly drilled to show an opening. It was painted semi-gloss black and set aside for final assembly.
|
PAINT |
 Notice I didn't say decaling,
because there are none if one is building the aircraft before it's acceptance in
the VVS. The kit gives one some nice looking Propagtem decals, but these were
for the tractor green over light blue scheme give to the I-207/3 once in VVS
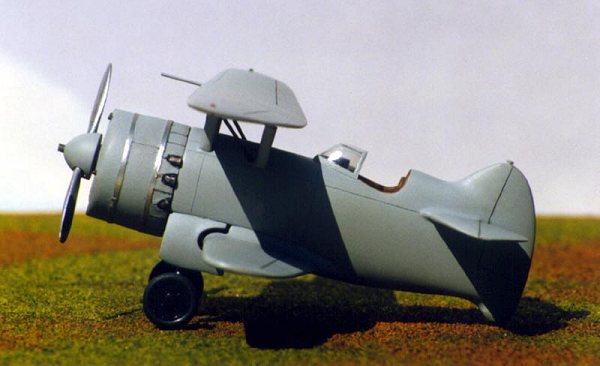
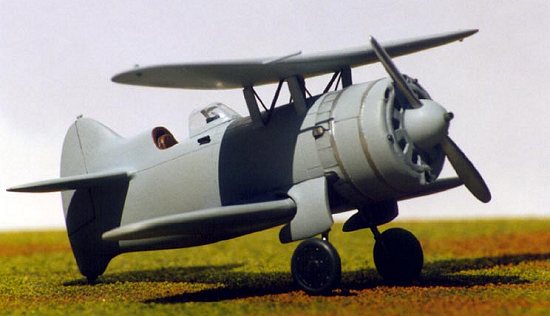
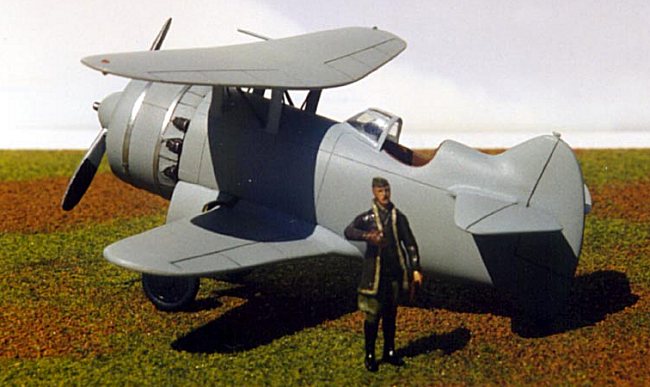
service. Overall, the production prototype was paint a light gray, which matched
very closely to RLM 76. Therefore, the entire model was painted RLM 76. A clear
gloss was applied for ink washes in the control recesses. The model was lastly
finished in a coat of clear flat and wing navigation lights applied to the upper
and lower surfaces of the upper wing using Waldron-punched disks of Bare-metal
foil, Krystal Kleer, and clear red and clear green paint where appropriate. The
fuselage to wing rod bracing were done using 34-gauge wire and the cabane cross
bracing done with 0.025 wire. All rods were painted black before attachment.
Notice I didn't say decaling,
because there are none if one is building the aircraft before it's acceptance in
the VVS. The kit gives one some nice looking Propagtem decals, but these were
for the tractor green over light blue scheme give to the I-207/3 once in VVS
service. Overall, the production prototype was paint a light gray, which matched
very closely to RLM 76. Therefore, the entire model was painted RLM 76. A clear
gloss was applied for ink washes in the control recesses. The model was lastly
finished in a coat of clear flat and wing navigation lights applied to the upper
and lower surfaces of the upper wing using Waldron-punched disks of Bare-metal
foil, Krystal Kleer, and clear red and clear green paint where appropriate. The
fuselage to wing rod bracing were done using 34-gauge wire and the cabane cross
bracing done with 0.025 wire. All rods were painted black before attachment.
September 2000
Copyright ModelingMadness.com
If you would like your product reviewed fairly and quickly, please contact the editor or see other details in the Note to Contributors.