| KIT #: | 48038 |
| PRICE: | $67.00 |
| DECALS: | One option |
| REVIEWER: | John Summerford |
| NOTES: | Caracal Decals CD48023 |
| HISTORY |
 The T-45 was built under license
from British BAE Systems of the Hawk trainer and first flew in April, 1988.
McDonnell Douglas made extensive modifications for the US Navy, the most obvious
being the addition of a tail hook and dual wheel nose gear. Internally, the
airframe was strengthened and more anticorrosion measures incorporated. The
T-45C included a glass cockpit and improved navigation systems. All of the
original “A” versions were upgraded to the “C” standard.
The T-45 was built under license
from British BAE Systems of the Hawk trainer and first flew in April, 1988.
McDonnell Douglas made extensive modifications for the US Navy, the most obvious
being the addition of a tail hook and dual wheel nose gear. Internally, the
airframe was strengthened and more anticorrosion measures incorporated. The
T-45C included a glass cockpit and improved navigation systems. All of the
original “A” versions were upgraded to the “C” standard.
VT-21 RedHawks
The fighting RedHawks of flight Training Squadron Twenty-One were established as an advanced training unit two-zero-two in April 1951, the squadron was re-designated as Flight Training Squadron-Two One on May 21 1960. The first Navy and Marine Corps students were trained in the F6F Hellcat. In May 1954, the squadron transitioned to its first jet aircraft, the F9F Panther with the squadron later operating the F9F-8 cougar, TA-4J Skyhawk and, in Feb 1992, making the final transition to the T-45 Goshawk.
| THE KIT |
A single bag holds four sprues of light gray styrene parts and a separate clear sprue is also in the bag. The are no photo-etch parts. Surface detail on the exterior parts is a bit overstated. The ejections seats lack detail and resin replacements might be a good option. Total parts count is 144. Instrument panels for either the “A” or “C” are included.
 Options are for open or closed
canopy, extended slats, extended dive brakes, and flaps up or down. A search of
the internet revealed no photos of all three extended at the same time while the
plane was parked. If the dive brakes were extended, they were only by a couple
of inches, also the same for the slats. All of the photos viewed showed the
flaps down.
Options are for open or closed
canopy, extended slats, extended dive brakes, and flaps up or down. A search of
the internet revealed no photos of all three extended at the same time while the
plane was parked. If the dive brakes were extended, they were only by a couple
of inches, also the same for the slats. All of the photos viewed showed the
flaps down.
The instructions are in a 20-page booklet, including the front and back cover, printed in black ink. Assembly is broken down to 19 steps and the last four pages cover painting and decaling. A paint index references Vallejo, Model Air, Mr. Color, and Italeri acrylic paints. The bottom of the box has color illustrations.
| CONSTRUCTION |
The cockpit parts were painted first. While they were drying, the intake and exhaust trunks were assembled, but not joined together yet so that the system could be test fit in the fuselage. As part of that strategy, the intakes were the next to be glued to the fuselage halves. However, the halves were twisted in the middle, affecting the fit of the intake trunks, so the halves were taped together to get the correct alignment. I’m glad I did this early in the build because it became apparent that the twist was severe enough that fitting the wings was going to be difficult.
Investigating further, the rear bulkhead was taped in place, then halves clamped together. An awful gap appeared at the aft end of the fuselage intake parts, so the lower wing was given a test fit. This informed me how to bend the lower portion of fuselage halves outward to close the gaps with the intake parts and apply liquid cement from the inside.
 Turning to the interior, the nose
wheel bay was built up, but left out the nose gear called for installation at
this point. The part for the roof is also the tub for the cockpit, so the seats
came next. I used photo-etch lap belts left over from an earlier build and
fabricated shoulder belts from card stock. That assembly and the trunking were
glued into the right fuselage half along with some lead weight.
Turning to the interior, the nose
wheel bay was built up, but left out the nose gear called for installation at
this point. The part for the roof is also the tub for the cockpit, so the seats
came next. I used photo-etch lap belts left over from an earlier build and
fabricated shoulder belts from card stock. That assembly and the trunking were
glued into the right fuselage half along with some lead weight.
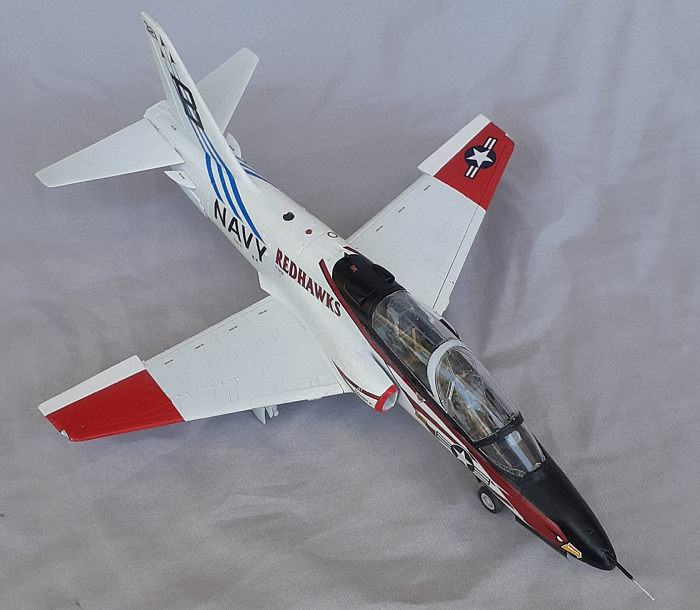
After completing the fuselage, including the stabilators, attention went to the wings. The wheel wells build up in three pieces each. The flaps were left off for later and their actuators were glued in place after the wings were offered up to the fuselage. It took some filing here and there to get a good fit and putty was needed on the underside. I’m glad I added the intakes early in the build and discovered the twist because there is no room for a spreader bar.
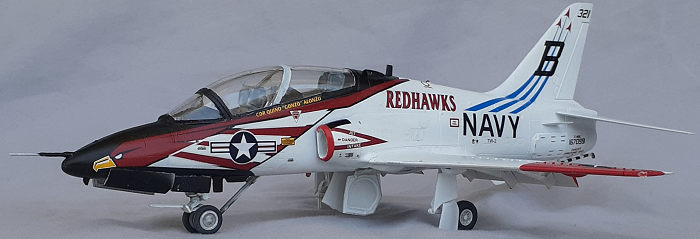
Before the canopy is glued in place, a clear divider is installed in its interior. I’m confused how that should work because the slot in the divider forces it too far forward when it is lined up with the tab in the canopy. The solution is to remove the tab, but I have no idea how do that without marring the canopy. The tops of the ejection seats needed filing and repainting in order to get the canopy to fit in the closed position. The fit to the fuselage was very good. That was masked along with the windshield and the model went to the paint booth.
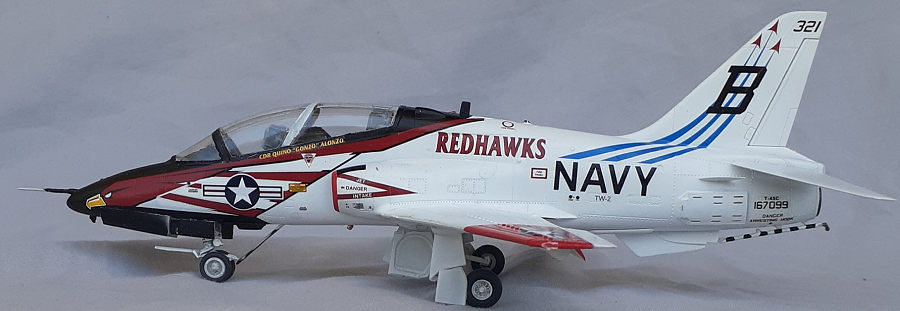
| COLORS & MARKINGS |
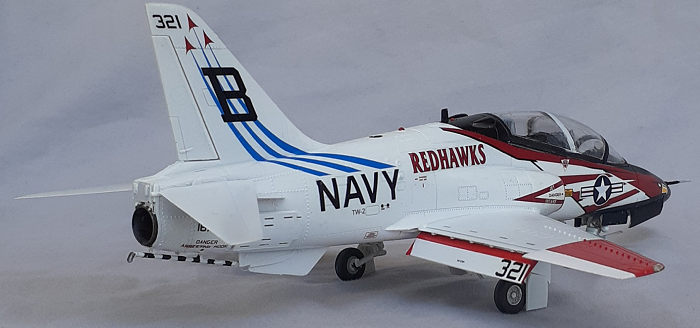
The entire model was given a coat white rattle can automotive primer. Seams were given further attention and then, for second coat, everything, including wheel wells, was sprayed gloss white. The wing tips, intake rims, and flaps were masked painted for the red markings. The tricky masking for the black nose followed.
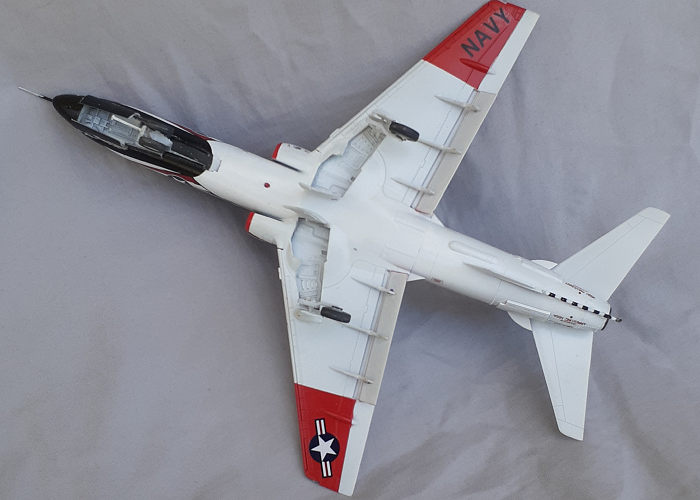 The decal instructions from Caracal
Models direct the entire nose be painted black so that the demarcation line
travels in a diagonal from the back of nose gear well to behind the canopy, just
in front of the intakes. The hawk decal has a one-millimeter black boarder
around it, so that is the amount of play one has to work with. I wasn’t sure how
opaque the white stripes would be over the black paint, so I didn’t mask for the
diagonal and instead masked the area below the cockpit where the strips would
fall. This also gave more room to adjust the decals. Once satisfied, gloss black
was sprayed on.
The decal instructions from Caracal
Models direct the entire nose be painted black so that the demarcation line
travels in a diagonal from the back of nose gear well to behind the canopy, just
in front of the intakes. The hawk decal has a one-millimeter black boarder
around it, so that is the amount of play one has to work with. I wasn’t sure how
opaque the white stripes would be over the black paint, so I didn’t mask for the
diagonal and instead masked the area below the cockpit where the strips would
fall. This also gave more room to adjust the decals. Once satisfied, gloss black
was sprayed on.
Nearly six hours was spent over three sessions applying the decals. The hawk decals and the tail decals are the largest and getting them maneuvered in place and lined up with their counterparts was the most challenging. I used plenty of water when applying them and then brushing some Micro Sol over their surface and it worked great. (The white portions are, indeed, opaque.) There are a lot of secondary markings and stencils to add and they bring the model to life. After drying overnight. A gloss clear coat sealed the decals.
The landing gear was assembled and while the glue was curing, the flaps were set in place. The tail hook was added next then the gear and doors installed. Small drops of super glue were added the door hinges to reinforce their attachments.
With the underside taken care of, the model was set on its wheels so that the wing tip light lenses, dorsal blade antenna and pitot glued in place, completing the model.
| CONCLUSIONS |
I wonder if the warps and twists that I encountered were the result of not letting the mold cool enough before removing the plastic, so perhaps blame the factory, not the engineering. This kit is roughly ten years old (really?!) and when you compare it to Kinetics’ IA 58 Pucará one can see that they have improved over the last decade. Regardless, this is a fun project that took me about 25 hours to finish.
John Summerford
23 November 2021
Copyright ModelingMadness.com. All rights reserved. No reproduction in part or in whole without express permission.
If you would like your product reviewed fairly and fairly quickly, please contact the editor or see other details in the Note to Contributors.