Meng 1/48 F-18E Super Hornet
| KIT #: | LS-012 |
| PRICE: | $65.00 delivered |
| DECALS: | Four options |
| REVIEWER: | Dan Lee |
| NOTES: | Used Eduard Big Edition – resin ejection seat, IP and wheels with canopy masks. |
| HISTORY |
The F/A-18E Hornet aka the Super Bug is the main 4.5 Generation Fighter of the US Navy. It's a much better plane than its predecessor (the earlier legacy Hornets) in terms of performance and range as well as carrying a more capable electronics suite. Also like the earlier Hornets very good in terms of maintenance which is a major reason why the Tomcat and Intruder are no longer with the Navy as it takes much fewer maintenance hours to keep a Super Hornet flying than the older Tomcat and Intruder.
 World famous
Top Gun Graduate (and 2nd place in his class, just to make it clear)
Captain Pete “Maverick” Mitchell is the only man in history to shoot down 3
Mig-28s in a sharp dogfight over the Indian Ocean in 1986. For reasons unknown
to the US Navy (Iceman or Xenu?) he was still flying for the Navy as a test
pilot at the age of 62 (to be fair, there was a 61 year old formerly retired
Ukrainian ground attack pilot who did fly combat missions in the current at the
time of this writing Ukraine/Russian war till he was shot down and killed in
2023). For those who haven't seen Top Gun 2.0, please disregard the next
paragraph /spoiler alert./
World famous
Top Gun Graduate (and 2nd place in his class, just to make it clear)
Captain Pete “Maverick” Mitchell is the only man in history to shoot down 3
Mig-28s in a sharp dogfight over the Indian Ocean in 1986. For reasons unknown
to the US Navy (Iceman or Xenu?) he was still flying for the Navy as a test
pilot at the age of 62 (to be fair, there was a 61 year old formerly retired
Ukrainian ground attack pilot who did fly combat missions in the current at the
time of this writing Ukraine/Russian war till he was shot down and killed in
2023). For those who haven't seen Top Gun 2.0, please disregard the next
paragraph /spoiler alert./
Mav would be recalled to teach current aviators the skills to destroy an “unknown” enemy's uranium processing plant located in a mountain valley surrounded by SAMs and 5th GENERATION fighters where the structure's only vulnerability was a vent shaft no bigger than a Womp Rat, but would ultimately end up flying and commanding the mission himself. In the end /spoilers!/ he would tangle with three Su-57 Felons (5th GENERATION!) in an F-14A with his late RIO's son (shooting down two) to become the latest US Navy cinematic fighter ace.
| THE KIT |
Please see DaBoss' preview of this kit to see what is in the box.
| CONSTRUCTION |
Shockingly, I did not follow the instructions as I began with the intakes. I found the narrow openings and curves difficult for my not-so-small fingers to try and sand the seams. I ended up filling the seams best I could with Vallejo plastic putty and wipe off the remainder. There was still a noticeable gap that would be noticed by anyone with a dental mirror but that was as far as I wanted to fix the intake seams. The main landing gear wells were painted and glued in place.
Next I worked on the wings/upper fuselage assembly. Meng provides two options for the wings (folded or flight) that should be chosen before you add the folding wing section. I chose them to be in flight and used the parts for that option. I also glued the parts together for the flaps for both the leading edge and trailing edge using Tamiya Extra Thin Cement.
 I tackled
the tailplanes/rudders. One thing that bothered me about Meng's design
philosophy is that it reminds me of Revell Monogram. No rhyme or reason as to
the part seams which don't follow any panel lines especially the parts for the
rudder hinges. This made the kit more difficult than I thought it would be as I
spent a fair amount of time sanding and filling areas as well as masking off
areas that needed to be protected from sandpaper.
I tackled
the tailplanes/rudders. One thing that bothered me about Meng's design
philosophy is that it reminds me of Revell Monogram. No rhyme or reason as to
the part seams which don't follow any panel lines especially the parts for the
rudder hinges. This made the kit more difficult than I thought it would be as I
spent a fair amount of time sanding and filling areas as well as masking off
areas that needed to be protected from sandpaper.
The cockpit was painted as per instructions (used NATO black instead of flat black) and the Eduard 3d resin instrument panel was added. It provides a lot of visible detail which is why I bought it in the first place. I didn't add more cockpit detail till later so I glued together the nose wheel well parts, attached them to the underside of the cockpit then put the assembly into the lower nose fuselage pieces. Meng did a smart thing here with their Super Hornet rather than trying to build the entire nose section (creating a pain in the butt seam and weak butt join... see my previous CF-18 Hornet from Hasegawa review for that story) they would merge the top of the fuselage with the nose bottom section keeping the model's structural integrity and removing a very difficult seam with a smaller seam.
Next I added the rear side panels. This was the biggest headache of the entire kit for me as there were a number of areas where it didn't fit smooth or had a noticeable step to fix. I also added the extensions to the intake and had them prepainted Dark Ghost Grey as per instructions. There were some gaps in these parts that would need some fixing later (I used some careful masking and Vallejo plastic putty to seal up the gaps with the excess removed with damp Q-Tips.)
I merged the upper fuselage with the lower fuselage then worked on sanding all the seams I needed to fix which meant I had to break out more CA glue for filling and wet/dry sandpaper. It took me several days of careful sanding to deal with the awkward seams. I had to mask off certain areas with tougher masking tap to try and prevent myself from damaging various details. This included the seams around the nose where the upper nose met the lower nose section, the centerline seam of the lower nose section and the areas where the side panels met the rear of the Super Hornet. It took a week to get rid of all those seams and then break out the metal ruler with a big pin in a pinvise to replace all the ruined details.
 The Super
Bug's LERXs have a nice big seam underneath that needed a fair amount of
sanding/filling. It took about three times to fill and sand the area smooth to
my satisfaction. I took some care as to not destroy certain details, but I ended
up having to redo several panel lines though thanks to all the sanding I did.
The Super
Bug's LERXs have a nice big seam underneath that needed a fair amount of
sanding/filling. It took about three times to fill and sand the area smooth to
my satisfaction. I took some care as to not destroy certain details, but I ended
up having to redo several panel lines though thanks to all the sanding I did.
I added the nose cone to the model, but left off the gun port till after painting. It fit well, but just needed some Vallejo plastic putty to deal with some slight gaps. Next I took the main canopy and removed the centerline mold marking. I used 600 grit sandpaper, various nail polishing sticks then finally Qtips dipped with NOVUS 2 rubbing compound to remove all the scratches. I discovered that I had been using too big a grit for removing the centerline mold markings on the clear parts. Anything less than 400 grit or above is going to leave a permanent mark. If you use finer grit sandpaper then most of the scratches will disappear (it should have been obvious duh, but it wasn't for me.)
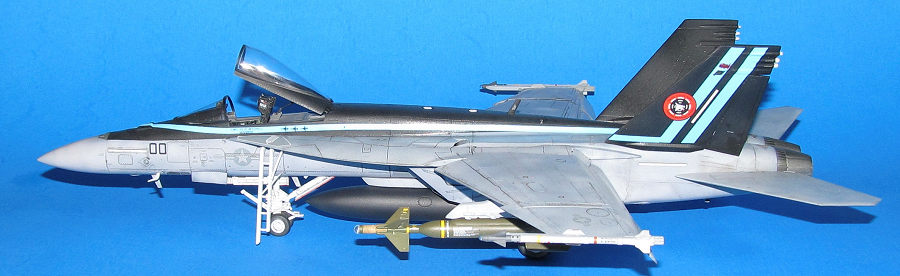
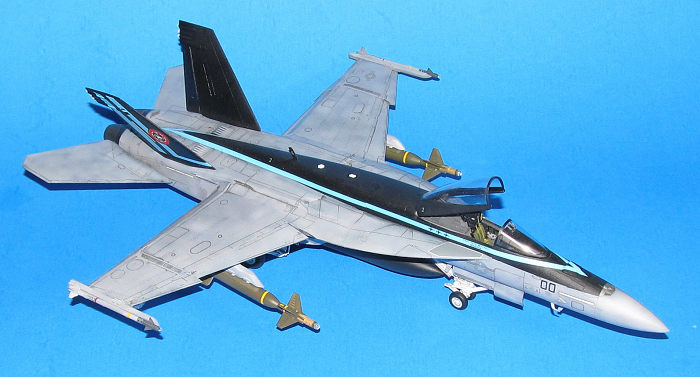
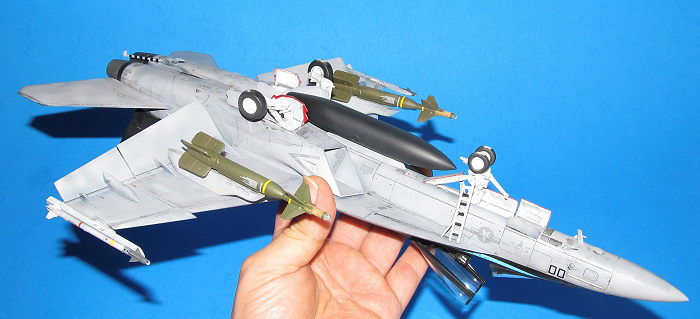
The various small assemblies like the wheels, weapons/pylons (two AIM-9X, two GBU-24 laser guided bombs, centerline fuel tank and various pylons), landing gear and boarding ladder were assembled at this time mostly using CA glue to join the parts together. Seams and mold markings were sanded off using 400 and 600 grit sandpaper. I selected landing configuration for the landing gear (they do also have the option to be placed in launch position.)
| COLORS & MARKINGS |
The tailplanes were primed first with black Stynylrez primer. After it was dry the primer was polished smooth using various grades of polishing cloths and the various seam issues fixed with more filling/sanding/polishing. I sprayed on Gunze Gloss black in two very thin coats.
Next various orifices in the Super Bug were stuffed with packing sponges to keep paint out and sprayed with black Stynylrez primer. I ended up spraying two separate coats over three days because I had primer runs, lots of boogers and some fill/sand repairs to clean up/complete. This required a fair amount of polishing primer relatively smooth.
A day after the last primer coat,
I sprayed on white paint for black basing aka blotchy paint scheme. Let it dry
for a day or so before I sprayed on the bottom col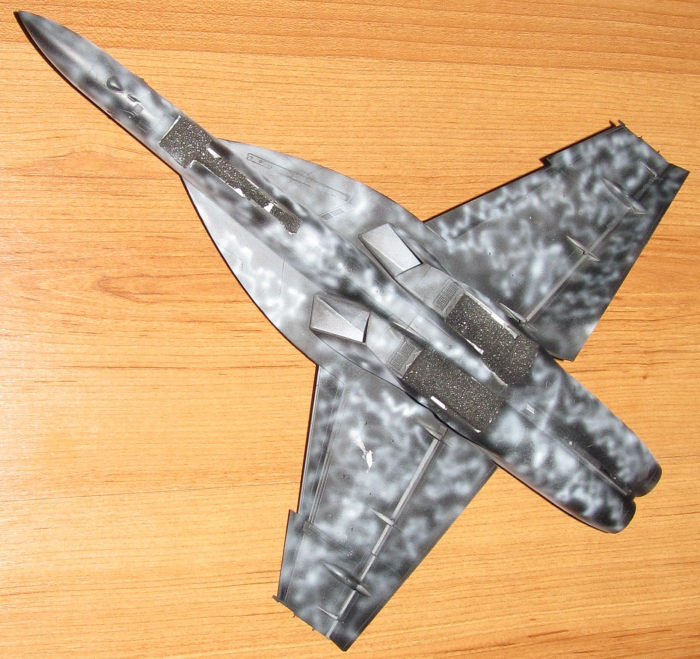 or
of Mission Model Paint Light Ghost Grey and then MMP Dark Ghost Grey for the
topside. I did my best to keep the paint blotchy spraying the paint coat thin.
or
of Mission Model Paint Light Ghost Grey and then MMP Dark Ghost Grey for the
topside. I did my best to keep the paint blotchy spraying the paint coat thin.
The resin main wheels and masked canopy pieces were painted the same way... primed with various colors (NATO black for the canopy and grey Stynylrez for the tires) then the tire hubs were painted flat white while the canopy was blotched with thin squiggles of white. When the wheels were dry, the hubs masked and then they were painted German Grey while the canopy was painted Dark Ghost Grey.
Lastly, the various landing gear doors were primed and painted Light Ghost Grey. When they were dry I brush painted the surrounding edges gloss red using a mix of Tamiya gloss red and a drop of Tamiya paint retarder to keep the paint from being too thick and keeping them from showing any brush markings.
The weapons were painted as per instructions (the whole bomb was painted OD not Light Ghost Grey) and the centerline fuel tank was painted gloss black as it was in the movie. I ended up brush painting the laser seeker desert yellow to match what was in the instructions. The ring around the exhausts was masked off and painted Vallejo Metal Color Steel.
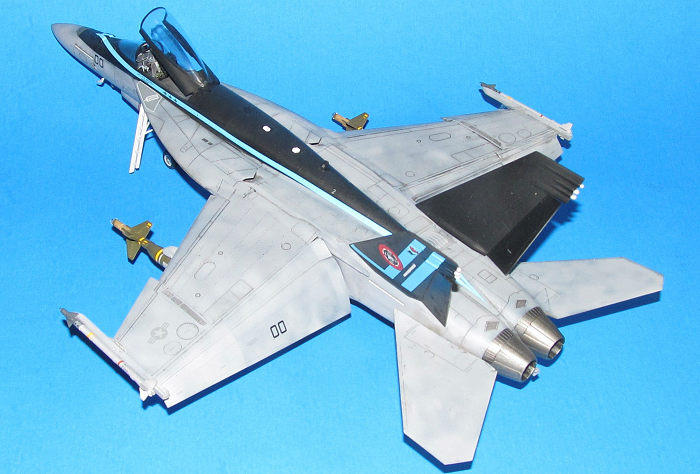
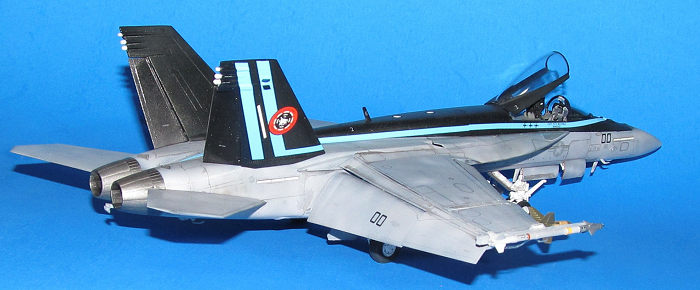
I had to mask off area around the central spine so as to “Maverick” the Super Bug as per the movie. I didn't screw it up so it only took a single take. Once the paint was dry, I sprayed on two light coats of Vallejo Clear Acrylic in preparation for the decals.
When the gloss coat was dry, I used the Meng Top Gun decals except the stylized national insignia because it wasn't what was on the screen. Meng decals were pretty good as I didn't have too many issues even with the light blue fuselage stripes. I used Micro Sol mostly but also used some dabs of Solvaset for the more stubborn areas.
I assembled the rest of model before I used mix of water color, oil paint and Tamiya panel liner to weather the Hornet including the wheel wells, landing gear, landing gear wheel hubs and landing gear doors. I made it a touch more dirty than it was in the movie. I'm sure the ground crews at Top Gun would keep an instructor's plane very clean, but I like the dirty weathered look of Navy aircraft so that is what I went with. I let everything dry before I sprayed on the final coat of Vallejo flat.
| FINAL BITS |
First thing I did was assemble the exhausts. I ignored the obvious centerline seam by spraying the interior Vallejo dark burnt metal then the exhaust nozzles exterior Gunze Burnt Metal and the interior VMC Light burnt exhaust. These were inserted and glued in place after painting, but before decaling.
 Next I added
all the details in the cockpit that I didn't add before assembly. The reason why
I do that is that I have a habit of knocking off details during the rough
handling from sanding, clumsiness and painting so to keep the cockpit looking
good now I wait till final assembly. I had a problem with the windscreen which
was related to the IP coaming. I ended up shaving off a millimeter off each side
so the windscreen would sit flat on the fuselage.
Next I added
all the details in the cockpit that I didn't add before assembly. The reason why
I do that is that I have a habit of knocking off details during the rough
handling from sanding, clumsiness and painting so to keep the cockpit looking
good now I wait till final assembly. I had a problem with the windscreen which
was related to the IP coaming. I ended up shaving off a millimeter off each side
so the windscreen would sit flat on the fuselage.
Before I glued in the IP coaming, I added several grams of ball bearing sized fish weights to the nose and glued with some CA glue. I did a weight check during construction and found that the Super Bug was a bit of a tail sitter.
The Eduard resin ejection seat looks pretty good. I used the decals and the prepainted steel harnesses which makes it stand out.
Lastly, I added the ailerons, landing gear, boarding ladder, the tailplanes, pylons and weapons. Meng supplies pins for the weapons pylons to keep the weapons in place. You really have to jam the weapons in there to keep them from sliding off the pins. Next the completed, painted and decaled AIM-9X Sidewinders were added to the wingtip rails. Finally the antenna and canopy were glued in place.
| CONCLUSIONS |
Despite the fact I think certain things could have been improved (rear side panels) and parts not aligned on panel lines, Meng did a fantastic job with this kit. It certainly isn't cheap when compared to the Hasegawa Super Bug, but it seems a little easier to build and benefits from 20 or so years of product development. Definitely not for the beginner, but an intermediate modeler can make a very good model from this kit.
The Eduard set makes a lot of the details pop out and worth the trouble to use it. Overall, I'm very happy I got to build my version of Maverick's ride from Top Gun 2.0.
/runs around singing “Highway to the Danger Zone”/
Dan Lee
10 May 2024 Copyright ModelingMadness.com.
All rights reserved. No reproduction in part or in whole without express
permission from the editor. If you would like your product reviewed fairly and fairly quickly, please
contact the editor or see other details in the
Note to
Contributors. Back to the Main Page
Back to the Review
Index Page
Back to the Previews Index Page