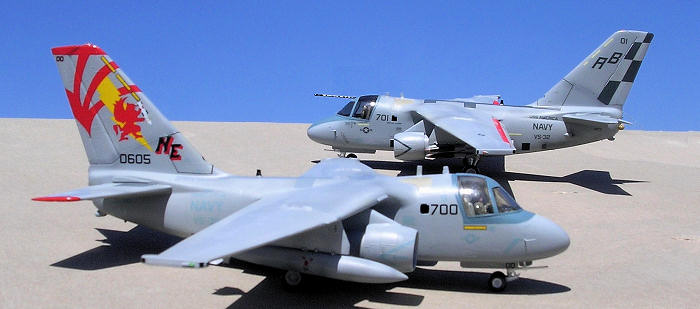
Revell 1/72 S-3B Viking
| KIT #: | 04327 |
| PRICE: | 19.10 Euro |
| DECALS: | Two options |
| REVIEWER: | Carmel J. Attard |
| NOTES: | Hasegawa mold. Pavla detail parts incorporated. |

| HISTORY |
Destined to be a
replacement of the Grumman S2F Tracker, the prototype S-3 first flew on
 duties with VQ-5 and VQ-6, though their
service life was quite short due to the high cost of maintenance.
The first flight of
the developed S-3B took place on 13th
September 1984 and 122
A models were brought to this standard.
The Viking had a maximum speed of 450
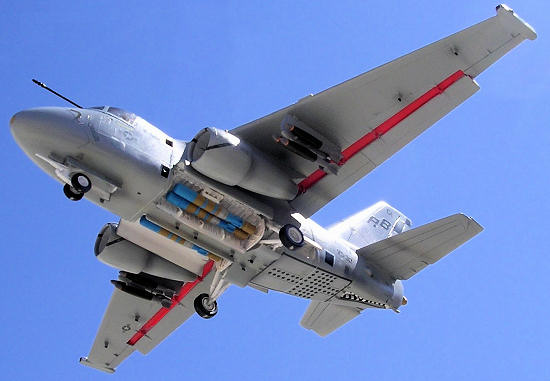
Knots, a range of 2,000 miles. It can carry 2 hard points under each wing for
mines, Harpoon ASM, external tanks or ‘buddy’
As to the weapons deal,
Scott Van Aken (www.modelingmadness.com)
who spent long years working on S-3s has indicated that
"...depending
on the date of a particular S-3, it may well be that the planes were no longer
capable of delivering weapons as the hardware/software that provided data and
targeting info may well have been removed. The entire left side of the interior
behind the rear seats was full of racks that had nothing in them but modules for
the various offensive systems. Though the computer that interfaced all the
various systems from the intercom to the radar was still there, all the tactical
stuff was gone. Doesn't mean they couldn't carry the torpedoes, but they
couldn't really use them.
 All of the
comm/nav/radar equipment was installed in bays that were accessible from the
outside. When that interior stuff was deleted, so was the sensor operator and
his place was taken by lead weights so that the seat ejection sequences would
not be disrupted as the tactical operator on the right rear was still being
carried. After 1996 all the ASW electronics were stripped out of the planes and
they were pretty much used for search and tanking only. In fact the unit names
were changed from ASW to Sea Search squadrons. Means no weapons would be
carried, but there would be a D 704 refuelling pod under one wing pylon. I
believe they used the left side for that so the pilot could monitor it.
| THE KIT |
This
is the same Hasegawa kit with only minor differences where the cockpit canopy is
not tinted and there is an extra small window added at the forward fuselage
area. This implies that the fuselage halves are from a later batch of production
The kit contains 86 parts molded in mid grey plastic which slot together so well that no rubbing down of joint lines is necessary. The 10-page instruction in both English and German language contains 24 stages of construction and 3-pages of decal placement for two liveries which differ from each other producing a contrast Viking finish in each case. The kit contains detail options such as crew door that can be glued open or closed and the forward censor can be opened to reveal a radome underneath. There is provision for a flight-refuelling probe. Alternative fuel tanks or bombs can be fitted to under wing pylons.
| CONSTRUCTION |
The various
stages of fuselage and wing construction are straightforward including a
detailed cockpit, detailed undercarriage and 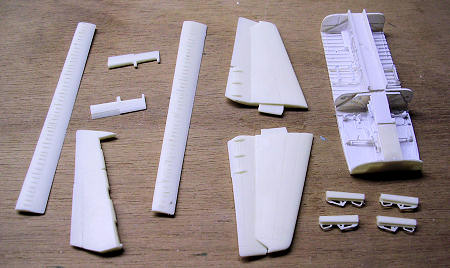 cockpit where a decal is provided for the
instrument panel and complete with 2-crew figures. Color detail is clearly
indicated. I went a stage further in detailing the model by making use of the
excellent Pavla Models ‘S-3 Viking’ sets U72-80 comprising a well detailed bomb
bay and wheel well resin parts, 11 items in total. In addition I also used
another Pavla set U72-79, which consisted of detailed control surfaces also in
cream resin.
Fitting the new bomb bay/wheel well resin part entailed cutting away the kit
forward fuselage area, which is same fitting length as the resin part. The resin
bomb bay and bay doors parts had the heavy runners cut with a razor saw and
sanded down the excess feeder part. This was time consuming but very rewarding
if one does not rush with preparation and fitting of the item. The tail
stabilised was a straightforward job. The elevator and trim tabs are molded in a
different position to that in the Revell kit so that they look different on the
kit too. I also used the extended flap parts from the second set. These required
adding five metal pins to e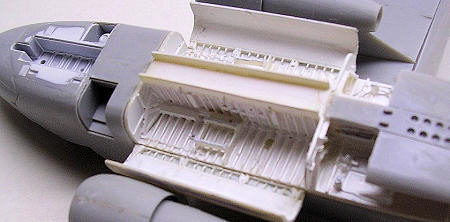 ach flap. Pairs of small triangular hinges were also
added to each of the metal pins, adjacent to the flaps side.
Several stub aerials come with the kit. Those in way of bomb bay doors situated
under the fuselage were retrieved from the cut kit part and added to the resin
central piece of bomb bay that lies between the bay doors. One aerial stub
positioned second in line aft of cockpit was replaced with a slightly bigger one
shaped from a piece of plastic card.
One feature lacking from the Revell kit is the tinted cockpit canopy. I used one from a Hasegawa kit I had in my stash. Alternatively one can add a coat of brownish lacquer or varnish to simulate the same tint of brown. In fact I used this method on an Airfix kit that I was building in line with the Revell model, with quite effective results. I also added two practice Mk 50 Barracuda torpedoes retrieved from the Airfix kits, which I painted in light brown, and medium blue. For the under wing pylons I added three Mk 82-500 lb HE bombs to each pylon. An extended refuelling probe was added to the front of cockpit canopy and a tiny rectangular hinged door added at the probe to canopy root.
| COLORS & MARKINGS |
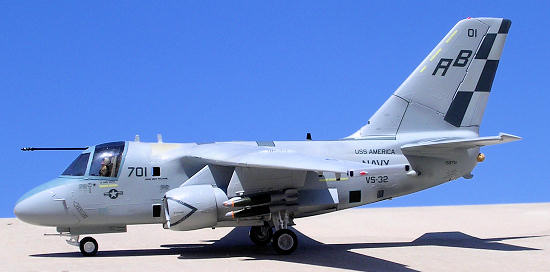
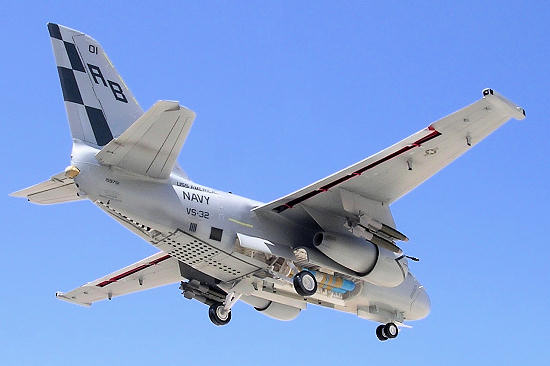 The
only S-3B Viking ever to land at Hal-Luqa airfield was one from VS-32, one that
took part in Deny Flight operations over
| THE AIRFIX KIT |
As indicated earlier I
also built the Airfix S-3. The model lacked a few things that the Revell/
Hasegawa product offers. The kit is molded in white plastic, rather thicker in
section but with flush practically non-existent, making the raised panel lines
and surface detail accurate and not too exaggerated.
I found that the fuselage length was slightly too short
while the wings needed to be s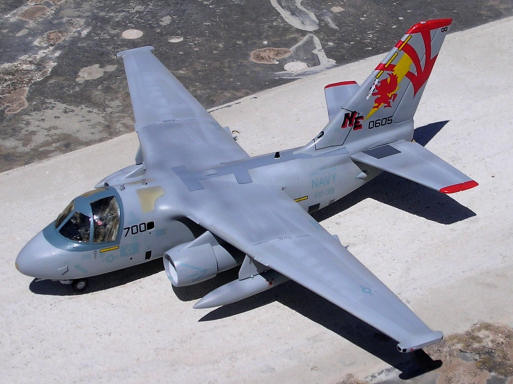 hortened by 3 mm at each side. These I shortened
by first removing the wing tip sensor, then cut away 3 mm from the edge and
refit the sensor to its original place. Missing from the Airfix kit were two
tiny aerials fitted to side of nose, one at each side. These I produced from
bent wire.
The cockpit had an integrally molded instrument panel, side
console but I found that detail to aft bulkhead was lacking and brought detail
to same level as the Revell kit added measured cross lengths of stretch sprue
pieces.
Wing
fitting to fuselage went well but needed rubbing down to bring a smooth
continuity. The cockpit was varnished to give it a dark transparent tint,
followed by a coat of Klear. Interior of engine intake was painted partly light
grey and partly white, while compressor blades were silver. In both kits I
ensured that enough lead weight was added to make the kit balance on its nose
wheel before putting the fuselage halves together. I decided to discard the kit
decals and use instead Revell decals for VS-38 USS Constellation. These have a
colourful yellow and red lion and lightning decorations on the tail fin. The
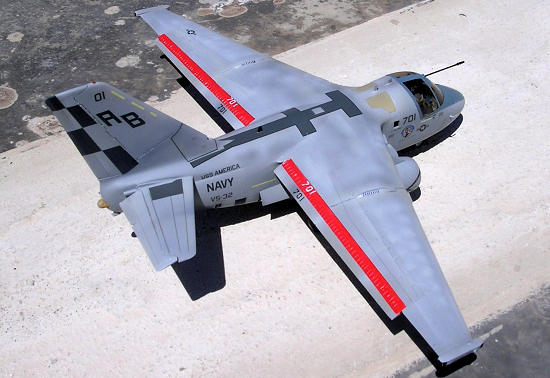
upper fuselage walk ways varied in color to the Revell kit ones, and I drew the
outline on a blank decal sheet which I painted light grey. Then cut it to
conform to same outline as the other walkway. Weathering effect on upper deck
and wings was obtained by varying mix of light ghost and white and apply to
panels which were partially masked. Two fuel tanks were added to the Airfix kit
pylons.
| CONCLUSIONS |
Two
different make of models still produced the desired accurate S-3 Vikings much to
my delight, as I never had a Viking in my collection.
| REFERENCES |
World
Air Powers Journal Vol 34/Fall 1998.
April 2011
If you would like your product reviewed fairly and quickly, please contact me or see other details in the Note to Contributors.