Kitty Hawk 1/48 F-35A Lightning II (AF-1)
| KIT #: | KH80103 |
| PRICE: | Around $50 |
| DECALS: | Two options |
| REVIEWER: | Donald Zhou |
| NOTES: | Advantages: Well detailed, full weapon fit, and choice of open or closed weapon bay. Disadvantages: Two mysterious holes in the back, fit problems, RAM putty/mat too prominent. P.S. Initial release contains a photo-etched set. |
| HISTORY |
Of all the F-35 variants, the A
version is the most conventional. It has a much smaller back with a fuel tank
since it does not need to do any ST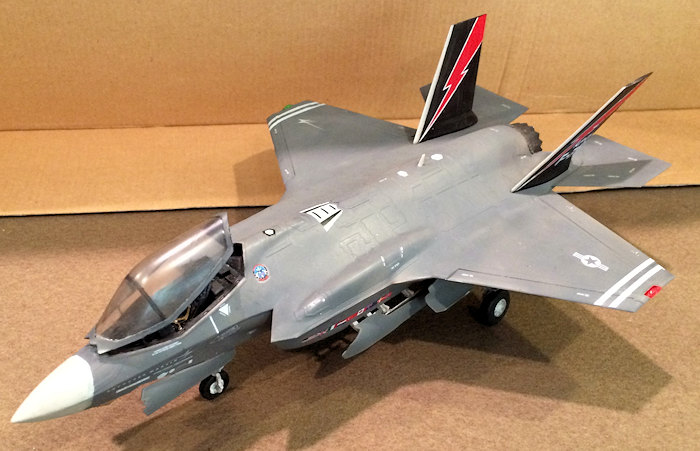 OVL (this is the biggest reason why the F-35
has a range of only 400miles) and a much smaller wings due to the fact it does
not need to land on a carrier. It’s also the only version to carry an internal
gun. The other two versions currently can only carry a stealthy gun pod. IOC is
slated at the end of this year and the F-35A will be able to carry AIM-9X
internally by 2020 or so.
OVL (this is the biggest reason why the F-35
has a range of only 400miles) and a much smaller wings due to the fact it does
not need to land on a carrier. It’s also the only version to carry an internal
gun. The other two versions currently can only carry a stealthy gun pod. IOC is
slated at the end of this year and the F-35A will be able to carry AIM-9X
internally by 2020 or so.
| THE KIT |
The kit has already been described here.
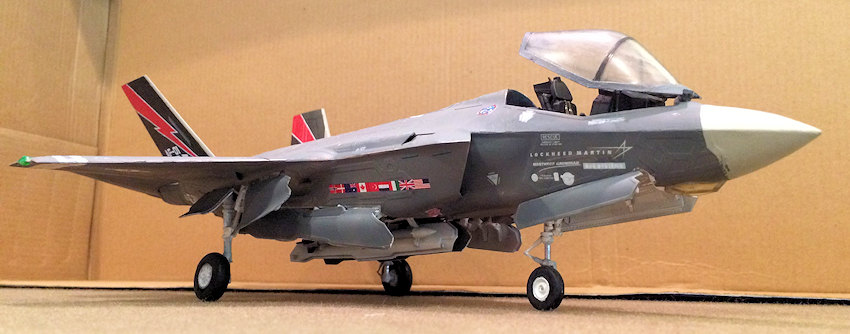
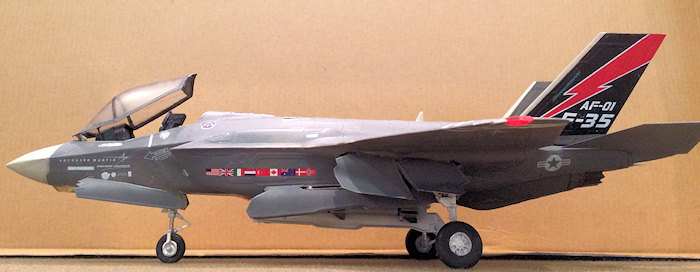
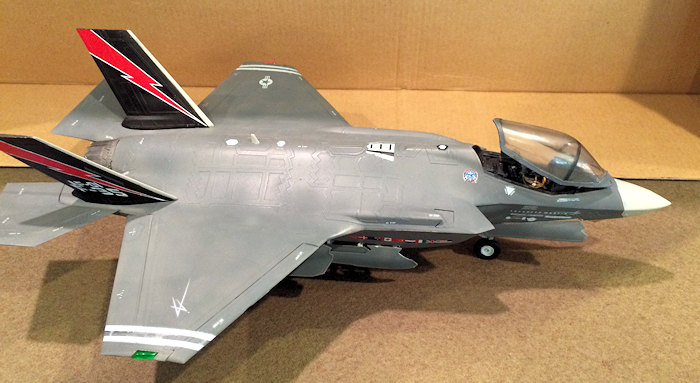
For this version, my second Kitty Hawk kit, I’ll be doing the opposite, the weapon bay will be open, the cockpit will be open with no pilot and I will be using the first decal option, that of the AF-1.
Also, I forgot to mention with AF-6, the decal options officially have two vehicles. “Unofficially” however, several other nation’s insignias are included including British, Canada, Norwegian, Turkey, S. Korea, and Japan etc. If you are able to source some extras, some beautiful “what ifs’ can be done. There is an Israeli version on the net that’s a sight to behold!
| CONSTRUCTION |
I will only cover what needs to be done to do the open bay version here since most of the construction notes are covered already (See above).
 Construction once again, starts
with the cockpit. This one is different since I will be keeping the canopy open.
I still have the good looking harness set so added that to the seat after
painting it olive green. The screen is “off”. I painted it with Euro I Dark
Grey. Most screen, even LCD’s does not become completely black, but rather a
very dark grey when turned off. Euro I Dark Grey is a good paint to replicate
this. I’m going for the “airshow” look here.
Construction once again, starts
with the cockpit. This one is different since I will be keeping the canopy open.
I still have the good looking harness set so added that to the seat after
painting it olive green. The screen is “off”. I painted it with Euro I Dark
Grey. Most screen, even LCD’s does not become completely black, but rather a
very dark grey when turned off. Euro I Dark Grey is a good paint to replicate
this. I’m going for the “airshow” look here.
The open bay version is far more involved. There are A LOT more doors also. Carefully read the instructions since there are a lot of retraction gears that are spread out all over the place. This is especially compounded by the AMRAAM loading doors and the two small maintenance doors too.
There are also a few details inside the bays themselves. Leave off the two fuel lines and the electronic boxes since they are flat black until later. The bay looks busy once done.
Next are the weapons. The GBU-32’s
are assembled and painted in Olive Drab with light ghost grey fins and tails.
The AMRAAMS that are in the kit are nothing home to write about. The details are
soft and some, like
 the extra fuel cell bulge prominent on C5 and above is not
very clear at all made worse by three small ejector pin marks on the body. I was
planning to use the spare AMRAAM’s from my F-22 kits but unfortunately, they got
lost while shipping over here from China so I had to swallow it and just use the
kit missiles.
the extra fuel cell bulge prominent on C5 and above is not
very clear at all made worse by three small ejector pin marks on the body. I was
planning to use the spare AMRAAM’s from my F-22 kits but unfortunately, they got
lost while shipping over here from China so I had to swallow it and just use the
kit missiles.
Other than that, the construction is the same as AF-6. Yes, the two holes in the back are still there and yes, you can still fix them with spare plasticards. One thing of note that I forgot to mention are the main gears. The wheels are connected to the brake disc first. Unfortunately, only a small stub connects the disc to the gear. As can be imagined, either use super glue or brass rods to reinforce this joint first, then cement on the wheels. I had the wheels fall off several times before running for the super glue….Should’ve gone with my intuition right off the bat!
| COLORS & MARKINGS |
Before main painting can begin, I
used Insignia White and sprayed the gear doors, the gears and wells white. This
time also including the weapon bays and bay doors also. Then after 12 hours, I
ripped off several sheets of toilet paper and stuffed the wells. Next, I taped
the canopy, spray the strengthening frame flat black from the outside and then
glued it on. Yes, outside since AF-1 to AF-3 had the strengthening
 frame on the
outside. It’s not until starting with AF-4 that the frame moved to the inside.
This is slightly difficult since Kitty Hawk molded the frame on the inside only,
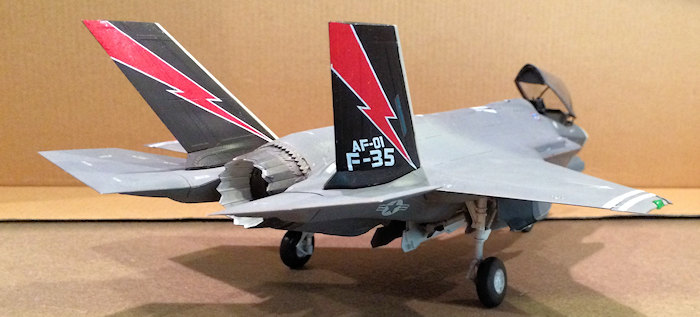
making taping slightly difficult. With AF-1, you also need to spray the vertical
stabilizer black. I did this with Tamiya’s Semi-Gloss Black.
frame on the
outside. It’s not until starting with AF-4 that the frame moved to the inside.
This is slightly difficult since Kitty Hawk molded the frame on the inside only,
making taping slightly difficult. With AF-1, you also need to spray the vertical
stabilizer black. I did this with Tamiya’s Semi-Gloss Black.
Main painting was harder and easier. Harder due to the fact the weapon bay was open. But also far easier since AF-1 never ever carried the RAM putty lines! I realized this too late since I was painting AF-1 and AF-6 together. Ohh well, I should’ve sanded down the putty lines down a bit and not add the steel into the paint and get a lighter shade of grey paint. But by that point, it was moot. What was done was done since I’m not going to strip the paint off and redo everything!
Decals experience are the same as AF-6. Again, do follow the AF-1 instruction to the letter as there are subtle maintenance stencil differences between AF-1 and AF-6. The vertical stabilizers especially since you got two very big red lightnings going down the surfaces. Breakout your favorite decal softener and slobber it on copiously to make sure they get knocked down since the stabilizers do have a few rough surfaces.
| FINAL CONSTRUCTION |
Now that decals are done, the “fiddly bits” can be attached. The first thing to go was the afterburner nozzle. I used the remaining plastic one. It was far easier and much less of a hassle but the detail doesn’t match the photo-etched one.
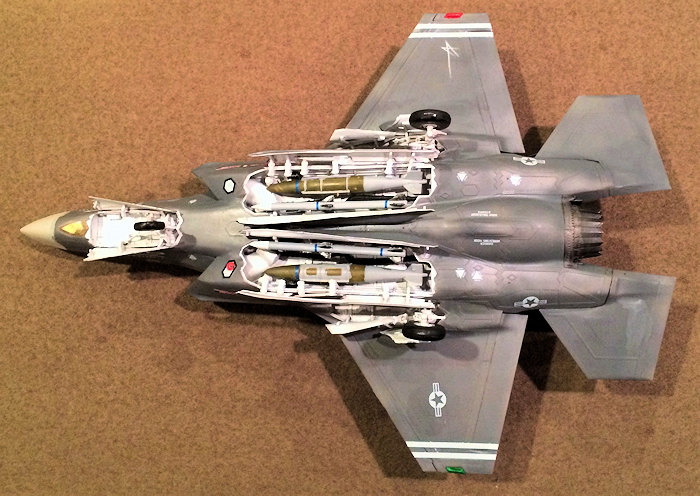 Next are the landing gears and
doors followed by the weapon bay doors. Don’t forget the details inside the bays
either. However, before this I put in the bombs and missiles. There isn’t that
much of a surface for the AMRAAM to go on so in the end, I was forced to use
super glue. The bombs are another story. There are only two small pegs for you
to put them on and they get hidden by the bomb body. It was quite a trip to find
the two pegs while messing with the bombs but eventually I got them to go.
Next are the landing gears and
doors followed by the weapon bay doors. Don’t forget the details inside the bays
either. However, before this I put in the bombs and missiles. There isn’t that
much of a surface for the AMRAAM to go on so in the end, I was forced to use
super glue. The bombs are another story. There are only two small pegs for you
to put them on and they get hidden by the bomb body. It was quite a trip to find
the two pegs while messing with the bombs but eventually I got them to go.
The doors themselves, first put on the smaller ones. Trust me, do it the other way around and you will send the smaller doors flying into the great unknown. Then carefully cement the main doors on. Going through each of the retractor gears with Tamiya fine cement to make sure they are cemented shut. Even then, the joint are so separated and weak, you do not want to grab the model by the doors…Literally cause….
…Turning the model over was a PITA since well, as stated above, there just isn’t much room to put your fingers on anymore at this point. The canopy’s main connector joint was put on after getting “Smoked” with Tamiya Smoke to give it the correct smoky shade. I also added the two canopy retractor rods that are prominent on the canopy. The last two things added are the EOTS pod and the running lights.
| CONCLUSIONS |
And there you have it! After learning the lesson from AF-6, AF-1 proved to be a far faster build. However, the challenge got raised a notch due to the fact it has open bays and canopy. However, that does not detract from the model. Both F-35 looks good and if you are looking at a quarter scale F-35, then the Kitty Hawk one would more than fill the bill. They should go together nice and dandy with my F-22’s!
24 May 2016
Copyright ModelingMadness.com
If you would like your product reviewed fairly and fairly quickly, please contact the editor or see other details in the Note to Contributors.