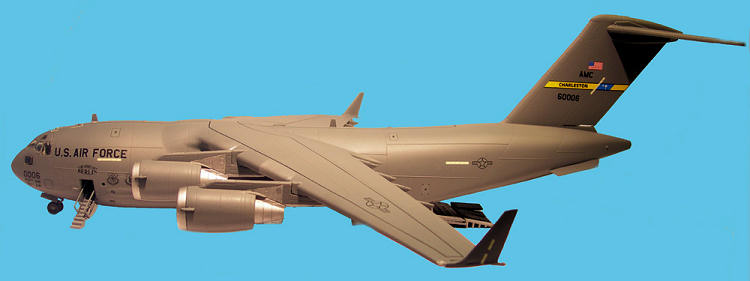
Revell 1/144 C-17A Globemaster
|
|
04044 |
|
PRICE: |
$40 |
|
DECALS: |
Two USAF options |
|
REVIEWER: |
|
|
NOTES: |
Surprising level of cargo bay interior detail |

|
HISTORY |
The
Boeing (formerly
McDonnell Douglas) C-17 Globemaster
In the 1970s, the US Air Force began looking for a replacement for the
C-130 Hercules tactical airlifter. It held
the
Advanced Medium STOL Transport (AMST)
competition, with
Boeing proposing the
YC-14 and
McDonnell Douglas proposing the
YC-15. Though both entrants exceeded the Air
Force’s specified requirements, the Defense Department cancelled the AMST
competition before selecting a winner. The Air Force subsequently began the C-X
program to develop a larger AMST with longer range to augment its strategic
airlift. The DoD also cancell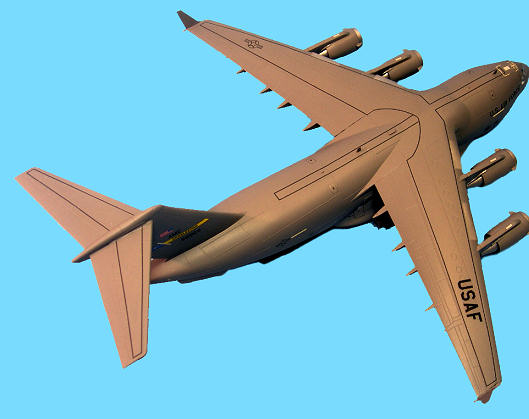 ed this program.
By 1980, the USAF found itself with a large fleet of aging
C-141 Starlifter cargo aircraft. Compounding
matters, the Air Force historically never possessed sufficient strategic airlift
capabilities to fulfill its airlift requirements. The USAF set mission
requirements and released a request for proposals (RFP) in October 1980.
McDonnell Douglas elected to develop a new aircraft based on the YC-15; Boeing
bid an enlarged version of its YC-14. Lockheed submitted two designs, a C-5
based design and an enlarged C-141 design. In August, 1981, the Air Force
selected McDonnell Douglas to build its proposed C-17. The new aircraft differed
in having swept wings, increased size, and more powerful engines. This would
allow it to perform all of the C-141’s existing missions, but also to perform
some of the
C-5 Galaxy’s missions, thereby freeing the
C-5 fleet for larger, outsize cargo carrying work.
McDonnell Douglas continued development until December 1985, when the
Air Force awarded it a full-scale production contract for 210 aircraft. At
first, McDonnell Douglas struggled with how to build the aircraft, and these
problems along with limited funding caused delays in bringing the aircraft into
the USAF inventory. Some criticized the developing aircraft and raised questions
as to more cost-effective alternatives. In April 1990, Defense Secretary
Dick Cheney reduced the order from 210 to
120 aircraft. The C-17's maiden flight was on September 15, 1991 from the
McDonnell Douglas west coast plant in
Long Beach, California, which was about a
year behind schedule. The first aircraft (T-1) and five more production models
(P1-P5) participated in extensive flight testing and evaluation at
Edwards Air Force Base. The C-17 received
the "Globemaster
In April 1994, the C-17 program was still experiencing cost overruns,
and did not meet weight, fuel burn, payload and range specifications. It also
failed several key criteria and tests that had been conducted to evaluate its
air-worthiness.
By the mid-1990s, most of the problems had been resolved. The Air Force
declared the first C-17 squadron operational in January, 1995. In 1997,
McDonnell Douglas merged with its former competitor, Boeing. In April, 1999
Boeing proposed to cut the price of the C-17 if the Air Force bought 60 more,
and in August 2002 the Air Force increased the order to 180 aircraft.
In October 2007, 190 C-17s were on order for the USAF and Boeing had
purchased parts for 30 new C-17s at its own expense in hopes that Congress would
approve the funds requested. Congress approved an additional 15 C-17s in an
FY2008 supplemental. These funds extended production from August 2009 to August
2010. On 6 February 2009, Boeing was awarded a contract for 15 additional C-17s,
increasing the Air Force’s total C-17 buy to 205. As the US military’s
involvement overseas continues to change, so has the requi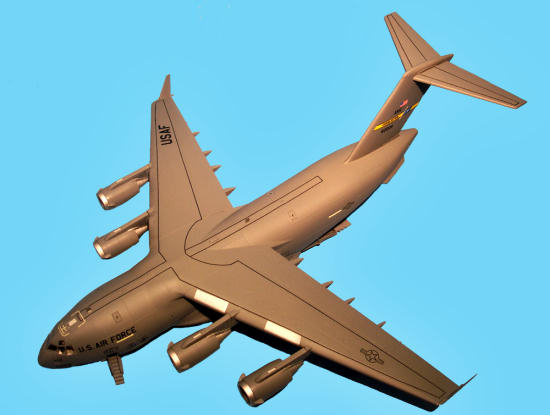 rement for strategic
airlift: thus, the Air Force’s total number of C-17s will now be 223 and the
production line will continue until 2013.
The C-17 is powered by four fully
reversible,
F117-PW-100
turbofan engines (essentially the same as
the commercial Pratt and Whitney PW2040, used on the
Boeing 757). Each engine is rated at
40,400 lb. of
thrust. The thrust reversers direct the flow
of air upward and forward. This reduces the probability of
foreign object damage and provides reverse
thrust for backing the aircraft.
The C-17 has a crew of three (pilot, copilot, and loadmaster) for cargo
operations. Cargo is loaded through a large aft door that accommodates both
rolling stock (trucks, armored vehicles, trailers, etc.) and palletized cargo.
The cargo floor has rollers - used for palletized cargo - that can be flipped to
provide a flat floor suitable for rolling stock. One of the larger pieces of
equipment that the C-17 can carry is the 70-ton
M1 Abrams tank.
Maximum payload capacity of the C-17 is 170,900 lb., and its
maximum takeoff weight is 585,000 lb. with a
payload of 160,000 lb.
The C-17 has an unrefueled range of about 2,400 nautical
miles on the first 71 units, and 2,800 nautical miles on all subsequent
units—which are extended-range models using the sealed center wing bay as a fuel
tank. Boeing refers to these units as the C-17 ER. The C-17 is designed to
airdrop 102
troops and their equipment.
The C-17 is designed to operate from runways as short as 3,500 ft and as
narrow as 90 ft. In addition, the C-17 can operate out of unpaved, unimproved
runways (although there is the increased probability of damage to the aircraft).
The US Air Force, the
United Kingdom,
Australia,
Canada
and
Qatar all operate The C-17.
|
THE |
On opening the box, I was struck by just how big the real airplane is,
given that this is 1/144th scale.
And comparing the finished model with my Revell 1/144 Super Connie gives another
size comparison that is striking to say the least.
 The kit consists of 124 parts molded in gray plastic on ten sprues and a
single sprue of 13 clear parts. There is virtually no flash on any of the parts.
There is a combination of recessed panel lines as well as raised details to
replicate similar lines and shapes on the real aircraft. Considering the scale,
the interior is very well-detailed: there is an interior shell that contains the
detailed side walls and a cargo floor, and a compartment-length floor decal
provides even more definition once applied.
There is not much detail in the cockpit, but little can
be seen through the cockpit glass, so no big deal here.
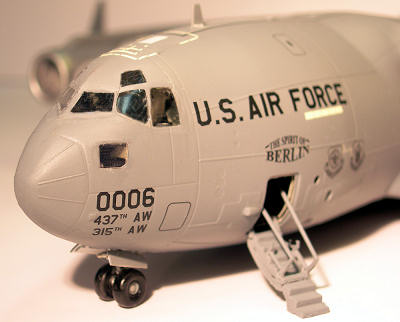
The kit provides several options: extended or retracted landing gear;
open or closed cargo door; and an open or closed door with entry stairs and
handrails for the flight crew. The 12 page instruction booklet includes 38
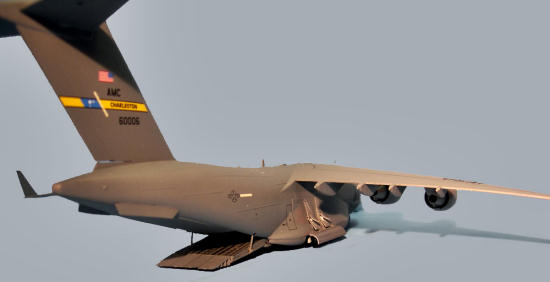
steps. The very excellent decals include markings for two USAF C-17A
Globemasters: the
“Spirit of Berlin” from the 437th Airlift Wing, operating out of Charleston AFB,
SC; and
the “Spirit of the Wright Brothers” from the 62nd Airlift Wing out of McChord
AFB, WA. The decals include wing walk outlines, door outlines and stenciling.
The color scheme is overall FS 26173,
|
CONSTRUCTION |
I must say up front that I find the Revell of Germany instructions not quite as
discernible as other kit manufacturers’, so unless you have built a few of their
recent kits, I highly recommend a little study before starting the assembly
process to gain familiarity with the Revell-unique assembly procedure symbols
(e.g., “detach with knife” and “allow the parts to dry” – this one, a drawing of
a clock face, was especially confusing until I finally read an explanation for
it).
The first option decision is closed or open cargo door. I chose the open door,
so this involves cutting the aft door away from the floor so it can be glued in
the open position. The cockpit is molded as one piece, so this is glued to the
forward cargo compartment bulkhead, which in turn is glued to the cargo floor.
In Step 3, I assembled the nose gear into the bottom of the cockpit/bulkhead
tub.
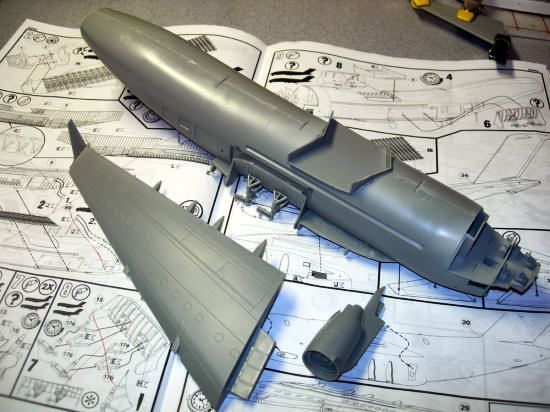
The cargo floor decal needs to be applied here because you will be enclosing the
floor in the interior shell. Although the instructions call for light gray, I
painted mine the same color as the aircraft exterior (Model Master
Steps 5-8 guide you through assembly of the landing gear, and it is quite a
process, given the intricate design of the real aircraft’s gear. In the end,
this was the only problem I experienced: it was difficult to determine how
things should line up, so when I finally glued the landing gear to the model in
Step 9 and then had it finally assembled, things did not quite sit level all
around. I am not sure what the answer to this is, because this did not become
evident until late in the assembly process, but I couldn’t figure out how I
should have improved the process to minimize this issue.
Per step 10, I glued the aft cargo floor to the cargo door. In Steps 11 and 14,
one glues the front lower windows into the forward fuselage and smaller, round
windows into the doors. I opted to exclude the smaller windows with the idea
that I would use clear Tacky Glue later to simulate these. For the forward,
lower windows, a note of caution: make sure these are well-secured to the
fuselage halves. I didn’t, and one of mine popped out when I removed the
exterior masking from it. Needless to say, it fell into the interior of the kit
in an area where I couldn’t fish it out. I later had to cut a new window out of
thin clear plastic and go thru the mess of shaping it to the correct opening
size.
Steps 12, 13 and 15-16 involve assembling the horizontal stabilizers and the
wings.
I next glued the interior shell to the right fuselage half and attached the
bottom fuselage that primarily covers the main landing gear compartment. I then
glued the left fuselage half to that assembly. Next, I glued on the horizontal
stabilizers and the wings.
 Steps 22-26 involve the assembly of the four engines. I left off part 52 from
each engine, as I would spray paint these aluminum and attach them toward the
end of the assembly process.
Per Step 27, I assembled the 5 part crew access door with its handrails and put
it aside. I then attached, but did not glue, the four engines to the wings.
If you are displaying the model with the gear down, Steps 29 and 30 show you how
to cut apart the nose and main landing gear doors, which are then glued to the
model in steps 31 and 33.
Step 35 is where I first discovered my uneven landing gear problem, as I
attached the numerous wheels to the gear. Once I sat the model on a level
surface, I knew I had a problem. In the end, the model will still wobble on its
main gear, but given the side skirts, it is hard to see this unless you are
really messing with the model, so I decided to leave it be.
The final steps involve gluing the ramps to the aft cargo door and the crew door
to the forward fuselage.
|
COLORS & MARKINGS |
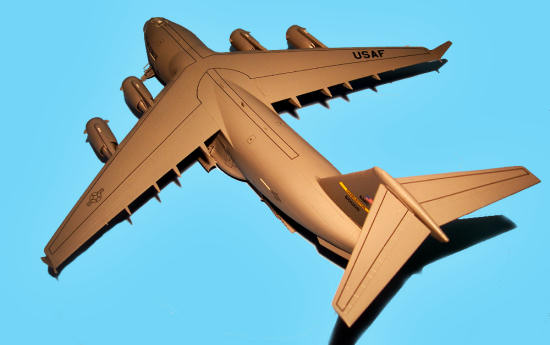 Given the overall
After the exterior coat was dry, I applied the decals. The most difficult, of course, are the wing walkway outlines, and I had to fiddle with these to get them to line up properly. But all of the decals seemed to snuggle down nicely with a good application of Solvaset.
Once the decals were dry, I took some of the shine off the model with a coat of
Testors Dullcote. I attached the engine cowlings and hand painted the wheels
with Testors Flat White.
|
CONCLUSIONS |
This is my second Revell 1/144 kit since the fifties (their Super Connie being the first), and I must say it’s another home run. The kit looks great on the display shelf and really captures the details of the C-17. I highly recommend this to all modelers with a little experience, and read the friggin’ instructions!
|
REFERENCES |
“C-17
Globemaster
If you would like your product reviewed fairly and quickly, please contact me or see other details in the Note to Contributors.