
Academy 1/72 A-37B Dragonfly
| KIT #: | 1672 |
| PRICE: | HK$35 at Wai Le in Yau Ma Tei |
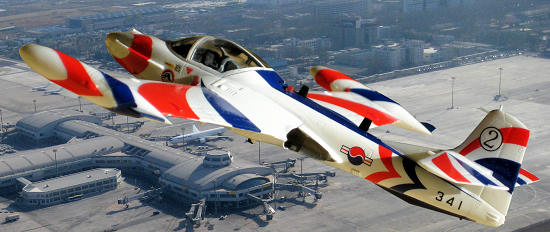
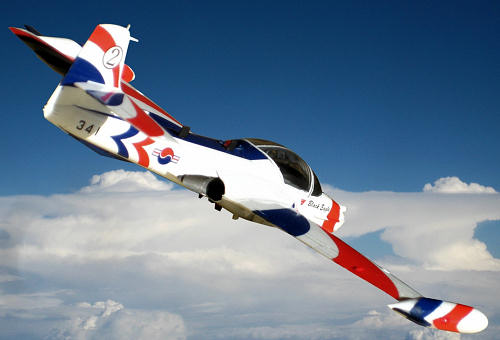
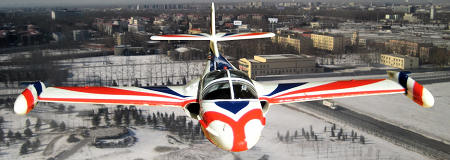
| DECALS: | ROK 'Black Eagles' display team |
| REVIEWER: | Richard F |
| NOTES: |
| HISTORY |
But from 1994 to 2007, the Black Eagles flew the hardy little Cessna
A-37B. This jet, as is pretty well known, grew out of Cessna's T-37 jet
trainer. With much more powerful engines, it became a potent light attack
aircraft. It still operates today in smaller air
 forces,
especially in Central and
forces,
especially in Central and
In
Back to the Black Eagles, they perform all over the world each year.
Not much is available in English about this team. They have a cool-looking
website in Korean though. In one photo, it shows a cool-looking smoke trail
in the form of a "taegeuk", the red and blue symbol in the centre of
The 2012 team commander is a fellow named Lt Col Young Hwa Kim, who
has experience on the F-16, and his team mates have flown those and the F-5
and F-4 too. The whole team look like a friendly bunch. See them
here.
Formation aerobatics in fast jets is a tricky business and most
teams have had a crash or two in their history. The Black Eagles are no
different. A training accident in 1998 killed one pilot. In 2006, Captain
Kim Do-hyun, 33, crashed after guiding his aircraft away from the spectator
areas. According to air force officials, he chose not to eject so he could
be sure the plane would crash away from the crowd, thus losing his own life.
The Black Eagles seem to have bounced back from that and with their
new rides look set for plenty of awesome aerial routines.
| THE KIT |
 This
is the well-known Academy kit in a different boxing. You can read a preview
right here on Modeling Madness. I have built
this before, in its more well-known boxing, and found it a straightforward,
clean build which gave a very satisfying result even without any putty or
sandpaper (I didn't have any when I made it).
This
is the well-known Academy kit in a different boxing. You can read a preview
right here on Modeling Madness. I have built
this before, in its more well-known boxing, and found it a straightforward,
clean build which gave a very satisfying result even without any putty or
sandpaper (I didn't have any when I made it).
Cleanly moulded, with nicely engraved panel lines, and reasonable
detail in the cockpit, this kit suggests "easy to build" even before you
pull the sprues out of the plastic bag. It isn't necessarily going to be
"fast to build" because it is pretty well detailed for 1/72 without going
over the top. There is an Eduard PE set available for this kit.
You don't need any of the underwing stores for the aerobatics
version, but this boxing also includes decals for a USAF overall gunship
grey OA-37B of 19th TASS, 51th TFW from
| CONSTRUCTION |
 g
the Korean aerobatics version, you need to fill the holes for the outboard
pylons; if doing the USAF version, you need to open the holes for the
inboard pylons. The instructions also show a few items that need to be
removed for the Korean plane. A knife and then some sandpaper took care of
that pretty quickly.
g
the Korean aerobatics version, you need to fill the holes for the outboard
pylons; if doing the USAF version, you need to open the holes for the
inboard pylons. The instructions also show a few items that need to be
removed for the Korean plane. A knife and then some sandpaper took care of
that pretty quickly.| COLORS & MARKINGS |
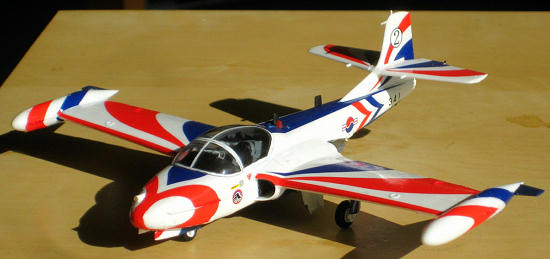
Well, underneath all that colour, it's a white plane. Nothing much to
say. I cracked out some Tamiya X-2 gloss white and brush-painted coats until it
looked right. For this, I used a nice fresh Tamiya brush which I have marked as
"White Acrylic Only". This ensures that there a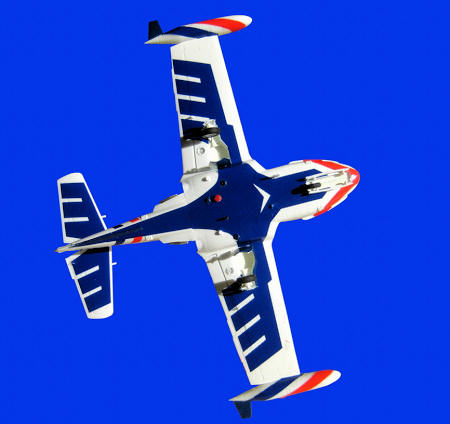 re
not faint traces of whatever colour I'd used before, something that happened no
matter how diligently I cleaned my brushes. Somehow there was always a molecule
of red or blue caught in there somewhere and it would streak down my white
planes. No longer! Three or four coats gave me a lovely glossy and smooth
finish.
re
not faint traces of whatever colour I'd used before, something that happened no
matter how diligently I cleaned my brushes. Somehow there was always a molecule
of red or blue caught in there somewhere and it would streak down my white
planes. No longer! Three or four coats gave me a lovely glossy and smooth
finish.
The decals obviously took a little longer. You need to take your time
with them. The smaller ones are no problem and go onto the glossy finish without
hassle. Make sure you put the tail number's white circle on before the number!
Also, check that you apply the correct serial number (3 digits, on the rear
fuselage) for the tail number you've chosen. The instructions give a list of the
known variations from the 96 and 98 display seasons. There are some very minor
variations between seasons on the other markings too so watch for those.
The larger colour areas are a little trickier. On the wings, above and
below, there's no major difficulty. Just work carefully but fast, so you get the
swooshes in the right spot before they stick. Like most Academy decals I have
used, these are a bit fragile. It's the smaller markings that go on the curved
areas - the nose and the wing tanks - that are more difficult. Despite wise
advice from fellow modelers, I still have not graduated to decal setting
solutions. I really must get off my duff and secure some. But in the absence of
that, I have found that using Tamiya gloss clear helps in a similar way. I
brushed it on over the trickier decals and that generally helped them stay where
they belong. I think this makes them quite brittle too, so it is obviously not a
long term solution.
In some areas, I just painted the blue and red (for example, the little
fins on the wingtip tanks and the tiny fin under the rear fuselage). That seemed
easier than messing with decals. The difference in shade is almost
imperceptible.
| CONCLUSIONS |
This is a great kit and it's nice to have such a colourful jet on the shelf. Even if you're not a fan of aerobatics teams, or even if a ROKAF plane is a bit out of the boundaries of your collection, having something like this breaks up the grey or cammo on your shelf top flightline. The kit is easy to build.
| REFERENCES |
 http://blackeagles2.airforce.
wikipedia
February 2012
If you would like your product reviewed fairly and quickly, please contact me or see other details in the Note to Contributors.