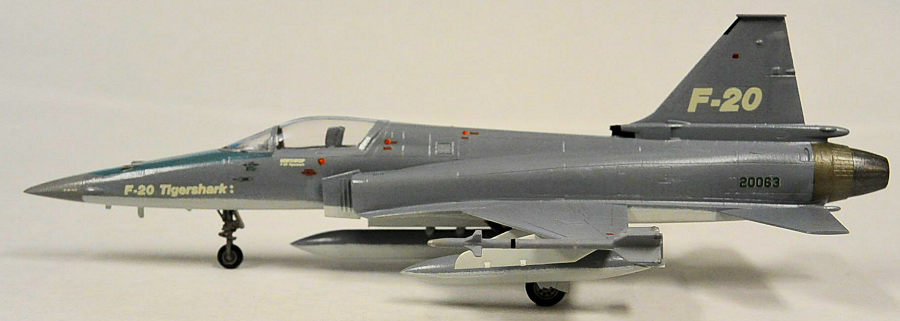
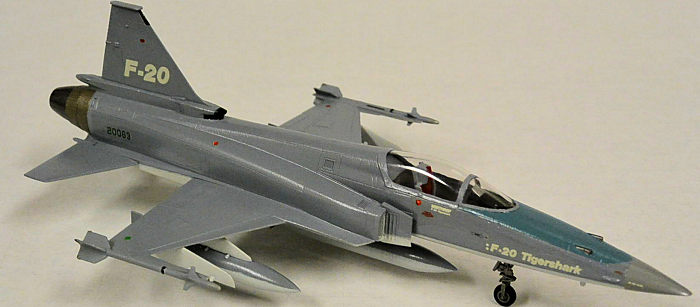
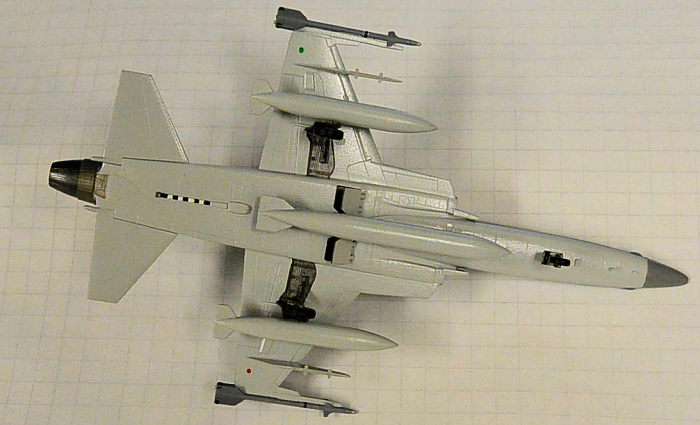
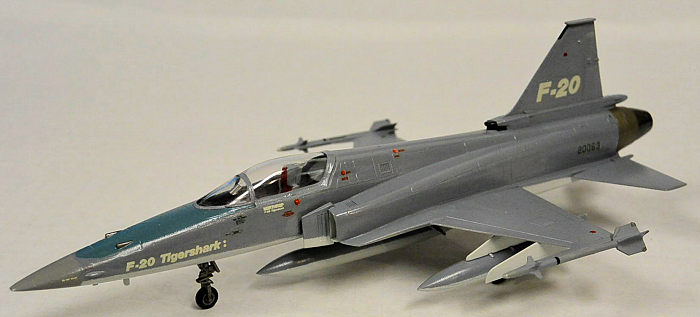
Hasegawa 1/72 F-20 Tigershark
| KIT #: | D 21 |
| PRICE: | $10.00 30 years ago |
| DECALS: | One option |
| REVIEWER: | George Schembri |
| NOTES: |
| HISTORY |
 The kit information
indicates that the F-20 Tigershark started out with the designation of F-5G, the
first stage of development utilizing the basic airframe of the F-5E with
modifications to the rear fuselage to house the single GE-F404 engine replacing
he original dual GE-J85 configuration. The F404 provided 60% more thrust than
the two J85’s lifting the aircraft Thrust-to-weight ratio to 1.13! Developments
included refined wing design dual control fly-by wire control systems along with
greater usage of composite materials in construction.
The kit information
indicates that the F-20 Tigershark started out with the designation of F-5G, the
first stage of development utilizing the basic airframe of the F-5E with
modifications to the rear fuselage to house the single GE-F404 engine replacing
he original dual GE-J85 configuration. The F404 provided 60% more thrust than
the two J85’s lifting the aircraft Thrust-to-weight ratio to 1.13! Developments
included refined wing design dual control fly-by wire control systems along with
greater usage of composite materials in construction.
Although the fighter never went into full production it was reported that the Northrop Corporation did not take a prototype approach with the F-20 and the three units produced and displayed were technically prototypes but they were actually intended to be a production quality aircraft..
| THE KIT |
I have always been a fan of the F-5 series aircraft and when this kit was first available I purchased two of them ready to build the ‘Grey’ and the ‘Red/White’ Demonstrators – I have been a little slow in getting the first unit produced (about 30 years?) but I was finally able to get it going.
I cannot recall when I actually did buy the kits but this kit appears to be the original release series with Japanese and English lettering inside and out with Kit # D21 with D021:500 on the side of the box. The instruction sheet notes ‘printed in 1984’. (For those interested, the :500 means it cost 500 yen in Japan. Japanese consumer law requires a retail price be printed somewhere on the box. Ed)
Considering the age of the
kit, there are nicely engrave panel lines and decent detailed landing gear with
shallow wheel wells having enough detail – the landing gear doors which enclose
the main wheels are molded into the main fuselage, same thing as the front
landing gear whi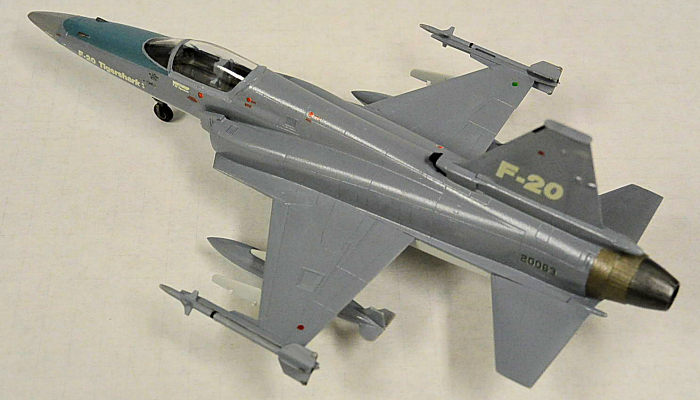 ch has its main doors also molded in the closed position. The
inlet ducts are just bare dead ends but are just deep enough to hide the lack of
any detail. The jet exhaust is a single molded piece with the exhaust ducting
closed tightly enough that you can just see a bit of the enclose afterburner
detail. The cockpit is pretty basic with a typical tub design with decals
providing the cockpit instrumentation and a pilot figure to fill the seat. There
are some rear cockpit pieces but the instructions show to use these components
only if you are having an open cockpit – it is pretty barren behind the seat
when the kit is built with a closed canopy.
ch has its main doors also molded in the closed position. The
inlet ducts are just bare dead ends but are just deep enough to hide the lack of
any detail. The jet exhaust is a single molded piece with the exhaust ducting
closed tightly enough that you can just see a bit of the enclose afterburner
detail. The cockpit is pretty basic with a typical tub design with decals
providing the cockpit instrumentation and a pilot figure to fill the seat. There
are some rear cockpit pieces but the instructions show to use these components
only if you are having an open cockpit – it is pretty barren behind the seat
when the kit is built with a closed canopy.
Belly speed brakes are shown to be assembled open but there is now detail on hydraulics. Optional refuelling probe and boarding ladder are also provide but were not used. The only armament provided is the wingtip Sidewinders with three external fuel tanks and a set of base pylons completing the hard point mountings. There is an External Stores guide showing the different equipment the F-20 was able to deploy but you would need a separate Hasegawa Aircraft Weapons kit to complete any options.
The paint guides show the Federal Standard identification numbers with the required mixing ratios if you were using the typical Gunze paints – I planned to use the Vallejo Model Air paints which have the required FS identification numbering. The decals are pretty basic with not much stencilling and there are some USA insignias but not sure when they would have been used.
| CONSTRUCTION |
The plans were pretty straight forward, leaving out he ejection seat and joystick until the final assembly. Some filler was required at the wing roots and where the inlets mated to the main fuselage but nothing too scary. Using Tamiya Thin Cement made for a quick build and there was some light sanding at the fuselage joints. I thought I would some filler for the front gun housing piece but none was actually needed. Drop tanks were assembly with some light scraping and sanding to make the tanks smooth.
| COLORS & MARKINGS |
 I haven’t built too many
kits in the last decade and this camo scheme was simple enough to let me gain my
confidence back and provide me with an opportunity to go full acrylic with get
used to applying the paint. Using Vallejo Model Air paints allowed me to simply
drop the pain into my Paasche H1 airbrush and start spraying without having to
thin anything down. The FS ID numbers were easily matched and the paint sprayed
on nicely staring with the underbody FS 36495 Light Gray (Vallejo 71.276) Lifted
masking tape was used on the fuselage and fuel tanks to provide a straight line
and a nicely blended effect when the upper surface FS36375 Gray was applied
(Vallejo 70.990 thinning required). Next the radome was mashed and sprayed with
FS 36270 (Vallejo 71.275) as was the anti-glare panel in front of the cockpit
using FS 35237 (Vallejo 71.114) . Tamiya X-10 Gun Metal and Testors Model Master
Jet Exhaust 1796 was used for the rear engine parts. The open cockpit was
painted as suggested and internal decals applied and ejection seat installed –
minimal cockpit – focusing on a quick turnaround of basically an OOB build.
Canopy was masked and painted.
I haven’t built too many
kits in the last decade and this camo scheme was simple enough to let me gain my
confidence back and provide me with an opportunity to go full acrylic with get
used to applying the paint. Using Vallejo Model Air paints allowed me to simply
drop the pain into my Paasche H1 airbrush and start spraying without having to
thin anything down. The FS ID numbers were easily matched and the paint sprayed
on nicely staring with the underbody FS 36495 Light Gray (Vallejo 71.276) Lifted
masking tape was used on the fuselage and fuel tanks to provide a straight line
and a nicely blended effect when the upper surface FS36375 Gray was applied
(Vallejo 70.990 thinning required). Next the radome was mashed and sprayed with
FS 36270 (Vallejo 71.275) as was the anti-glare panel in front of the cockpit
using FS 35237 (Vallejo 71.114) . Tamiya X-10 Gun Metal and Testors Model Master
Jet Exhaust 1796 was used for the rear engine parts. The open cockpit was
painted as suggested and internal decals applied and ejection seat installed –
minimal cockpit – focusing on a quick turnaround of basically an OOB build.
Canopy was masked and painted.
 I was lucky with the decals
– they did have some yellowing and needed to be convinced to be separated from
the sheet. A few times I had to slip an Exacto blade under a few of the decals
as they were suborn to fully separate. The red fuel tanks fuselage dots were a
bit off register showing a little bit of white under the red. All decals adhered
well with the help of using Micro Set/Sol solutions.
I was lucky with the decals
– they did have some yellowing and needed to be convinced to be separated from
the sheet. A few times I had to slip an Exacto blade under a few of the decals
as they were suborn to fully separate. The red fuel tanks fuselage dots were a
bit off register showing a little bit of white under the red. All decals adhered
well with the help of using Micro Set/Sol solutions.
Some black decal trim was used on the missiles and the rear tail fin section to ensure a straight sharp line, using Humbrol Satin Black 85 to complete the areas as needed. Nav lighting was painted using Testors Green 1124 and Testors Model Master 4630 Transparent Red.
External tanks and pylons were installed as were the landing gear and Sidewinders. Canopy was set n place using Micro Krystal Klear to secure it in place and to fill the slight gaps in the rear section of the canopy.
| CONCLUSIONS |
This was a nice easy build and a easy enough paint scheme and a pretty good confidence builder in preparation of some upcoming builds. I have always like the look of the F-20 and this kit provides an great representation of the aircraft. The next F-20 kit build will probably be a South Korean or maybe a ROC scheme with full armament options. I don’t think there are many choices if you want a 1/72 scale Tigershark but this kit does deliver.
 I do not have too much
experience air brushing acrylics but I liked using the Vallejo Model Air paints.
There were a few spots that need a bit of brushing up as the acrylics behave
quite different form the enamels. I have always painted with enamels in the past
but the acrylic cleanup was amazingly easy and quick – will definitely be
investing in a new supply of paint colours for future builds. I am planning to
give the AK Interactive line a try on my next kit build.
I do not have too much
experience air brushing acrylics but I liked using the Vallejo Model Air paints.
There were a few spots that need a bit of brushing up as the acrylics behave
quite different form the enamels. I have always painted with enamels in the past
but the acrylic cleanup was amazingly easy and quick – will definitely be
investing in a new supply of paint colours for future builds. I am planning to
give the AK Interactive line a try on my next kit build.
Thanks MM for a great website and the opportunity to do this review – it adds a great dimension to the hobby, not only writing the review itself but also reading all the other reviews from other builders and realizing that difficulties will present themselves and will be dealt with accordingly. The focus of model building is to have fun and share the experience as well as having history lessons on some fantastic engineering achievements and accomplishments in the field of aviation.
| REFERENCES |
References - Wikipedia
George Schembri
6 October 2020 Copyright ModelingMadness.com If you would like your product reviewed fairly and fairly quickly, please
contact
the editor or see other details in the
Note to
Contributors. Back to the Main Page
Back to the Review
Index Page
Back to the Previews Index Page