| KIT #: | 48013 |
| PRICE: | 280 DKK |
| DECALS: | 2 options |
| REVIEWER: | Nicolai Plesberg |
| NOTES: | Also reboxed by Revell |
| HISTORY |
For a brief history of the development go here.
| THE KIT |
The
SMW and Revell
kits share one thing in common; the plastic parts are EXACTLY the same so there
are different decal options as well as instructions – well, personally I find
the Revell instructions more informative regarding detail painting as the SMW
instructions lacks that information and there are part number errors in
 them as
well – Revell has got that right in their instructions. The kit consists of four
light grey styrene sprues, marked A, B, C and E, and one little clear sprue,
marked D, with three small parts; the wing navigational lights and the large
sensor glass for the sensor turret. The parts are nicely molded virtually flash
free and with engraved discrete panel lines and rivets. Some sink marks are
present but nothing putty and sanding can’t fix. The layout of the parts is by
the way much like the
1/72 kit
I reviewed earlier, but of course more parts are present as the size is larger.
For example in the 1/72 kit the wings were in one piece while they in the 1/48
edition are split in upper and lower halves, presumably as a precaution to avoid
sink marks (at least too many of them).
them as
well – Revell has got that right in their instructions. The kit consists of four
light grey styrene sprues, marked A, B, C and E, and one little clear sprue,
marked D, with three small parts; the wing navigational lights and the large
sensor glass for the sensor turret. The parts are nicely molded virtually flash
free and with engraved discrete panel lines and rivets. Some sink marks are
present but nothing putty and sanding can’t fix. The layout of the parts is by
the way much like the
1/72 kit
I reviewed earlier, but of course more parts are present as the size is larger.
For example in the 1/72 kit the wings were in one piece while they in the 1/48
edition are split in upper and lower halves, presumably as a precaution to avoid
sink marks (at least too many of them).
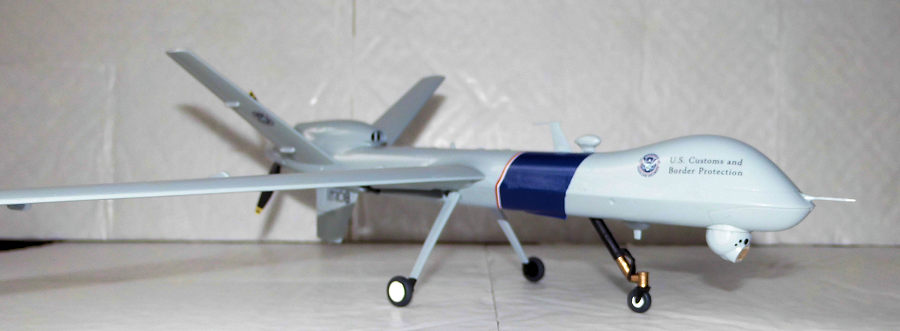
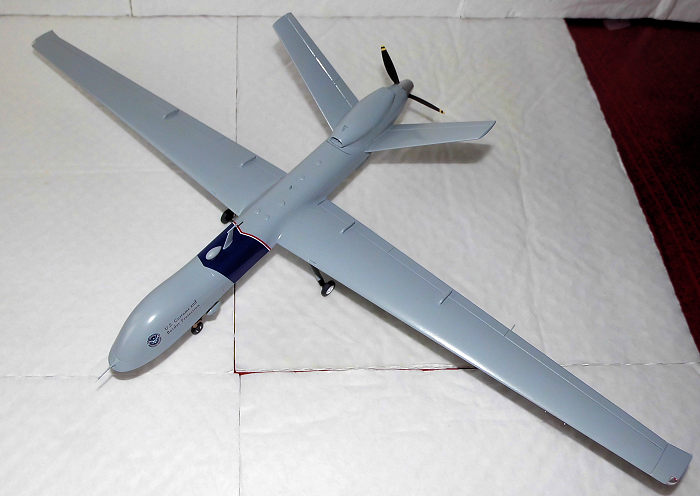
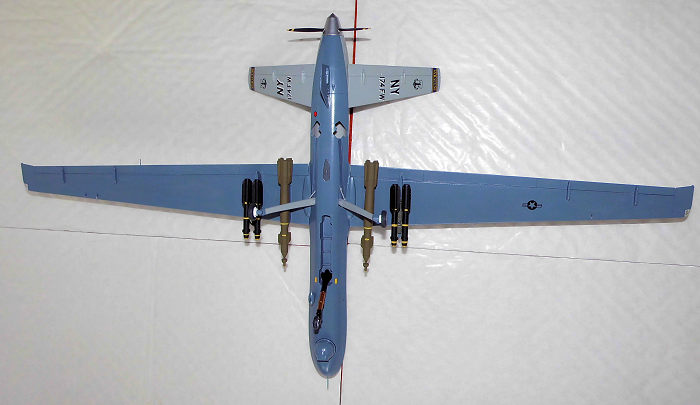
Both kits have nicely printed decals, the SMW sheet offers two options, an MQ-9 from the 432nd Expeditionary Wing, USAF, Creech AFB, Nevada and one from the U.S Department of Homeland Security / Customs and Border Protection, while the Revell kit offers a single option from the 174th Fighter Wing, Hancock Field AFB, Syracuse, NY, 2011.
| CONSTRUCTION |
This is probably one of the easiest builds that I’ve ever constructed so far in this scale. Instead of giving a point to point description, I just adding on to the (Revell) instructions as they are fully adequate doing their job (I actually used the same approach in my 1/72 review).
Step one consists of gluing the main gear bays into the lower fuselage half. Before this is done, however, there are some nasty ejector pin marks in the bays that must be eliminated first. The best way of dealing with them is some good old scraping action with a no 10 blade; it only takes about a minute in all or so and then they can be glued into the fuselage – some clamps may be necessary to get a proper bond. Due to the nature of most clamps one bay at a time can be fixed in place as there is no room for clamps on both bays simultaneously; at least if fixing the bay with one clamp in each end, which is deemed necessary to achieve the best stable join.
Steps two
and three concerns the wings – just glue them together and that’s it. Well, with
the first build I did, just that after having shortened the alignment pins, but
the second went a little different. I first expanded the holes for the three
little antennas there are supposed to go in them. The trouble is that they don’t
fit into the holes and with the first build, I figured to sand the mount on the
three tiny antennas, but one flung into the unknown in the process so I had to
replicate a new one. It’s much
easier to expand the holes! A small flat needle file is excellent for that job
and when it’s done the wings can be glued together. In the second build I chose
to model an unarmed Reaper from the U.S Department of Homeland Security so the
mounting holes fr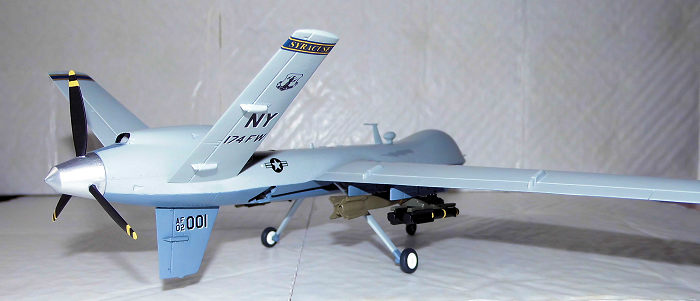 om the pylons were stuffed with stretched sprue bits. This can
also to advantage be done prior of gluing the wings together – your choice. As
mentioned earlier the locating pins in the lower wing halves must be reduced in
length (about half length) so the wings will join up properly or else there will
be unwanted gaps.
om the pylons were stuffed with stretched sprue bits. This can
also to advantage be done prior of gluing the wings together – your choice. As
mentioned earlier the locating pins in the lower wing halves must be reduced in
length (about half length) so the wings will join up properly or else there will
be unwanted gaps.
Step four involves gluing the wings together on the middle and then attach them to the lower fuselage. The flashed over hole that is to be opened is done with a 3,2 mm drill bit – the fit will be tight, but it will ensure a precise fit. Some filing action in the front hole is also needed or else the fit with the fuselage will be bad (too many unnecessary gaps).
Step five; some nose weight has to be attached to avoid tail-sitting before the fuselage is joined. With plenty of space available it shouldn’t be a problem. 20 grams are recommended, but I put 21 in the first and 25 in the second – your choice.
Step six concerns the assembling of the engine nacelle including the tail planes. I advice two changes here; first, the tail planes should be attached after the nacelle has been glued to the fuselage so eventual smoothing out the joins is a lot easier to do. Second, on all photos / live footage of real Reapers, I have noticed a “splitter” rod in the air intake. It is included on the sprue with the number C18, but is marked not for use (for some odd reason). It is also very difficult to extricate from the sprue without damaging it, so I replaced it with a suitable Evergreen bit. Finally it must be attached before the nacelle halves are joined.
Regarding the tail planes due to some misalignment in the mold (the only really quibble with this kit) there is an issue with the leading edge of the left tail plane and a smaller one with the trailing edge of the right tail plane. Several sessions with the liquid glue bottle sorted it easy out, but be careful not to overdo it. Thick viscosity tube glue is not recommended for this! In my first build I used ordinary filler, but it was a bear (so I felt it) to get it done, so I resorted to my trusty Faller Super Expert glue bottle for an easier solution the second time around.
Step seven is
about gluing the engine nacelle to the fuselage – the fit is almost Tamiya like,
but some filler (not much) is required to get it all faired smoothly in. While
you’re at it, deal with the sink marks that are present on the airframe will add
a lot for the look of the finished model. With the second build I painted the
interior of the rear of the gear bays (inside of the fuselage!) with the
exterior color of Ghost Grey and the interior of the nacelle was painted flat
black to 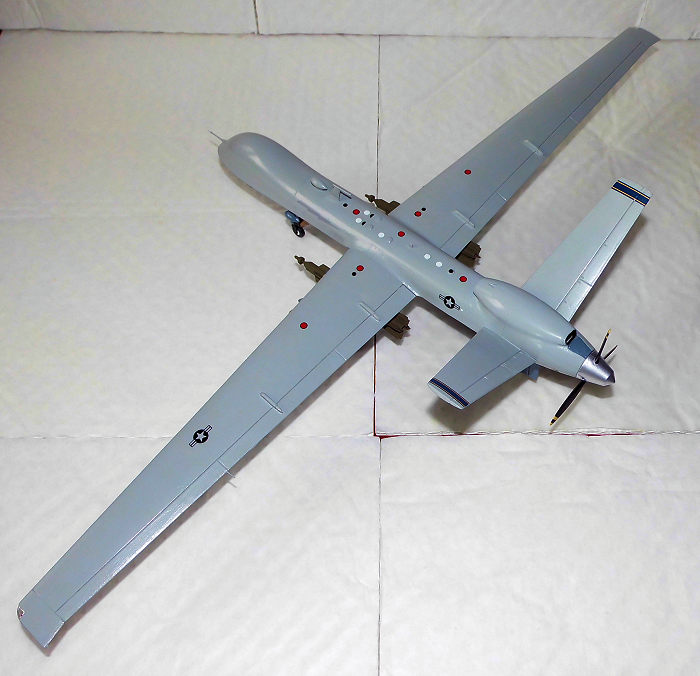 hide its emptiness before gluing it in place. When the nacelle has been
faired in, the tail planes can be attached. The seams can be filled with thinned
white glue to advantage – it’s easier than other seam filling compounds and less
messy. You can also glue the belly fin in place and seam fill as the other tail
planes at this stage – your choice.
hide its emptiness before gluing it in place. When the nacelle has been
faired in, the tail planes can be attached. The seams can be filled with thinned
white glue to advantage – it’s easier than other seam filling compounds and less
messy. You can also glue the belly fin in place and seam fill as the other tail
planes at this stage – your choice.
Step eight is the assembly of the nose sensor turret and attaching it to the fuselage. The latter should be avoided until at the end of the build for the sake of easier painting. Remember, that the turret can hold a small amount of extra weight should it be necessary….!
Steps nine to thirteen is assembly, painting and attachment of the landing gear. The main gear legs are festooned with sink marks so they need to be eliminated before painting them. Don’t forget to paint the gear bays before the gear legs are attached for easier access to painting them! Gear bay color seems to equal under surface color in any case. If someone can prove otherwise I’d like to hear from them regarding this.
Step fourteen attaches the rear lower fin plus the belly “football” antenna – a sink mark in the latter needs to be dealt with before it can be glued in place. As I in the second build already attached the fin at the same time with the tail planes, this step seems to be superfluous.
Step fifteen concerns fitting a panel aft of the exhaust plus the assembly and painting of the propeller and spinner. If it is to rotate without falling off a modification inside the engine nacelle should be devised before attaching it to the fuselage. In the second build I attached a bit of 4 mm styrene sheet and with a 2mm hole drilled (the exact size for the propeller shaft), then gluing it into the nacelle back before the nacelle was attached to the fuselage. It was far better than my solution in the first build (explained later).
If an armed version is to be build, steps sixteen to twenty one plus twenty five covers the assembly of the ordnance and the pylons. There’s nothing much to it other than a careful cleanup of the parts as well as assembly and painting plus decaling (in step 25).
Steps twenty two to twenty four involves the fitting of the smallest remaining details which is best saved after decaling is completed. Well, the only part I recommend gluing in place before painting, as it needs a slight fairing in with filler, is the pitot probe piece. The probe itself is of course at risk of breaking off, but caution is advised in order to avoid it. Actually the probe broke off when cutting it from the sprue in both builds so the problem may not be present anyway! The probe is of course restored at the end of the build.
As soon as construction is completed and the surface prepared, painting can be done.
| COLORS & MARKINGS |
In the Revell
build I had a scheme of Ghost Grey FS 36375 over Dark Grey FS 36176. The colors
used for that scheme were Humbrol 127 (acrylic) for the Ghost Grey sides / upper
surfaces and Model Master 4754 (acrylic) for the under surfaces. As usual a
couple of coats are needed to get a good coverage, but nothing new in that.
After glossing the surface the decals went on with as good as no troubles at
all. The only challenge was the bands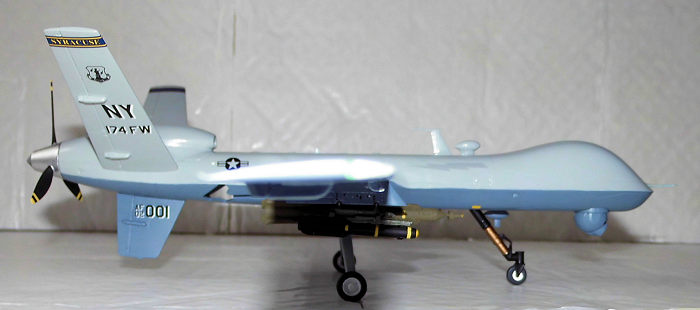 that should wrap around the tail plane
tips; a little softener was needed to get them to wrap properly. A gloss coat
sealed in the decals and upon drying they got a satin coat to tone down the
gloss.
that should wrap around the tail plane
tips; a little softener was needed to get them to wrap properly. A gloss coat
sealed in the decals and upon drying they got a satin coat to tone down the
gloss.
In the Skunkmodels Workshop build it was even easier; Ghost Grey FS 36375 all over! With this build I used Humbrol 127 (the enamel variant) and three coats were necessary to get a perfect coverage. After the gloss coat the markings went on. As they’re printed by Cartograf they presented no problems in applying them. The only real challenge is the dark blue fuselage band that wraps around in front of the wings. It comes in three pieces so it’s easy to handle but alignment with each other does require caution. It is obvious that the two antennas, C8 and E11, should not be glued in place until after decaling is completed! However, I advice to cut some slices out for the mounting holes for the two antennas as soon as the decal has been placed on the model before sealing it with varnish.
| FINAL CONSTRUCTION |
With the Revell
build it was the attachment of the small antennas plus weapons and the pylons.
The wing tip lights were drilled out with a half millimetre drill and some clear
red / green color went in. The lights were attached with clear gloss. The
propeller was attached with blu-tack as I didn’t dare gluing it in place. And,
as the last step, the sensor turret was glue d in place as well and with that the
model was finished.
d in place as well and with that the
model was finished.
With the Skunkmodels Workshop build I had the same small things left; the propeller (squeezed in place) and the sensor turret plus the aforementioned antennas, C8 and E11 were glued in place. The under wing antennas fitted in the enlarged holes, but the holes were a bit big (enlarged too much I think, so be careful not to overdo it!) so some grey paint was used to fill them in. The last items to attach were the wing tip navigational lights, although I had a detour with them. You see I had dutifully drilled the holes simulating the bulbs, painted them respectively transparent red / green and where just waiting to be attached to the model; when I reached for them they were GONE (BIG SIGH and a LOT of curses). I, however, managed to make some new ones from a piece of acryl and when attached finishing another model to the collection.
| CONCLUSIONS |
 This is in fact an exceptional fine kit that
builds without trouble and an almost perfect fit so with some experience they
will be an enjoyable experience of modeling. Just be aware of the issues that
I’ve given here because it gives the results of ones efforts just that extra
touch of finesse. It would, however, be an additional advantage if aftermarket
decals can be utilized to increase the possibilities with this kit. If possible
get the Revell reboxing as the instructions here seems more complete than in the
SMW boxing. Aftermarket decals can then expand the possibilities since Revell
only offers one decal option (a bit lousy I think).
This is in fact an exceptional fine kit that
builds without trouble and an almost perfect fit so with some experience they
will be an enjoyable experience of modeling. Just be aware of the issues that
I’ve given here because it gives the results of ones efforts just that extra
touch of finesse. It would, however, be an additional advantage if aftermarket
decals can be utilized to increase the possibilities with this kit. If possible
get the Revell reboxing as the instructions here seems more complete than in the
SMW boxing. Aftermarket decals can then expand the possibilities since Revell
only offers one decal option (a bit lousy I think).
Your editor agrees with Nicolai's assessments regarding this kit when he built the Revell version. Biggest issue is that it is big so requires some major shelf space due to the wingspan.
| REFERENCES |
If you ever get in doubt whether a specific kit has been issued by one or another manufacturer, try this website: www.scalemates.com. I at least have found some value in the vast database of kits at this site.
4 January 2018
Copyright ModelingMadness.com. If you would like your product reviewed fairly and fairly quickly, please
contact
the editor or see other details in the
Note to
Contributors. Back to the Main Page
Back to the Review
Index Page
Back to the Previews Index Page