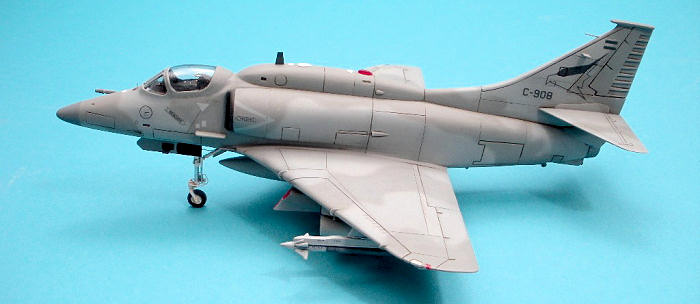
Matchbox 1/72 A-4M Skyhawk
| KIT #: | PK-29 (1976) |
| PRICE: | $Currently out of production |
| DECALS: | Two Options |
| REVIEWER: | Victor Scheuerman |
| NOTES: | Some parts borrowed from the Italeri A-4B |

| HISTORY |
| THE KIT |
| CONSTRUCTION |
This kit had the
cockpit improved, starting with a .010” card instrument panel that was
further detailed with card and photoetched parts. The missing side consoles
were slabs of .060” card cut to shape and then sections of .010” card were
added to the tops. The new tops were then detailed with card and punched
discs using Waldron’s Sub-Miniature Punch & Die Set. To simulate the sound
padding on the walls, a section of .005” card had a diamond pattern embossed
on it by using a ball-point pen and steel straight edge. The kit seat was
replaced by the excellent resin True Details ESCAPE found in set 72408. A
floor made from card was added, as was the missing aft bulkhead. The final
addition was a scratchbuilt control stick made from card and stretched
sprue.
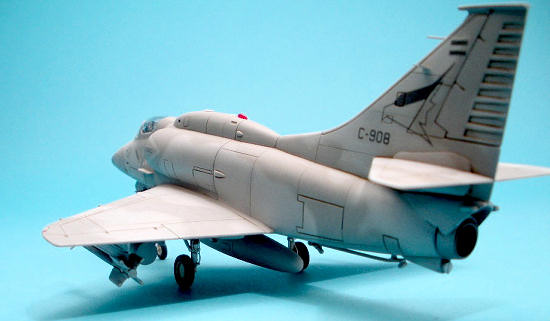 All of the cockpit
contents, including the cockpit area, were primed in Testors Model Master
(MM) Interior Black enamel. Floquils Primer Gray was then used as the
interior grey, and sprayed on appropriate areas and then detailed painting
was done using various acrylic paints. The side consoles were glued to the
new padded wall, and some lead weights were added to the nose.
Testor’s Liquid
glue was applied first to the tail assembly and then the fuselage halves
were mated. After the nose cap was glued into location, Tenax liquid glue
was then applied along the fuselage seam with a small brush and left to dry
overnight. Next day, superglue was run along all seams and the entire
fuselage was sanded smooth. The later A-4s have a pronounced fairing running
along of the bottom of the nose. Matchbox has supplied an emaciated version
of this that does not quite look right. To capture the correct shape, a
length of .010’ card was glued into location, and then this addition was
faired in with applications of superglue. In addition, the A-4AR has an
additional round housing superimposed on this fairing. A punch disc of .020”
was glued into place that was then sanded to correct profile. Removed panel
lines were then engraved using Testors Tape as an edge. The actual engraving
was accomplished by first running the back of a new #11 along the guide a
couple of times. Final cut was with an OLPHA P-Cutter blade to both deepen
and clean the new panel line. The fin was modified by adding the top housing
made from a block of .040” card. This was faired in with a slice of card and
filler. In addition, the two ESM housings mounted on the tailpipe were added
from modified parts from the Italeri kit. The completed fuselage was set
aside.
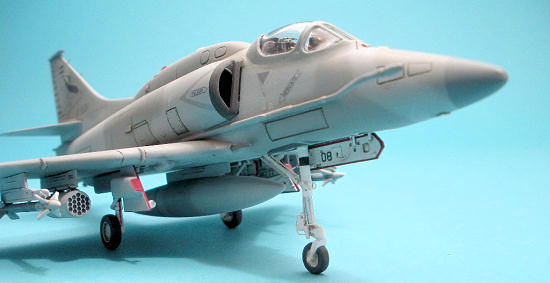 With the fuselage
assembled, the main wings were tackled next. First, the locating slot in the
front bay for the incorrectly configured retraction arms was removed. Then a
.010” card roof and aft bulkhead was added to the bay. The wing halves were
glued together and then the front bay had three of the sides framed in with
.010” card walls and some ribbing was also added. When dry, some hydraulic
details were replicated with fine copper wire. All of the raised panel lines
on the wings were sanded off and unfortunately, only the front row of vortex
generators could be retained. Engraving was carried out as per the fuselage,
with the ESM housings at the lower wingtips added after modifying parts from
the Italeri kit.
For joining the
fuselage and wings together, a generous application of Testors Liquid glue
was used. This was allowed to start to set up a tad and then the wing was
attached and run back and forth. In addition to fully seating the wing
against the fuselage, it also acts as filler as some liquefied plastic is
forced out. A small application of superglue to the bottom, followed by a
light sanding produced very good results. As the tailplanes would be
attached after painting, all these parts were set aside.
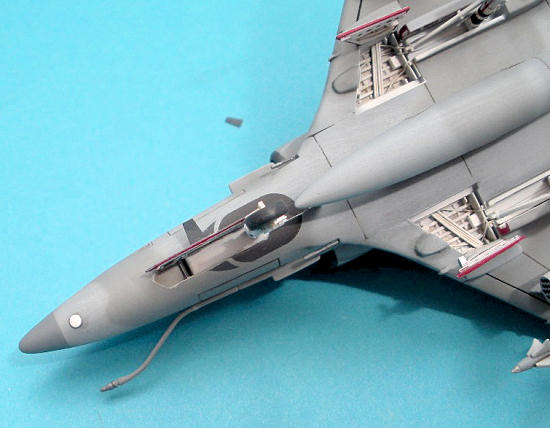 Due to the fact
that the unused Italeri landing gear (that model posed in flight) is
superior to the kit item, this was used. The upgraded undercarriage fell
into one of three categories. First, the superior Italeri parts were
detailed with a combination of fine silver, copper, or brass wire and card.
Second, the kit doors used were upgraded by sanding thinner, then adding
detail made from card. Final option was to scratch build a new nose gear
door from card, copper wire, and a square of Plumber’s tape.
For underwing stores, the Italeri kit acted as a source. Both the pylon mounted rocket pods and centerline tank was used after cleaning up and some minor detailing. Added detail for the pods consisted of adding the missing sway braces from .010” card and eight .028 x .010” discs. The tank had some side panels made from .005” card, and a filler cap made from Plumbers Tape. For the outer wing Sidewinder pylons, Italeri supplied the main part, with a modified launcher coming from a Hasegawa F-16 kit. The excellent late model Sidewinder comes from an updated sprue from a Revell F-16 kit.
| COLORS & MARKINGS |
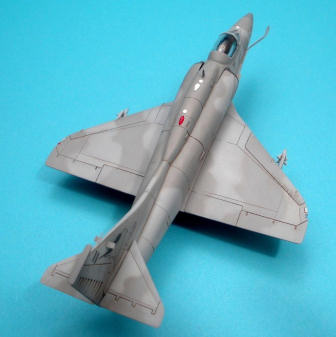 Before the kit was
started, I wanted to make sure that A-4AR decals were available. FCM decals
from Brazil do produce a sheet that includes the desired markings. This was
ordered from Hannants and arrived shortly after. This sheet offers complete
four-views showing the entire disruptive pattern – excellent. According to
the sheet, the two greys are Light Gray 36375 (Light Ghost Gray), and medium
gray 36231 (Dark Gull Gray). As it turns out, Model Master makes both of
these colours in enamel and they were used.
Foam was used as a
cockpit mask and then the entire project, including the masked canopy, was
shot in Testors Model Master (MM) Light Ghost Grey (LGG). Some corrections
were carried out with a spot application of superglue, followed by sanding
and a spot application of primer. After the corrections were made, the
canopy was white glued into location. The entire project was pre-shaded in
MM Interior Black, followed by a misting of the LGG, which also did double
duty of base camouflage colour. A free-hand application of MM Dark Gull gray
(DGG) followed. Select areas were then masked, to be sprayed a different
colour. The wells were shot in white, while the intake warning triangles
were shot in the reverse grey (decals are provided, but the paint is an
exact match). When dry, the intake lips were masked as was part of the false
canopy on the lower fuselage (also supplied as a decal). These two areas
were sprayed with a dark grey that was mixed to match the dark grey of the
decals. Another area t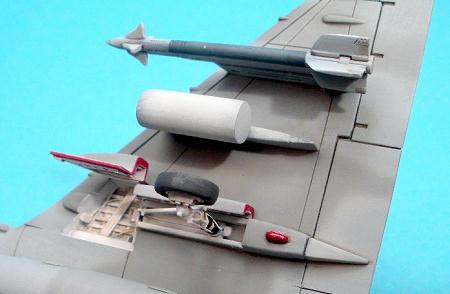 hat was masked was the cover plates where the flare
ejector is mounted. Photos of the actual AR show these to be light grey, so
these were done accordingly. Final variation on grey was the nose tip and
housing on top of the fin.
To add some visual
interest, the underwing items were sprayed in a variety of greys, with the
Sidewinder getting some blue added. Stenciling was simulated with a
Technical Pen, and after detailed painting and weathering, these items
looked the part.
With painting
completed, the model was given a smooth gloss finish compliments of Micro
Gloss. Next, the FCM decals were applied using Micro Set. When dry, Micro
Sol was used, getting the decals to get right into the Matchbox trenches.
Letting the model sit for a week to fully cure, a Raw Umber wash was applied
to the panel lines, producing satisfying results. The model was shot with
Testors Flat Lacquer to dull the finish somewhat and then the masking was
removed from the canopy.
| FINAL CONSTRUCTION |
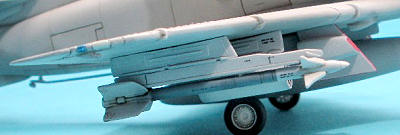 Final items like
the blade antenna for both the upper fuselage and nose gear door were made
from card, painted and glued to their locations. All stores and gear doors
were applied, along with a red beacon to the top fuselage compliments of
Cutting Edge. With paint applied to wing tip lights and the pre-painted
cannons applied, this Argie AR was ready for parade.
| CONCLUSIONS |
Though the Fujimi 1/72 A-4 is a far superior kit and the Italeri A-4B is better, a little TLC and the spares bin sure improves the basic Matchbox kit.
November 2008
Copyright ModelingMadness.com If you would like your product reviewed fairly and quickly, please
contact the editor or see other details in the
Note to
Contributors.