Panda 1/35th UH-1N Twin Huey
| KIT #: | 35008 |
| PRICE: | $30.00 MSRP |
| DECALS: | Two options |
| REVIEWER: | Greg Ewald |
| NOTES: | Good fit, good deal. horrible decals. |
| HISTORY |
The UH-1N first flew in April 1968. It was developed for
the Canadian market as an upgraded version of the UH-1H. The US Marines started
flying the UH-1N on
For the
The US Air Force has been using the UH-1N since the 1970's, it
started as an CSAR and Special Forc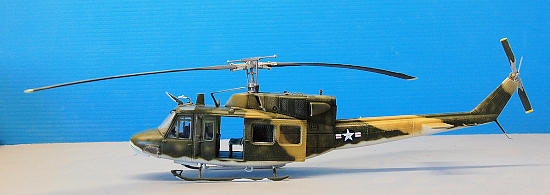 es helo. That main role is now taken over by
the MH-60G. The 6th SOS still uses the November. The current use of the UH-1N
replaced the Air Forces UH-1F/H's used for VIP, SAR, and missile command duties.
es helo. That main role is now taken over by
the MH-60G. The 6th SOS still uses the November. The current use of the UH-1N
replaced the Air Forces UH-1F/H's used for VIP, SAR, and missile command duties.
The US Navy uses the HH-1N version in an SAR role.
The US Marines have used the UH-1N since 1971 in multiply roles: CAS, FAC, MEDVAC, C2, SAR, transport and assault. Every battlefield the Marines have been on since the late stages of the Vietnam War, the November has been flying overhead.
Under license agreement by Agusta the AB-212 is an Italian
built version. Serving as both a civilian and military model.
In total some 50 countries around the world use a version of the UH-1N in one role or another.
The next step for the UH-1N in some countries is the
For the US Marines the UH-1N was to be rebuilt as the UH-1Y. Having new engines, 4 rotor blades, and new tails to match the upgrades of the AH-1Z. Both airframes use 84% of the same parts. With the current use and projected use of the UH-1N it was decided to fire up the assembly line again and build new airframes to get another 30+ years out them.
| THE KIT |
Panda
has produced another winner with this model. The detail is adequate, with enough
room for those of you who want to go haywire (you know who you are) and superdetail, and great f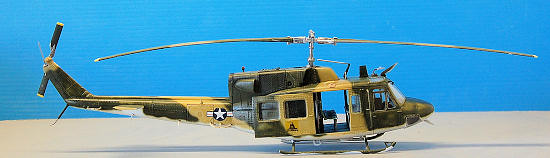 or an OOB build, as this one is.
The styrene has a small amount of sinkholes and molding plugs that will need to be sanded down and filled, but not too many. In fact, the molding process that the engineers used covers up most of the areas when the kit is complete, which is a nice feature for those of us who aren’t addicted to bondo and mr. surfacer. “Where’s my bondo,Honey?”
This kit is obviously just one of many Huey variants, as you are left with a bunch of unused bits and savory items to be stacked into your spares drawer. There are markings for two aircraft, but don’t bother trying to use them, unless you are a masochist.
| CONSTRUCTION |
The fit of the pieces is what we have come to expect from Panda Models, clean, neat, and easy. Yes, a little clunky in spots, but all in all, it is a shake n bake.
Most of the parts go into the cabin,
and end up looking quite the deal. The two part upper seats are a particularly
pleasant surprise, with well molded detail. Those of you using CC aft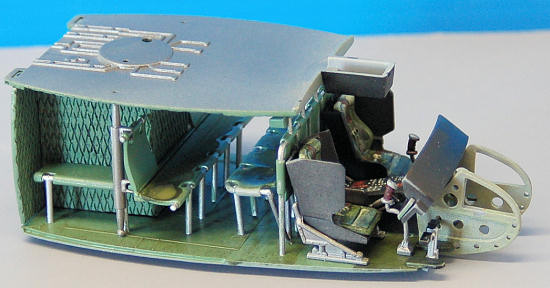 ermarket
will still want to hang on to these in case you need to fix up another kit.
I was somewhat disappointed in the dash, there is no
raised detail at all, and you are issued a black and white decal to replicate
the dials, which is rather unconvincing.
ermarket
will still want to hang on to these in case you need to fix up another kit.
I was somewhat disappointed in the dash, there is no
raised detail at all, and you are issued a black and white decal to replicate
the dials, which is rather unconvincing.
I pre-painted most of the interior prior to assembly, there are just too many fiddly bits to try to it afterwards. While I was impressed with the total engineering of the kit, the interior has one major hang up, part B26, the zigzag bars that support the stern seating are really tough to get into place, and test fitting revealed that they are off scale and must be trimmed down carefully.
After only four hours, the cab was
done, and it was time to move onto the fuselage!
Break out the rubber bands if you are using a slow
setting glue. For this sort of thing, I like to use a thin superglue, and clamp
as I go, about every three inches or so. Mini bar clamps and clothespins work
wonders here. The loc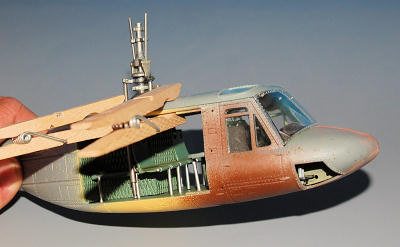 ating ribs for the cockpit assembly are fantastic, and
really make the whole kit come together very easily. Good job Panda!
ating ribs for the cockpit assembly are fantastic, and
really make the whole kit come together very easily. Good job Panda!
When it comes time to attach the upper part of the fuselage, you will need to raid someone’s laundry basket, or go to a store for some clothes-pins, they are about the only thing that works well to hold down the styrene while the glue sets up. Don’t tell my wife.
The clear parts are rather thick, but do fit well, if you want a scale effect, you would want to make new ones by vacuum forming or using clear sheet. Even with a lot of sanding and test fitting, the kit parts are out of scale. You will want to use a clear parts adhesive for these, they will fog in a NY minute, even after an overnight dunk in Future.
The engine housing should not be
assembled according to the instructions, unless you want to us a lot of putty.
Hold off on applying the front and side panels until you get the main bit
attached and in place. I had to sand off more than 1/8th of an inch
of
part a7 to get it to fit within the rotor master. Test fit,
test fit, and then test fit.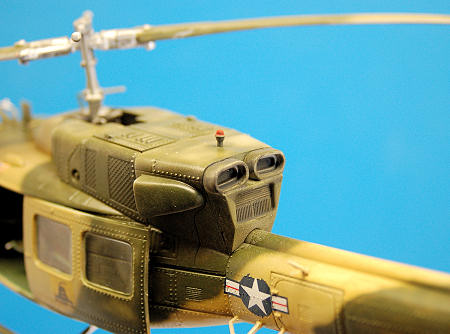
In steps 8 and 9, you get to put on
a lot of the fiddly bits, which in 1/35th , are quite large and easy
enough for even the most ham-handed of us to place. (nice change from 1/72nd)
Many of these are listed as “optional”, so check on your particular bird if you
want something that it had. Me? I glue everything on, I like all the
protuberances.
The rotors are a dream come true, they actually are stable, and don’t look like they will break off if you sneeze on them. Of course, I did not cement any of the rotor structures on, because transporting them would be a nightmare, and it is a heck of a lot easier to paint the things while they are not resting on top of the helicopter. I also did not cement either of the side doors, so I would be able to close and open them while making “whoop-whoop” sounds. I did, however, glue into place the front cab doors (D9/D10).
The rotors were steamed over some boiling soup (hey, why waste energy/) and eased into the droopy postion.
| COLORS & MARKINGS |
Hearing
from a friend of mine that his father worked with Twin Huey’s in
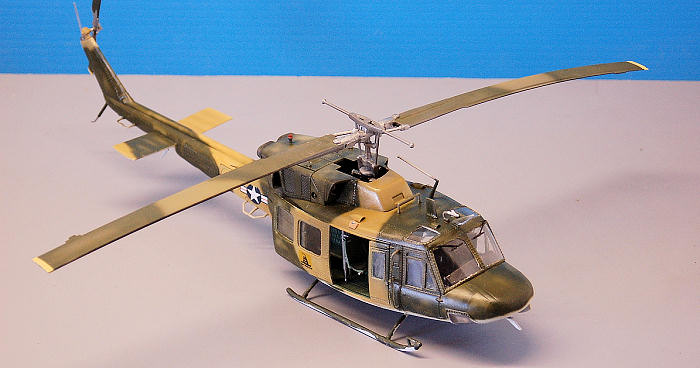
I have actually painted helicopters in the field, and we would spray an outline with rattlecans, and then come back with a high-volume-low-pressure paint unit (HVLP) and fill in, which left quite a lot of faded bits, especially after a rainfall or two. Replicating this effect was fairly easy using a detail Hansa airbrush, and filling in with a Badger Hybrid.
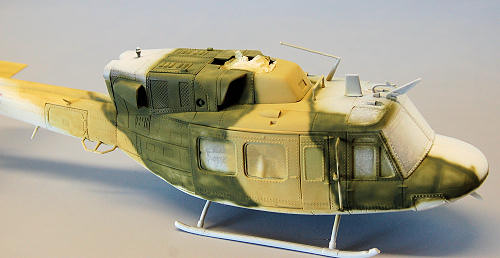 With two tones each of olive and tan,
I attacked the aircraft freehand, and am actually quite happy with the result, a
sort of “rode hard, put away wet”
look.
With two tones each of olive and tan,
I attacked the aircraft freehand, and am actually quite happy with the result, a
sort of “rode hard, put away wet”
look.
A thinned down layer of Future was sprayed on to replicate the typical semi-gloss nature of the paint that was used on the real bird, and to help as a base to hold those decals down over all of the rivet detail.
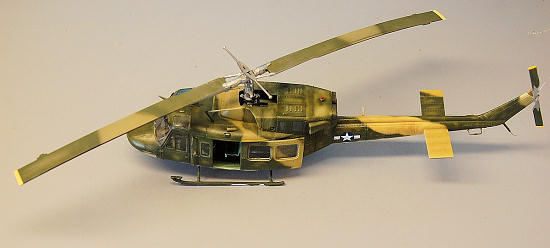
A light black wash was applied to pick out some details, and then it was onto the decals. Oh my.
Did I say “oh my”? I probably said something else that is
less than politically correct. If you buy this kit, toss the decals into the
trash and buy some aftermarket. Like many a politician’s promise, they looked
good on paper, but soak them in some water and be prepared to be upset. One of
the first just disintegrated within ten seconds or so, and since this supposed
to be an OOB build, I only applied the two stars/bars on the side for this
review, new decals to be adhered later. I could not resist, however, applying a
The clear bits were frosted with a thin wash of acrylic
muddy brown, and then wiped off, just as they were in
Seal it all up with some Future, and the dishes are done! In less than twenty hours of work time, we took a mere bit of gray plastic, and made a SEA Huey.
| CONCLUSIONS |
| REFERENCES |
This article would have been horribly incomplete without the assistance of many of you (yes I see you lurking in the corners), and most of all, the collaboration of Tank.
JB Beam (no, not kidding), who gave me all of the information about SEA Huey’s.
Air Force Fact sheet.
Wikipedia
History of Marine Corps Aviation by Mersky
Popasmoke.com
globalsecurity.org
October 2008
My thanks to www.dragonmodelsusa.com and your editor for the review kit.
If you would like your product reviewed fairly and fairly quickly, please contact the editor or see other details in the Note to Contributors.
Back to the Review Index Page 2015