Hobby Boss 1/72 Ka-50 Black Shark
| KIT #: | 87217 |
| PRICE: | $18.00 |
| DECALS: | Two options |
| REVIEWER: | Dan Lee |
| NOTES: |
| HISTORY |
The Kamov Ka-50 Black Shark or known by its NATO moniker
“Hokum” is a single seat attack helicopter whose development started in 1984 and
was shown to the West in 1989, but thanks to the collapse of the Soviet Union
and the fragile influx state of the Russian economy its development took much
longer than expected as it began service in 1995.
 It was
initially thought of as a helicopter fighter and designed to shoot down NATO
attack helos, but the Black Shark serves the same role as other twin seat attack
helicopters (recon, escort and attack.) Only 32 of the single seat version have
been made and assigned to provide air support for Russian Spetznaz operations.
It was
initially thought of as a helicopter fighter and designed to shoot down NATO
attack helos, but the Black Shark serves the same role as other twin seat attack
helicopters (recon, escort and attack.) Only 32 of the single seat version have
been made and assigned to provide air support for Russian Spetznaz operations.
A twin seat version with a modern sensor suite was designated as the Ka-52 Alligator in 1996. It was only in the late 2000s when the helicopter entered operational service. The Russians ordered 146 for delivery with options to produce some 116 more in the years to come.
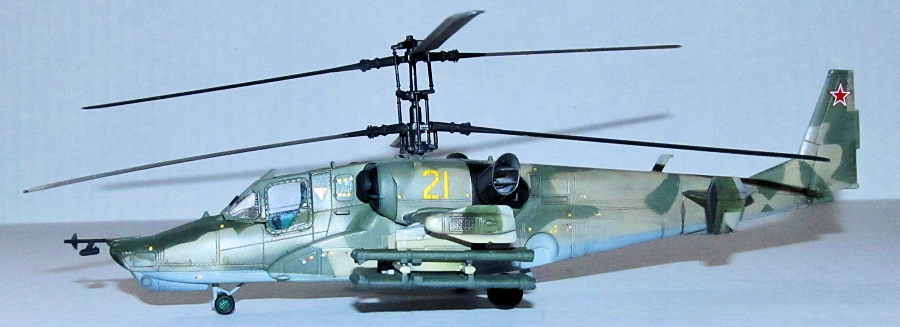
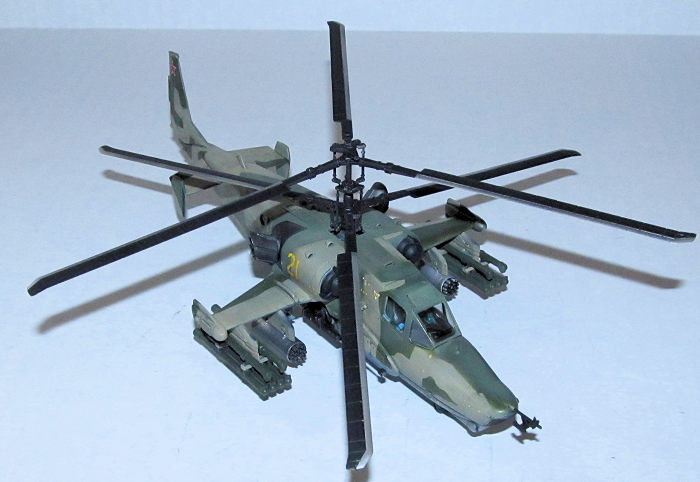
The Ka-50 has the unique contra-rotating rotor design of the Kamov design bureau and it is the first helicopter to feature an ejection seat as well as a necessary rotor ejection system to keep the contra-rotating rotors from becoming an airborne meat grinder. Thanks to its contra-rotating rotors it does not need a tail rotor yet it has impressive maneuverability. It carries a 30mm Shipunov 2A42 autocannon (the defacto 30mm autocannon of choice in the Russian military) as well as a variety of laser guided anti-tank missiles, rockets, gun pods, bombs and AAMs.
| THE KIT |
Hobby Boss released this 1/72 scale kit in 2007. It is an upgrade over the 1993 Italeri version which has raised panel lines and presumably more accurate details (but who knows as we've had some new kit clunkers in the past.) The kit comes with three sprues, two grey plastic sprues and one clear one for the canopy parts. It also comes with a decal sheet with two different markings as well as the typical Hobby Boss instruction pamphlet without numbered steps.
The plastic is decent and contains no visible flaws or imperfections or flash.
| CONSTRUCTION |
I started off building all the sub assemblies beginning with
the rotor assembly for a change. It was a fairly straight forward build but it
is a touch delicate before the Tamiya Extra Thin Cement cures. The other sub
assemblies (cockpit, stub wings, and fins) presented no difficulty. I built the
weapons as well, but there is an error in the instructions about the rocket pods
as they have them pointing backw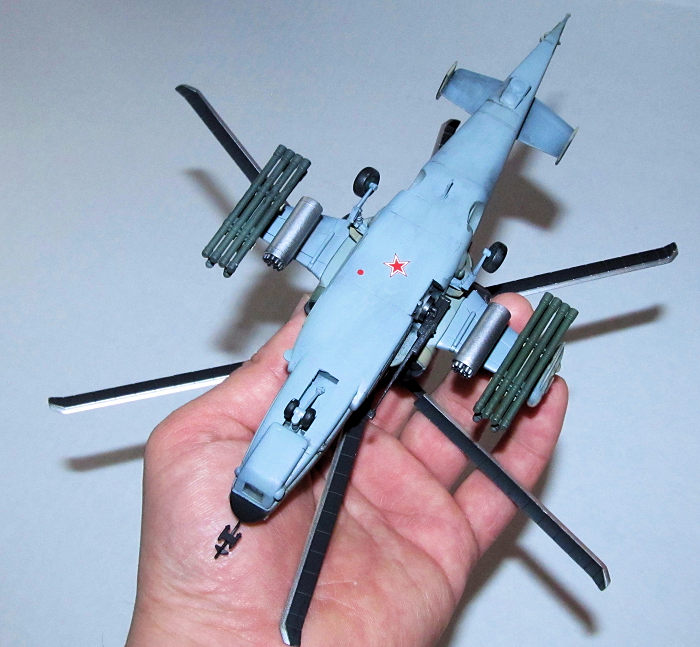 ards!
The end with the tubes should be at the front and the end with the holes should
be at the rear. It looked a bit odd to me (but what do I know about Russian
Rocket pods?) till I took a quick internet search and discovered the error.
ards!
The end with the tubes should be at the front and the end with the holes should
be at the rear. It looked a bit odd to me (but what do I know about Russian
Rocket pods?) till I took a quick internet search and discovered the error.
I added some plastic card to the interior based on photos of the interior. Next I primed the cockpit parts with Stynylrez black primer and then used Akan Mig/Mil interior color aka Jade Green for the interior as well as the interior of the fuselage. The remaining details were hand painted black, white and red. The ejection seat was painted black, the cushions Khaki and the seat belts Buff. I used Tamiya tape for the lap belts. I added an 1/8 oz weight in the nose (secured with CA glue) to avoid any potential tail sitting.
The rotor assembly was primed with Stynylrez black and then painted Vallejo Metal Color Magnesium. Once it was dry, it was glued in place to the starboard fuselage along with the cockpit. I then used CA glue to attach most of the fuselage together. Once the CA glue cured, the seams were sanded down smooth. There was some small gaps that required using CA glue and more sanding.
Next the winglets were assembled and the various miscellaneous parts such as antenna, small intakes and bumps were glued on to the main fuselage. The main intakes were left off till after painting.
Lastly, the engine exhausts are two piece ones with the nozzle vents split down the middle. Instead of dealing with almost impossible to fix seams, I removed the nozzle vent plastic and sanded the exhaust interiors sort of smooth. Once the seams were dealt with, I cut four pieces of 10 thou thick plastic card as the width of the exhaust interior to replace the nozzle vents. I glued them in place using Tamiya extra thin cement. These were primed and painted Vallejo Metal Color Magnesium.
| COLORS & MARKINGS |
 I masked
off the rotor, canopy and cockpit entrance with low tack masking tape (both
painter tape and kabuki tape.) I sprayed on black Stynylrez primer first as I
had issues before with spraying on Akan paint before (I found in my experience
AKAN paints go on too runny and too thin without a primer.) After it dried, I
sprayed on AKAN's USSR blue grey in very light coats. Once it was dry, I sprayed
on AKAN USSR sand in similar fashion. Both AKAN paints dry semi-gloss.
I masked
off the rotor, canopy and cockpit entrance with low tack masking tape (both
painter tape and kabuki tape.) I sprayed on black Stynylrez primer first as I
had issues before with spraying on Akan paint before (I found in my experience
AKAN paints go on too runny and too thin without a primer.) After it dried, I
sprayed on AKAN's USSR blue grey in very light coats. Once it was dry, I sprayed
on AKAN USSR sand in similar fashion. Both AKAN paints dry semi-gloss.
The instructions say that the camouflage spots are to be done in red brown. Most Russian helicopters have camouflage spots painted Russian OD so I opted for that instead. I cut masks using kabuki tape, but I had to do split the masking as two different batches because I couldn't cut the masks that thin and round enough. I used Mission Models Russian Armor Olive Drab for the spots. I masked around the engine intakes and exhausts which were painted black.
The rotors were painted with Stynylrez primer and then the leading edges were masked off and painted Vallejo Metal Color Dark Aluminum. The landing gear was painted blue grey, then the wheels were masked off and the hubs painted Model Master Acrylic Gloss Green and rubber portions German Grey. The 30mm gun was painted Tamiya gunmetal while the mount was painted AKAN USSR Blue Grey. Once the paint was dry, the remaining subassemblies were added and it was onto the decals.
 The decals
were fairly straight forward. The few Russian helicopter stencils are pretty
easy to do. These Hobby Boss decals went down okay with little to no silvering.
I used MicroSet and Solvaset for the stubborn ones.
The decals
were fairly straight forward. The few Russian helicopter stencils are pretty
easy to do. These Hobby Boss decals went down okay with little to no silvering.
I used MicroSet and Solvaset for the stubborn ones.
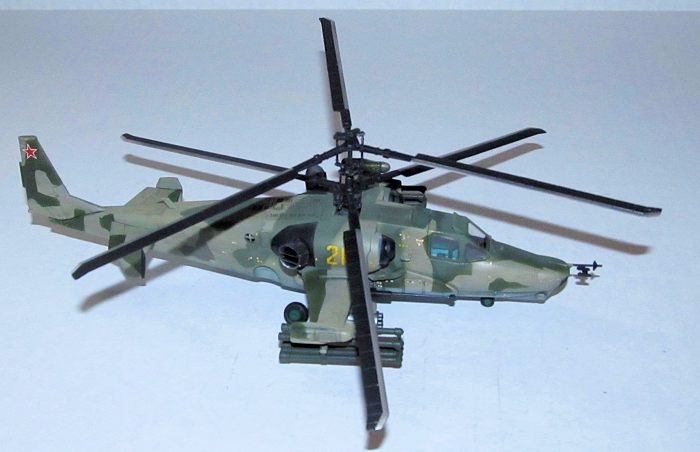
I used a mixture of Tamiya black and brown enamel washes to darken the panel lines and blend the colors. The excess was removed quickly using damp Q-tips. Once the wash was dry, I sprayed on Tamiya flat coat for the final coat.
The weapons were glued onto the launcher rails and pylons. The landing gear was glued in place, but the rear landing gear is a touch wonky so I would suggest letting the glue cure before letting the model sit on the full landing gear. The main gun, engine exhausts and intakes were glued in place. Lastly, the canopy was glued in using white glue.
| CONCLUSIONS |
It was a pretty easy build without any major headaches outside of the kit mistake with the rocket pod orientation. A bit of planning and preparation is needed to paint the standard Russian helicopter camouflage scheme, but not outside of the realm of the average modeler. If you like building helicopters, Russian helicopters or something unique then this kit is for you. I can't vouch for the accuracy, but it looks like a Black Shark/Hokum to me.
Highly recommended for modellers of all skill levels.
4 June 2019
Copyright Modelingmadness.com
If you would like your product reviewed fairly and fairly quickly, please contact the editor or see other details in the Note to Contributors.
Back to the Main Page Back to the Review Index Page Back to the Previews Index Page