| KIT #: | 04944 |
| PRICE: | $20.95 |
| DECALS: | One option |
| REVIEWER: | Dan Lee |
| NOTES: |
| HISTORY |
The Mil Mi-28N Havoc is the 21st century
backbone of Russia's attack helo force replacing the Mil Mi-24. It started life
in the early 70s as the replacement for the Mil Mi-24 series with a similar
layout to the cancelled AH-56 Cheyenne. In 1980, the Mi-28 was redesigned with
what would be considered the stereotypical attack helo config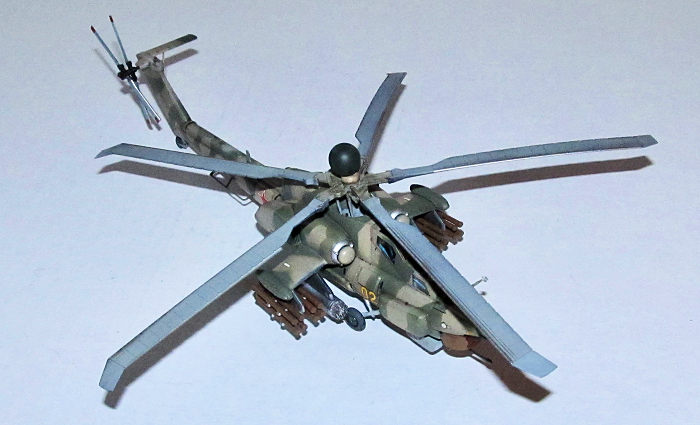 uration (which
makes it look a lot like its contemporary AH-64) with a two man armored crew
cabin, winglets for weaponry and tail. Thanks to the lack of funds, the program
slogged on till 1993 when it was cancelled by the Russian Government as it was
not all weather like the Ka-50.
uration (which
makes it look a lot like its contemporary AH-64) with a two man armored crew
cabin, winglets for weaponry and tail. Thanks to the lack of funds, the program
slogged on till 1993 when it was cancelled by the Russian Government as it was
not all weather like the Ka-50.
In 1995, Mil came up with the Mil-28N. The Mil Mi-28N was designed to be the Russian answer to the AH-64D Longbow Apache equipped with radar to give it all weather day/night attack capability. It was in development til 2006 when the first batch to go into active service was accepted into the Russian Air Force.
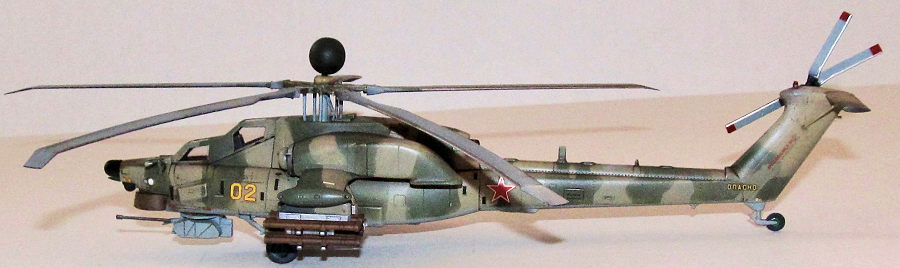
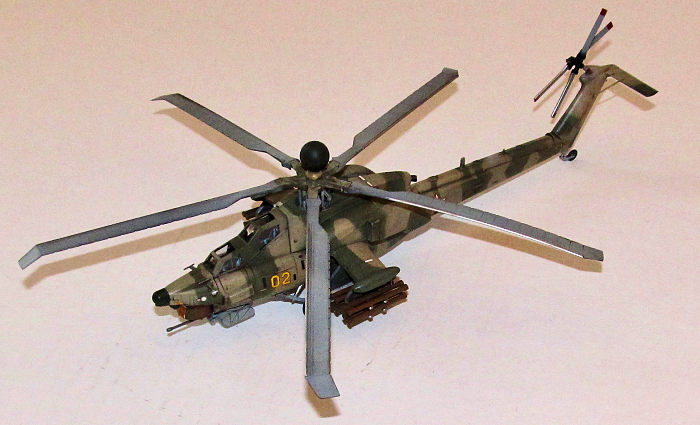
The Havoc is equipped with a 30mm autocannon, rockets, ATGMs, AAMs and bombs as well as a variety of sensors including radar, FLIR and night vision goggles. It also carries various jammers and armour to protect it from incoming fire up to 23mm. Russia has purchased 120+ in the past decade with the intention to purchase more.
| THE KIT |
 Revell AG originally made this kit in 1999 as the earlier
Mi-28 Havoc and released a Mi-28N version in 2015 with upgraded parts. The kit
consists of two sprues of yellowish tan plastic of around 100 parts and one
sprue of clear plastic that contains a mere two parts (canopy and sensor
window.) It comes with a comprehensive instruction booklet and paint guide
except it is only for Revell AG paints only which makes things a bit complicated
if you use other paints.
Revell AG originally made this kit in 1999 as the earlier
Mi-28 Havoc and released a Mi-28N version in 2015 with upgraded parts. The kit
consists of two sprues of yellowish tan plastic of around 100 parts and one
sprue of clear plastic that contains a mere two parts (canopy and sensor
window.) It comes with a comprehensive instruction booklet and paint guide
except it is only for Revell AG paints only which makes things a bit complicated
if you use other paints.
The parts have fine panel line and decent enough detail which is okay for this scale but also the exterior detail has been simplified. The interior is Matchbox like minimal with two not accurate cockpit seats, consoles and two control sticks.
| CONSTRUCTION |
I started off building the engine
section. I added everything that didn't require major masking or sanding
filling. The rest of the model was built as subassemblies because if I followed
the Revell AG instructions exactly then I would have gone insane from all the
masking. I glued the parts together using CA glue on the visible seams and
Tamiya Extra thin for the hidden sea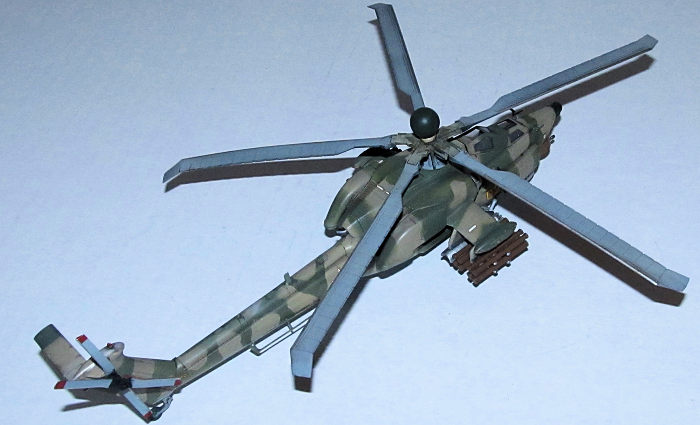 ms to avoid the dreaded phantom seam. The
seams were sanded down and the scratches smoothed/polished.
ms to avoid the dreaded phantom seam. The
seams were sanded down and the scratches smoothed/polished.
The subassemblies:
-The internal cockpit which wasn't detailed as you can barely see inside. I thought about upgrading it, but avoided this task as this build was supposed to be a simple build.
-The main and tail rotor blades were cleaned up while the rest of the rotor parts were left off as the rotor paint scheme requires a lot of masking.
-The main autocannon and sensor turrets.
-The engine exhausts and inlets (again masking.)
-Landing gear and wheels
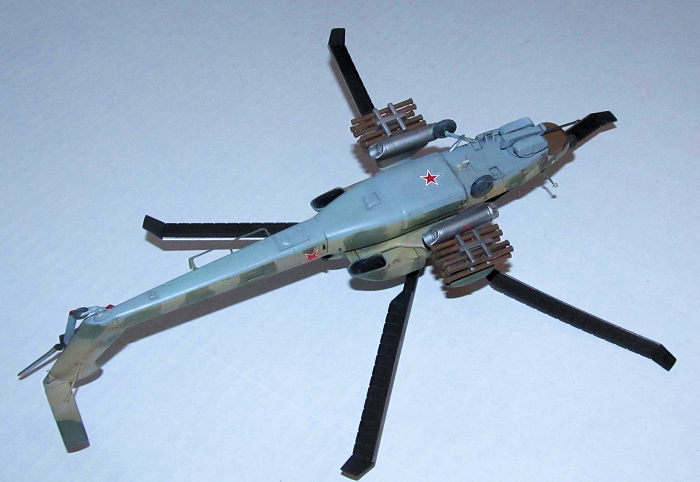
-Winglet pylons and launch racks
-Winglet weaponry
-Clear pieces masked
| COLORS & MARKINGS |
 I ended up having to mask and paint
each of the subassemblies first. Some were straight forward like the sensor
turrets and autocannon which were just a single color while others required a
lot of masking like the rotor blades and pylons. I primed most of the parts with
Stynylrez primer first.
I ended up having to mask and paint
each of the subassemblies first. Some were straight forward like the sensor
turrets and autocannon which were just a single color while others required a
lot of masking like the rotor blades and pylons. I primed most of the parts with
Stynylrez primer first.
I masked and painted the rotor blade edges silver as per the instructions. The underside of the main rotors and tail rotor required additional masking for the USSR blue grey and red warning stripes. The rotor head was painted dark grey and USSR blue grey while the radardome was painted USSR olive drab.
The rest of the subassemblies or parts were painted as per the kit paint scheme.
| MORE CONSTRUCTION & PAINTING |
Next I inserted the cockpit into the fuselage then glued the fuselage together using CA glue. The seams were sanded smooth. The turrets were supposed to go into the fuselage at this step, but I left them off because of the past experience ie: headaches masking those parts.
I added the engine pod with winglets. Once it was in place, I then added the masked canopy to the fuselage using Tamiya extra thin cement. Next it was off to paint.
The fuselage was sprayed first with Stynylrez black primer. When it was dry, I sprayed on thin coats of AKAN USSR desert sand and let it dry for a few hours before I started masking the desert sand portions of the fuselage with cut to shape cheap Chinese made Kabuki tape which has really weak stick compared to its Japanese made counterparts. This is pretty much the only place I can use this tape (lemonade out of lemons.) Anyway, I sprayed on the USSR olive drab and the tape didn't lift (huzzah) so I didn't need to retouch that much.
 When the paint was dry and the
masking was removed, I sprayed on two light coats of Tamiya clear for the
decals.
When the paint was dry and the
masking was removed, I sprayed on two light coats of Tamiya clear for the
decals.
The decals came off the sheet and snuggled down onto the surface with a bit of MicroSol/Set. This stage went quickly as apparently Russian helos don't have a very extensive amount of stencils.
The entire helo was weathered using Tamiya Black Panel Line (enamel) Wash and the excess removed using mineral spirits. I like using the stuff but I found that I had to vent everything outside as the stuff gave me a headache. Once dry, I sprayed down a final coat of Tamiya flat and removed the masking off the canopy.
The various parts including weaponry were glued onto the helo. I removed the tabs for the various turrets which allowed them to rotate and glued them in place. The sensor glass was brush painted using yellow clear and left to dry before it was glued into the main sensor turret.
The main and tail rotors was glued together and left to rotate freely (the motion is a touch stiff so the rotation is not that free.)
| CONCLUSIONS |
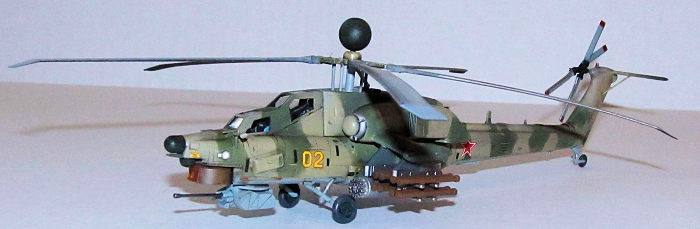
It is a cheap simple kit with simplified details that has a complex camo pattern. Not a great kit, but well worth the money considering the price. Added bonus is that at 1/72 scale the model doesn't take up a lot of shelf space unlike 1/48 scale helos. I had fun building it as I learned more about modern Russian attack helos.
This makes a nice kit for a change of pace or a nice practice kit for painting complex camo schemes.
Dan Lee
20 December 2019 Copyright ModelingMadness.com If you would like your product reviewed fairly and fairly quickly, please
contact the editor
or see other details in the
Note to
Contributors. Back to the Main Page
Back to the Review
Index Page
Back to the Previews Index Page