| KIT #: | HC1384 |
| PRICE: | AU$15-00 (at a Swap n' Sell) |
| DECALS: | One option |
| REVIEWER: | George Oh |
| NOTES: |
| HISTORY |
In 1960, Alexander Yakovlev
saw an experimental British Short SC1. In the period 1960/1963, he and his
Yakolev Design Bureau toyed with a V/STOL aircraft and produced the Yak.36 as a
technology demonstrator. It was allocated the codename FREESTYLE by NATO. With
this experience, the Bureau pushed-on with a new design in the 1970s. They
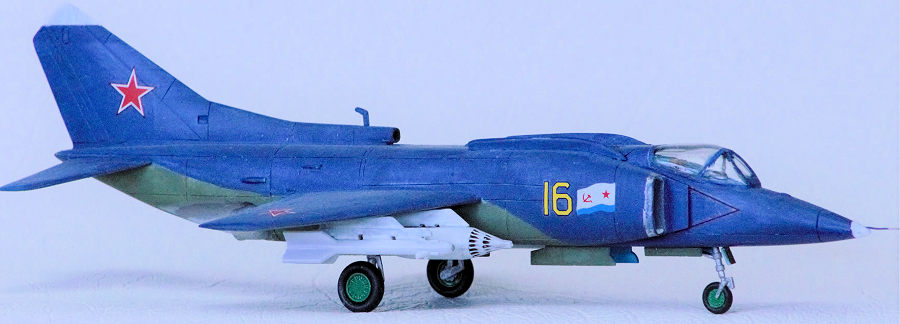
produced a single-seat, c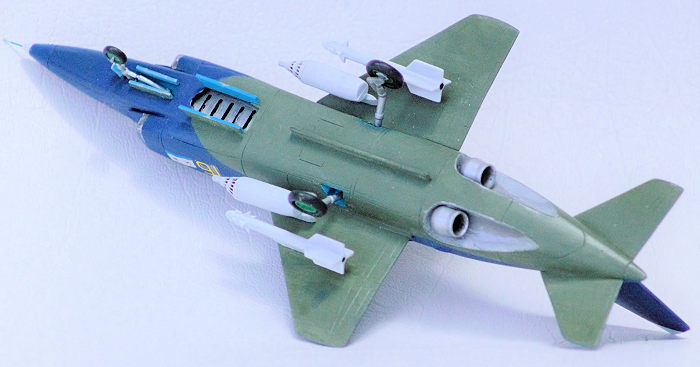 arrier-borne, subsonic, three-engined strike fighter -
the Yak.38. It was allocated the NATO codename FORGER. Two Rybinsk RB-38
turbojet engines were mounted vertically behind the cockpit, as down-jets, and
were used during vertical takeoff and landing. Behind them, the third engine, a
Tumansky R-28 V-300 turbofan, was mounted horizontally. Its output force was
vectored downward for takeoff and landing, and rearward for forward flight.
arrier-borne, subsonic, three-engined strike fighter -
the Yak.38. It was allocated the NATO codename FORGER. Two Rybinsk RB-38
turbojet engines were mounted vertically behind the cockpit, as down-jets, and
were used during vertical takeoff and landing. Behind them, the third engine, a
Tumansky R-28 V-300 turbofan, was mounted horizontally. Its output force was
vectored downward for takeoff and landing, and rearward for forward flight.
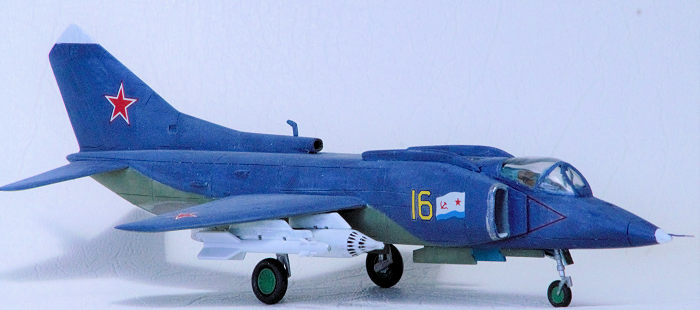
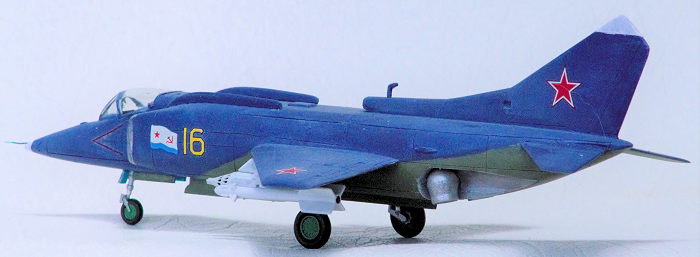
It was a long aircraft with a short-chord delta wing that featured folding tips, and four hard points for guns, bombs, missiles or rocket pods. The two production versions, the Yak-38 and the Yak-38M, were named the FORGER-A. Additionally there was a trainer version, the -38U, with a longer drooping snout.
The development of the FORGER paralleled that of the British Hawker Harrier in concept and time. FORGERs were deployed aboard Russian Kiev-class aircraft carriers, and experiments were conducted to operate them from large civilian cargo vessels paralleling the Royal Navy's 'Harrier Carrier' concept on a STUFT (Ship Taken-Up From Trade).
| THE KIT |
 This kit comes in a
lid-and-tray box that holds two sprues of 48 light-grey parts and one clear bit.
Panel line detail was of the finely-recessed type. Cockpit detail was basic. It
consisted only of a seat-shaped lump of plastic, and a pilot to cover it up.
Each wing and tail plane was a single piece, as were the two R-73 AA-11 ARCHER
air-to-air missiles (at least, that's what I think they are) and the plate that
covers the intakes of the vertical engines. The boxart shows the cover is a
frame that surrounds a grid of beams that supports a finer metal grill.
This kit comes in a
lid-and-tray box that holds two sprues of 48 light-grey parts and one clear bit.
Panel line detail was of the finely-recessed type. Cockpit detail was basic. It
consisted only of a seat-shaped lump of plastic, and a pilot to cover it up.
Each wing and tail plane was a single piece, as were the two R-73 AA-11 ARCHER
air-to-air missiles (at least, that's what I think they are) and the plate that
covers the intakes of the vertical engines. The boxart shows the cover is a
frame that surrounds a grid of beams that supports a finer metal grill.
I bought this 1990 kit because it looked unusual, and because it was cheap. I started building it because I was attracted by the unusual green bellied colour scheme.
| CONSTRUCTION |
I started this build by
brush-painting the inside of the cockpit, the seat, and the upper & lower faces
of the vertical engines (why didn't they create engines from two tubes?). All of
these parts have to be trapped between the fuselage halves, and once that was
done, I attached all possible outside parts - the wings, tailplanes, intakes and
four strakes. Close attention to the anhedral of the wing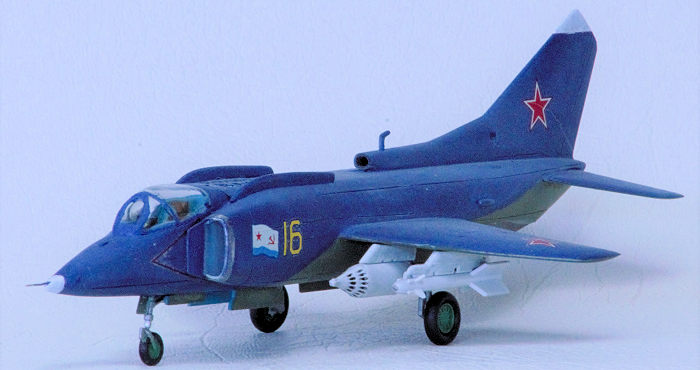 s and tailplanes, is
essential. I achieved this by resting the fuselage on its ventral strakes, then
propping the wingtips on stacks of coins. A tiny bit of filler was needed along
the wing roots, along the fuselage seams and to blend-in the intakes. After all
of the filling and sanding was done, the panel lines were rescribed (for
neatness sake).
s and tailplanes, is
essential. I achieved this by resting the fuselage on its ventral strakes, then
propping the wingtips on stacks of coins. A tiny bit of filler was needed along
the wing roots, along the fuselage seams and to blend-in the intakes. After all
of the filling and sanding was done, the panel lines were rescribed (for
neatness sake).
At first, this model was to be an OOB-build, but one look at the top cover plate of the vertical engines cover torpedoed that plan. It was moulded as a solid piece, but photos and the boxart, show it to contain a grid/framework that supports a grill or mesh. To replicate the grid-&-grill of the cover, I drilled-out the area of the grid, then dressed the edges. I replicated the grid with plastic strips, and I replicated the finer grill with 400-scale PE ships railing. The trick was to fashion a plastic stamp to fit into the square apertures of the grid. It was used to push the PE tightly into each aperture, where they were secured with superglue - and the PE was flush with the surface of the grid. Yay me!!! Now, he was ready for painting, so I masked-off the canopy, wheel wells and the vertical engines recesses.
| COLORS & MARKINGS |
At first, I sprayed the whole model, and some lose parts, with Citadel Miniatures (CM) skull white - a dirty/off-white shade, because that's what the boxart said. However, when I eventually looked at the instructions, I realised that the undersides should be a dark green. My challenge was to find a green that is different from the dark IJN green that I use on WWII RAF aircraft, and I hit on CM's Loren Forest green. And I made a lucky mistake (but more on that later).
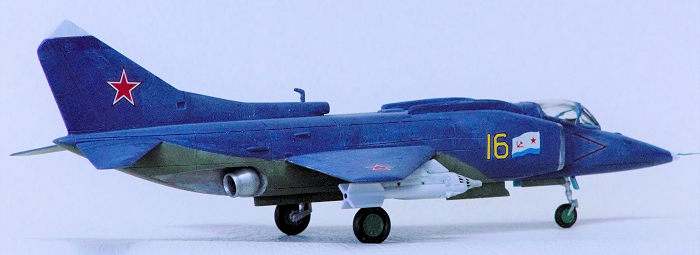
 Masking followed so that I
could spray the sides and upper surfaces with a dark blue. The problem is that I
didn't have a Russian blue, so I turned the CM's Ultramarine blue and a brush. I
really didn't plan to brush-paint this whole model. After the masking was
removed, I brushed the rear nozzle cut-outs with CM boltgun metal (a dark
silver). The rear nozzles were sprayed a chrome silver outside, and
brush-painted silver inside with a black throat.
Masking followed so that I
could spray the sides and upper surfaces with a dark blue. The problem is that I
didn't have a Russian blue, so I turned the CM's Ultramarine blue and a brush. I
really didn't plan to brush-paint this whole model. After the masking was
removed, I brushed the rear nozzle cut-outs with CM boltgun metal (a dark
silver). The rear nozzles were sprayed a chrome silver outside, and
brush-painted silver inside with a black throat.
But while I was painting my FORGER, I hit a snag. Anticipating the next/decaling step, I sought-out the kit decals, but couldn't find them. Double Rats!!! Fortunately (for me) I discovered Begemot's decals (72-050) for this model. Yay them!!! So, while I waited for them to arrive, I Futured the airframe and made sure that all of the remaining parts were correctly painted. The edge of the intakes was done with Molotow Liquid Chrome (applied with a toothpick). The weapons were sprayed Tamiya gloss white with a Molotow tip for the missiles, and a black wash for the rocket pods.
The decals arrived on an A5 sheet with enough decals for 4 different aircraft, though 15 are illustrated. Most of the sheet is stencilling (which I hate). I put each down on to a small drop of Future, then pressed them down into the detail. A spray of Tamiya clear flat was used to seal them in - from a new bottle, to avoid a possible snow-storm.
| MORE CONSTRUCTION |
I dry-fitted the two rear exhaust directional nozzles to check that they would rotated freely from horizontal to vertical. They couldn't because the fuselage lips fouled them. Some heavy-duty carving was called-for to reshape the cut-outs till the nozzles could be rotated through the full required arc. Then the repairs were repainted before I could glue the nozzles together (VERY carefully). You can see this on the different photos.
 The weapon pylons had been
sprayed that dirty white, and I had failed to paint them the green of the
underside. Twit!! Fortunately, my conflicting references show the pylons could
be either colour, so I stayed with the white because I liked the contrast. The
weaponry was attached with Superglue (for security). One word of caution - the
air-to-ground rocket pods have a missing socket that I guess should be in the 12
o'clock position. That's where I put it, with the aid of a basic jig.
The weapon pylons had been
sprayed that dirty white, and I had failed to paint them the green of the
underside. Twit!! Fortunately, my conflicting references show the pylons could
be either colour, so I stayed with the white because I liked the contrast. The
weaponry was attached with Superglue (for security). One word of caution - the
air-to-ground rocket pods have a missing socket that I guess should be in the 12
o'clock position. That's where I put it, with the aid of a basic jig.
After unmasking (then touching-up) the underside wheel and down-jet bays, I attached the last bits - main wheels to the main legs, the legs to the underside of the fuselage, and then all of the doors to their relevant stations, and the pitots to their positions. The modified top/intake cover of the down-jets was glued in the closed position, and it fit beautifully. The nose cone and the tip of the tail were brush-painted pure white, then a brass ship's yardarm was inserted into the nose in-lieu of the kit's overly-thick one. This is (another) mistake because the brass is thin and easily bent. I shoulda' stuck with a pin.
| CONCLUSIONS |
If I was a more-dedicated modeller, and less in a hurry to complete this build, then I might have replaced the nose wheel doors and down-jet doors, with thin foil, or something, more in scale. And I might have added an easily scratch-built odd-rods antenna array. I might do those yet.
Despite the need to trap a few more parts between the fuselage halves, this is not a difficult build. In fact, the ease of assembly is helped by the one-piece wings and the lack of inside detail (such as is found in the Revell kit), so I'm happy to recommend this kit to other modellers.
7 July 2022 Copyright
ModelingMadness.com. All rights reserved. No reproduction in part or in whole
without express permission. If you would like your product reviewed fairly and fairly quickly, please
contact
the editor or see other details in the
Note to
Contributors.