| KIT #: | 4317 |
| PRICE: | around 20 Euro or so |
| DECALS: | Many options |
| REVIEWER: | Fernando Rolandelli |
| NOTES: | Cost-effective, well detailed, plenty of decal options. Configuration a bit outdated. |

| HISTORY |
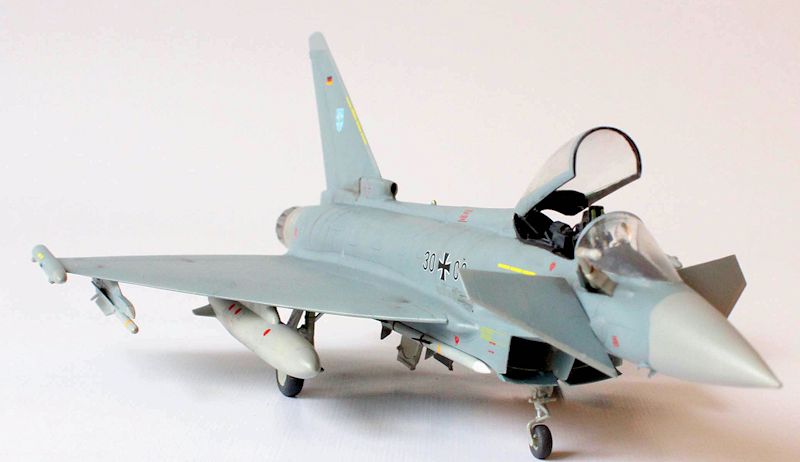
Eurofighter Taifun, 30-21, JG73 „Steinhoff“, Bundesluftwaffe, 2007
Born in the ´70s, when Europe was a cauldron of failed high-end fighter designs and industry consortia that dissolved into the void, and for some time held alive only by the stubbornness of an industry which refused to die, the Typhoon has developed into a mature design and a most capable fighter. It certainly looks as avant-garde today, even among F-22s and Rafales and Gripens and latest-generation F-16s as the original EFA looked in the ´80s, among Phantoms and Tornadoes.
| THE KIT |
There are several Typhoon kits in the “gentleman´s scale”. The best looks to
be the Hasegawa one, albeit at a price; the runner up is the Revell-Germany,
while the Italeri and Airfix are best to be avoided. Price and immediate
availability here at Bonn made me choose the Revell kit for what was my
original intention, building a “commemorative series” of Bundesluftwaffe
aircra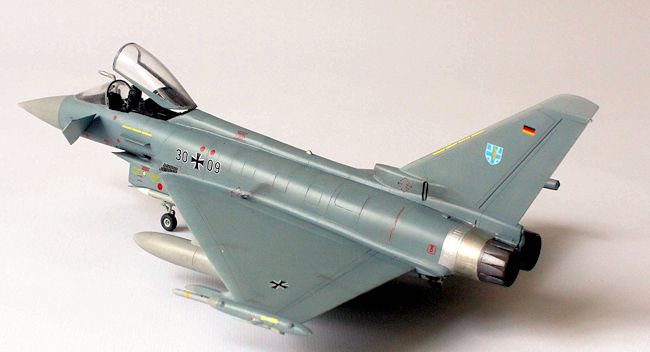 ft
to “celebrate” my deployment to Germany.
The kit is good, I mean, it shows excellent intentions marred by that general
feeling of cheapness Revell kits use to have (hey, man, they ARE cheap!).
Breakdown is complicated, but I guess the complex shape of the machine dictates
that. There is enough armament to satisfy everyone and to be faithful to each of
the plane´s users; sadly, lack of pylons (two each wing are missing) prevents
the builder to turn this graceful airplane into a weapons truck. Besides, these
modern aircrafts are moving targets, they are being upgraded all the time; so, I
suspect the configuration is an early one (it even lacks a cannon; its issue as
standard was only agreed in 2007 and presumably homologated for use later –just
in time for operational use in Afghanistan) German machines do not show the
IR-seeker either. I guess the problem of “mini-fleets” is as acute as it was on
Tornadoes.
The intention being a rather simple build, I decided to limit the detailing to
an Eduard Zoom PE set. To prevent a tail sitter, metal shot was crammed in the
nosecone and around and behind the cockpit, secured with cyano and Milliput.
| CONSTRUCTION |
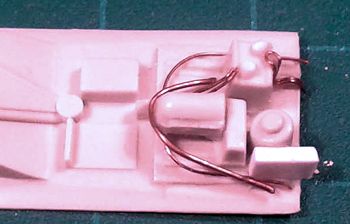 on
the very few pictures available of this sensitive area (hey, there are
direct shots of the instrument panel aplenty! Isn´t that even more
sensitive?
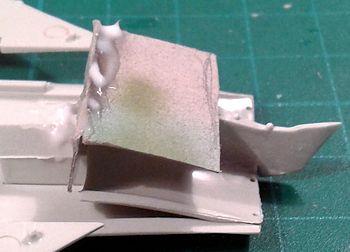
The intakes have no attempt at a trunking. To try to minimize the see-through
effect, I cut a false bulkhead in cardboard and fixed it at the back of the
intakes. It was not difficult. Another vent intake
 under
the left nose was blanked off, while the prominent exhaust at mid fuselage was
opened up!
Fuselage to wings join, if at all can be called like that, was complex but can
be handled. The fuselage lacks any joining section in the undersurface aft of
the nose, so it flexes on itself, creating gaps in the upper wing to fuselage
join. In hindsight, some spacer or stiffener would help. The join between wing
and fuselage runs through the wheel wells, creating an unsightly gap; I hide it
behind some semi-spurious detail. The oleo connections running along the u/c
legs are complex and daunting for a WWII modeller like me, but I attempted at
reproducing something similar.
Exhausts, both the external petals and the internal tubes are fixed before
joining fuselages. It would have been much more convenient, especially for
painting them comfortably, if they could be added from the outside.
Nevertheless, I tried to mimick the different tinting of the moving petals, an
operation involving some cutting and masking.
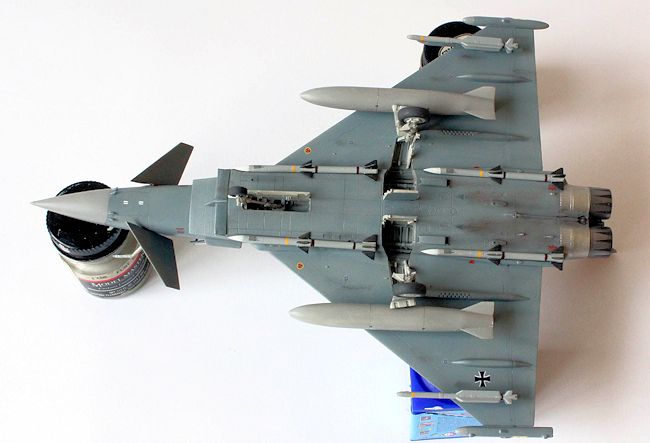 anards I
glued as a last step, after thoroughly finishing the model, in the funny angle
they seem to adopt when the aircraft is parked.
Why would someone build a modern aircraft if not to hang whatever he can find
from its pylons? Well, we have already talked about the pylons. The customary
four AIM-120 were hung from the fuselage stations (the Meteor BVR doesn´t look
to be operational today, much less in 2007) while the outer stations received
two IRIS-T (operational QRA configuration at the time). The kit includes more
weapons catered for each user of the plane: AIM-132 ASRAAMs and Sky Shadow ASMs
for the RAF ones, AIM-9M for the Italian and Spanish machines, and Taurus ASM
for the German ones (the latter doesn´t look operational at the time being
either) But what we are really missing is the pylons for weapons stations under
the wing and even fuselage (where a targeting pod is usually carried nowadays),
to accurately depict a present service machine.
| COLORS & MARKINGS |
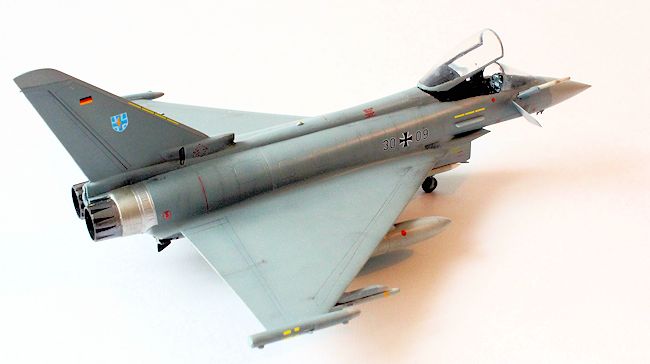
Well, specs for a Bundesluftwaffe Taifun call for FS35237 overall. It certainly
looks the right colour when compared to pictures, but way too dark. Even
allowing for scale effect, and the effect of the sun on the real airframes and
the shadowy nature of the colour, it looks too dark. I failed to find any hint
at a different colour in any source; and, living in Germany, I know the way this
people relate to regulations. One day,
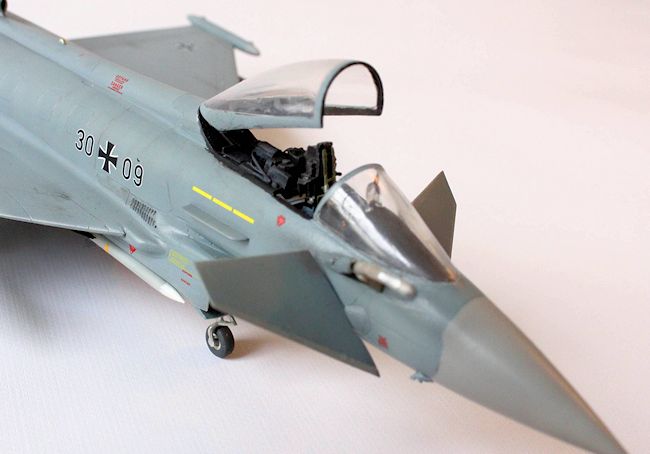 someone will
come with the discovery “Hey, 35237 was never actually the colour!” For the time
being, I mixed it with some 36320, to lighten it without taking the bluish
character away; then with some more, and then again. It still looks too dark.
Radome was painted Barley Grey, as were the dielectric surfaces and some leading
edges (those in the canards by handbrush; they have a distinct step); the latter
is not exactly accurate, but the contrast looks fine. Tanks and their pylons
were painted also Barley Grey; in pictures they are definitely a colour
different to the rest of the airframe, similar to the radome. Missiles were
painted in 36375. Intake trunking and wheel bays were painted Light Aircraft
Grey.
Contrary to RAF examples, which look certainly filthy (and certainly take pride
on that), Bundeslufwaffe machines look invariably pristine (and take pride of
that… different nation personalities?). Weathering was based on a heavy
preshading and “mottle painting”, to give an irregular look to the otherwise
plain surfaces; then, it was completed with some pastels, both dry and dissolved
in water.
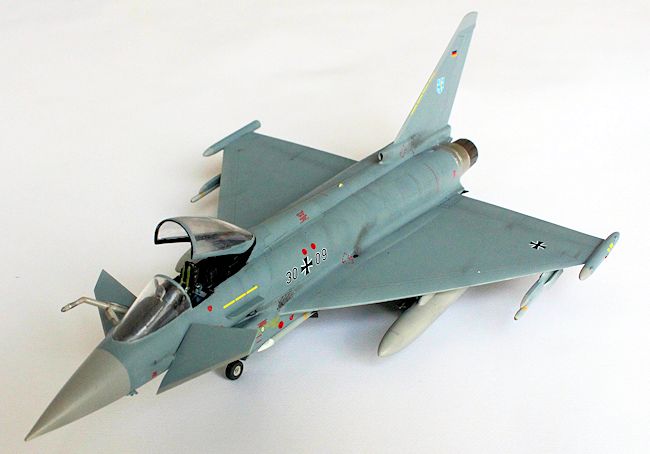 Full marks
should be given to the Xtracrylixs paints; they are accurate, dry to a smooth
surface (“they iron out fine” we would say), allow for painting effects and they
are very forgiving. Clogging the tip of the airbrush forcing you to unscrew and
clean it every two or three passes seems a good price to pay.
The decal sheet allows you to build a machine in service with any of the early
operators. Everyone seems to prefer the RAF ones, and certainly their squadron
heraldic is quite interesting: you can choose any out of four squadrons.
Bundesluftwaffe is represented by JG74 “Mölders” and JG73 “Steinhoff” (they are
called TaktLwG nowadays), but there are enough numerals to model any machine
then in service. Options for Italian 4° Stormo “Cavallino Rampante”, plus one
Spanish and one Austrian machines are provided. I followed the instructions to
the letter but the fuselage crosses and codes ended up just a bit too far back;
probably the profile in the instruction diagram is not drawn accurately.
Otherwise, they behave perfectly.
| CONCLUSIONS |
Revell kits always deliver. They are probably not the best nor ones “oozing
high quality”, as Tamiya or Hasegawa can be, but they are mostly honest,
cost-effective kits which can render a good replica with almost no extra
work, though probably not entirely apt to produce a masterpiece, unless in
the right hands and investing a lot of time. Me, I have neither.
| REFERENCES |
-
“Eurofighter Typhoon: Europa´s Mehrzweckjäger der 4. Generation“, E-book
-
„Eurofighter Typhoon“, Kagero Topshots 11041
May 2015
If you would like your product reviewed fairly and fairly quickly, please contact the editor or see other details in the Note to Contributors.