Italeri 1/48 Mirage F.1CG
| KIT #: | 2618 |
| PRICE: | $20.00 twenty years ago |
| DECALS: | Two Options |
| REVIEWER: | Spiros Pendedekas |
| NOTES: | Ikarus 48015 decals |
| HISTORY |
The origins of the successful Mirage F1 can be traced back in the early 1960s, when Dassault was tasked to design a low-altitude intruder that would not have the high approach speeds associated with the delta wing of the Mirage III. The resulting Mirage F2 was a quite big two-crew machine, featuring a high-mounted swept wing and horizontal tail surfaces. Along with the F2, Dassault would develop two parallel designs, a single-seat Mirage F3 interceptor and a scaled-down and simpler Mirage F1. This proved to be a wise decision, as the cancellation of the more complex and expensive F2 and F3 projects would provide crucial breathing space to the simple yet potent F1 design.
A French government contract was granted to Dassault in 1964 in anticipation of a potential French Air Force specification for an all-weather interceptor to succeed its fleet of Mirage IIIC aircraft. Consequently, the potent Mirage F1 design received Dassault’s full attention. The F1 was of similar size to the delta-winged Mirage III and 5 and was powered by the same SNECMA Atar engine as had been used on the larger Mirage IV. Although smaller wingspan than the Mirage III, the F1 nevertheless proved to be superior to its predecessor, carrying more fuel, possessing a shorter take-off run and exhibiting improved maneuverability.
 The
first flight took place on 23 December 1966, exceeding Mach 2 during its
fourth fight. However, on 18 May 1967, this plane was lost in an accident,
due to loss of control after encountering flutter, killing its pilot.
Despite this misfortune, the project was officially adopted by the French
Air Force and, after a redesign period, the second prototype performed its
first flight on 20 March 1967
The
first flight took place on 23 December 1966, exceeding Mach 2 during its
fourth fight. However, on 18 May 1967, this plane was lost in an accident,
due to loss of control after encountering flutter, killing its pilot.
Despite this misfortune, the project was officially adopted by the French
Air Force and, after a redesign period, the second prototype performed its
first flight on 20 March 1967
From then the program soldiered on, with three pre-service aircraft and one
static structural test airframe soon joining the prototype, with
construction authorisation of an initial batch of 85 production standard
Mirage F1 commencing in late 1971. The first deliveries to the French Air
Force took place in May 1973 and the type entered squadron service with EC
2/30 Normandie-Niemen in December of that year.
By October 1971, the Mirage F1 was under production at both Dassault's Bordeaux facility and at SABCA's own plant in Belgium, work at the latter having been performed under an industrial arrangement associated with Belgium's order for 106 Mirage 5 aircraft. The 79 aircraft of the next production run were delivered during the period March 1977 to December 1983. These were of the Mirage F1C-200 version and featured a fixed refuelling probe, which required an extension of the fuselage by 7 cm.
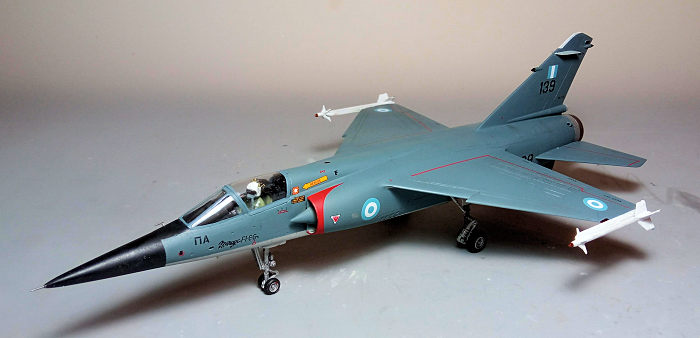
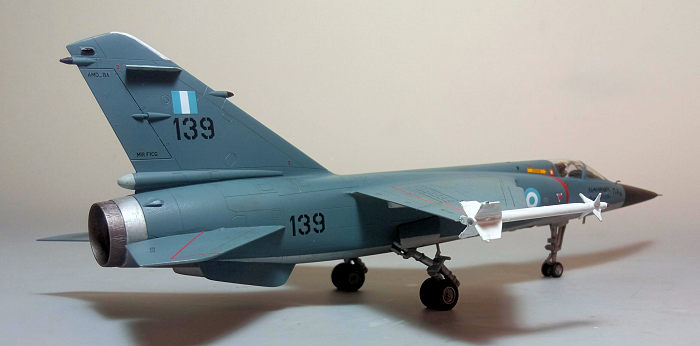
40 single seaters (designated as F1CGs) were ordered by Greece in 1974 and entered service with the Hellenic Air Force in 1975. Based in 114CW Tanagra AFB, they were assigned to the 342 and 334 all weather Squadrons. Armed with four AIM-9P Sidewinders, they were successfully used as interceptors, retiring on 30 June 2003 after 28 years of service and 160,000 flying hours.
| THE KIT |
 This is a
repop of the Esci mold, with an extra sprue containing parts to build more
modern variants. Esci first issued this kit as early as 1978, reboxing it
another five times before its demise in the mid-late 1980s. Italeri then took
over, did good maintenance to the molds and added the aforementioned extra
sprue, reboxing this kit every 7-8 years or so with nicely printed decal sheets.
Not claiming to be the latest and greatest and exhibiting a few
oversimplifications and minor inaccuracies it is by all means a good, solid kit,
especially taking into account its 1978 origins, promising to deliver a good
representation of the F1.
This is a
repop of the Esci mold, with an extra sprue containing parts to build more
modern variants. Esci first issued this kit as early as 1978, reboxing it
another five times before its demise in the mid-late 1980s. Italeri then took
over, did good maintenance to the molds and added the aforementioned extra
sprue, reboxing this kit every 7-8 years or so with nicely printed decal sheets.
Not claiming to be the latest and greatest and exhibiting a few
oversimplifications and minor inaccuracies it is by all means a good, solid kit,
especially taking into account its 1978 origins, promising to deliver a good
representation of the F1.
The specific kit is Italeri’s initial (2002) repop, bought from an Athens hobby shop in 2004 and for a look at its contents you may read our Editor’s preview found in the ever growing MM archives.
| CONSTRUCTION |
 Typically, I
started with the cockpit, where I attached the instrument panel (which contains
the pedals) and the rear bulkhead to the cockpit tub and trapped the subassembly
between the fuselage halves. The front coaming was attached at this time, as
well. Overall cockpit color was black and I used the kit-provided instrument
decals for the instrument panel and side consoles, which would look sufficient
under a closed canopy and a pilot thrown in.
Typically, I
started with the cockpit, where I attached the instrument panel (which contains
the pedals) and the rear bulkhead to the cockpit tub and trapped the subassembly
between the fuselage halves. The front coaming was attached at this time, as
well. Overall cockpit color was black and I used the kit-provided instrument
decals for the instrument panel and side consoles, which would look sufficient
under a closed canopy and a pilot thrown in.
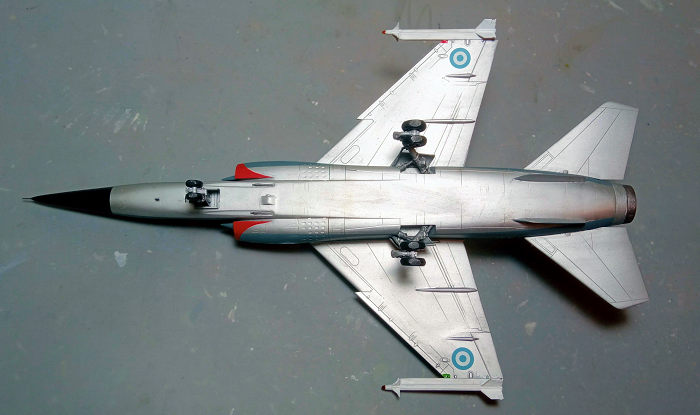
The two piece intakes were next assembled and attached (their innards were painted silver), followed by the 2-piece wings, the elevators, the ventral strakes and the fin located VOR fillet antennas. The already opened underwing ordnance holes were closed with styrene shims, as hellenic Mirage F1s rarely carried underwing stores (usually only Sidewinders on the wingtips). The nose cone was finally attached, where roughly 40 grams of fishing weights were secured in, to avoid tail sitting.
This concluded basic model assembly, which was pleasant and straightforward. Overall fit, while not Tamiya, was acceptable, with modest amounts of filler needed at the "usual” areas (wing roots, intakes etc). For more realistic looks, I drilled out the various small ram-air inlets scattered around the fuselage and after a final sanding I took the bird to the paint shop!
| COLORS & MARKINGS |
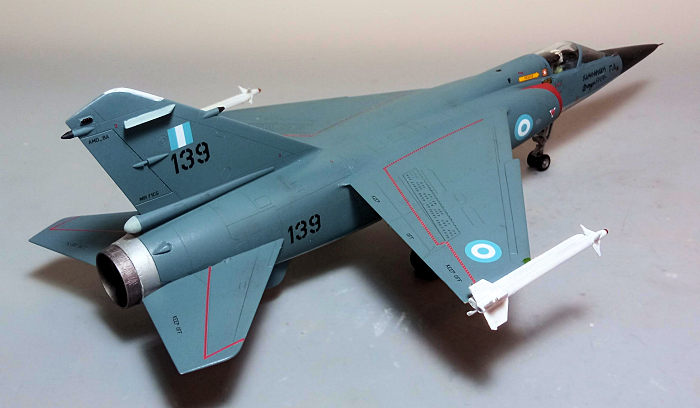
 I first
painted the nose cone and front anti-glare area black, then masked it off and
sprayed all undersides Hu11 Silver. After making it, I sprayed all topsides
Hu144 Intermediate Blue. Upon removing the masks I again masked the intake
fronts, in order to paint the distinctively red shaped areas, with a coat of
Future preparing the bird for decals.
I first
painted the nose cone and front anti-glare area black, then masked it off and
sprayed all undersides Hu11 Silver. After making it, I sprayed all topsides
Hu144 Intermediate Blue. Upon removing the masks I again masked the intake
fronts, in order to paint the distinctively red shaped areas, with a coat of
Future preparing the bird for decals.
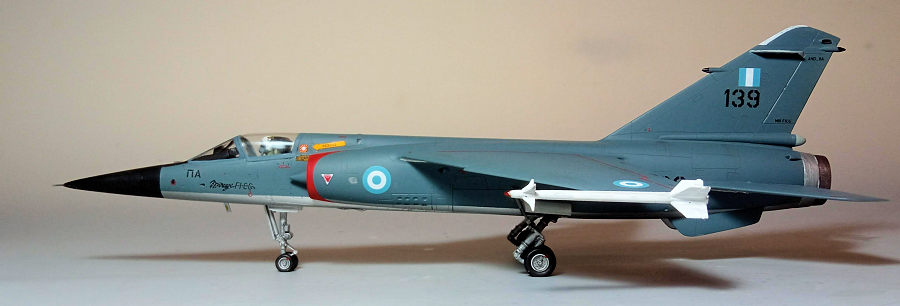
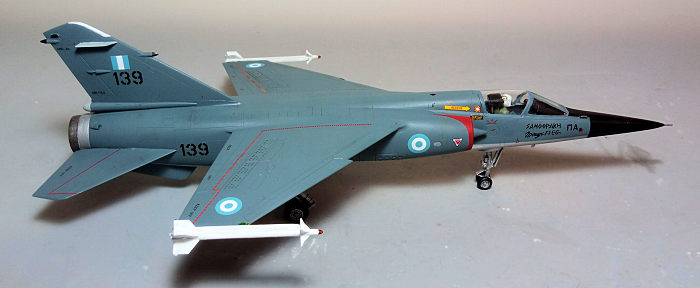
I used the very comprehensive and nicely printed Icarus #48015 decal sheet, in order to depict s/n 139 bird, named “ΣΑΜΟΘΡΑΚΗ” (the Greek island of Samothraki) as it stood in 114CW Tanagra air base sometime during the 90s. For the stencilling I used the equally nicely printed kit decal sheet. All decals behaved flawlessly, easily detaching from their backing paper and nicely attaching on every model area. a coat of Future sealed them.
| FINAL CONSTRUCTION |
The nicely done landing gear was assembled and attached in position. Fit was positive, something very helpful especially for the main legs which sit in a distinctive forward angle. All six wheels were tad filed to look weighted and it took some effort to make them all touch the ground. All landing gear parts, including wheel rims, bays and door innards were painted silver, tires were painted black and I decided to add some thin red lines at each wheel to represent the marking performed at the wheel shop during tire change to assure the tire does not slip relative to the rim.
Time to finalize the cockpit. I used the kit seat, which had black framing and olive drab cushion, only adding overhead ejection handles from stretched sprue, painted yellow/black. A pilot from a Hasegawa A-7 Corsair had his arms and head repositioned, in order to look more natural, was accordingly painted and attached to the seat. Finally, a simplistic HUD glass was made from clear styrene sheet and glued on top of the coaming, concluding the otherwise sparse cockpit which would now look satisfactorily busy.
Hellenic Mirage F1s carried up to four Sidewinder missiles, usually two at their wingtips, which is what I opted for. Since the kit doesn't supply any, I used two leftover ones and modified the kit’s wingtip rails (mainly chopped their rears) to look like the ones in reality. The missiles and pylons were painted white, while the front IR seekers were painted clear orange.
 The 2-piece
exhaust was way too shallow (something typical for the kits of that era), so I
cut off the rear turbine face and added a PVC tube extension of suitable
diameter.. Surely, the PVC walling is plain and unrealistic, but it is not too
obvious at casual glance. The complete exhaust was painted Mr Hobby burned iron,
apart from its front external ring, which was painted steel.
The 2-piece
exhaust was way too shallow (something typical for the kits of that era), so I
cut off the rear turbine face and added a PVC tube extension of suitable
diameter.. Surely, the PVC walling is plain and unrealistic, but it is not too
obvious at casual glance. The complete exhaust was painted Mr Hobby burned iron,
apart from its front external ring, which was painted steel.
Time for some weathering, not that much really, consisting of a black wash to accentuate the engraved detailing and also give some areas (like the landing gear) a used, oily look, followed by an application of dark brown/black dry pastels at selected areas. A matt coat gave the bird its final hue.
The VHF fillet aerial located at the front undersides was made from a piece of styrene sheet accordingly painted (I then realised that the kit provided one, which was correctly not mentioned in the instructions, as it was for a different version). Typically I lost the front pitot tube, which was replicated by a piece of stretched sprue, painted, together with the starboard side mounted secondary pitot, Testors Burned Metal.
The two interception lights fitted at the side of each intake were replicated by painting the corresponding indented areas silver with a fine tip silver pen. The fin mounted IFF antenna radomes were painted black, the fin top dielectric area was painted white and the drag chute rear cover was painted light gray.
The transparencies had their well defined frames hand painted and attached in position. Fit was good. The various wingtip, beacon and anti collision lights were accordingly represented by blobs of red and green clear paint, before calling the dressed in Aegean Blue French beauty done!
| CONCLUSIONS |
Despite its age, this is still a good kit of the iconic Mirage F1. General shape captures the graceful lines of the plane, molding is good with the molds well maintained by Italeri,, the level of detail offered is acceptable, clear parts are nicely done, instructions are excellent and the decals really stand out (something very true, especially at the latest reboxings). Out of the box, a very nice Mirage F1 can emerge, with the relatively easiness of construction deeming it suitable for anyone but the absolute beginner.
The other option for a quarter scale Mirage F1 is the Kitty Hawk offering, which is more modern, more detailed and with more options. Due to its complexity, it is not an easy kit, but I have heard it is certainly buildable. Despite the company’s demise, the kit can still be found at roughly double the price of the Italeri kit, so the modeler has clear options here. Also, since many Kitty Hawk toolings have found their way through other kit brands, it will not be much of a surprise if we see this mold reboxed sometime in the Future.
That said, the Italeri 1/48 Mirage F1, sensibly priced and periodically reissued with superb decal sheets, is by all means a kit that can still hold its own even nowadays (2024) and definitely a kit worth tackling if you are interested in building the graceful French fighter.
Happy Modeling!
14 July 2025 Copyright ModelingMadness.com. All rights reserved. No
reproduction in part or in whole without express permission from the editor.
If you would like your product reviewed fairly and fairly quickly, please
contact the editor or see other details in the
Note to
Contributors.