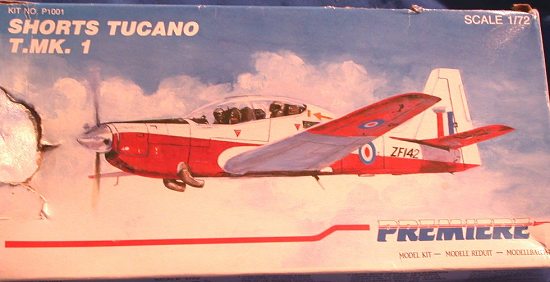
Premiere 1/72 Shorts Tucano T.1
|
KIT # |
P1001 |
|
PRICE: |
$ |
|
DECALS: |
6 RAF aircraft, all red and white |
|
REVIEWER: |
|
|
NOTES: |
|
HISTORY |
On the 21st March 1985 it was announced that the Embraer EBM-312 Tucano had won the Ministry of Defence AST412 requirement for a replacement of the ageing Jet Provost trainer. Short Brothers PIC of Belfast would build 130 aircraft at a fixed price contract over the next 5 years. There was also an option for a further 15 aircraft.
The major changes to the original airframes were the introduction of the Garrett 1100shp Turboprop engine, giving the aircraft some 50% more power, a redesigned canopy providing for full bird-strike resistance and a requirement foe Hawk T.Mk1 compatibility. The wing structure was also completely redesigned, The wing tips were altered to withstand 2g Turns at 20000 feet in level flight and the leading edges were changed to give the pilot more stall-warning notice. The fuselage and empennage were strengthened to meet the RAF’s requirement for a 12000 hours of training. the addition of airbrakes complemented the main alterations and despite the delays caused by all these modifications Shorts were able to complete two airframes per month.
|
THE KIT |
 Premier’s Shorts Tucano was a model
previously unknown to me, as I model almost exclusively WWII Prop driven
aircraft. I originally came across this aircraft at a New Zealand version of
Ebay and thought, “hell why not!” Two days later the carefully wrapped Tucano
arrived at my doorstep. On examination the Premier Tucano has all the hallmarks
of a short run kit with slightly “soft” detail and shallow engraved lines on
wings and fuselage, a small amount of flash.
Premier’s Shorts Tucano was a model
previously unknown to me, as I model almost exclusively WWII Prop driven
aircraft. I originally came across this aircraft at a New Zealand version of
Ebay and thought, “hell why not!” Two days later the carefully wrapped Tucano
arrived at my doorstep. On examination the Premier Tucano has all the hallmarks
of a short run kit with slightly “soft” detail and shallow engraved lines on
wings and fuselage, a small amount of flash.
Instructions consist of a single folded sheet with exploded diagrams showing the major construction and a multi-lingual history. Paint and decal instructions are easy to follow and again multi-lingual.
Six Aircraft are depicted in the decals, all of them RAF Trainers with only the aircraft codes being different, All aircraft are painted in that lovely Red/White RAF trainer scheme.
Just a little comment about the type of plastic is needed here, The Premire plastic is unlike any model plastic I have come across before, for some reason my usual glue of choice, Humbrol precision poly cement didn’t want to stick this baby together, No how, No way!! The glue just “dried” without welding the plastic together, any small knock and the parts separated. I ended up switching to superglue for the remainder of the gluing. Once my fingers were separated onwards to the Construction.
|
CONSTRUCTION |
 Seats were painted British Interior green [sic] and
seat-beats were made out of masking tape and lead foil, on correspondence with
Scott Van Aken who made this model some 15 years or so ago warned me that she
was a heavy tail sitter and to cram as much weight into the nose as possible. So
with that in mind I used lead sheet to make side cockpit consoles and other
detail bits. Once the cockpit was done it was time to join up the fuselage,
that’s when I discovered the above mentioned plastics resistance to model glue,
after three attempts at holding the fuselage together I gave up and switched to
the super glue.
Seats were painted British Interior green [sic] and
seat-beats were made out of masking tape and lead foil, on correspondence with
Scott Van Aken who made this model some 15 years or so ago warned me that she
was a heavy tail sitter and to cram as much weight into the nose as possible. So
with that in mind I used lead sheet to make side cockpit consoles and other
detail bits. Once the cockpit was done it was time to join up the fuselage,
that’s when I discovered the above mentioned plastics resistance to model glue,
after three attempts at holding the fuselage together I gave up and switched to
the super glue.
All joins needed a little cleaning up due to the fact that all the moldings were “soft” as in the edges were rounded rather than nice and sharp , even careful sanding ‘al la vacuform’ didn’t fix the problem completely and a small amount of filler was used on the fuselage to wing join and tail-planes.
The nose halves needed about .5 mm taken off the side to bring them down to the same diameter as the fuselage. This isn’t as much a fault of the kit as the difference from squaring off the edges of the fuselage as described above. I took the opportunity at this point to cram the nose full of lead just so there was no chance that she would tail sit.
 The nose join
needed the most amount of work and a fair amount of filler went into smoothing
the nose into the fuselage. Once sanded back and checked it was time to
reinstate the obliterated panel lines. One of my lovely wife’s (many) hobbies is
doing those scratch art pictures that comes with a disposable scraper, now for a
modeler these are a gold mine because outside a commercial scriber (and I cant
justify $29 NZ for the Tamiya one) these are the best things for re-scribing
panel lines, just remember to always drag the scriber towards you. I used dynamo
tape as a guide around the curvy bits and the end result isn’t too bad even in
1/72nd scale.
The nose join
needed the most amount of work and a fair amount of filler went into smoothing
the nose into the fuselage. Once sanded back and checked it was time to
reinstate the obliterated panel lines. One of my lovely wife’s (many) hobbies is
doing those scratch art pictures that comes with a disposable scraper, now for a
modeler these are a gold mine because outside a commercial scriber (and I cant
justify $29 NZ for the Tamiya one) these are the best things for re-scribing
panel lines, just remember to always drag the scriber towards you. I used dynamo
tape as a guide around the curvy bits and the end result isn’t too bad even in
1/72nd scale.
With the major airframe completed it was time to install the undercarriage ……Ummm you know how I said that it wouldn’t be a tail sitter? WRONG !! even with the entire nose crammed full of lead the damn thing still sat on its tail, even stuffing the nose undercarriage bay full of lead made no difference, Ah well looks like I will have to make a base for this one.
The various aerials and small fiddly bits were added before that canopy was masked and added to the fuselage. One done it was of to the paint shop.
|
PAINT & DECALS |
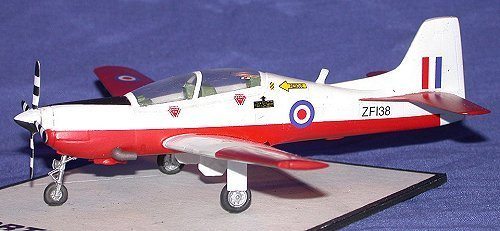
Bearing in mind that the finished paint scheme was to be red and white and both of these colors being very translucent I first sprayed the entire aircraft flat Tamiya aluminum, this covered up the gray green primer I used on the joints.
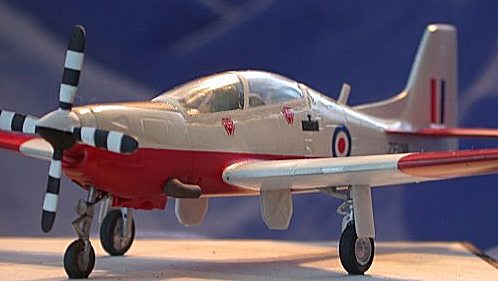
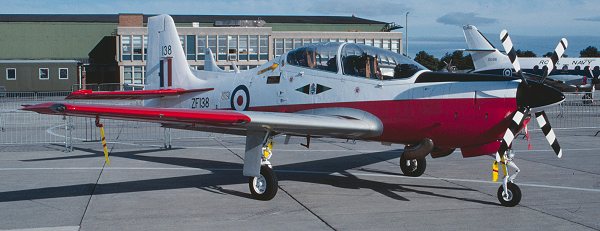
Once dry the fuselage and inner wing were then sprayed Tamiya gloss white, four light coats over a weekend finally gave it the color coverage that was needed, once I was satisfied with the coverage the white was masked off and the red was then sprayed, again using Tamiya paint. I had run out of gloss red in this instance so I used flat red instead. The Tucano was then put aside for a few days after the masking tape was removed. After the flat black antiglare panel was masked up and sprayed it was time for some decals, Oh wait, I had used flat red and gloss white.. being too lazy to bother with the hassle of cleaning out the airbrush after spraying future I cheated and used a nylon pot scrubber to polish the flat paint to a nice gloss finish. (Your editor hates to point this out, but the inner wing panels/gear doors need to be painted light aircraft grey. I'm sure that the instructions misled Mark on this aspect, but they really are this color [see image below])
Once happy with the finish It was time to apply the decals, Premier gives you the choice of 6 different aircraft, well six different tails codes anyway, the rest of the marking are generic to the plane. After being stung a number of times lately with odd-ball decals I have got into the habit of coating "unknown" decal manufactures with clear liquid film to stop the chances of them exploding into a million pieces on contact with water. So saying that the Premier decals went down with little fuss over the gloss paint and reacted well to the wet future sandwich system that I have been using of late for decals, one of those many tips and tricks that I have gleaned from the MM discussion board.
 Basically I
use a cotton bud (Q-tip for you yanks
Basically I
use a cotton bud (Q-tip for you yanks
Once the decals had dried a couple of coats of Humbrol Gloss Cote was sprayed over the model to seal in everything.
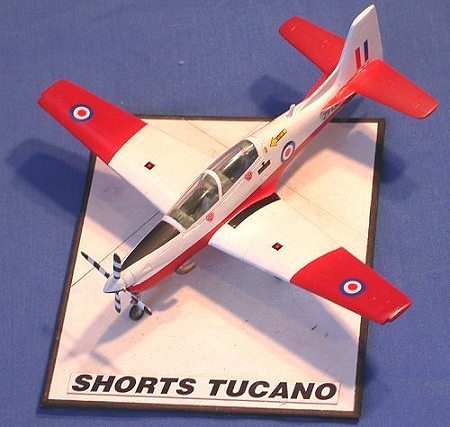
Finally the prop was painted those wacky black and white stripes and fitted to the airframe.
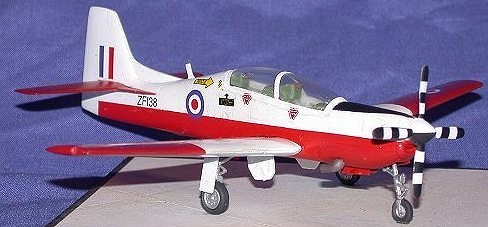
With that the Tucano was finished, just needing a simple base to over come the tail sitting problem. This was made out of high quality 1.5 mm card stock with the tarmac lines drawn on with a HB pencil and the edge done with one of the kids markers, the Shorts Tucano name plate was simply cut out from the side of the box.
|
CONCLUSIONS |
The Tucano has to rate as one the most enjoyable models that I have done this year, okay it's got a couple of things to watch out for but with care a really nice, different and colourful aircraft can be added to your collection. Sure stands out amongst all those drab Luftwaffe aircraft!
I would recommend it to anyone who likes 'em colourful.
|
REFERENCES |
http://www.flanker.flyer.co.uk/tuc-1.htm
http://www.paulnann.com/images/pn_w0484.jpg
Copyright ModelngMadness.com. All rights reserved. No reproduction in any form without express permission from the editor.
If you would like your product reviewed fairly and fairly quickly, please contact the editor or see other details in the Note to Contributors.
Back to Reviews Page 2017