Testors/Italeri 1/72 AH-1T Sea Cobra
|
KIT # |
634 |
|
PRICE: |
$8.50 |
|
DECALS: |
2 Aircraft: HMM-263 & HMM-268 |
|
REVIEW : |
|
|
NOTES: |
|
|
HISTORY |
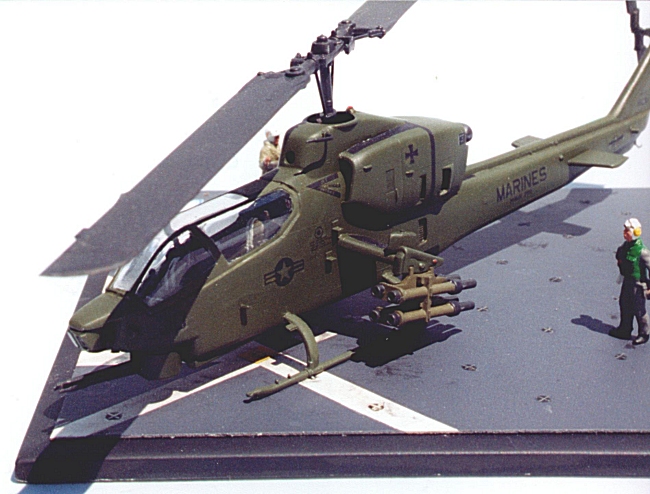
The Bell AH-1 series of helicopter gunships came into their own during the Vietnam War. The AH-1T Sea Cobra was an improved version of the AH-1J that the U.S. Navy and Marines began using in the early 1970s. The Marine Corps took delivery of the first production AH-1T in October 1977. Of the 57 aircraft delivered, the first 33 had no provision for TOW missiles, but they were subsequently retrofitted. The AH-1T could mount up to eight TOWs and two LAU-68 rocket pods with 2.75" unguided rockets. Standard gun armament was a triple-barreled 20mm unit in a front-mounted turret.
|
THE KIT |
 Italeri makes some of the best 1/72 helicopter kits around, especially their
newer offerings such as the UH-34 and H-21. This older AH-1T kit is not up to
the company’s latest standards, but builds into an acceptable replica
nonetheless. Overall detail is good, with raised panel lines. The cockpit isn’t
too bad, but there are no side consoles in the pilot’s and gunner’s
compartments. (I’ve also seen a comment that the instrument panels are
inaccurate for the -1T.) No crew figures are included. You can see straight
through the engine compartment vents -- there’s nothing inside -- and the twin
exhausts are blanked off a short distance from the nozzles. Seven pages of
instructions are comprehensive, with clear diagrams and text. Color matches for
Testors paints are included.
Italeri makes some of the best 1/72 helicopter kits around, especially their
newer offerings such as the UH-34 and H-21. This older AH-1T kit is not up to
the company’s latest standards, but builds into an acceptable replica
nonetheless. Overall detail is good, with raised panel lines. The cockpit isn’t
too bad, but there are no side consoles in the pilot’s and gunner’s
compartments. (I’ve also seen a comment that the instrument panels are
inaccurate for the -1T.) No crew figures are included. You can see straight
through the engine compartment vents -- there’s nothing inside -- and the twin
exhausts are blanked off a short distance from the nozzles. Seven pages of
instructions are comprehensive, with clear diagrams and text. Color matches for
Testors paints are included.
|
CONSTRUCTION |
I began by building the cockpit. The limited number of parts fit well, with the exception of the clear Heads-Up Display (HUD). It was difficult to figure out from the instructions exactly how the HUD mounts to part A2, and I white-glued it on it backwards before realizing my error. I didn’t try to accurize the instrument panels, which are barely visible in this scale, but I did scratchbuild consoles for both crew compartments. I used bits of scrap plastic to make the gunner’s controls, and a collective stick and control pedals for the pilot.
 Fit of the main fuselage parts was better than average. I deviated from the
instructions, assembling the upper and lower fuselage halves and intake shrouds
before trapping the finished cockpit and horizontal stabilizer between them. The
joints fall along natural panel lines, but to me the seams looked odd compared
to the raised panel lines. I filled them with gap-filling super glue and
rescribed them. I added a couple of access steps and what I believe are pitch
sensors to each side of the forward fuselage using tiny bits of sheet plastic.
Since I wasn’t planning to have a revolving main rotor, sensor turret or gun
turret, I left them off until final assembly for easier painting. The canopy was
crystal clear after a dip in Future, but it was a bit narrower than the cockpit.
Fit of the main fuselage parts was better than average. I deviated from the
instructions, assembling the upper and lower fuselage halves and intake shrouds
before trapping the finished cockpit and horizontal stabilizer between them. The
joints fall along natural panel lines, but to me the seams looked odd compared
to the raised panel lines. I filled them with gap-filling super glue and
rescribed them. I added a couple of access steps and what I believe are pitch
sensors to each side of the forward fuselage using tiny bits of sheet plastic.
Since I wasn’t planning to have a revolving main rotor, sensor turret or gun
turret, I left them off until final assembly for easier painting. The canopy was
crystal clear after a dip in Future, but it was a bit narrower than the cockpit.
When installing the rocket armament, be careful cutting the LAU-68 launcher attachments (B40 and B50) from the sprue. I inadvertently (and irreversibly) chopped off some of the part that cements to the stub wings, so my Sea Cobra mounts only TOW missiles. Sinkholes marred the chaff dispensers (B45, B52) and parts B46 and B51; these are much easier to fill and sand before assembly. I recommend leaving the skids off until after painting. I didn’t, and lost count of the number of times I broke one or more of the attachment points.
Most photos of AH-1Ts show what I think is a cylindrical infrared jamming device mounted on a circular plate a couple feet aft of the main rotor. The parts aren’t in the kit, but should be a snap to scratchbuild from scrap plastic. I didn’t put one on my model because I couldn’t document that this particular helicopter ever had the equipment.
|
PAINT & DECALS |
 Unfortunately, I couldn’t find a picture of the HMM-268 machine represented
by the kit (or any other SeaCobra from that squadron, for that matter), so I
relied on the instructions for the color scheme. I airbrushed the fuselage
overall dark green (FS34079) using Testors Model Master enamel in that shade.
The only real problem I had was masking for the flat black panels on either side
of the main rotor housing -- there isn’t much area on which to put a line of
tape. The TOW missile tubes themselves are olive drab (FS34087) with flat black
heads and rear bodies. The kit instructions call for dark green main rotor
blades, but I’ve never seen Huey or Cobra rotors that weren’t overall flat
black. Several posters to rec.models.scale confirmed my suspicions, so I went
with the latter color.
Unfortunately, I couldn’t find a picture of the HMM-268 machine represented
by the kit (or any other SeaCobra from that squadron, for that matter), so I
relied on the instructions for the color scheme. I airbrushed the fuselage
overall dark green (FS34079) using Testors Model Master enamel in that shade.
The only real problem I had was masking for the flat black panels on either side
of the main rotor housing -- there isn’t much area on which to put a line of
tape. The TOW missile tubes themselves are olive drab (FS34087) with flat black
heads and rear bodies. The kit instructions call for dark green main rotor
blades, but I’ve never seen Huey or Cobra rotors that weren’t overall flat
black. Several posters to rec.models.scale confirmed my suspicions, so I went
with the latter color.
I brushed on several coats of Future before decaling. The markings went on easily, but showed some silvering even after applying Micro-Sol. I simply poked minute holes in the decals with a hobby knife and let another drop or two of Future creep underneath.
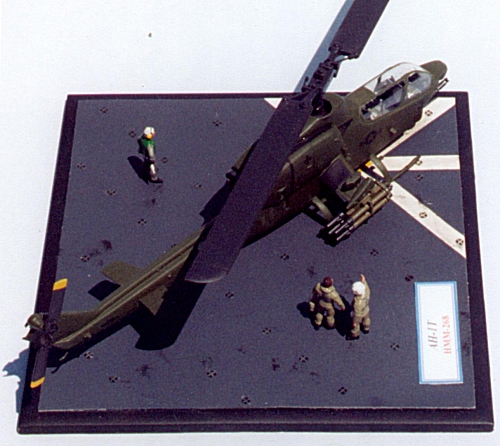
Since aircraft are, after all, flown by people, I always display my finished models in some kind of mini-diorama. Using photos from my reference, I made a simplified assault carrier deck and scrounged suitable figures from the Esci 1/72 NATO pilots and ground crew set.
|
CONCLUSIONS |
This was my first helicopter model. The single main rotor, simple color scheme and relative ease of construction make it an excellent choice for a novice rotorhead. It looks accurate compared to photos of actual Sea Cobras. If I were building another AH-1T, I’d probably use some pieces from an aftermarket photoetched set for the -1S or 1W to make up for the missing cockpit parts.
|
REFERENCES |
Heliborne: USMC Helicopter Assault, Yves Debay & Lindsay Peacock, Motorbooks (Osprey Color Library), 1993.
If you would like your product reviewed fairly and quickly, please contact me or see other details in the Note to Contributors.
Copyright ModelingMadness.com. All rights reserved. No reproduction in part or in whole without express permission.