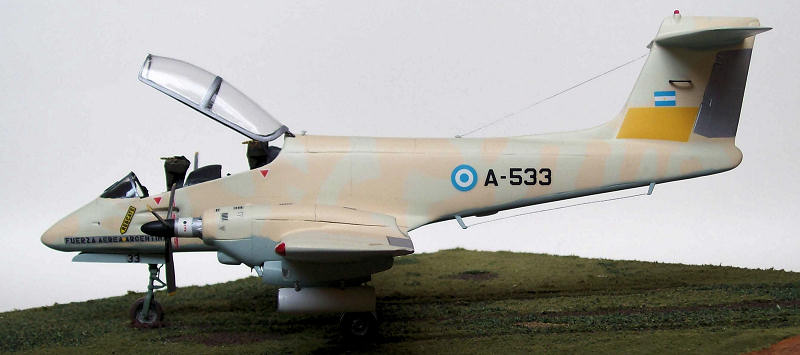
Herigate 1/48 IA-58A Pucara
| KIT #: | ? |
| PRICE: | $90.00 |
| DECALS: | ? |
| REVIEWER: | Pablo Calcaterra |
| NOTES: | Resin kit. Mirage kit Decals used |

| HISTORY |
A
very brief history of the FMA IA-58 Pucará
During the decade of 1960, the Argentine Air Force realized that needed a
ground support and reconnaissance plane.
In 1968 the first glider, made entirely of wood, flew for the first time. On
The first series aircraft was delivered to the Air Force on
 In 1978, with more planes now in service in the
On
The next important event in the life of the Pucarás was the 1982 war for the
Malvinas/Falklands islands.
The very same day that the Argentine forces took the islands, a section of 4
Pucará arrived in Puerto Argentino/
On April 8th four more planes were readied to go to the islands,
having arrived first to Comodoro Rivadavia. Two days later, the planes were
given their cammo colours for the theater of operations.
On April 15th the BAM Condor was created in
On April 26th the above-mentioned Squadron crossed to the islands
(Puerto Argentino/Stanley), and on the 29th they were deployed to
BAM Condor.
During the attack on May 1st that destroyed A-527 and killed the
pilot (Lt. Jukic) and 7 mechanics, A-502 was slightly damaged. Some shrapnel
had hit the plane and the canopy but was fixed using the available
resources: parts of another canopy, screws, bolts and pieces of metal.
As it would be very long to describe all the missions flown by the Pucarás
during those almost 2 months, I will only focus on the ones flown by the
plane built for this article: A-533.
On May 15th,
after the SAS raid on Borbón/Pebble
(Missions ordered from the islands had no O.F. number)
 May 17th,
the first mission for this plane: reports from Port Howard stated that 2
enemy landing crafts were navigating along Puerto Salvador bay. Five planes
flew in this mission for more than 2 hours but were unable to find the
targets. They spotted Harriers but the British pilots did not see the
Argentine planes. A-516 (Capt Grünert) and A-533 (Lt Calderon) turn was from
May 21st,
at 4 pm and after the first missions against the British troops in the
vicinity of San Carlos were flown, Lt Gimenez flew the plane to BAM Malvinas
(Puerto Argentino/Port Stanley), along with A-516 (Lt. Cruzado).
May 24th,
at 2 pm a section of two planes (Lt Brest in A-533, Lt Címbaro in A-516)
flew a mission looking for EW devices in the Bezuchere Is, which had been
potentially detected by the Argentine Navy. They returned without engaging
at
May 26th,
call sign FIERRO. Two Pucarás to find the enemy located North of
May 28th,
engagement with British troops attacking Darwin-Goose Green. Call sign
NAHUEL: A-537 (Capt. Vila), A-533 (Lt. Címbaro), A-532 (1st Lt.
Argañaraz), all armed with rockets. They took off at
 The follow up mission (call sign BAGRE): Capt Grünert (A-533), Lt Russo
(A-532), armed with 4 rockets launchers (LAU-61) with 19 rockets each, 7.62
mm machine guns and 20 mm guns. They took off at
Upon landing, it was discovered that A-533 had received 4 impacts on her
left engine and 58 on the fuselage. But still managed to get her pilot back
to base, though now it was also out of service.
June 13th:
A-533 was back in flying condition after several days of repairs.
June 14th,
the last 4 flyable Pucarás were readied for a close support mission and then
they were to fly back to the continent. They had two drop tanks under the
wings (318 lts) and 3 x LAU-61 rocket launchers in a
After the war:
A-533 was shipped to the
What happened to the pilots that flew A-533 during the war?
Lt. Calderón:
Survived the war
Lt. Gimenez:
flew several missions, shot down a Scout helicopter on May 28th
but perished when his plane crashed on a hill in bad weather on his return
leg.
Lt. Brest:
flew several missions and survived the war
Lt. Cruzado:
shot down and taken prisoner in the Goose Green/Darwin area on May 28th
after flying several missions
Capt. Grünert:
another experienced pilot that survived the war.
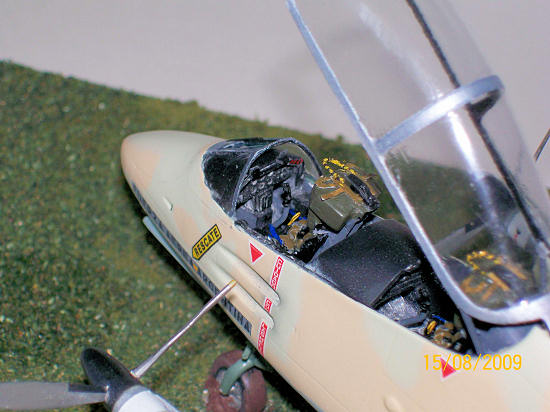 The Pucarás had a distinguished performance during the war, attacking the
ground troops from May 21st until June 10th. Rockets
and bombs along with the internal armament (4 x 7.62 machine guns and 2 x 20
mm cannons) were the usual armament, thought an attack with Napalm took
place on May 28th and another one was planned when the garrison
surrendered on June 14th. A testimony of the sturdiness of this
plane is the fact that only 3 Pucarás were shot down in combat: A-511 (Mj.
Tomba) shot down by the Sea Harrier of “Sharky” Ward, A-531 (Capt. Benitez)
by a Stinger missile, A-555 (Lt. Cruzado) by multiple small arms fire hits.
One Scout helicopter was shot down by Lt. Gimenez (A-537) but the pilot
crashed in small clouds against Blue Hill on the return leg. During the same
mission, Lt. Címbaro in A-532 claimed hits another Scout that had landed
trying to avoid the attacks of his Pucará. Due to its low speed and high
maneuverability, the Pucarás were able to follow every single evasive action
the helicopters were taking. Jeff Nibblet, having survived Címbaro’s
attacks, later stated that the Argentine planes were skillfully handled and
used their great speed range and maneuverability to attack the Scouts from
all angles, altitudes and speeds. They proved to be more difficult to evade
than jet planes.
In total, the Pucará Squadrons flew 103 sorties, suffered 3 planes shot
down, 4 captured in flying condition on June 14th and the rest
(18) were destroyed on the ground by air attacks, the SAS raid on Borbón/Pebble
Island or shelling by the ships of the Royal Navy.
In Foreign Service, the Pucará served in the Colombian and Sri Lanka Air
Forces and is still in service in the Fuerza Aérea de
In total, besides 3 prototypes, 105 units were produced. It can probably be
said that it has been one of the most successful design of the Fábrica
Militar de Aviones, along with the Pulqui II and the
Performance:
Max speed: 520 km/h
Ceiling 10,000 mt
Range 3040 kg.
Engines: 2 Turbomeca Astozou XVIG of 1022 shp.
Armament: A ventral station for up to 1,000kg and 2 stations on the wings for 500 kg of bombs, rockets, Napalm (for a grand total of 2,000 kg)
| THE KIT |
The Heritage kit is a multimedia one, with Photoetched, resin and vacuum
formed parts. Panels are incorrect in some areas; a little bit erratic I
would say sometimes, but overall a good starting point. It’s important also
to state that there were some areas broken in the left side cockpit wall in
the fuselage, too thin in others, and a couple of big bubbles close to the
tail area. There is lots of cleaning to do, specially to remove the resin
pouring stubs.
I bought the kit from a Uruguayan friend who lives in
| CONSTRUCTION |
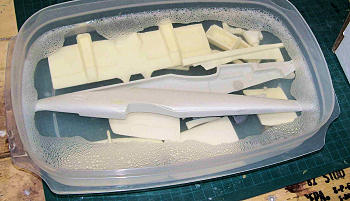 First step was to remove all the excess of
resin using a power drill (small one). It took me some time to finish it
(face mask, lots of dust in the air and the floor). Once this was
accomplished, I left the parts in water with detergent for a day, to make
sure the parts were as clean as possible.
One of the fuselage halves was slightly
warped and would not match the other half so I dip it in hot water to
correct it but to no avail. I then contacted the manufacturer by email, but
he was not able to tell me what water temperature would work best, or for
how long to leave it in the water (“don’t use too hot water and try several
times”).
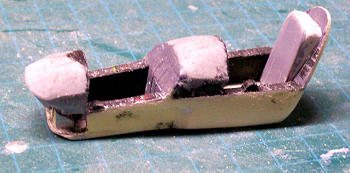 Then I moved to the cockpit. I brush
painted everything. Some considerable sanding was done to the backseat
instrument panel. Rudder pedals are fine; details in the cockpit are
acceptable. One thing that is missing in the back part of the cockpit is the
correct wall that would make the seat sit correctly. Using plasticard, I
scratch built this area and painted it in gray.
To make the front instrument panel fit and have the right profile, I sanded out HALF of the piece (top and bottom)! Lots of sanding, dry fitting and sanding again took place until this part fit in the cockpit and achieved the correct profile, with the right amount of panel area protruding from the sidewalls.
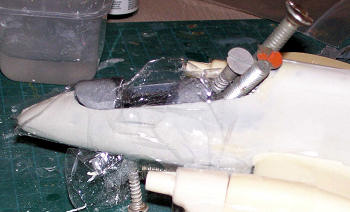 Before gluing the fuselage halves, I filled
the nose with nuts and bolts, “created“ some legs using screws, close the
fuselage and attached the wings using tape and tried to see how much weight
I had to add to the nose (forced to use this method as here again the
manufacturer was not able to give me an answer…There is no information in
the very basic and sketchy instructions). The tail is so heavy that not even
putting more metal on top of the seats the plane would sit on its front leg.
So I decided not to add any, and glue it to a base once finished. More of
this later…
I glued some plastic inside the cockpit
walls and then used two-part epoxy glue to make up the broken/missing areas.
Then, I finally was able to close the
fuselage halves. Because of the warping (fixed by sanding one of the
halves), then one side is
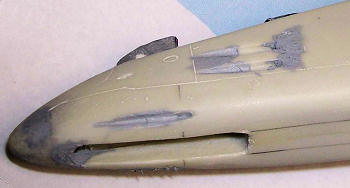 shorter than the other one. I decided to leave
this gap in the nose area, easier to fix with epoxy and sandpaper.
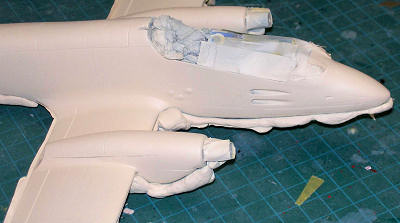
The dark yellow and gray (putty) areas are the epoxy. You can also note some missing panels and correct size of the 20 mm gun ports written with pencil. Also, the bumps in the machine guns access door are not present, just some oval marks (3 of them)
After modifying the machine cannons, I also extended the machineguns ports. The putty and part of the epoxy are seen in this picture of the opposite side of the nose
 Lots of putty and epoxy was required to
fill gaps here and there along the fuselage. New panel lines were made, and
some others corrected. The oval antenna under the fuselage was scratchbuilt
with plasticard. To make the 3 bumps covering the machine gun access panel,
I took some of the surplus engine cowling bumps from the 1/48th
Bloch 174 kit by Battle Axe, shaped them and glued them covering the oval
marks mentioned above. Some sanding and more putty were used to make a
smooth union.
More sanding was required to attach the central section of the wings, and of course, more epoxy and putty (plus sandpaper!). The engines were attached as well. Look at the areas where putty was required. The panels to access the top portion of the engines had to be scratchbuilt, as they were also missing.
Next I moved to the windshield. The shape
of the 3 sections is wrong. It looks more like a Me109 than a Pucara (the
side 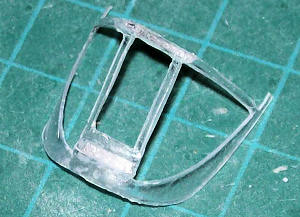 windshields should be rounded at the base, not straight as supplied in
the kit). As there are two vacuum formed sets supplied, I decided to fix the
shape of the 3 sections. Carefully, I cut out the plastic, leaving only the
frames, now with the correct profile. As this clear plastic is soft and some
areas in the central section are somehow straight, I added a couple of photoetched pieces in order to improve the shape.
I gave the frame a coat of black with the airbrush, and then one of aluminum. Using clear plastic from the box of a toy, I made again the side windshields and carefully glued it from inside. The central one, as it is colored, was made with plastic taken from the tabs you’d use for your office for hanging folders.
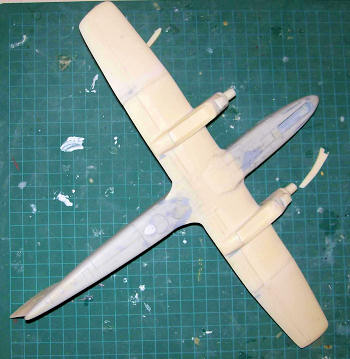 With some sanding of the mating surfaces, I
attached the external parts of the wings, taking care of achieving the
correct dihedral. I was forgetting: the circular panel under the fuselage
had to be moved forward, as the location in the kit is not correct. The tail
had been attached by then (vertical and horizontal, of course, with putty,
epoxy and sandpaper in high demand). Some panel lines were added in this
area as well.
To relax a little bit after so much
cutting, putty, epoxy and sanding, I moved to the external armament. Here I
used as a base the rocket launchers from an 1/48th Italieri A4-M.
As the planes during the war did n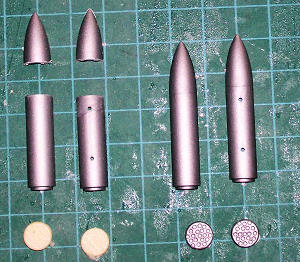 ot have the frontal cone, I cut it out and
made two more extremes using rubber molds and 1-minute resin (Araldite).
Once they were put together, I gave them a coat of light gray to check for
imperfections.
Next were the seats. Pretty nice straps and
details, except for the fact that the wider area close to the shoulders is
missing. I made some squares with plasticard, glued them in place, and used
Putty to 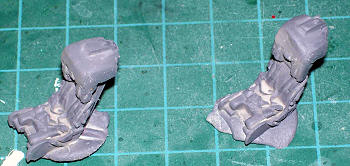 smooth the union. Here also a coat of light gray was used to check
for imperfections.
The pylons were glued in place and the
landing lights imbedded in them were made using pieces of clear plastic from
plastic sprue. I airbrushed in black some parts of the plane. And then gave
it a coat of Acryl RAF Interior Green to check for defec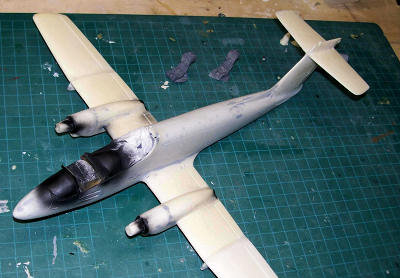 ts in the union of
parts, sanding, etc. This is also the color I picked for all internal areas
of the landing gear doors and bays.
To attach the windshield and have a step
less union, I had to carve out resin. Only then I was able to have a nice
mating of the parts. Later I still had
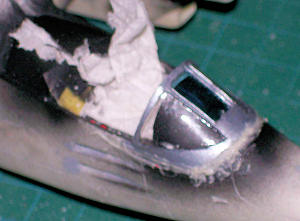 to use some putty to hide some gaps
in this area.
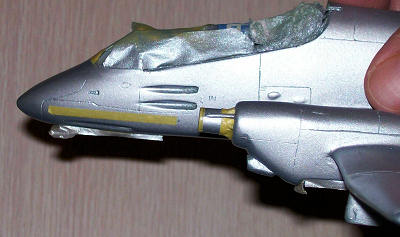
I now gave the whole kit a hand of Acryl Aluminum. With 2 coats of paint already, some of the panels I had marked were starting to get lost. Here you can see the nice union of the windshield I was able to achieve.
 The propellers blades (white metal) were
sanded to remove some imperfections, and some areas painted in black, tips
in yellow. The propeller hubs are supplied in resin and white metal, but the
resin ones are much better so I drilled 3 holes with a pin after painting
them in black. Using instant glue, I added the propellers to the hubs.
| COLORS & MARKINGS |
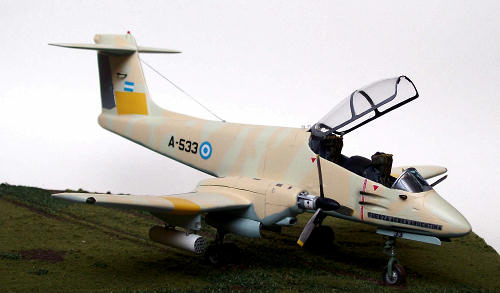
There are plenty of pictures of A-533 in
Internet, as she was displayed several times during her time in the Museum
in the
 I masked the parts that would remain
aluminum (spinners, rudder, inferior surfaces of the moveable parts). The
first cammo color was applied to the undersides. It was a mix of white and
RLM 78, following the directions found in a very nice article of Air Wars,
sponsored by Testors. With blue tac I masked this area and sprayed the top
sides using Radome Tan (4722 Acryl)
I masked the tan areas using more blue tack
an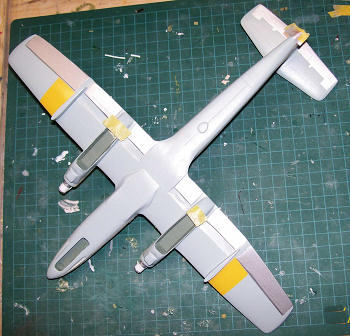 d sprayed the green (RLM 84).
The yellow ID bands were added.
I added the landing gear, minus the wheels,
and dry brushed some black in the area around the machine guns, cannons and
exhausts.
With a nice coat of several layers of
Future, I was ready to apply the decals.
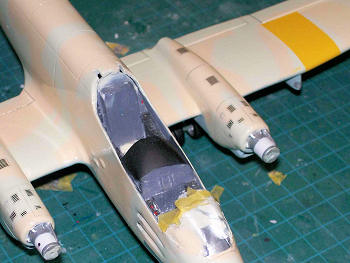 The screens in the engine cowling are
missing, and Heritage instead supplies decals. Once put in place, they don’t
look too bad. Probably a little bit too marked (overdone), but fine for me.
Decaling continued, adding some stencils, roundels and other details. The indicators on both sides of the engine “shaft” were cut from strips of decals of different colours and shapes.
 Thanks to Fabian Vera, I was able to get
the correct sized numbers and letters for my A-533.
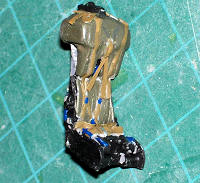
The seat was completed adding Tamiya tape to create some of the missing straps, especially in the top part of it.
Other details:
Before finishing with the decals, the
following bits were added:
 Venting tubes under the front part of the engine (the two largest ones in
plastic, the pipes with metal)
Venting tubes under the front part of the engine (the two largest ones in
plastic, the pipes with metal)I gave the kit a coat of satin clear varnish. Painted the navigation lights with Future to make them shiny. Painted the two white formation lights behind the top of the tail (a couple of blobs of glue were added first to give them some volume). Added the scratchbuilt brake lines to the main landing gear (2 on each) and then added the wheels.
Some structure was added inside the main nose wheel wells.
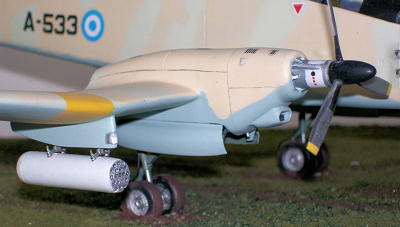 Heritage supplies very nice white metal
armament points of attachment. With these, I placed the rocket launchers
under the pylons.
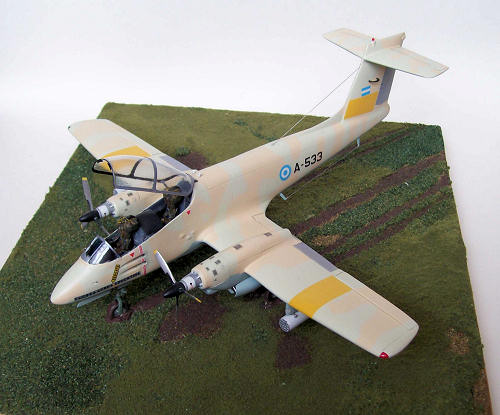
Then I made the base, using wood, drywall
compound to give it some “waves” and “dioramas grass” (3 different types
mixed in some areas). I made some “streaks” on the ground to simulate the
plane braking to a halt. These areas were painted in dark brown. Some Future
was added here and there to add some shininess (presence of water on the
ground).
I cut some holes thru the drywall compound,
where the wheels were going to sit, and added epoxy glue. The plane was
finally glued in place and I left if overnight with a support under the tail
until it was dry.
The epoxy and wheels were painted in the same dark brown mentioned above (mud). Fishing lane was used for the antenna that runs under the fuselage, and the one that goes from the tail to the top of the fuselage. They were then painted in aluminum with a brush.
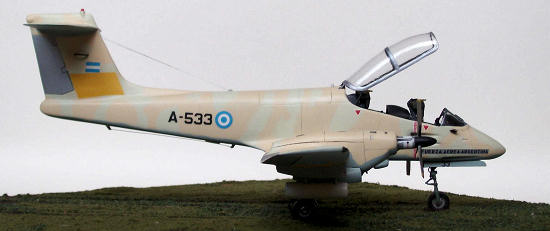
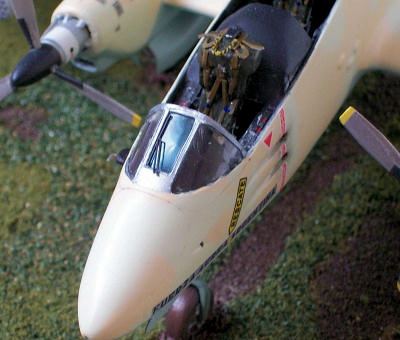
The canopy (with 2 scratch built mirrors)
was glued, adding some internal attaching points to the frame, like in the
actual plane. A couple of plastic pieces made the actuating arms.
The windshield wiper supplied with the kit (photo etched) was painted in black and glued in place.
And to finish almost 8 months of work, I added the two propellers. At last…my 1/48th Pucara project was over!
| CONCLUSIONS |
It took me many months to improve the basic
kit. I am very happy and satisfied with the end result. Of course, like it
always happens, once I was about to finish with it, a new kit from a
different manufacturer was launched (Mirage, which is superior to the
Heritage one in several aspects).
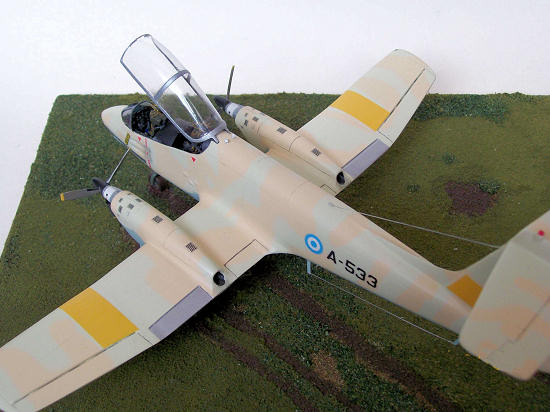
LOTS of work but a nice looking Pucara added to my collection of my recently built kits.
Thanks to Gabriel Bensusan, JMR, Rodolfo
Hub and Fabian Vera. To Charlie
Vernall for the picture of the plane in the
To Rodolfo Hub, a Pucara pilot in the war,
new Chief of Staff -
| REFERENCES |
IA-58A Pucara by Cettolo, Mosquera & Nunez
Padin (1997)
Historia Oficial de la Fuerza Aerea
FMA IA-58 Pucara, 30 anios en Servicio by Mosquera, Claria, Cettolo, Gebel, Marino y Posadas
March 2010
If you would like your product reviewed fairly and quickly, please contact me or see other details in the Note to Contributors.