Planet Models 1/72 GAF Nomad
| KIT #: | 227 |
| PRICE: | $57.26 |
| DECALS: | Two options |
| REVIEWER: | Peter Burstow |
| NOTES: | Resin kit with metal bits and vac clear bits |
The Government Aircraft Factory N.22
Nomad first flew in 1971, a twin engine STOL transport, it was developed to
maintain production at GAF after the Mirage contract was completed.
| THE KIT |
 hite
metal. Resin legs that thin would not support the model.
hite
metal. Resin legs that thin would not support the model.
| CONSTRUCTION |
Started as usual by cleaning up the
pouring lugs and flash, then washed the resin parts in warm soapy water.
Assembled the cockpit, a floor with centre console,
instrument panel and coaming, 2 seats, and two control wheels. I painted this
mostly light grey, with the instrument panel and console dark grey and then dry
brushed silver to pick up the moulded instrument detail. The seats are very
clearly visible so I made some seat belts from blue masking tape, and added a
drop of silver paint to represent the fittings.
 Built up
the passenger cabin, it's not really visible through the small side windows so I
didn't put a lot of effort into it. The floor was badly warped, A soak in hot
water and leaving it overnight between two blocks of wood sorted that. There
were 10 moulded markings for seats. References vary between 10 and 12
passengers, Planet split the difference and supplied 11 seats. I put 2 at the
front of the floor in an obvious space, and left out the seat just inside the
cabin door. Painted the inside of the cabin and the floor Tamiya XF-4 “yellow
green” a really noxious colour and one of the worse smelling paints I have ever
used. Painted the seats dark red for a bit of variety. The inside of the local
scrap yard example appears to be a sort of pale apple green, but is very faded
and flaking.
Built up
the passenger cabin, it's not really visible through the small side windows so I
didn't put a lot of effort into it. The floor was badly warped, A soak in hot
water and leaving it overnight between two blocks of wood sorted that. There
were 10 moulded markings for seats. References vary between 10 and 12
passengers, Planet split the difference and supplied 11 seats. I put 2 at the
front of the floor in an obvious space, and left out the seat just inside the
cabin door. Painted the inside of the cabin and the floor Tamiya XF-4 “yellow
green” a really noxious colour and one of the worse smelling paints I have ever
used. Painted the seats dark red for a bit of variety. The inside of the local
scrap yard example appears to be a sort of pale apple green, but is very faded
and flaking.
I packed
the nose area and the spaces around the nose undercarriage bay with lead shot
and superglue, not sure how much, I just kept adding shot till it was full,
probably about 20 grams. Joined up the fuselage, got a good match along the top
and a small step about midway along the underside. Filled the joint with
superglue and sanded clean. Added the lower stub wings, main wheel housings and
rudder, nothing was a great fit, and had another fill with Mr Surfacer and a
sand session.
 he
wing tips, needed a lot of carving and sanding to clean up, and I lost a lot of
detail in the process. I toyed with the idea of adding a spar, ended up just
butt jointing them, then added the struts.
The location for the tailplane was too high and too far
back, so I drilled a new hole through the fin, and holes in the tailplane
halves. Made a new spar from 1mm brass rod, and mounted the tailplane.
he
wing tips, needed a lot of carving and sanding to clean up, and I lost a lot of
detail in the process. I toyed with the idea of adding a spar, ended up just
butt jointing them, then added the struts.
The location for the tailplane was too high and too far
back, so I drilled a new hole through the fin, and holes in the tailplane
halves. Made a new spar from 1mm brass rod, and mounted the tailplane.
I then added some of the small detail items, first two bulges under the wings, I have only seen these in a photo of the first prototype under test, so not sure if they were present in the production models. Then eight shark fin like objects under the wings, I guess they are actuator housings, and then a scoop on top of each engine, these were not shown in the instructions, but obvious in photographs of the aircraft.
| COLORS & MARKINGS |
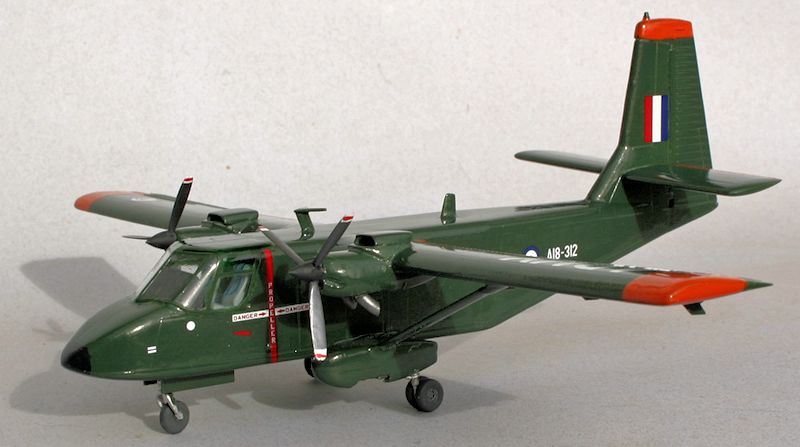
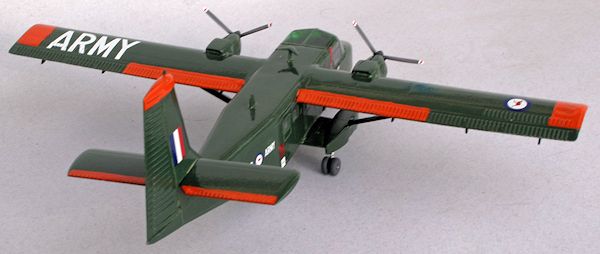
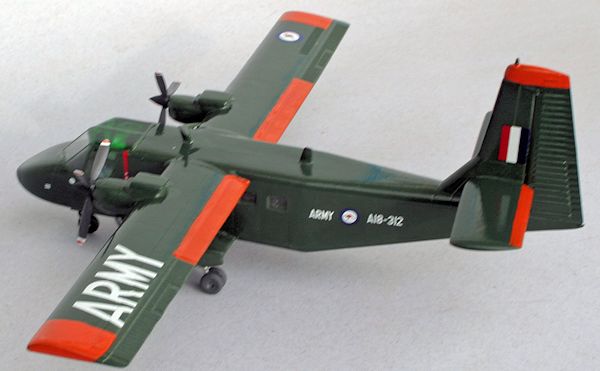
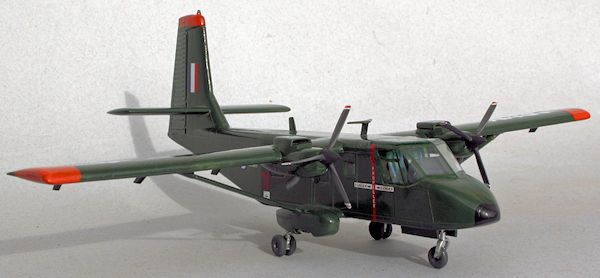
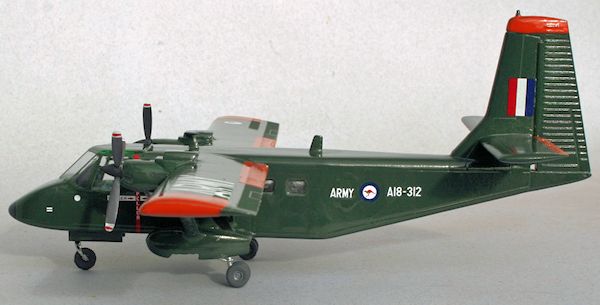
I went with the Australian Army
version supplied with the kit, a easy all dark green scheme. Masked the cockpit
and didn't bother with the cabin windows.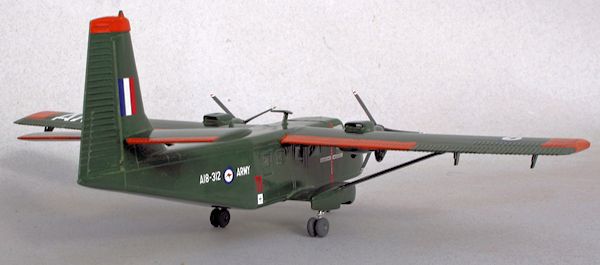 primer,
showed up a lot of places that needed fixing, especially the stub wing to
fuselage joint, which had already had a couple of fills and sands. It also
highlighted a few bubbles, the edges of the wing struts being really bad and
needing a lot of work.
primer,
showed up a lot of places that needed fixing, especially the stub wing to
fuselage joint, which had already had a couple of fills and sands. It also
highlighted a few bubbles, the edges of the wing struts being really bad and
needing a lot of work.
| FINAL CONSTRUCTION |
I then added the white metal
undercarriage legs, all that lead worked, it's not a tail sitter, but only just.
Hit another snag, the nose wheel leg is too short, or the main legs too long, as
the stance is very nose down. I soldered a length of copper wire to the nose
wheel fork, and adjusted the length till it sat better.
 Not a
bright choice, the melting point of white metal is about the same as solder, and
I melted part of the leg. Superglue would have done the job OK. Then added the
nose undercarriage doors. There were no main wheel doors supplied, and my photos
show them on some civil aircraft, but not on Australian Army planes, so I
decided they weren’t needed. I didn't use the four resin oleo forks supplied,
really were too small to handle, and nearly invisible between the main wheels.
Not a
bright choice, the melting point of white metal is about the same as solder, and
I melted part of the leg. Superglue would have done the job OK. Then added the
nose undercarriage doors. There were no main wheel doors supplied, and my photos
show them on some civil aircraft, but not on Australian Army planes, so I
decided they weren’t needed. I didn't use the four resin oleo forks supplied,
really were too small to handle, and nearly invisible between the main wheels.
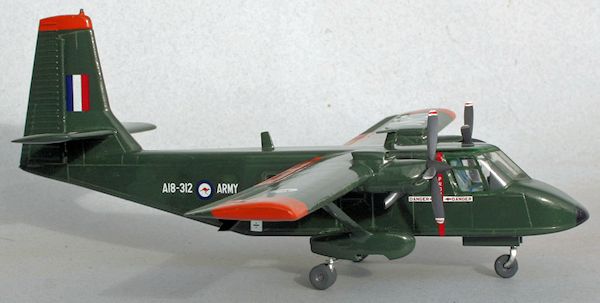
A bit more detail
painting in the cockpit, then added the vac-formed canopy. I hand painted the
framing with decanted rattle can green, as I have had trouble trying to match
these colours in the past. Painted the top of the canopy Tamiya X-25 'clear
green', there is a bit of variation in this panel, some aircraft have it as
solid, some clear and some tinted. I used Krystal Klear for the side windows. At
this point I noticed the extra windows, so the Klear got carved out and the
holes filled with two part automotive body putty. Another sanding session, and a
respray of the rear section of the fuselage.
Decided to add
some orange panels to give a bit of interest to the model, it looked very dull.
Should have painted them first, as it needed four coats to cover properly.
 Used the
kit supplied decals which worked fine with a little setting agent. I rearranged
the 'ARMY' wing logo and the roundels to match one of the photos. There was a
lot of variation on Army Nomads, logos come and go, as do the orange panels. I
found 5 pictures of A18-312 and all are different. Then an overall coat of floor
wax to seal the decals.
Used the
kit supplied decals which worked fine with a little setting agent. I rearranged
the 'ARMY' wing logo and the roundels to match one of the photos. There was a
lot of variation on Army Nomads, logos come and go, as do the orange panels. I
found 5 pictures of A18-312 and all are different. Then an overall coat of floor
wax to seal the decals.
Then added the five wheels, which had nice resin hub detail moulded on one side only. Hit another snag, the metal axles were too short on the main wheel legs, so I glued the tyres onto the legs instead. The nose wheel fork was far too large for the tyre so I had to squeeze it in, then again glued the wheel tyre rather than the hub. Had to touch up the paint on the wheels again. Last step was adding the propellers.
| CONCLUSIONS |
A fairly simple
build of a high quality and expensive resin kit of a small and relatively
obscure airliner. Lots of small resin detail parts. A few fixes needed, but easy
to deal with. The model is let down with a few inaccuracies, especially the
windows. The build was a lesson in checking references before starting a build.
It is interesting to compare to other
aircraft, in the general class of Dragon Rapide / Beech 18 replacements, like
the Beech King Air, DHC Twin Otter and the Britten-Norman Islander. All very
similar except for the minor matter of sales figures. This plane has a local
connection for me, I can see the factory it was built in from my kitchen window,
and I watched them test flying in the 70's.
Recommended for
all, especially those who enjoy filling and sanding.
| REFERENCES |
http://en.wikipedia.org/wiki/GAF_Nomad
http://www.airforce.gov.au/raafmuseum/research/aircraft/series3/A18.htm
December 2013
Copyright ModelingMadness.com. All rights reserved. No reproduction in part or in whole without express permission from the editor.
If you would like your product reviewed fairly and fairly quickly, please contact the editor or see other details in the Note to Contributors.