
| HISTORY |
Dragon 1/48 M48 Patton
| KIT #: | 3544 |
| PRICE: | #55.00 |
| DECALS: | Four options |
| REVIEWER: | Donald Zhou |
| NOTES: | Advantages: Easy Buildup, New Tooling, good selection of markings. Disadvantages: No canvas mantlet covering, no search light. |
| HISTORY |
The M48 Patton was the United States Army first MBT or Main Battle Tank. Developed in the 1950’s and first entering service in 1952, the tank was an evolutionary development of the M46 and M47 and was designed to replace both in Army service. Over 12,000 M48 were produced, mainly by Chrysler Corp. and American Locomotive Corp. (ALCO) before being superseded and then replaced by the M60 in the early 60’s.
 The main
spur that caused the development of the M48 was the Russian new T54. First
glimpse of this new tank were seen in the 1950’s, although it was plagued by
developmental problems, this spurred the West to quickly develop a counter.
The main
spur that caused the development of the M48 was the Russian new T54. First
glimpse of this new tank were seen in the 1950’s, although it was plagued by
developmental problems, this spurred the West to quickly develop a counter.
For the Americans, the tanks that was supposed to replace the M26/M46 series were always supposed to be the T42. But after that vehicle ran into serious developmental problems, the Army decided to just slap its turret onto a M46 chassis and call it a day, thus was born the M47.
Still, the Army had always viewed the M47 as an interim solution while the real replacement was (started, stopped) developed.
The M48 was developed from the M47. The hull was revamped. The right radio operator/bow machine gunner was completely dropped (in fact, for the M47E/M, this space was eventually closed down also), the driver was moved to the center of the front hull, a position that is still kept for today’s M1 Abrams. The front of the hull became a boat shaped roundel and slightly longer. The rear was completely changed (and later adapted to the M47E/M) with a new Continental AV-1790 producing 690 HP coupled to an Allison CD-850-4A transmission. This necessitated a complete redesign of the vehicle hull back. Eliminated was the two track tension wheels. The mufflers were moved from the back sponsons to the right rear end grill. Due to the engine’s power, extra air filters were added in place of the mufflers.
The turret was completely revamped. A new frontal shape that give the turret more protection and eliminated the shot trap of the M47 was added with more armor protection. The turret was now more of a “frying pan” shape than the M47. The main gun was the improved T139, coupled to the M41 90mm cannon with a co-axle machine gun. The gun is aimed with both a coincidental and stereoscopic range finder and probably the world’s first fire control system.
The commander cupola was unique since it was also a turret. Various designs were implemented before settling on the M1 tank cupola mount with multiple vision blocks beneath and a M2 .50 cal mount on top. The commander can fire the M2 while under cover. Overall, the M48 eventually evolved into all sorts of versions with some outrageous improvements such as the Israelis Machachs and the M48A5 with the M68 105mm main gun.
 Overall,
the M48 was a great success and gave many years of great service until
replaced by the M60. It served throughout the Vietnam War, where it was used
for landmine clearing because it was so well protected. A Russian anti-tank
mine can and will blow something lighter like the M551 Sheridan or a M113
APC. But if the M48 hit one, all it will do is blow off a road wheel and its
arm, and the M48 can still operate with at least two missing on a side. The
biggest conflict the tank will see is with the Israelis, who used the tank
with great success against their Arab neighbors all the way through the Yom
Kippur War. Although the tank suffered grievous losses in that war due to
man portable anti-tank weapons to the point some even said the tank was
obsolete, the Israelis kept on improving the tank until it was superseded
and replaced by their own Merkava tanks. The Jordanians, who also used the
M48, faired much worse, mainly due to bad tactics and training. Same with
the M48 used by the Pakistanis in the Indo-Pakistani wars. Even the
Pakistanis admitted their losses were generated more by bad tactics and poor
training, showing that it’s always the man in the tank that matter, not the
machines. Today, the tank is still in service with countries such as Taiwan,
Thailand, Turkey, and Iran etc. The tank is still in service in German as a
mine suppression vehicle and the U.S. as the completely modified M88
recovery vehicle. Fun fact, there was a plan to actually replaced the M88
with a recovery vehicle based on that of the M1 hull but one of the reason
that was dropped was not only the Cold War went PFFFFTTTT, but also there
was a huge fear that the M1 crews will start to raid their M88 brethrens for
spares and eventually will strip them down dry!
Overall,
the M48 was a great success and gave many years of great service until
replaced by the M60. It served throughout the Vietnam War, where it was used
for landmine clearing because it was so well protected. A Russian anti-tank
mine can and will blow something lighter like the M551 Sheridan or a M113
APC. But if the M48 hit one, all it will do is blow off a road wheel and its
arm, and the M48 can still operate with at least two missing on a side. The
biggest conflict the tank will see is with the Israelis, who used the tank
with great success against their Arab neighbors all the way through the Yom
Kippur War. Although the tank suffered grievous losses in that war due to
man portable anti-tank weapons to the point some even said the tank was
obsolete, the Israelis kept on improving the tank until it was superseded
and replaced by their own Merkava tanks. The Jordanians, who also used the
M48, faired much worse, mainly due to bad tactics and training. Same with
the M48 used by the Pakistanis in the Indo-Pakistani wars. Even the
Pakistanis admitted their losses were generated more by bad tactics and poor
training, showing that it’s always the man in the tank that matter, not the
machines. Today, the tank is still in service with countries such as Taiwan,
Thailand, Turkey, and Iran etc. The tank is still in service in German as a
mine suppression vehicle and the U.S. as the completely modified M88
recovery vehicle. Fun fact, there was a plan to actually replaced the M88
with a recovery vehicle based on that of the M1 hull but one of the reason
that was dropped was not only the Cold War went PFFFFTTTT, but also there
was a huge fear that the M1 crews will start to raid their M88 brethrens for
spares and eventually will strip them down dry!
| THE KIT |
 See
Scott’s review of the same kit
here. I bought the same kit. This kit first came out in 2013 and
instantly put all other M48 kits to shame! With good reason! The kit is
ultra-modern, with great casting, enough parts to get the mojo moving but
unlike so many other over engineered Dragon kits, not so much as to
completely overwhelm you. I have the ancient Tamiya kit…In fact, it was that
kit that forced me to buy this one cause of how ancient that kit was and
still is. This kit offers all the clear parts, unlike the Tamiya one and
most importantly, there are no holes on the bottom cause kit manufactures
have stopped their fascination with motorization a long time ago. Still,
there are quite a few things missing…Which Dragon corrected with their
second version of the tank…Which are also at least $20 more expensive! Sigh,
this forced me to buy Legends production resin canvas mantlet cover and
search light…And as you are about to hilariously find out, I made a huge boo
boo with that purchase! LOL!!!!!! **Smiley face**
See
Scott’s review of the same kit
here. I bought the same kit. This kit first came out in 2013 and
instantly put all other M48 kits to shame! With good reason! The kit is
ultra-modern, with great casting, enough parts to get the mojo moving but
unlike so many other over engineered Dragon kits, not so much as to
completely overwhelm you. I have the ancient Tamiya kit…In fact, it was that
kit that forced me to buy this one cause of how ancient that kit was and
still is. This kit offers all the clear parts, unlike the Tamiya one and
most importantly, there are no holes on the bottom cause kit manufactures
have stopped their fascination with motorization a long time ago. Still,
there are quite a few things missing…Which Dragon corrected with their
second version of the tank…Which are also at least $20 more expensive! Sigh,
this forced me to buy Legends production resin canvas mantlet cover and
search light…And as you are about to hilariously find out, I made a huge boo
boo with that purchase! LOL!!!!!! **Smiley face**
| CONSTRUCTION |
 Construction
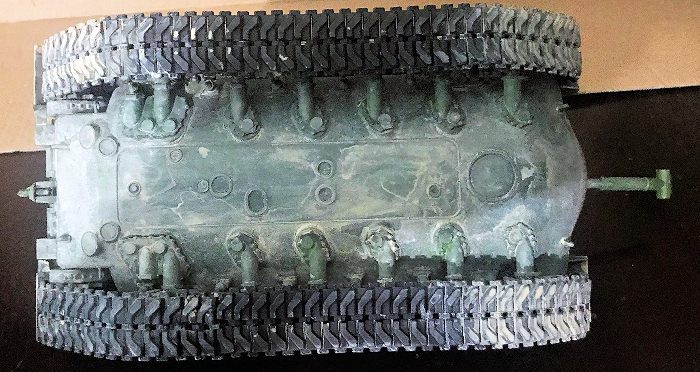
begins with all the running gears like every other major armor kits out
there. Again, like all Patton series of tanks, the running gears are
complex, especially since the inner wheel hubs and the tires are separated.
I cemented these on and attached all the road arms, the volute suspension
systems and hydraulic shock absorbers. Most of the hull was spent on this so
take your time.
Construction
begins with all the running gears like every other major armor kits out
there. Again, like all Patton series of tanks, the running gears are
complex, especially since the inner wheel hubs and the tires are separated.
I cemented these on and attached all the road arms, the volute suspension
systems and hydraulic shock absorbers. Most of the hull was spent on this so
take your time.
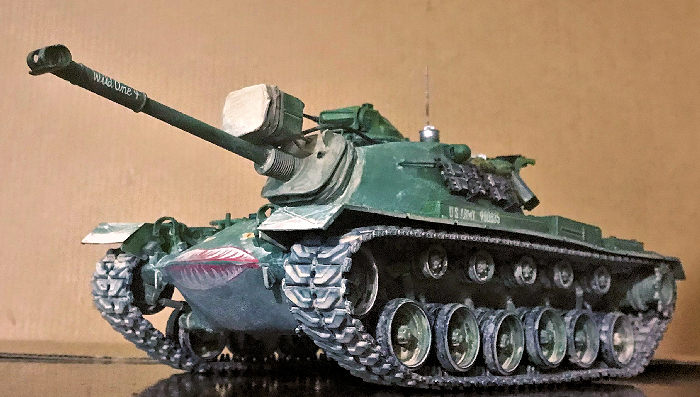
The turret begin with the gun…Since most M48 carried the canvas cover mantlet, I ordered the Legend production one….And didn’t read the description at all….It was only after it arrived with the resin searchlight that I found out why it did not fit the kit! It’s meant for the TAMIYA kit!!! Not this one!!! DOOOOOOHHHH!!!! DOOOOOHHH!!! DOOOHHHHH!!! DOOOHHH!!! Head, meet wall again and again and again!!! Sigh, I decided I can make it work by using superglue….Globule after globules of it and lots of stretched sprue to fill up the gap, shorten and cut the gun tube to correct size and length and then putty up the rest. It’s also the reason it stayed up on the shelf of doom for a year before it came down again so I can complete my “70+ years of U.S. Army tank development” run.
Anyways, after that brouhaha, I actually got the mantlet down pretty pat. The stretched sprues look like the ribbings on the real thing…It’s just about ¼ inch too long that’s all but guess most people won’t be able to tell. I bought the rest up quickly. I did not cement on the clear parts or parts that look like carpet monster food until later. To the paint shop….Finally….
| COLORS & MARKINGS |
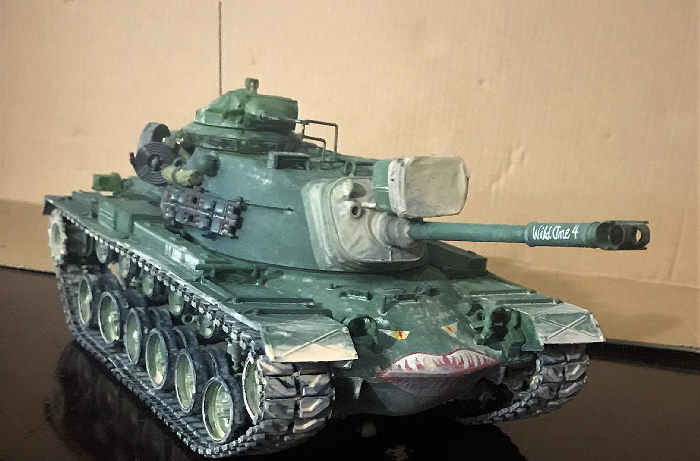
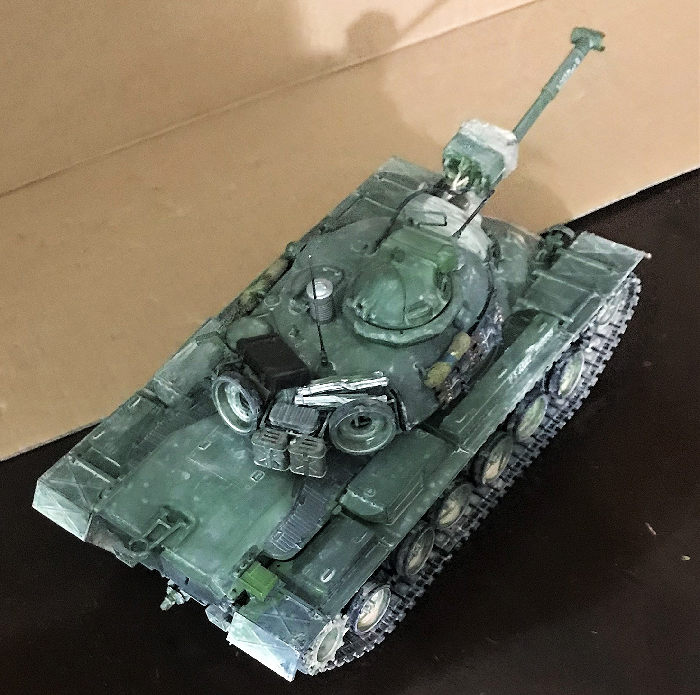
There are four markings and as Scott said, most people, including me, picked up the shark mouth option. I used the Tamiya shark mouth instead since it’s a little thicker and tougher so went down better. I applied the rest after I got the initial medium green from Testor’s down. I was able to locate a second bottle so it will last me awhile. I painted the canvas cover dark yellow. The road wheels are the same colors as the main body, with flat black rims. Afterwards, the tracks went on so they can be weathered at the same time. Weathering is my usual methods. This time, however, since I’m modeling a tank serving in the Mekong Delta, I heavily dusted it up, with the running gears and bottom hull heavily muddied up with earth tones and light sand since I would wager this thing took a mud bath at least one time a day! After all of that, final assembly can begin.
| FINAL BITS |
 The
first thing are all the clear parts. These were added no problem. The
commander cupola took some work since the bottom viewing windows are a
single clear piece, it will be tough to tape it up so I just eye ball it and
painted it that way. It worked out well since the windows’ edge are sharp
and I can lay down the brush clearly so I didn’t mar any of the windows.
Afterwards, the cupola was assembled without any problems. The hatch can be
made movable if you are careful. Lastly, I painted the machine gun barrel
gun metal and attached it to the cupola to complete it.
The
first thing are all the clear parts. These were added no problem. The
commander cupola took some work since the bottom viewing windows are a
single clear piece, it will be tough to tape it up so I just eye ball it and
painted it that way. It worked out well since the windows’ edge are sharp
and I can lay down the brush clearly so I didn’t mar any of the windows.
Afterwards, the cupola was assembled without any problems. The hatch can be
made movable if you are careful. Lastly, I painted the machine gun barrel
gun metal and attached it to the cupola to complete it.
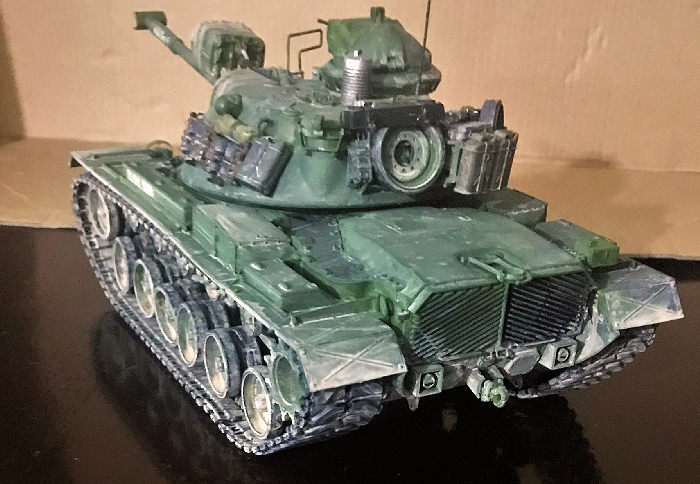
The good thing about my Legend Production purchase is that it also came with a bunch of goodies including: a 4 gallon hot meal mess tin, a 3 gallon hot/cold liquid container, some .50 and .30 cal ammo boxes and two folding cots. From my Tamiya M48 kit, I stole some spare tracks, two ruck sacks, the spare road wheels and then sourced two more jerry cans elsewhere. I painted them and weathered them before locating them throughout the turret. The spare tracks on the cloth hangers, the spare wheels on the back end of the bustle rack with the jerry cans. The hot food tin was squeezed into the extra stowage space and the rest into the rack itself. Finally, I located the long electrical wire that connects to the search light. Tamiya kit offers this and it’s too long so I cut out half of it and attached it to this kit. Model done!
| CONCLUSIONS |
So, now that I’m finally finished with this, I’m itching to get the M47/G kit to dole it up as a U.S. Army piece to fit in my “70+ years of U.S. Army Tank development” series. Not only that, my Takom M-60A3 with the M9 tank-dozer blade just arrived so all of my tanks in my “70+ years of U.S. Army tank development” run are here! This is a good kit but a major cash grab since dragon did not offer the canvas mantlet and the search light till the next boxing, which led me through one hell of a mess of a brouhaha! But despite that, it’s really nice looking alongside my M4 Shermans through all of my M1 Abramses.
Only
I r
Aft
The VecWildcat V are very noticeable indeed, especially the width of the cowling opening and the tall rudder.
3 December 2021
Copyright ModelingMadness.com. All rights reserved. No reproduction in part or in whole without express permission.
If you would like your product reviewed fairly and fairly quickly, please contact the editor or see other details in the Note to Contributors.