| KIT #: | 35365 |
| PRICE: | $62.00 |
| DECALS: | Two options |
| REVIEWER: | Dan Lee |
| NOTES: | Tamiya Detail Set (metal barrel and photo-etch) |
| HISTORY |
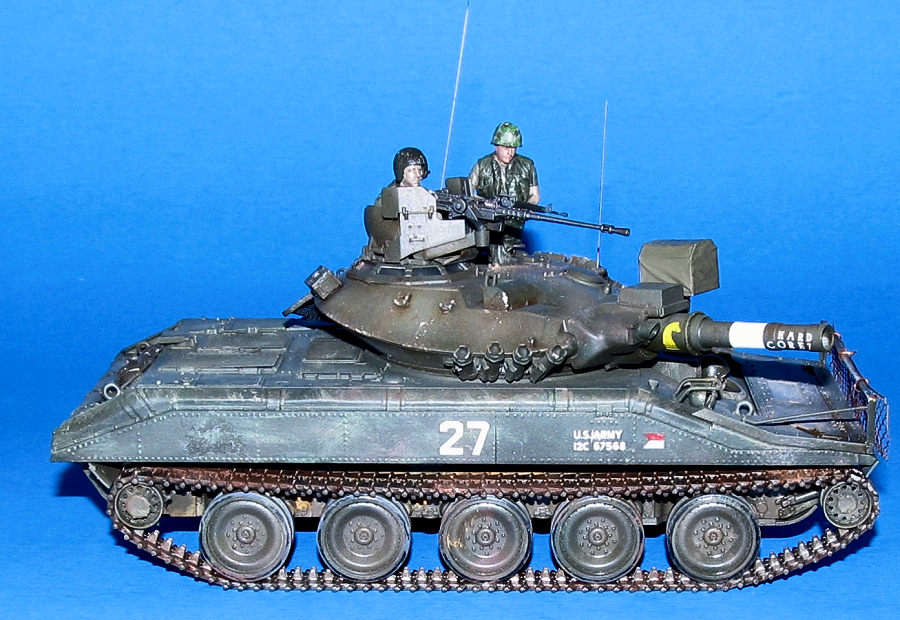
The M551 "Sheridan" AR/AAV (Armored Reconnaissance/Airborne Assault Vehicle) was a light tank developed by the United States and named after General Philip Sheridan, of American Civil War fame. It was designed to be landed by parachute and to swim across rivers. It was armed with the technically advanced but troublesome M81/M81 Modified/M81E1 152mm gun/launcher, which fired both conventional ammunition and the MGM-51 Shillelagh guided anti-tank missile.
The M551 Sheridan entered service with the United States Army in 1967. At the urging of General Creighton Abrams, the U.S. Commander of Military Forces in South Vietnam at the time, the M551 was rushed into combat service in Vietnam in January 1969. In April and August 1969, M551s were deployed to units in Europe and South Korea, respectively. Now retired from service, it saw extensive combat in the Vietnam War, and limited service in Operation Just Cause in Panama, and the 2nd Persian Gulf War liberating Kuwait.
 The
Sheridan was retired without replacement officially in 1996. A large bulk of
Sheridans were retained into service at the National Training Center (NTC) at
Fort Irwin, California and as Armor Officer Basic training at Armor Training
Center, then located at Fort Knox, Kentucky. They worked as simulated “Red”
armored opposition force (OPFOR) to train U.S. military units on simulated tank
on tank armored combat to test on combat effectiveness in a desert environment.
They were finally retired from the NTC in 2003.
The
Sheridan was retired without replacement officially in 1996. A large bulk of
Sheridans were retained into service at the National Training Center (NTC) at
Fort Irwin, California and as Armor Officer Basic training at Armor Training
Center, then located at Fort Knox, Kentucky. They worked as simulated “Red”
armored opposition force (OPFOR) to train U.S. military units on simulated tank
on tank armored combat to test on combat effectiveness in a desert environment.
They were finally retired from the NTC in 2003.
The Sheridan had mixed results in combat during the Vietnam War. It's mobility and firepower were appreciated by the infantry in the rough terrain as standard tanks had a hard time in the jungle terrain as they were too heavy and prone to throwing tracks. However, it's pitiful armor, caseless ammo and low engine power were not appreciated by the crews. It was vulnerable to mines and RPGs/anti tank rockets and its caseless ammo propellant had a tendency to ignite if struck by fragments from a RPG warhead. It's complex targeting electronics usually ended up failing due to the climate and rough handling which didn't matter as they weren't really needed as the Sheridan rarely faced enemy armor.
The Sheridan had the same problem as the M113 in which its aluminum armor would ignite/melt if a hit caused temperatures to reach the melting point of aluminum. It's steel turret could deflect .50 caliber rounds, but could not stop RPGs. Crews began to improvise with screens made of chicken wire to prematurely detonate RPG rounds.
It wasn't exactly a big hit with Congress either as the project ended up having cost overruns in the range of $1.2-1.3 billion during the low inflation 1960s.
Info from Wikipedia
| THE KIT |
 In the past
Tamiya had already molded this AFV before. However, it had some details missing
and had shape issues that upset many a Sheridan expert. The Academy kit was
supposed to be newer and better, but it suffered shape and errors too. This new
release by Tamiya is supposed to have corrected most if not all the issues
suffered by the earlier releases.
In the past
Tamiya had already molded this AFV before. However, it had some details missing
and had shape issues that upset many a Sheridan expert. The Academy kit was
supposed to be newer and better, but it suffered shape and errors too. This new
release by Tamiya is supposed to have corrected most if not all the issues
suffered by the earlier releases.
The kit comes on five sprues of olive drab plastic (four unique sprues and one duplicate for the set of wheels and tracks) one clear sprue for the lights and windows, nylon mesh for the RPG screen and one piece of string for the tow cable. It is a typical Tamiya kit that is well molded and free of flash. There are no rubber tracks as they used link and length style tracks instead.
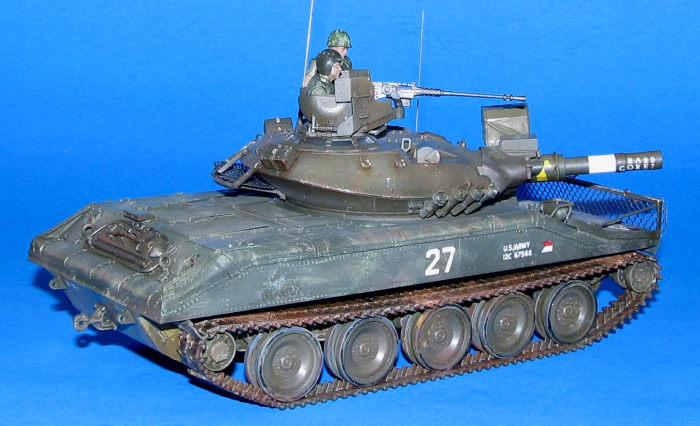
There is also a separate upgrade set that includes a metal barrel, photo-etch grills and a photo-etch chain link grill for the RPG screen.
| CONSTRUCTION |
 I began the
kit by building the turret. It is a straight forward assembly that isn't
complicated. The metal barrel didn't need any glue as it is a tight fit into the
gun breech. However, I did leave off certain parts like the covered IR
searchlight and the ammo boxes because they would be painted differently than
the rest of the turret. Tamiya should be commended for making it easy to add the
smoke dischargers using numbered tabs to ID which one goes where.
I began the
kit by building the turret. It is a straight forward assembly that isn't
complicated. The metal barrel didn't need any glue as it is a tight fit into the
gun breech. However, I did leave off certain parts like the covered IR
searchlight and the ammo boxes because they would be painted differently than
the rest of the turret. Tamiya should be commended for making it easy to add the
smoke dischargers using numbered tabs to ID which one goes where.
Next I built the upper and lower hulls separately. The clean up of the mold marks and sprue nubs off the wheels was the most tedious part of the build. Again, I left all the the parts that were going to painted differently like the light lenses, the wheels and the RPG screen. I did add the photo-etch grills for the engine though.
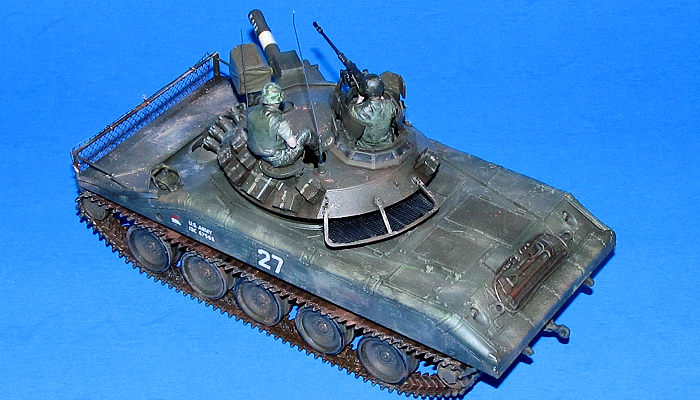
The crew figures were glued together. Tamiya did a decent enough job with these that they didn't require much filler except a small dab of plastic putty around the shoulders.
| COLORS & MARKINGS |
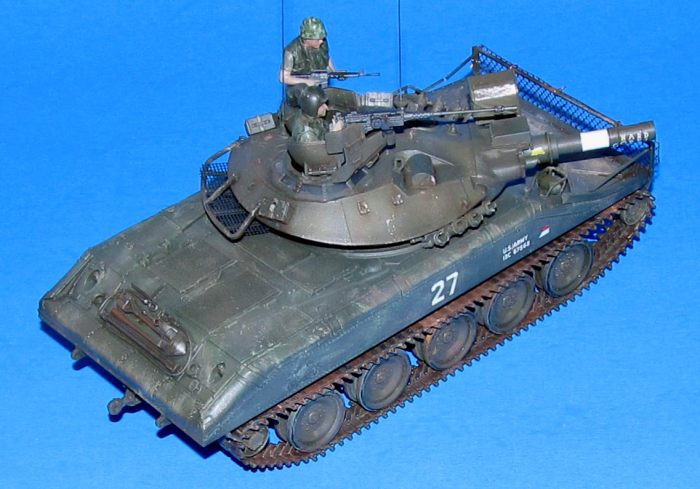 I decided to
use the markings on the box from the 3/4th
Cavalry Regiment 25th Infantry Div.
US Army so the entire model and parts were primed first with Badger Black
Stynylrez primer. Once it was dry, I sprayed the turret and main hull with
Tamiya Olive Drab XF-62 in a light blotchy coats. I also sprayed on extra
thinned mixtures of Dark Green on the bottom and Flat Green on the top to give
evidence of wear and sun fading. I sprayed the wheel interiors with OD, dark
green and thinned Buff trying to keep the paint off the black/rubber areas.
I decided to
use the markings on the box from the 3/4th
Cavalry Regiment 25th Infantry Div.
US Army so the entire model and parts were primed first with Badger Black
Stynylrez primer. Once it was dry, I sprayed the turret and main hull with
Tamiya Olive Drab XF-62 in a light blotchy coats. I also sprayed on extra
thinned mixtures of Dark Green on the bottom and Flat Green on the top to give
evidence of wear and sun fading. I sprayed the wheel interiors with OD, dark
green and thinned Buff trying to keep the paint off the black/rubber areas.
The tracks parts were sprayed with metal grey and the rubber pads were brush painted NATO black. The .50 machine gun was painted gunmetal.
Once the paint was dry, I added the decals. They went on over the details with a bit of help from MicroSol and Solvaset.
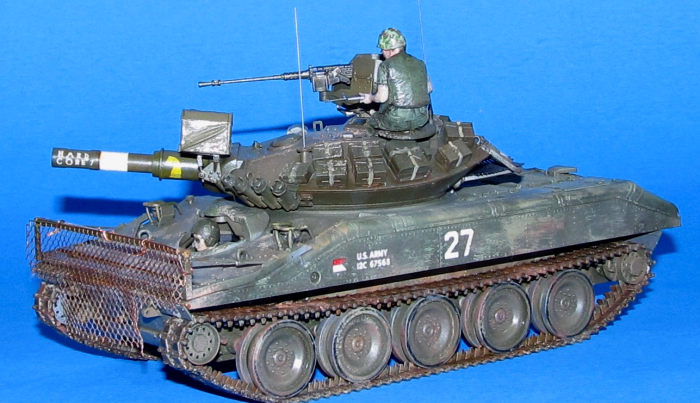
Once the decals were dry, I began to weather it using a combination of weathering powders (Vietnam mud red, dark earth and standard dust.) I left off rust on the hull because most of the Sheridan was made up of aluminum except the turret which got a little bit of rust.
I then used a light oil based wash to blend everything together. Doing this work took time and it make a mess of things at my work bench. Not to mention the fumes which I vented out. Lastly, I used a worn brush to dab paint (desert yellow and red brown) where it would emulate muddy boot prints.
| FINAL CONSTRUCTION |
 After
weathering, the tracks were glued in place. I found that link and length
isn't my favorite method of doing AFV tracks. Some people find it easy, but
I found it just as fiddly as individual links which I actually prefer. I
think it is because the damn things would fall apart with even gentle
handling. I rarely had that issue with link/pin tracks. Next time I'll use
faster setting CA glue instead of Tamiya Extra Thin Cement to secure the
tracks to the wheels.
After
weathering, the tracks were glued in place. I found that link and length
isn't my favorite method of doing AFV tracks. Some people find it easy, but
I found it just as fiddly as individual links which I actually prefer. I
think it is because the damn things would fall apart with even gentle
handling. I rarely had that issue with link/pin tracks. Next time I'll use
faster setting CA glue instead of Tamiya Extra Thin Cement to secure the
tracks to the wheels.
The painted and weathered machine gun assembly was glued together and mounted in place. All the clear parts (lenses and windows) were also added at this time. I weathered the windows to make them look dirty and worn while I pretty much left the periscopes and lenses clear.
I added the RPG screen to the frame. I bent up the screen to make it look like it ran through the jungle while scuffing the paint and adding rust. I secured the metal screen with a few tiny dabs of CA glue.
The figures were brush painted the best I could. I used various tones of green and yellow to make the clothes look sun faded and dirty especially the pants. My flesh figure painting skill is mediocre so I did my best to make them look almost human by varying the flesh tones to make one look tanned except around the shoulders and neck and another one look red. I used pin washes of Tamiya dark brown to make detail stand out. I glued the figures in place as per the instructions.
I added some cut lengths of thin metal wire to represent the various radio antenna on the Sheridan and glued them in place using CA glue.
| CONCLUSIONS |
The Tamiya M551 Sheridan makes into a really nice looking representation of the flawed M551 Sheridan. The link and length tracks didn't work out as well as I thought, but that could be the reviewer not being used to using them. Otherwise, this is definitely a Tamiya armor kit that is accurate enough, has enough detail to look the part and is easy to assemble. Fun for all levels of modeler skill/experience.
10 September 2021
Copyright ModelingMadness.com. All rights reserved. No reproduction in part or in whole without express permission.
If you would like your product reviewed fairly and quickly, please contact the editor or see other details in the Note to Contributors.