Dragon Black Label 1/35 M-103A1
| KIT #: | 3548 |
| PRICE: | $69.95 |
| DECALS: | Three options |
| REVIEWER: | Robert Myers |
| NOTES: |
|
| HISTORY |
 The Heavy Tank M103 was used by both the United States Army and Marine
Corps from 1957 through 1963 (Army) and 1974 (Marine Corps). At 62 tons it was
the heaviest and most heavily armed tank in US service until the M1 Abrams main
battle tank. The M103 was never used in combat, but was formed into the heavy
armor battalions stationed in Germany during the cold war. They were replaced by
M60s.
The Heavy Tank M103 was used by both the United States Army and Marine
Corps from 1957 through 1963 (Army) and 1974 (Marine Corps). At 62 tons it was
the heaviest and most heavily armed tank in US service until the M1 Abrams main
battle tank. The M103 was never used in combat, but was formed into the heavy
armor battalions stationed in Germany during the cold war. They were replaced by
M60s.
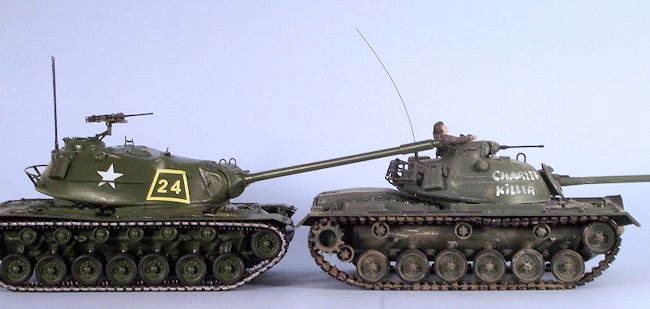
The turret of the M103 was much larger than that of the M48 to make room
for the 120 mm gun and had two loaders assigned to it, in addition to the gunner
and the commander. Two loaders were required due to the two part ammunition used
by the 120 mm gun. The driver sat centered in the front of the hull, in pretty
much the standard US tank configuration. Starting in 1959 219 M103s were rebuilt
to M103A1s.
It was powered by a Continental, AV1790, 12 cylinder, air cooled, 810 hp
gasoline engine. The maximum speed was about 21 mph with a range of 80 miles.
| THE KIT |
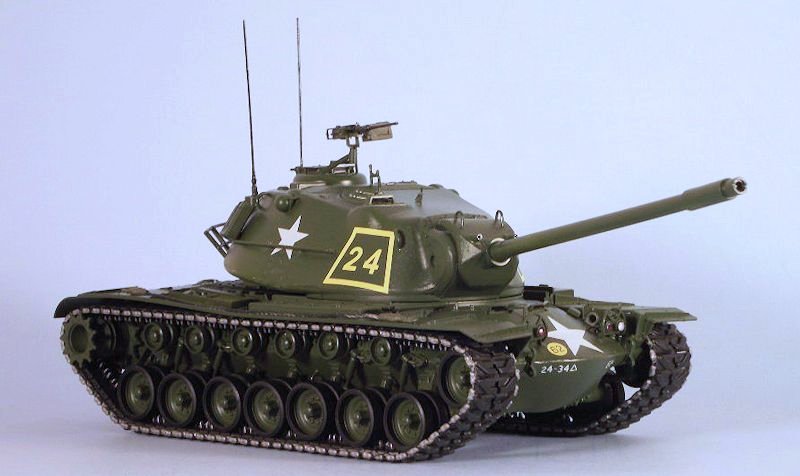
The M103A1 comes in a large, box packed to the brim with parts. This
includes: 10 sprues in soft, light grey plastic, packaged separately, two
yellow/tan DS tracks, 1 small photo-etc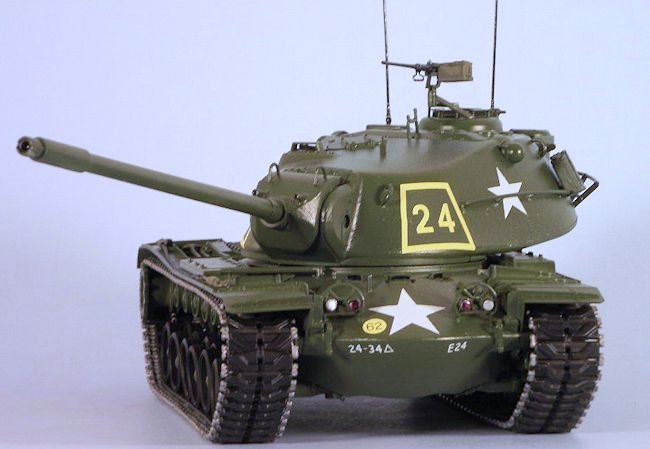 h sheet, 1 small length of twisted steel
wire for use as a tow cable, and a decal sheet from Cartograph of Italy. The
decals options include E Company, 34th Armor, 24th Infantry Division, Germany,
1959 and 2 unidentified Army versions. You will have a bunch of left over
parts!
h sheet, 1 small length of twisted steel
wire for use as a tow cable, and a decal sheet from Cartograph of Italy. The
decals options include E Company, 34th Armor, 24th Infantry Division, Germany,
1959 and 2 unidentified Army versions. You will have a bunch of left over
parts!
The instruction sheet covers the build in 17 steps and includes an
additional sheet to show corrections to parts of Steps 1, 8 and 17. These are
typical Dragon instructions. They can be confusing and require you to study the
sheet carefully to decide in advance which optional positions you want parts to
be displayed. Such as the travel rest for the main gun tube. I installed mine
folded on the back of the tank. That requires some planning on the build
sequence.
The molding is excellent and the placement of connecting tabs between
the part and the tree are well placed. The only real problem is deciding where
to cut the sprue. You can trim off mounting tabs if you are not careful. Trim
them a little long and check the fit.
| CONSTRUCTION |
I started construction with the lower hull. There are drive wheel
(sprocket) seven road wheels, one front return wheel and six upper return
rollers along with all of the suspension parts on each side of the M103. I glued
the suspension parts in place on both sides, made sure they were all level on a
piece of mirror, then set them aside to dry for a day. I use the mirror to check
and see if everything touches it. It will show gaps between it and the
suspension arms if some are too high. (Be sure you check the “corrections” sheet
while you assemble the lower hull and suspension. The rear drive sprocket
housing is a different number/piece than shown on the instruction sheet.)
After a goods nights sleep, I painted the road wheels with a Tamiya TS-5
rattle can. The rubber part is separate from the steel wheel. I sprayed the
rubber wheel parts and track Krylon primer black and set them aside to dry.
After they had dried for 30 minutes, I brush painted
 the steel parts of the
track with Model Master steel.
the steel parts of the
track with Model Master steel.
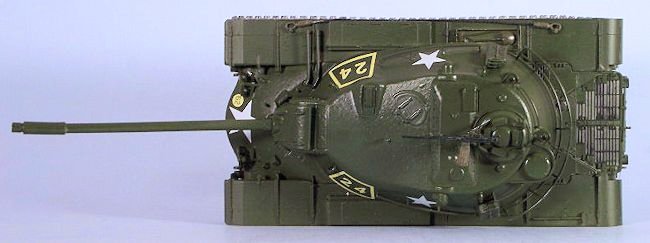
The next step was the upper hull. The parts glued in place with no
problems. Each part has a placement mark on the upper hull. I used the photo
etch where called for and had no problems, it is easy to form/glue and again
they have a placement mark on the hull.
I had been warned ahead of time that the exhaust deflector on the rear
deck stuck up too high and prevented the turret installation. My easy fix was
to take a Dremel motor tool and thin down the plastic inside the turret mounting
ring on the upper hull. It is on the inside of the hull so it won’t show. The
easy part is it only took about 30 seconds. After finishing that I glued the
upper hull, fenders and lower hull together and called it a night. The fenders
are very thin and look great, but they tend to be wavy. I haven’t figured out
how to fix that.
After all of the suspension work the turret looked like a piece of cake
and it pretty much was. The fit was excellent for the upper and lower parts. All
of the small pieces are just glued to the turret with no pins or placement tabs.
However, each part has a small locator mark on the turret to show you where to
glue it. Again, no drama, just work slowly and stop often to check the part
numbers, instructions and the “corrections” to the instruction sheet.
| COLORS & MARKINGS |
At this point it was time for the Tamiya TS-5 olive drab paint.
Everything but the machine gun sprue, track and black rubber part of the wheels
was sprayed with the rattle can. This was the first time I had used Tamiya
rattle cans so I let it sit for a week; hoping for the best. It came out great!
The paint is a semi-gloss, very similar to the new - slightly faded finish on
the real tanks of this era.
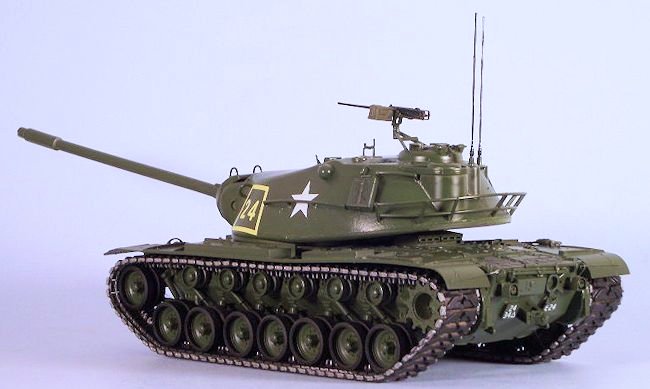
 Time for the final assembly. I glued the wheels in place on both sides
of the hull and let them sit for a couple of hours while I put the jerry cans,
antenna and machine gun on the turret. With the glue on the wheels almost dry. I
put the sprocket in the track, slipped the track over the wheels and pressed the
sprocket onto it’s mounting. The wheels lined up nicely on the track. A little
final detail painting and again, I let everything dry
for a day or two.
Time for the final assembly. I glued the wheels in place on both sides
of the hull and let them sit for a couple of hours while I put the jerry cans,
antenna and machine gun on the turret. With the glue on the wheels almost dry. I
put the sprocket in the track, slipped the track over the wheels and pressed the
sprocket onto it’s mounting. The wheels lined up nicely on the track. A little
final detail painting and again, I let everything dry
for a day or two.
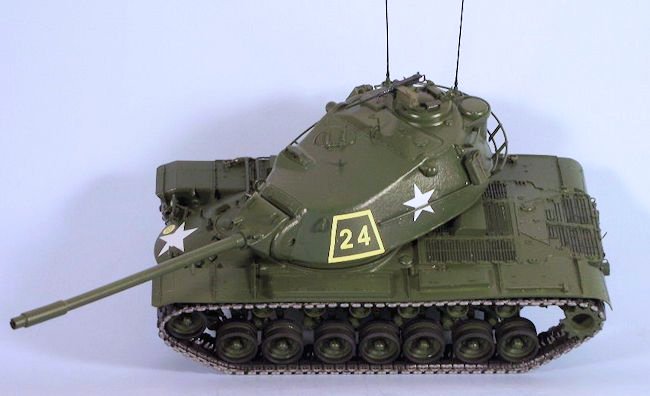
These decals are very thin and in register. The white covers nicely. I
used the decals for E Company, 34th Armor, 24th Infantry Division, Germany,
1959. They were soaked in warm water and applied over a bead of Micro-Set and
smoothed out. After about 15-20 minutes, I applied a bit of Micro-Sol. The
decals snuggled right down on the semi-gloss paint. There was no silvering or
cracking. A couple of days later, everything was given a wash in warm water.
The last step was to install the turret to the hull. Since I thinned the
mounting ring, it slipped right into place. It now represents a clean tank in
garrison, but with the machine gun installed.
| CONCLUSIONS |
 I like this kit! I have ordered the M103A2. It is typical Dragon with
good molding and so-so instructions. I would like a DS mantlet cover and a tank
commander!!!! I know it has some dimensional issues. I choose to ignore them in
my build and this review. When I showed this build to the other military
modelers at my club meeting no one picked up on the issues. This may seem like a
simple review, but the build was simple. This new generation of Dragon kits go
together very well.
I like this kit! I have ordered the M103A2. It is typical Dragon with
good molding and so-so instructions. I would like a DS mantlet cover and a tank
commander!!!! I know it has some dimensional issues. I choose to ignore them in
my build and this review. When I showed this build to the other military
modelers at my club meeting no one picked up on the issues. This may seem like a
simple review, but the build was simple. This new generation of Dragon kits go
together very well.
This kit courtesy of my wife as a birthday present.
September 2014 If you would like your product reviewed fairly and fairly quickly, please contact the editor or see other details in the
Note to
Contributors.