
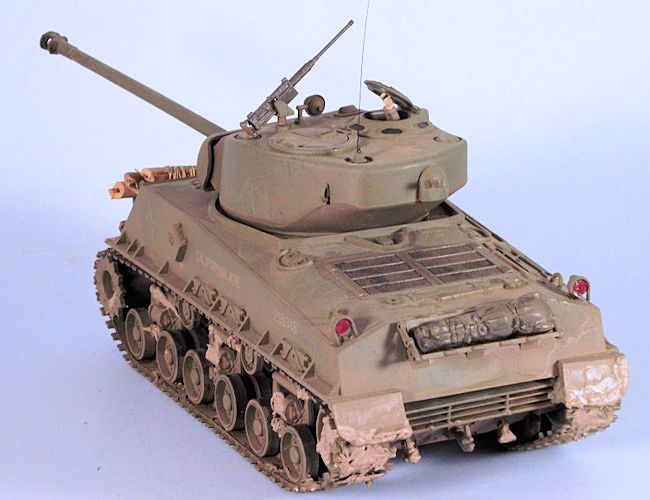
Tamiya 1/35 M4A3E8 Sherman
| KIT #: | 30018 |
| PRICE: | $OOP |
| DECALS: | Two options |
| REVIEWER: | Robert Myers |
| NOTES: |
Motorized version, with hull cutouts underneath for switches. |
| HISTORY |
The M4
Sherman, officially the Medium Tank, M4, was the primary battle tank used by
the United States during World War II. It took its name from the American
Civil War General William Tecumseh Sherman.
 The Army
had seven main sub-designations for M4 variants during production: M4, M4A1,
M4A2, M4A3, M4A4, M4A5, and M4A6. These designations did not necessarily
indicate linear improvement: for example, A4 was not meant to indicate it
was better than the A3. These sub-types indicated standardized production
variations, which were in fact often manufactured concurrently at different
locations. The sub-types differed mainly in engines, although the M4A1
differed from the M4 by its fully cast upper hull; the M4A4 had a longer
engine system that required a longer hull.
The Army
had seven main sub-designations for M4 variants during production: M4, M4A1,
M4A2, M4A3, M4A4, M4A5, and M4A6. These designations did not necessarily
indicate linear improvement: for example, A4 was not meant to indicate it
was better than the A3. These sub-types indicated standardized production
variations, which were in fact often manufactured concurrently at different
locations. The sub-types differed mainly in engines, although the M4A1
differed from the M4 by its fully cast upper hull; the M4A4 had a longer
engine system that required a longer hull.
The M4A3E8 HVSS (Easy Eight) - included a wider track, Horizontal Volute Spring Suspension, a 76mm M1 gun, a Ford GAA V-8 engine and a welded hull . The new suspension allowed for more armor to be added.
| THE KIT |
 This is
an old Tamiya kit from the 1970s. So why bother with it when there are newer
Easy Eights available? It is a good starter kit. It is well molded and
builds easily. There are a minimal number of parts. The molding is crisp for
1970s era technology and has no flash. The underneath of the hull has
openings for the electric motor switch and a couple of screw holes.
This is
an old Tamiya kit from the 1970s. So why bother with it when there are newer
Easy Eights available? It is a good starter kit. It is well molded and
builds easily. There are a minimal number of parts. The molding is crisp for
1970s era technology and has no flash. The underneath of the hull has
openings for the electric motor switch and a couple of screw holes.
The
track is the old Tamiya rubber bands that no glue will stick to. There is no
photo etch and the headlight guards are thicker than scale should warrant.
| CONSTRUCTION |
This is an
old build that has sat on my shelf for over 30 years.
I built it back when I was just starting to build tanks. So, I would
consider this a re-build review. I read most of the build reviews and learn a
lot from them, but I tend to forget not everyone visiting this site has 50 years
of building time under their belt. (Yes, I said 50, it is not a typo, I started
young and I'm old!) So, lets go simple and perhaps this will give you an idea
for some of those older kits that look a little plain next to the new ones.
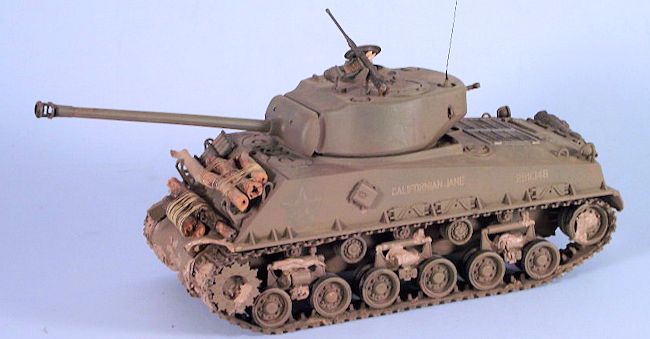
 I never did
glue the commander's hatch down and since I was pushing myself to try new things
I decided it needed a figure. Fast forward, my figure painting is horrible. So,
I ripped one of his arms off and glued it inside the tank to hold the hatch
partly open. A figure was added and I am not embarrassed about my figure
painting skill.
I never did
glue the commander's hatch down and since I was pushing myself to try new things
I decided it needed a figure. Fast forward, my figure painting is horrible. So,
I ripped one of his arms off and glued it inside the tank to hold the hatch
partly open. A figure was added and I am not embarrassed about my figure
painting skill.
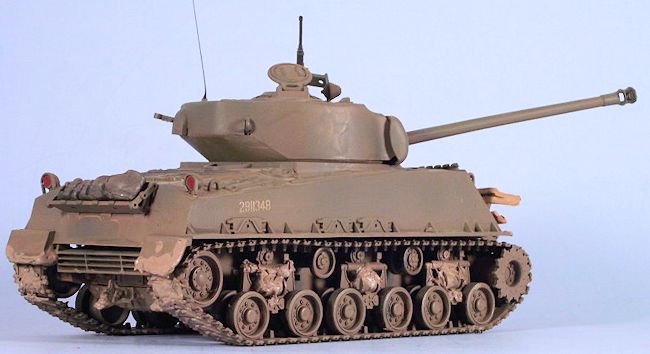
Next were
the little details; The canvas pack on the rear was given a black wash as were
the engine cover grates, the vision ports were painted flat black, front lights
were painted silver with a wash of white, tail lights are stop light red
metallic over a flat black base, the machine gun is gunmetal with a black dot
for the muzzle & wood handles and finally an antenna was made from stretched
sprue.
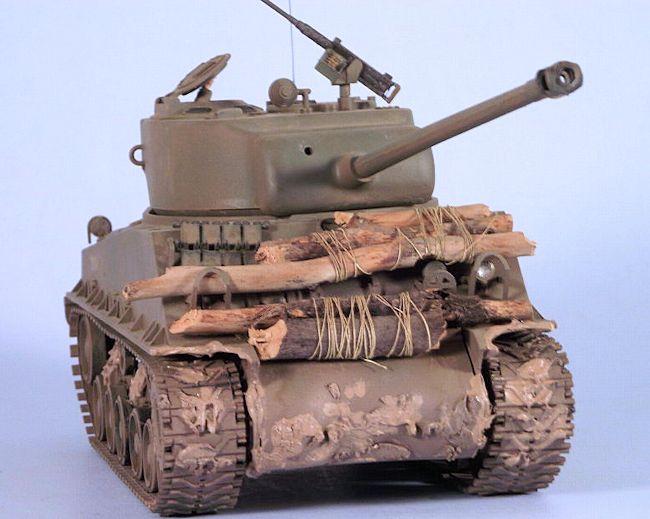
At this
point I thought It was looking good, but "just not quite there." After viewing
some real images online, I decided to add some wood to the front. I went out
into the yard and found some sticks. I broke and cut them to the lengths I
wanted, then tied them together with tan thread. They were fit into place next
to some old spare track links. I hope it makes the crew feel a little more
protected. It does help to cover the oversize parts on the front.
| CONCLUSIONS |
This is an
old kit with minimal detail. The driver's and gunner's hatches are molded shut
and the details on the hull like the pioneer tools and extra track links are
molded on. However, these kits are cheap, plentiful and very easy to build. It
would make an excellent kit for a beginner or a slump buster for most anyone to
get back to modeling or try out some detailing techniques. Yes it has it's
inaccuracies, but overall it looks like an Easy Eight.
| REFERENCES |
Wikipedia
Robert
Myers June 2014 If you would like your product reviewed fairly and fairly quickly, please contact the editor or see other details in the
Note to
Contributors.