Tamiya/Monogram 1/35 M-60 MBT
| KIT #: | RS 92038 |
| PRICE: | $10.00 for both |
| DECALS: | |
| REVIEWER: | Robert Myers |
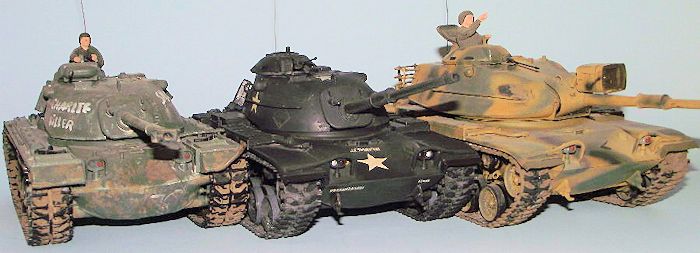
| NOTES: | I know we usually review unbuilt kits. However, I purchased these kits as built models online. I wanted to review a re-build and combine of both the kits to produce an M-60 main battle tank |
| HISTORY |
Most of us are familiar with the M-60 in the
A1, A2, A3 and RISE versions, but we don’t see builds of the original M-60.
So, if you will stay with me, I will start with a little history. The M60,
officially the 105 mm Gun Full Tracked Combat Tank, M60, is a
first‑generation main battle tank (MBT) introduced in December 1960. It was
widely used by the U.S. and its Cold War allies, especially those in NATO,
and remains in service throughout the world today despite having been
superseded by the M1 Abrams in the U.S. military.
 Developed
from the M48 Patton, the M60 series was never officially classified as a
Patton tank, but as a "product improved descendant" of the Patton series of
tanks. The M60 first saw trials in 1957. It was designed to counter British
reports of an existing Soviet 100mm gun and reports of a new Russian tank
armed with a 115mm gun. Due to the urgent need to upgrade the 90mm gun in
the M‑48 Patton and due to the threat posed by newer Soviet tanks starting
to equip the Warsaw Pact Forces; the US Army felt the improved design
provided an increased operational range, mobility, required less refueling,
servicing, and incorporated a 105 mm gun as main armament. The hull was a
one piece steel casting divided into two compartments, the crew in the
front, and the engine at the rear.
Developed
from the M48 Patton, the M60 series was never officially classified as a
Patton tank, but as a "product improved descendant" of the Patton series of
tanks. The M60 first saw trials in 1957. It was designed to counter British
reports of an existing Soviet 100mm gun and reports of a new Russian tank
armed with a 115mm gun. Due to the urgent need to upgrade the 90mm gun in
the M‑48 Patton and due to the threat posed by newer Soviet tanks starting
to equip the Warsaw Pact Forces; the US Army felt the improved design
provided an increased operational range, mobility, required less refueling,
servicing, and incorporated a 105 mm gun as main armament. The hull was a
one piece steel casting divided into two compartments, the crew in the
front, and the engine at the rear.
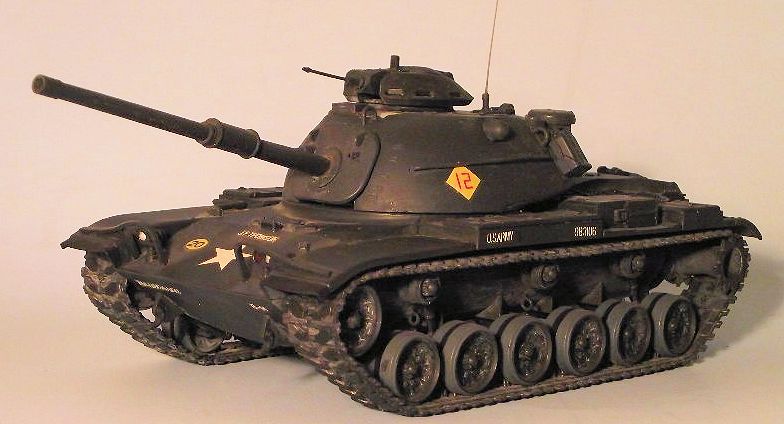
The resulting M60 largely resembles the M48 it
was based on (notice the turret), but has significant differences. The M60
mounted a bore evacuated 105 mm main gun, compared with the M48's 90 mm, had
a hull with a straight front slope whereas the M48's hull was rounded, had
three support rollers per side to the M48's five, and had road wheels
constructed from aluminum rather than steel, although the M48 wheels were
often used as spare parts.
The M60 was the last U.S. main battle tank to
utilize homogeneous steel armor for protection. It was also the last to
feature an escape hatch under the hull. (The escape hatch was provided for
the driver, whose top‑side hatch could easily be blocked by the main gun.
Access between the driver's compartment and the turret fighting compartment
was also restricted, requiring that the turret be traversed to the rear.)
 The
M-60 was put into production in 1959, and entered service in 1960. Over
15,000 M60s (all variants) were constructed. In 1963, the M60 was upgraded
to the M60A1. It has now been officially retired from US military service.
However, many remain in storage and in service with other countries
throughout the world. Two side notes, Iran purchased about 150 M-60s. It is
not known how many remain serviceable. The M-48 was classified a “Heavy
Tank.” The M-60 dropped the heavy tank designation and used the “Main Battle
Tank” designation.
The
M-60 was put into production in 1959, and entered service in 1960. Over
15,000 M60s (all variants) were constructed. In 1963, the M60 was upgraded
to the M60A1. It has now been officially retired from US military service.
However, many remain in storage and in service with other countries
throughout the world. Two side notes, Iran purchased about 150 M-60s. It is
not known how many remain serviceable. The M-48 was classified a “Heavy
Tank.” The M-60 dropped the heavy tank designation and used the “Main Battle
Tank” designation.
It was criticized for its high profile and
limited cross‑country mobility, but proved reliable and underwent many
updates over its service life. The interior layout, based on the design of
the M26/46/47/M48, provided ample room for updates and improvements,
extending the vehicle's service life for over four decades.
| THE KIT |

| CONSTRUCTION |

Now that it looked like a tank, I added the
side rails re-shaped the turret side rails and attached them to the sides of
the turret along with installing the cargo rack to the back. The antenna is
stretched sprue.
No muss no fuss and an M-60 is born. Well, it is not
totally accurate, but I like it. If you do your own conversion, find the
images of the tank you want to do. There were a lot off differences in rails
and cargo racks.
| COLORS & MARKINGS |
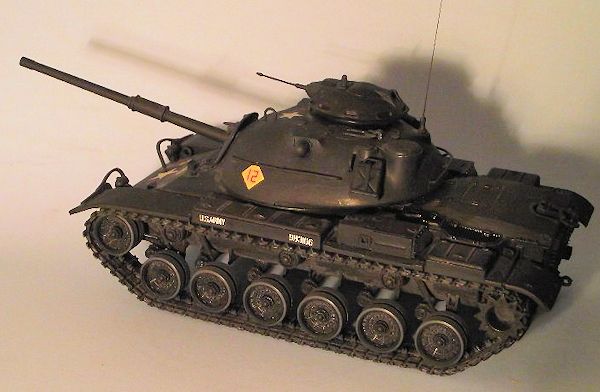
The painting and final details were a breeze. The
same person had built these two kits and painted them in a period correct green.
It looks very dark and almost black in some of the pictures, but it is correct f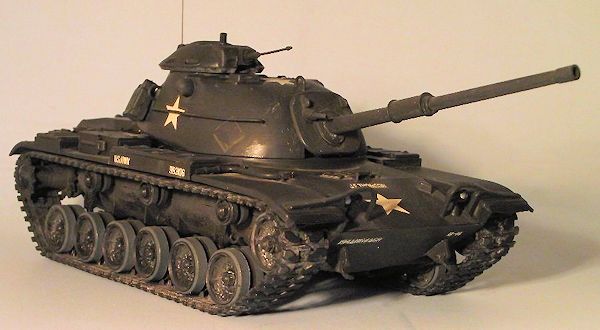 or
an early 1960s shade of weathered dark olive. I did the cutting and glueing very
carefully, since I could not match the paint. The result is a period correct
dark green weathered to a flat finish with no paint work on my part and
incorrect decals. I can live with the decals.
or
an early 1960s shade of weathered dark olive. I did the cutting and glueing very
carefully, since I could not match the paint. The result is a period correct
dark green weathered to a flat finish with no paint work on my part and
incorrect decals. I can live with the decals.
| CONCLUSIONS |
| REFERENCES |
http://en.wikipedia.org/wiki/M60_Patton
http://www.militaryfactory.com/armor/detail.asp?armor_id=28
Google Images
Back to the Previews Index Page