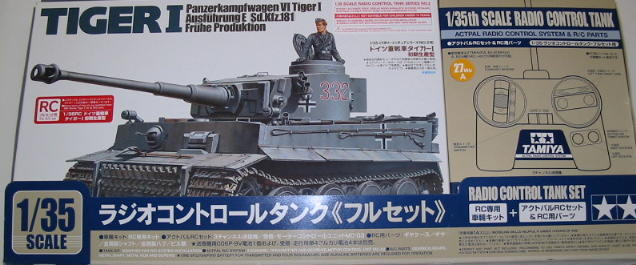
| KIT: | Tamiya 1/35 Tiger I (early production) |
| KIT #: | 48202 |
| PRICE: | $125.00 MSRP |
| DECALS: | Six options |
| REVIEWER: | Bill Michaels |
| NOTES: | Radio controlled kit based on kit 35216 |
| HISTORY |
One of the lessons the Germans learned during the fighting in Russia in the summer and fall of 1941 was that they had a need for a heavy tank- that the medium Pz IIIs just weren’t powerful enough. To meet this need, the Tiger was developed. The Tiger carried a powerful 88mm main gun, and featured frontal armor up to 100mm thick. However, the rush to produce the tank caused a number of teething problems that would plague the tank in service. Also, even as it entered service, it became apparent that the design was dated—it featured vertical surfaces instead of the more effective sloped armor plate found on tanks such as the Russian T-34.
The Tiger I first saw action in August of 1942, in the Leningrad area. The lessons learned by the first Tiger units in Russia were applied to the design, and five months later, the early production models were seeing service in Tunisia and Russia by the start of 1943.
The Tiger’s first big battle was the Battle of Kursk in July of 1943—146 Tigers took part. Interestingly, more Tigers were disabled due to breakdown caused by mechanical problems or poorly trained crews than to enemy fire. After that, Tigers served in all theatres of the war, though usually in small numbers. In total, 1,355 Tigers were produced.
I’m not a Tiger expert, but I have learned that there were four main types of Tiger Tanks, all available as a 1/35 scale kit. First, there is the prototype Tiger, as first used near Leningrad in 1942. (This model was recently released by Dragon, to very good reviews.) That tank was followed by “Early Production”, “Mid-Production”, and “Late Production” models. (Tamiya has released all of these at one point or another.)
As if four versions weren’t enough, adding to the potential for confusion are such things as early and late gun mantlets, early and late drive sprockets, and different types and shapes of air cleaners. According to the Tamiya instructions, you could have an early production Tiger with a late mantlet, for example. Absent a big pile of references, I just have to trust that Tamiya got it right. (In looking around the web for other reviews, I haven’t found much in the way of complaints about the Tamiya Tigers, so I think they must have gotten their Tigers correct.)
| THE KIT |
 This
deluxe RC kit is the standard Tamiya 1/35 scale Tiger I kit, modified for
Radio Control operation. The combined kit includes everything needed,
except batteries, paint, and glue.
This
deluxe RC kit is the standard Tamiya 1/35 scale Tiger I kit, modified for
Radio Control operation. The combined kit includes everything needed,
except batteries, paint, and glue.
I built Tamiya’s Tiger I (early) kit 35216 a couple of years ago, and found it to be a good kit. When I opened this RC version, I wasn’t sure what to expect. I was half expecting this RC model to be one of Tamiya’s old motorized kits, updated with new motors and electronics. Instead, I was pleased to see that this RC kit is based on the same Tiger I built two years ago. It even includes the same commander figure.
So, this RC version of the kit is based on Tamiya’s recent Tiger I ausf. E, which is the early production version of the Tiger. (This is not the 1970s version of the kit, the one that was reviewed by Scott Van Aken here.) The 1970s era kits were not all that accurate, with some errors in shape caused by the need to use standard motorizing gearboxes. In the 1990s, Tamiya released a series of new Tiger kits, which lived up to the reputation that Tamiya kits have these days. Different kits were released, correctly capturing the differences between early, mid, and late-production Tigers. The RC version of the kit was released in 2000.
What’s In the Package:
Because the kit is based on Tamiya’s Tiger I Ausf E, which has been around for 10 years or more, I’m going to focus on what makes this kit unique—what is the RC conversion about? Rather than provide a shot of the all the sprues that come in the standard Tiger, I have instead taken a picture of what is new and different- what you get with the RC version.
The kit comes in two boxes, shrink-wrapped together in a long cardboard tray. One box is the standard Tamiya large armor kit box, and the other contains the RC unit and special parts used for motorization. This includes all the parts needed to create three gearboxes with their nylon gears.
The box with the tank in it looks just like the 35216 version of the kit, with the exception there are some stickers in a couple of places on the cover, proclaiming that this is the RC version. Bundled with it is a second box, which contains the Radio Control unit, and the parts unique to the RC version—motors, gearboxes, metal fasteners, etc.
Radio Control Box:
The included RC unit provides three channel control. An RC tank needs at least two channel control-- forward/reverse, and steering. This unit provides that, plus a third channel to control a motor and gearbox for turret rotation. The tanks in this series come with radios on one of four different frequencies.
When operating a radio controlled model, only one model can be operated at a time on a given frequency. These RC tanks use one of four frequencies in either the 27 MHz or 40 MHz bands. (Two in each band, identified as “A” and “B”. My unit is labeled “27A”.) The 27 MHz and 40 MHz frequencies are generally used by RC toys, while the 75 MHz band is used by more serious RC boat and car hobbyists. RC units operating on 27MHz or 40 MHz are more susceptible to interference, partly as a result of the fact that these inexpensive units are less able to detect and reject interference. Used in applications such as this RC tank, they should be fine, however, as it is unlikely the vehicle is going to be driven far away from the transmitter.
The model needs a 9 volt battery for the transmitter, and four AAA batteries to power the tank. The instructions caution you not to use nicad batteries. The instructions don’t say why, but the reason is that standard AAA batteries are 1.5 volts per cell, so a set of four yields 6 volts. Triple A nicads are only 1.2 volts each, so a four cell pack will only have 4.8 volts.
If running time and/or the cost of disposable batteries is a concern, it shouldn’t be too hard to replace the AAA battery box with a 6 volt NiMh rechargeable pack. In addition to being rechargeable, a NiMh pack would also give longer runtime. However, this may not be a practical solution unless you already own a suitable charger- the cost of a rechargeable pack and charger may be a bit much unless you can use it with other RC models as well.
The radio and wiring harness inside the tank comes all pre-wired. This includes the three motors, battery box, switch, and receiver. The motors are wired with different color wires for identification- the left side motor has yellow and green wires, while the right side has blue and red wires.
Kit Box:
Upon opening the box, the kit looks just like the original version, with a couple of exceptions. First, the instruction booklet is a good bit larger, as it includes all of the extra material about the assembly and installation of the gearboxes and the rest of the RC gear. The other change is that there is a new lower hull, with the necessary changes to accommodate the installation of the RC parts. The rest of the kit appears to be the same as 35216.
The lower hull is clearly different form the display version of the tank. There is one obvious, non-scale change to the hull—a bulge on the tank bottom. This area is apparently necessary to give the hull enough depth to accommodate the battery box inside the model. The other change to the lower hull won’t be apparent until after the kit is assembled—the presence of non-scale bolt heads holding the road wheels in place. (The axles the road wheels are mounted on are fine threaded carriage bolts.) In this scale, operational torsion bars are not possible, so there is no suspension movement for the road wheels. As a result, the model will be best operated on fairly smooth ground.
The upper hull has one deviation from scale appearance—a small slot in the rear desk to allow the steel whip antenna for the radio receiver to pass through from the lower hull. Also, the upper hull is not glued to the lower hull, so there will probably be a visible seam where the two meet at the front of the hull. (Because it falls on a natural seam, hopefully it won’t be very visible.)
The original display version of the kit is pretty good, and you could build one of four different tanks. A handy chart is included in the front of the assembly sequence, which tells you which parts are used with which vehicle. For example, the first option is a tank that has:
- Late production sprocket
- Late production air pre-cleaner
- “S” mine launcher on the hull
- Late Production mantlet
- Loader’s periscope
- Spare tracks on turret
- No spare tracks on the hull.
The instructions consist of a twenty page booklet. This is a comprehensive instruction manual—it includes all the material from kit 35216, rewritten to add all of the necessary steps for the RC parts. Each assembly step is clearly illustrated. On the upper hull and turret steps, the instructions clearly call out which parts go for which version of the tank. Color information is called out as needed, using Tamiya colors.
Just like kit 35216, the moldings are of very good quality. There is no flash on the parts, and minimal mold lines. The kit is engineered such that there are no ejector pin marks that will need to be filled. As would be expected with an operational model, the kit comes with standard vinyl tracks, molded in a metallic gray color.
Markings:
There is a good size decal sheet with markings to create one of six different vehicles—the same as in the non-RC version of the kit. You can create one of the following vehicles using the kit decals:
- Tank No. 213, sPzAbt 502, Russia, 1944, in overall Panzer Dark Yellow
- Tank No. 332, sPzAbt 503, Russia, October 1943, in overall Panzer Grey
- Tank No. 131, sPzAbt 504, Tunisia, April 1943, overall dark yellow.
- Tank No. S45, sPzAbt 101, Russia, 1943, in overall dark yellow with green and red-brown camouflage
- Tank No. S04, sPzAbt 101, Russia, January 1944, in overall white winter camouflage
- Tank No. S33, PzRgt 2, in overall dark yellow with green camouflage.
| CONCLUSIONS |
Recommended. If you want a radio control model that is also a good scale model, and don’t want to spend hundreds of dollars on a 1/16 scale RC tank, then this series of kits may be just the ticket. While they list for about $125, I got mine from the local shop (Spare Time Shop, Marlboro, MA) on sale for $99, and I’ve seen them for even less from places such as Tower Hobbies. That’s not a bad price, especially if you consider that the Tiger kit by itself retails for about $45. In addition to the Tiger I, Tamiya also offers a King Tiger and a Leopard 2A5 MBT in the 1/35 scale RC line. (If only they offered a US tank to go with my Trumpeter LCM, which I’m converting to an RC boat!)
July 2005
| REFERENCES |
Tiger I, Schiffer Military History Vol. 44, by Horst Scheibert; copyright 1991, Schiffer Publishing, West Chester, PA
If you would like your product reviewed fairly and quickly by a site that has around 300,000 visitors a month, please contact me or see other details in the Note to Contributors.