| KIT #: | 84810 |
| PRICE: | $27.99 SRP |
| DECALS: | Three options |
| REVIEWER: | Jonathan Prestidge |
| NOTES: |
| HISTORY |
 The KV-1
was the original Russian monster tank. It was designed in 1939 and was very
advanced for the time. The motor in the KV-1 was a 550 hp V-12 diesel called the
V-2. The KV-1 housed the same 76.2mm main gun as the T-34. Its armor was
designed to withstand anti-tank weapons up to 76mm. In action, the KV-1 had
difficulty keeping up with the T-34s they were supposed to support. Often, their
tremendous weight prevented KV-1s from using the same bridges that the T-34’s
easily crossed. They were cumbersome and had frequent breakdowns of their
gearbox and transmission. Lack of radio equipment meant that it was almost
impossible to coordinate action once the battle had been joined. Like all other
Russian tanks, KV-1s suffered from poor tactics and uncoordinated utilization by
the Soviet Command.
The KV-1
was the original Russian monster tank. It was designed in 1939 and was very
advanced for the time. The motor in the KV-1 was a 550 hp V-12 diesel called the
V-2. The KV-1 housed the same 76.2mm main gun as the T-34. Its armor was
designed to withstand anti-tank weapons up to 76mm. In action, the KV-1 had
difficulty keeping up with the T-34s they were supposed to support. Often, their
tremendous weight prevented KV-1s from using the same bridges that the T-34’s
easily crossed. They were cumbersome and had frequent breakdowns of their
gearbox and transmission. Lack of radio equipment meant that it was almost
impossible to coordinate action once the battle had been joined. Like all other
Russian tanks, KV-1s suffered from poor tactics and uncoordinated utilization by
the Soviet Command.
| THE KIT |
 The Hobby
Boss 1/48th KV-1 Model 1941 was released in 2006. The instructions
were well printed and easy to follow, though I deviated from the sequence of
assembly in some areas. The overall engineering of the kit was very good,
resulting in nice detail without difficult construction or an excessive parts
count. The KV-1 was molded in light gray plastic and there was minor flash on
most of the kit parts. No figure was included. The kit decals were thin, in
register, and provided markings for three tanks. There was also a color painting
guide. While it had five views of the all green tank, it only had a single side
view of the two camouflaged tanks. There were nice link and length tracks with
the longer portions pre-formed, which minimized assembly time. A heavy copper
tow cable and photo-etched fender braces were included as well.
The Hobby
Boss 1/48th KV-1 Model 1941 was released in 2006. The instructions
were well printed and easy to follow, though I deviated from the sequence of
assembly in some areas. The overall engineering of the kit was very good,
resulting in nice detail without difficult construction or an excessive parts
count. The KV-1 was molded in light gray plastic and there was minor flash on
most of the kit parts. No figure was included. The kit decals were thin, in
register, and provided markings for three tanks. There was also a color painting
guide. While it had five views of the all green tank, it only had a single side
view of the two camouflaged tanks. There were nice link and length tracks with
the longer portions pre-formed, which minimized assembly time. A heavy copper
tow cable and photo-etched fender braces were included as well.
| CONSTRUCTION |
 Differing
somewhat from the kit instructions’ assembly sequence, I built the kit in two
major sub-assemblies: the hull and the turret. When assembling the hull, I glued
all the hatches and other detail parts to the top decking before attaching it to
the chassis. This allowed me to use liquid glue (applied from the underside of
the decking) which resulted in clean joins for the detail bits. I left the
tracks off until after painting for ease of weathering. The photo-etched fender
braces required the use of Super Glue. I had to do a bit of dry-fitting and
cleanup on each part. Once assembly was complete, there were a few minor gaps
here and there that required filling and sanding. After about ten hours of
enjoyable building, I had the two main components (hull and turret) ready for
paint.
Differing
somewhat from the kit instructions’ assembly sequence, I built the kit in two
major sub-assemblies: the hull and the turret. When assembling the hull, I glued
all the hatches and other detail parts to the top decking before attaching it to
the chassis. This allowed me to use liquid glue (applied from the underside of
the decking) which resulted in clean joins for the detail bits. I left the
tracks off until after painting for ease of weathering. The photo-etched fender
braces required the use of Super Glue. I had to do a bit of dry-fitting and
cleanup on each part. Once assembly was complete, there were a few minor gaps
here and there that required filling and sanding. After about ten hours of
enjoyable building, I had the two main components (hull and turret) ready for
paint.
| COLORS & MARKINGS |
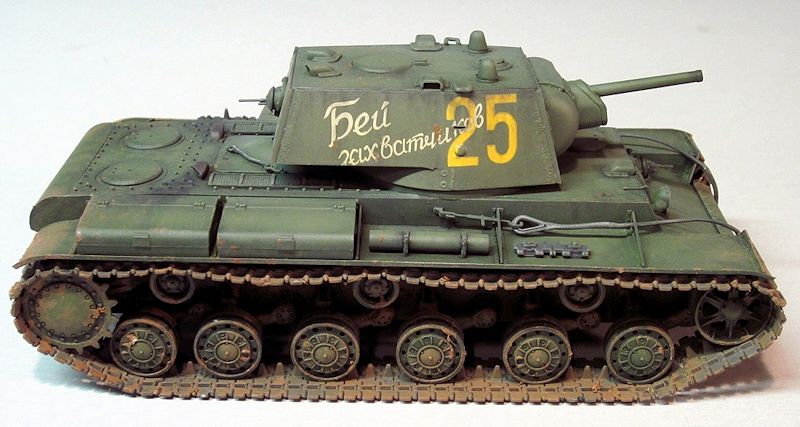
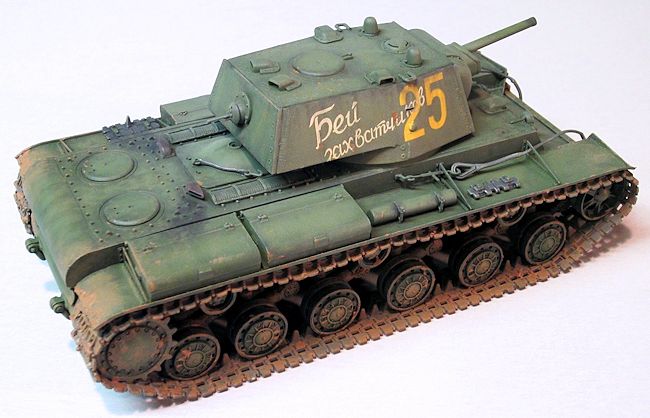
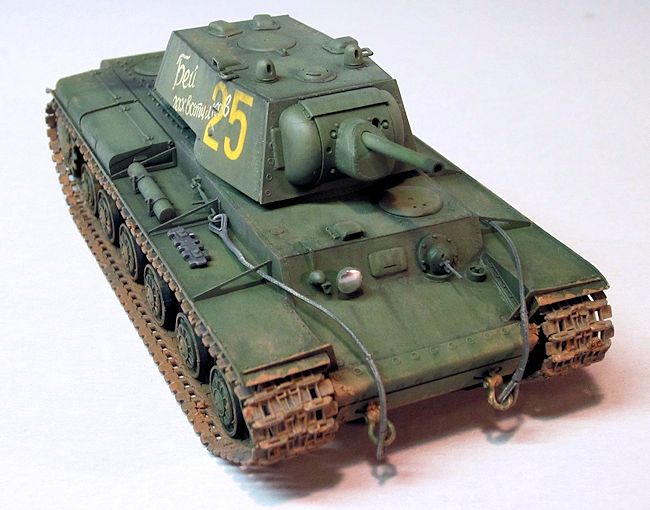 I chose the
first of the kit markings - a KV-1 of the 51st Independent Tank
Battalion, Leningrad Front, Spring 1942. First, everything was airbrushed
PolyScale acrylic Dark Green FS34079 (a good match for Soviet Armor Green)
thinned with Future. Thinning with Future helped the paints spray better and the
satin finish was better suited to washes/filters. Once the entire model had been
sprayed, I added some PolyScale Israel Khaki to the Dark Green and sprayed
various panels on the upper surfaces of the upper hull and turret. I did this to
give some tonal variation to the Dark Green. The tracks were painted dark gray
next. They were dry-brushed with Testors oil-based silver prior to installation
and weathering.
I chose the
first of the kit markings - a KV-1 of the 51st Independent Tank
Battalion, Leningrad Front, Spring 1942. First, everything was airbrushed
PolyScale acrylic Dark Green FS34079 (a good match for Soviet Armor Green)
thinned with Future. Thinning with Future helped the paints spray better and the
satin finish was better suited to washes/filters. Once the entire model had been
sprayed, I added some PolyScale Israel Khaki to the Dark Green and sprayed
various panels on the upper surfaces of the upper hull and turret. I did this to
give some tonal variation to the Dark Green. The tracks were painted dark gray
next. They were dry-brushed with Testors oil-based silver prior to installation
and weathering.
| FINAL CONSTRUCTION |
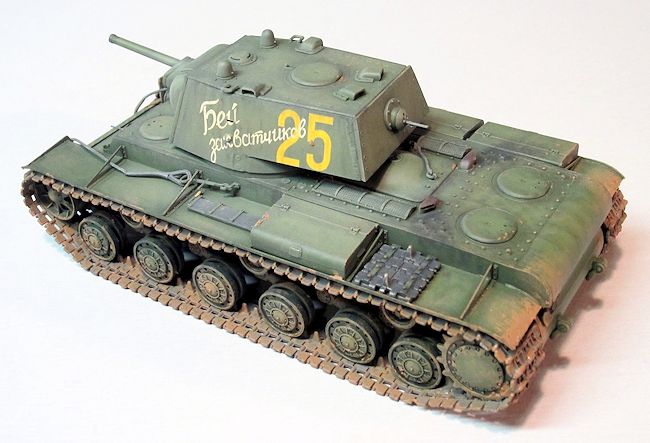
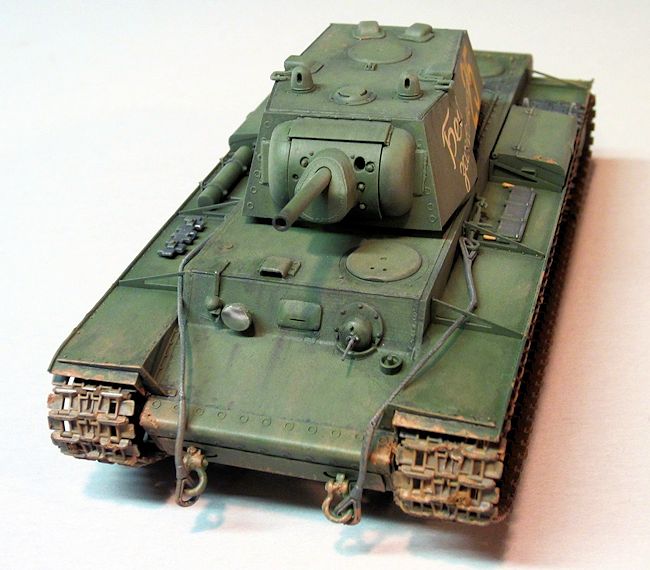
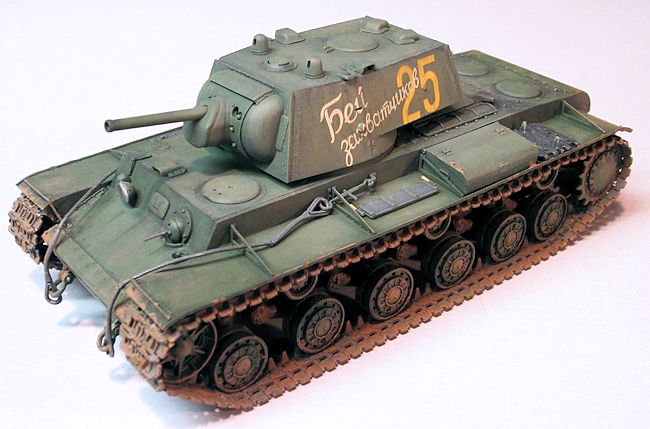
I added the
tow cables (using rope from a Tamiya kit instead of the thick copper tow cable
that came standard), extra bits of track (also from a Tamiya kit), and the
machine guns at this time. I then air-brushed Poly Scale Flat Clear mixed with a
few drops of Hazel Tan over the entire tank. I used pastels to further dirty the
KV-1. Final detailing was then completed.
| CONCLUSIONS |
April 2014
If you would like your product reviewed fairly and fairly quickly, please contact the editor or see other details in the Note to Contributors.