Meng 1/35 T-72B1 MBT
| KIT #: | TS 033 |
| PRICE: | $72.00 |
| DECALS: | Nine options |
| REVIEWER: | Dan Lee |
| NOTES: |
| HISTORY |
The genesis for the T-72 came after the introduction of the T-64 in 1963 where the Red Army wanted to modify the T-64 design to add a bigger bore cannon, a more reliable engine and redesign for ease of maintenance. More problems showed up as the T-64 chassis proved to be inadequate to handle the more powerful and reliable diesel engine. Unfortunately for these alternative fixes, main tank designer Alexander Morozov of Uralvagonzavod (T-64 designer and biggest advocate) had a powerful voice in the Defense Ministry.
It wasn't till the 1968 when Uralvagonzavod produced a tank that fixed many of the flaws of the T-64. Designated Object 172, this particular tank was supposed to be only to be used as a mobilization tank (wartime use only.) It went through a 2 year test phase against the T-64A only to be modified again based on field results. Thanks to some political maneuvering, Object 172 was taken off the mobilization list and became a standard production tank. Production started in 1972.
 Originally,
the T-72's armour was made from cast steel plate, but over time it was changed
as anti-tank weapons capabilities were upgraded. In 1977, the T-72A had ceramic
inserts added to the front of the turret which the US Army nicknamed Dolly
Parton armour. Later versions added more layers of armour to the front of the
turret nicknamed Super Dolly Parton. On top of this later models of the T-72 had
various versions of explosive reactive armour added. The T-72 was equipped with
NBC protection and amphibious abilities.
Originally,
the T-72's armour was made from cast steel plate, but over time it was changed
as anti-tank weapons capabilities were upgraded. In 1977, the T-72A had ceramic
inserts added to the front of the turret which the US Army nicknamed Dolly
Parton armour. Later versions added more layers of armour to the front of the
turret nicknamed Super Dolly Parton. On top of this later models of the T-72 had
various versions of explosive reactive armour added. The T-72 was equipped with
NBC protection and amphibious abilities.
The T-72B1 was introduced in 1985 as it added capability to fire an ATGM via the 125mm cannon, better fire control and Kontakt-1 explosive reactive armour.
It still is the backbone of the Russian armoured units as it is a rather simple and easy tank to maintain. During the disastrous 1st Chechen War, Russian armoured units were sent into Grozny without infantry support or sometimes even mounted machine guns. They were hit hard by Chechen anti-tank teams. The newer turbine powered T-80 tanks were hardest hit as their main gun propellant storage was vulnerable to direct hits from HEAT rounds and had tendency to explode.
It should come as no surprise that the newer T-90 tanks were designed based around the T-72 with some of the features of the T-80.
The T-72 became the Soviet Union's most important and numerous tank export during the Cold War as it was sold to many client states as well as modified to suit clients needs with some 25000+ variants produced or currently in production (licensed or unlicensed.)
| THE KIT |
 Despite
being a relatively new company Meng has produced a lot of quite nice armour
kits.
Despite
being a relatively new company Meng has produced a lot of quite nice armour
kits.
There has been a lot of quibbling about details, but there are so many varieties of T-72s that it is hard to be accurate for all or some of the variants. Not being a T-72 expert, I have read that this kit will build a B1 variant and that's pretty much it. If you want another version then you are going to have to wait for or get a kit of the version you want.
Meng's T-71B1 comes with 22 sprues of tan plastic, and one fret of p.e. There are 200 track links and mounting pins. A jig for suspension adjustment and one for track assembly are also included. The parts are quite detailed and flash free, but with the usual mold markings. There are no ejection pin marks in visible areas.
| CONSTRUCTION |
The instructions start off the with
road wheels, but I started building the turret and main gun instead. Meng was
clever designing the main gun parts so that the visible seams did not require
sanding which usually doesn't happen unless you have a metal barrel. I did a
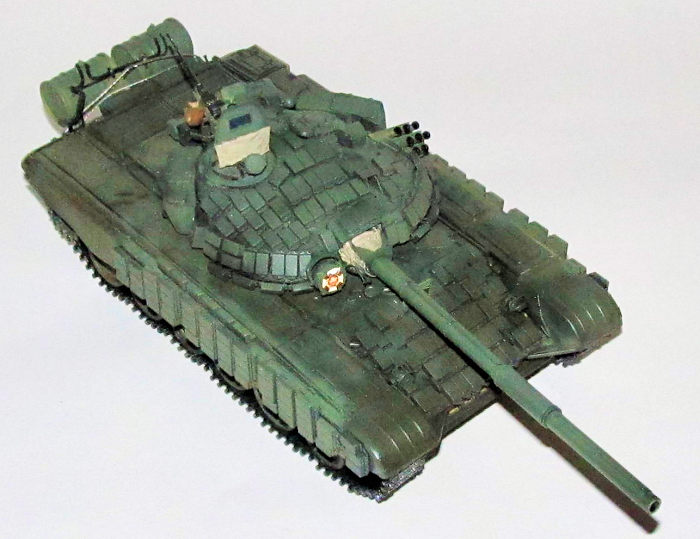
little bit of sanding and filling on the underside though. The turret required a
fair amount of work as I followed the assembly steps as each layer of parts
built upon the previous parts (if you don't then you are going to have a hard
time with it.) Within a
 couple of
hours, I had the turret glued together including the ERA blocks minus the AA gun
and the main barrel.
couple of
hours, I had the turret glued together including the ERA blocks minus the AA gun
and the main barrel.
Next I assembled the tracks. Only issue I had was that the mountings pins sometimes popped out or were too small so the track would come apart before my very eyes. I ended up having to glue a number of them although the instructions say you don't need to. The provided track assembly jig helped quite a bit as I glued together two treads consisting of 97 track links over two days. The instructions say 96, but I found 96 links was a link too short. These were painted Tamiya Metallic Grey.
The main hull and various subassemblies were glued together. Same layer by layer process as the turret with the ERA blocks added last. I did not attach the side skirts for painting reasons. Finally, I glued the road wheels together.
| COLORS & MARKINGS |
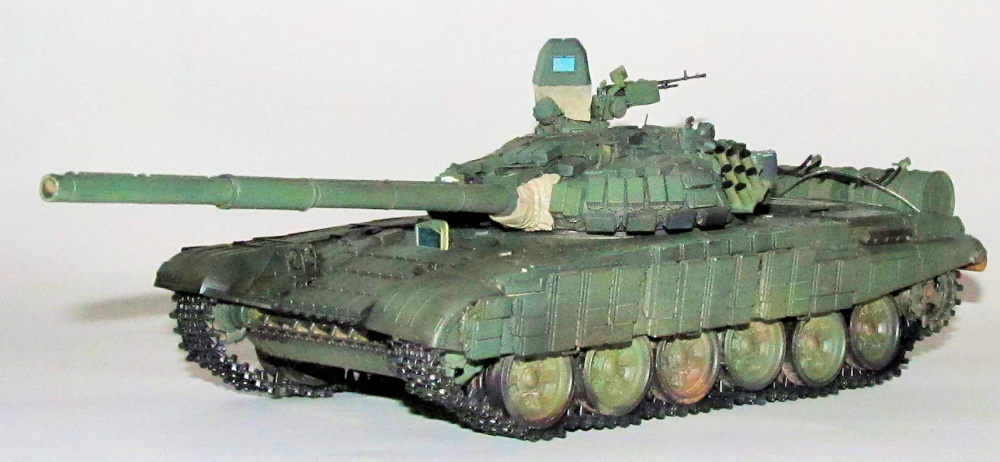
Throughout history Russian armour has been usually painted a shade of dark green what that shade maybe is up to interpretation. The Meng kit provides nine different schemes (eight dark green and one multicolored scheme for a Naval Infantry tank.) I picked a dark green scheme used in a 2008 military exercise rather than one used in Russia's various wars with Georgia and Chechnya. I first primed the model using Mission Models black primer. Once dry, I sprayed on Mission's Russian Olive Drab 2 in two light coats.
 The
canvas parts of the gun mantlet and armoured screen for the AA gun were brush
painted using Tamiya buff while the log used as a counterweight for towing was
painted dark brown and buff. The road wheels were first painted flat black then
sprayed carefully with Mission Models OD2.
The
canvas parts of the gun mantlet and armoured screen for the AA gun were brush
painted using Tamiya buff while the log used as a counterweight for towing was
painted dark brown and buff. The road wheels were first painted flat black then
sprayed carefully with Mission Models OD2.
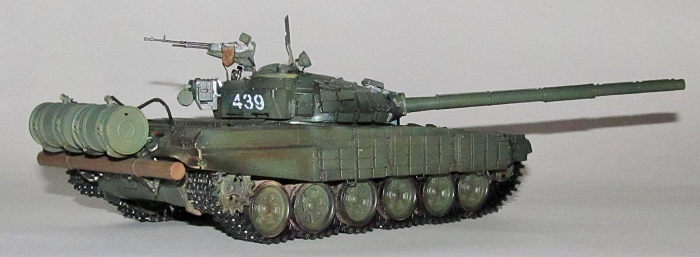
Once the paint was dry, I sprayed on two coats of Future for the decals. When the Future was cured I added the markings for 439, a tank used in a 2008 military exercise. After a couple of days, I sprayed on the first flat coat.
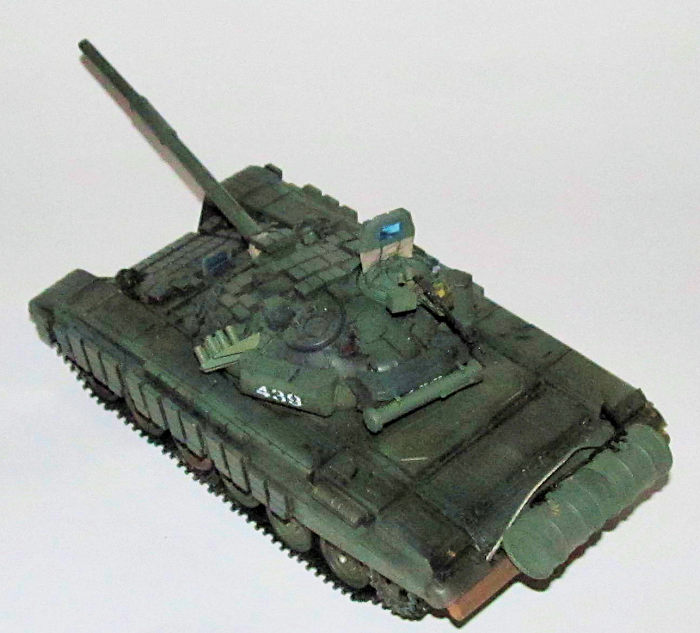
I decided to try something different and spray Mig pigment diluted with water through my airbrush as the bulk of the weathering. I kept most of the mixture around the areas closer to the ground. It was a bit messy, but it worked and provided a much thinner and easier to control than with a brush. I kind of over did it because I know the final flat coat would thin the pigments out (so everything evens out in the end.)
I then used a water colour wash for the upper surfaces. The excess was removed with a lot of damp Q-Tips. Once dry, I sprayed on the final flat coat.
Final assembly was actually done before weathering, but after painting. The road wheels and tracks were added. I found I had to glue the tracks together as they fell apart more than once when I picked up the model. The ERA covered side skirts were added and glued in place. I had to use clamps to hold them in place till the glue set. Finally I added the AA gun turret complete with ammo can and cartridge collection bag.
| CONCLUSIONS |
The Meng T-72B1 is a straight forward well detailed build (except the tracks.) I think Meng's T-72 kit is somewhere between Dragon's overly complex armour kits of 1000s of pieces and Tamiya's superb easy to build kits with rubber band tracks.
Overall it was an enjoyable build of a prominent Cold War opponent.
13 March 2018
Copyright ModelingMadness.com
If you would like your product reviewed fairly and fairly quickly, please contact the editor or see other details in the Note to Contributors.
Back to the Main Page Back to the Review Index Page Back to the Previews Index Page