
Tamiya 1/35 KV-1C
| KIT #: | 35066 |
| PRICE: | $28.00 |
| DECALS: | Four options |
| REVIEWER: | Dan Lee |
| NOTES: | Aber Aluminum Gun Barrel and Bronco KV-1 Link Tracks |
| HISTORY |
The Soviet high command found a need for a heavy tank based on the experience in the Spanish Civil War. They preferred the multi turret break-through tank prototypes like the T-100 and SMK, but the design team of the SMK designed a 45 ton version of the SMK equipped with a single turret armed with a 76.2mm tank gun.
 During the
ill fated Soviet-Finnish War where the tank's namesake, Kliment Voroshilov,
proved to be quite the military incompetent while the tanks named after him
proved to be more worthwhile. They were invulnerable to Finnish Anti-tank fire
and the 76.2mm gun could stop anything the Finns had. The results were enough
for the Soviets to order the KV-1 into production.
During the
ill fated Soviet-Finnish War where the tank's namesake, Kliment Voroshilov,
proved to be quite the military incompetent while the tanks named after him
proved to be more worthwhile. They were invulnerable to Finnish Anti-tank fire
and the 76.2mm gun could stop anything the Finns had. The results were enough
for the Soviets to order the KV-1 into production.
The KV-1 was a shock to German commanders during the opening days of Operation Barbarossa. It could only be stopped by anti-tank guns at point blank range or a close range shot from an 88mm AA gun. Unfortunately, the Soviets spread out many of those tanks instead of concentrating them for which they suffered heavy losses. The KV-1 and T-34 forced the German Panzer designers to design their own versions of these tanks (the Tiger and Panther.) By 1942, the KV-1 was obsolete and production went to more T-34s.
In the end, the T-34 proved to be a more useful tank as it carried the same firepower with less weight, more speed/maneuverability, able to cross Russian bridges unlike the KV-1, and required less manpower/resources to build/maintain. The KV series continued on as the basis for the SU-152 and the Iosef Stalin series of heavy tanks. The KV-1C is actually a Wehrmacht designation of the 1942 version of the KV-1.
| THE KIT |
 I bought
this last year at the local hobby shop's Boxing Day sale for super cheap. This
is one of the older kits in the Tamiya catalog. It was originally designed run
with an electric motor and has gaps and holes in the lower hull of the tank
where the motor would go. It comes with two sprues of dark green plastic
including a tank commander figure, a tiny decal sheet for four tanks, the old
style Tamiya instruction booklet and history, a sprue of polycaps and a pair of
rubber band tracks.
I bought
this last year at the local hobby shop's Boxing Day sale for super cheap. This
is one of the older kits in the Tamiya catalog. It was originally designed run
with an electric motor and has gaps and holes in the lower hull of the tank
where the motor would go. It comes with two sprues of dark green plastic
including a tank commander figure, a tiny decal sheet for four tanks, the old
style Tamiya instruction booklet and history, a sprue of polycaps and a pair of
rubber band tracks.
I opted to get a set of Bronco treads to replace the rubber band tracks and an Aber 76.2mm turned aluminum gun barrel as a drop in replacement for the two piece plastic barrel that would require a lot of effort that I didn't want to do.
| CONSTRUCTION |
 I removed
all the road wheels from the sprues and glued them together with polycaps. They
were sanded to remove any mold marks and sprue nubs. The lower hull was
assembled and the gaps for the original electrical motor were filled with cut
pieces of 30 thou thick plasticard and glued in place. Once that was done, the
upper hull was added.
I removed
all the road wheels from the sprues and glued them together with polycaps. They
were sanded to remove any mold marks and sprue nubs. The lower hull was
assembled and the gaps for the original electrical motor were filled with cut
pieces of 30 thou thick plasticard and glued in place. Once that was done, the
upper hull was added.
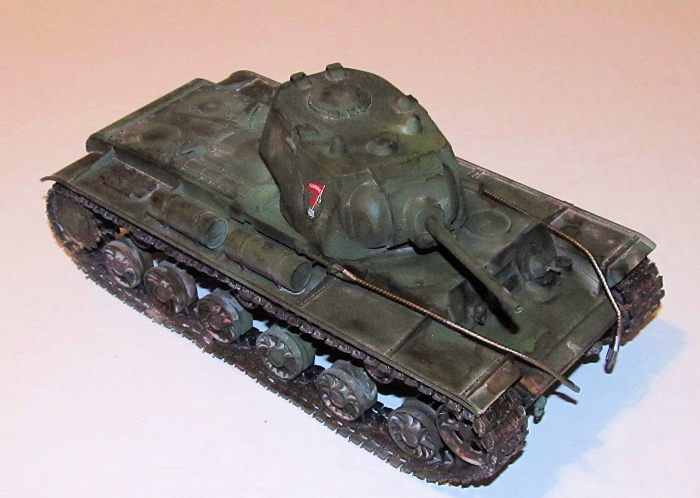
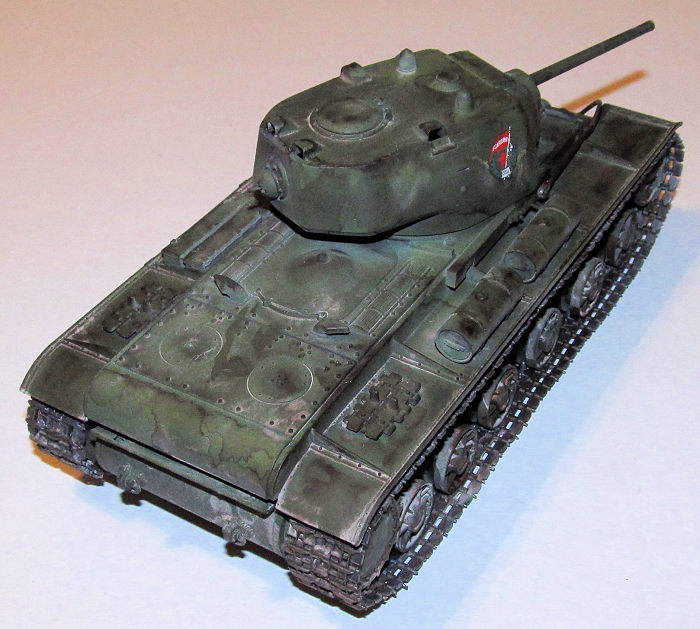
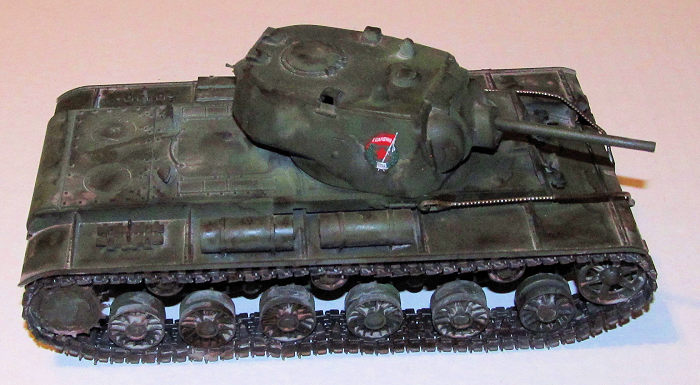
The turret was quickly assembled and the Aber gun barrel glued in place with CA glue. The seams along the top of the turret were filled in with Vallejo plastic putty. There was a seam running down the middle of the rear of the turret that required sanding/filling. I didn't bother working too much on the bottom seams as they wouldn't be seen.
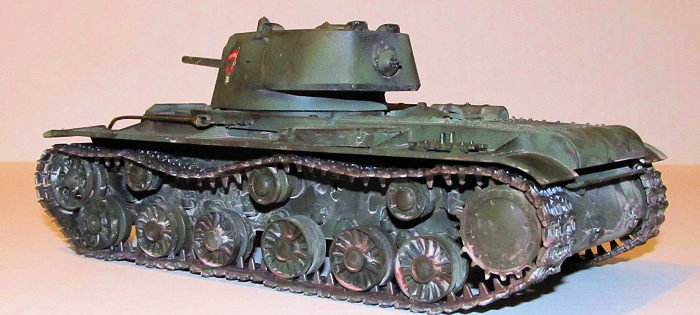
Bronco provides link tracks for those who don't like heating screwdrivers to melt rubber tracks. Also Soviet tracks weren't all that tight compared to their Western (then ally) counterparts so they had a tendency to droop unlike the taut rubber tracks. The Bronco instructions claim you need 88 links per track (probably for their KV-1.) I found that you only needed 85 a side for the Tamiya version. It was tedious work to make the tracks so I made them 8 links each session over a week. The only thing I didn't like about the tracks was that the pins had a tendency to pop out even with a dab of Tamiya Extra Thin cement. The final small bits were added on the tank including fuel drums and hooks.
| COLORS & MARKINGS |
I sprayed on Mission Models black primer first. When it was dry, I sprayed on the visible surfaces Mission Models white primer. The idea is to provide hints of shadow and light. I learned this technique from reading Jose Luis Lopez and watching youtube videos on it so I was curious to try it.
Next I sprayed on a thin coat of
Tamiya Olive Drab for the base color. Then I sprayed on thin coats of Tamiya
Olive Green and Flat Green to provide a rough approximation of WW2 Russian armor
green. I do see hints of shadow and light, but not as much as I want. Probably I
sprayed on the paint coats a touch too thick. Will work on it again in a later
model. The tracks w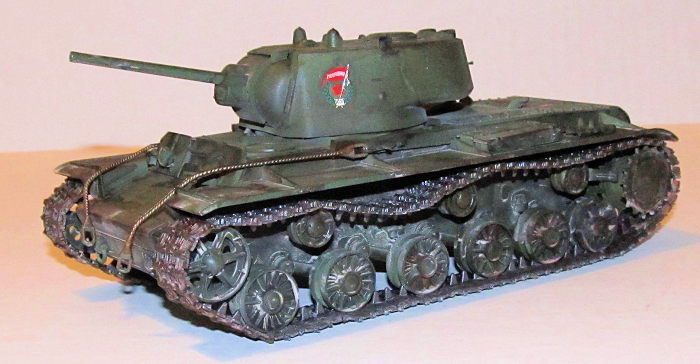 ere
painted flat black then sprayed Vallejo Metal Color Magnesium and Steel to
provide the dark metal color.
ere
painted flat black then sprayed Vallejo Metal Color Magnesium and Steel to
provide the dark metal color.
I didn't bother with a gloss coat and added the Soviet Guards Insignia on the side of the turret with some help from Solvaset. I wiped down the model and sprayed on a flat coat (so the weathering material would stick better.) First I made the tracks rusty with help from Vallejo acrylic rust wash and Mig European pigments. Next I put on a lot of watercolor wash (two parts burnt sienna and one part black) on the top of the hull and turret. When it was dry, I made a sludge wash of Mig Concrete dust and Euro dirt pigments and with a soft brush smeared it all over the tank focusing on flat surfaces and where infantry (and crew) would stand on the KV-1C. Next I sprayed on some Vallejo ochre yellow to simulate small mud splatters. Finally, I added some Vallejo fuel stains wash around the external fuel tanks and engine.
I then took damp Q-Tips to wipe down parts of the model to show some attempt at cleaning or remove what seemed like an excess of sludge, mud and wash. After the tracks were installed, the model was sprayed with a flat coat to seal everything in.
| FINAL CONSTRUCTION |
 I placed the
tracks on and posed them to drop over the top running wheels. I glued in the
final pin to secure the links together. I ran some glue over the joints to
freeze the tracks in place. These Bronco tracks really improve on the awful
rubber band tracks that originally came with the kit.
I placed the
tracks on and posed them to drop over the top running wheels. I glued in the
final pin to secure the links together. I ran some glue over the joints to
freeze the tracks in place. These Bronco tracks really improve on the awful
rubber band tracks that originally came with the kit.
Lastly, I took the rust painted plastic tow cables and bent them into a draped over shape. They were glued in place using CA glue. I can see why Tamiya replaced the plastic ones with string. There it was, I was done the KV-1C.
| CONCLUSIONS |
The Tamiya KV-1C is an ancient cheap kit from the early days of Tamiya Armor, but it is not a terrible kit with a little bit of help from aftermarket parts. With some patience and weathering, you can make a really nice model of a historic Soviet tank that helped blunt the German advance long enough for Marshall Winter and Siberian Troops to save the Soviets from being conquered by the Nazis.
4 December 2018
Dan Lee
Copyright ModelingMadness.com If you would like your product reviewed fairly and fairly quickly, please
contact
the editor or see other details in the
Note to
Contributors. Back to the Main Page
Back to the Review
Index Page
Back to the Previews Index Page