Tamiya/M&B models 1/35 KV-85
KIT #: ?
PRICE: $
DECALS: ?
REVIEWER: Jack Bruno
NOTES: Conversion

HISTORY
Back in the day when all Armor Modelers had nothing but Resin Aftermarket Additions for then current projects, M & B Models hit with a KV-85 Tank to be used with a KV-1 kit from TAMIYA. Surely this vehicle was the prototype between the KV and JS series because of the distinct similarities of the turret, minus the 122 mm gun of the JS type.  In the Resin kit you are supplied with a turret, 85 mm gun barrel, new Hull to fit the TAMIYA Chassis and other do dads.  Minor sanding was needed to bring it up to par and once a good going over with a glass to find any bubbles. pits or flaws.......I was ready to go.
 
CONSTRUCTION
Assembly could not have been any easier with simple part substitution as the only requirement.  TAMIYA plastic parts were needed throughout.  Before I delve any deeper into the kit, I must give you a "Golden Age Of Modeling Timeframe" here.......the world had not seen the likes of EDUARD, KASTEN or FRUIL yet. DRAGON was a year away with the Scud, let 
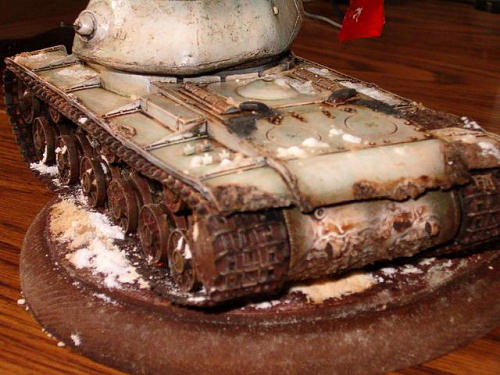
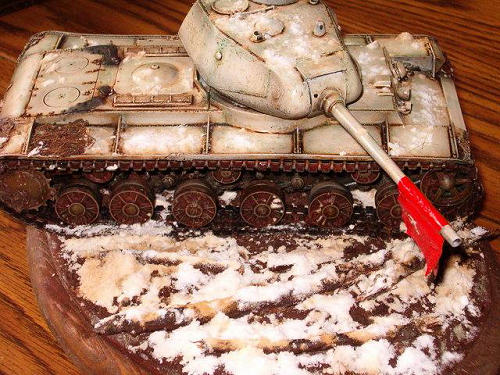
alone the JS-II.  So, all we had was TAMIYA KV tracks with the detail on the outside only.   HOWEVER, having seen the recent TRUMPETER KV series up close, I picked up a pair of Flex Track from fellow Modeler, Ron Thorne, who built his KV with the plastic link & sag track.  My world is now complete as I was able to have detail on my tracks and not feel shame.
 
COLORS & MARKINGS

With the kit fully assembled it was yearning and begging me for a winter setting.  Being the man that I am, I fully complied to the Muse of Modeling.  I sprayed the entire kit TAMIYA Flat Black and gave a few progressive lighter shades of green, starting with TAMIYA Japanese Army Green, which is a very good Soviet WWI.I. Tank color. I then hit with a few blasts of POLLYSCALE Flat White. After all this dried overnight we went on to a FUTURE Glosscoat and followed with an Oil Wash of Dark Brown.  I had already collected my base and twigs and stones from the curb to be my groundwork in addition to my CELLUCLAY. The CELLUCLAY was allowed to dry after putting the twigs/stones on it and pressing it in to assure a good fit. After this was dry..........I painted different shades of Browns and really gave it a thorough soaking of Brown Oil Wash. WHILE the wash was still in puddles, I sprinkled Baking Soda onto the base and let the Brown wash soak through in places. This gave me the effect of a thaw.  It worked out beautifully and I'm looking forward to using it again with my Sherman 105 "Bulge" setting. (working title: By-Tor and the Snow Dog)
After the oil wash on the KV I streaked a tad of green to represent worn area's and paint coming through the whitewash.  I did not use a Flat Coat because I intended a sorta "wet look" and again it came out with better than expected results. A little pastel powder around the exhaust and gun barrel and it was placed into it's setting. One thing was missing..........a splash of color.........so out came the VERLINDEN Flag Set and the Soviet Battle Flag was draped over the gun barrel. 
 
CONCLUSIONS
I was very pleased with this effort and it really filled a void in the Soviet Vehicle arsenal. If you see one of these sets at a swap, grab it.........you'll be pleased too. 

Editor's Note: As you can see, Jack is having trouble getting the whole model in the frame of the images. It must be a Chicago thing and we are working on it.

Jack Bruno

October 2006

Copyright ModelingMadness.com

If you would like your product reviewed fairly and fairly quickly, please contact the editor or see other details in the Note to Contributors.

Back to the Main Page

Back to the Review Index Page 2018