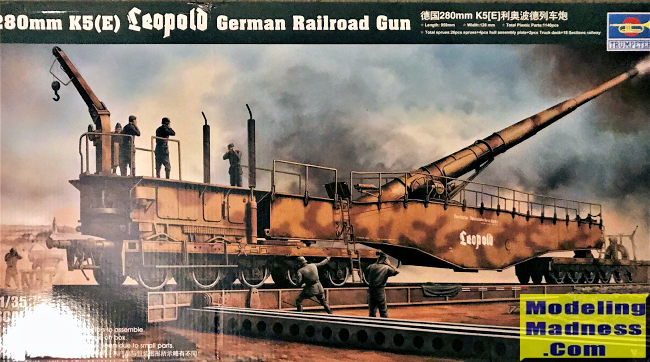
Trumpeter 1/35 K5E 'Leopold'
| KIT #: | 00207 |
| PRICE: | $135.00 |
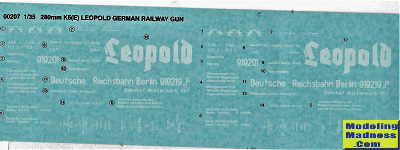
| DECALS: | Two options |
| REVIEWER: | Donald Zhou |
| NOTES: | Advantages: Huge, much more detailed than the competing Dragon one, esoteric subject. Disadvantages: HUGE, A LOT of small parts, missing the shell tongs on the crane. |
| HISTORY |
The development of the railway gun (not to be confused with the railgun now in development with the U.S. Navy) was at first seen during the American Civil War, in which the Union mounted several large 13inch naval guns on rails. General Lee also used a railway flatbed car, mounted with a siege mortar and then pushed by a locomotive to the front to interfere with General “I didn’t LOOSE!!! I JUST MERELY FAILED TO WIN”!!!!! McClellan (a BIG shout out to Oversimplified History on this one! Knew I’m gonna used that one sooner or later!). The true birth of the railway gun would be in WW I. After getting caught off guard, the French realized they need guns, especially large guns badly. So in a crash program, they took surplus naval coastal guns, and then shipped them to the front. However, there were some problems. These guns needed mountings, and they needed some sort of placement. Putting them on the ground proved to be impractical as they needed large, deep concrete foundations to absorb the massive recoils and prevent them from sinking to the ground. A new, quicker solution would be to mount them on railway trucks and build a railway underneath them. To this end, eventually, both sides produced a large number of railway guns, with France producing more, in various calibers than the rest combined.
The final act of railway guns would be in WW II, culminating in the Massive, and I do mean MASSIVE German 800mm, or 32inch Schewer Gustav or Dora, now, there are arguments whether those are two guns, or the same gun with two different names to confuse the allies but one thing’s for sure, it’s still the LARGEST artillery piece every made (some idiots would argue the American “Little David” is larger, but that’s only because it had a bigger bore diameter at over 900mm, the rest? Little David don’t even come CLOSE to the Dora!). Weighting in at well over 2000 tons when finished, the Dora was only used once, and that was at the Siege of Sevastopol. It took over a month, 2,000 men to finish the two double rail way tracks to support it and build the weapon, which was transported on 800 different box cars and flat beds, and another 2,000 men to operate and protect her! All in all, this is what I like to call, “The Furher sure is compensating for something” project as it was, and still is, very impractical and useless in a moving war! It was destroyed as the allies approached Germany proper.
A more practical gun, on the other hand, would be the K5. In the 1930’s Germany went on a crash course program to develop a railway weapon to guard the coast and to be used as a super heavy artillery piece. Krupp quickly developed a 283mm or around 11inch weapon, with a simplified gondola to house the gun, and used two off the shelf railway trucks, modified to German standards to mount the completed piece on it. 8 guns were produced. Two of the guns, named Leopold and Robert by their crews, were shipped from guarding coastal France down to Italy to shell the Americans stuck on the beaches of Anzio. Due to the massive rolling freight train noises the shell generated in flight, the two guns were quickly named the “Anzio Annie” and “Anzio Express”. The two gun were never found while at the front since they were carefully hidden in tunnels while loading, depriving allied recon aircraft of ever seeing them. After they fired off their last shells, they were quickly moved to the town of Civitavecchia to prepare them for the retreat. However, the Americans by that time, broke through the beaches and were moving swiftly in. Robert was destroyed by its crew before they surrendered. Annie was damaged, but repairable so the Americans were able to salvage her and repaired her to good enough working condition by using any spares from Robert. She was shipped to Aberdeen in Maryland where she underwent various tests before being put on static outdoor display for the next several decades until she was moved to Fort Lee after a major force restructure. She’s still there san the rear control and loading mount. There is another surviving K5E, out at Fort Todt Museum out in France. She is complete with the rear control and loading mount and had recently gone under a repaint on the main gondola and gun but the railway trucks are still rusted after all these years.
| THE KIT |
 Ok,
that is another rather large sized box! Ok, this time though, the reason why is
this is gonna be the second time going at this kit. I actually first bought this
kit in late 2004 when it was first released, got it to around 90% complete
before I got the call to work in China long term and had to give the kit to
someone else. It always bothered me that I never got to finish the job and
buying it again in China is a no go since this kit is HUGE and I knew
transporting it back to the States gonna
Ok,
that is another rather large sized box! Ok, this time though, the reason why is
this is gonna be the second time going at this kit. I actually first bought this
kit in late 2004 when it was first released, got it to around 90% complete
before I got the call to work in China long term and had to give the kit to
someone else. It always bothered me that I never got to finish the job and
buying it again in China is a no go since this kit is HUGE and I knew
transporting it back to the States gonna
 be
a hassle with how big it is. Got back to the States, the kit is now long out of
production and with two small kids in tow, I decided to drop it as it is again,
HUGE with a lot of parts and I don’t want them to swallow any or break any. So,
now 17 years later, the kit was re-released short while ago, and on Amazon,
someone was selling it for $120 total! Cheap considering I paid $135 without tax
the first time around and with inflation, the price had gone down! I had to pay
taxes, but even then it was only $132 in total….Time to jump…Again!
be
a hassle with how big it is. Got back to the States, the kit is now long out of
production and with two small kids in tow, I decided to drop it as it is again,
HUGE with a lot of parts and I don’t want them to swallow any or break any. So,
now 17 years later, the kit was re-released short while ago, and on Amazon,
someone was selling it for $120 total! Cheap considering I paid $135 without tax
the first time around and with inflation, the price had gone down! I had to pay
taxes, but even then it was only $132 in total….Time to jump…Again!
 The fact of
the matter is, back in 2003 or so, when the kit was announced, Dragon also
announced they would be doing the same thing too, also in 1/35th scale. Everyone
thought Dragon, a long time player would simply trounces Trumpeter in detail and
price wise. Both kits were released at around the same time and when it came
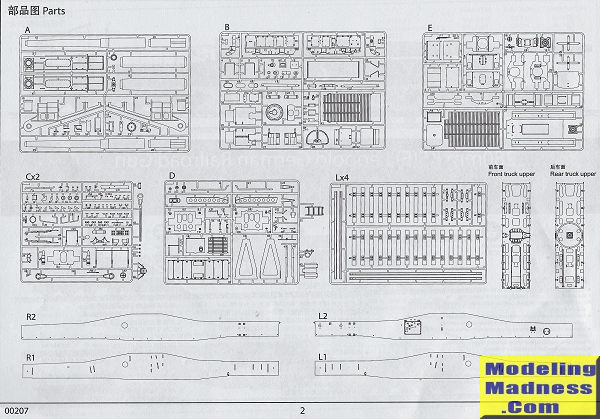
out, everyone was kind of surprised. This is because parts wise, Trumpeter
offers 1154 plastic pieces, not including the rail road bedding, tracks and
beds, which contains another 75 pieces since Trumpeter also offers a “cross
track” option in which the piece can be placed on a turntable section that
offers the gun limited traverse. Dragon offers only the straight track option.
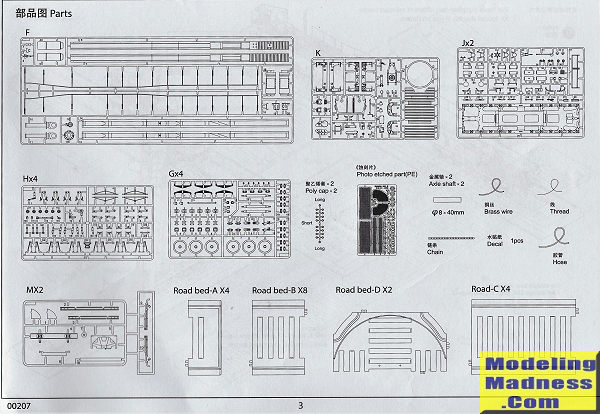
Also not counted are all the multimedia parts, the photo-etch, two big metal
rods that serves as heavy duty hydraulic linkage containers, a copper chain, two
sized copper wires and a plastic tubing. Added together, Trumpeter offering
easily tops 1200 parts while Dragon’s only adds up to less than 800.
The fact of
the matter is, back in 2003 or so, when the kit was announced, Dragon also
announced they would be doing the same thing too, also in 1/35th scale. Everyone
thought Dragon, a long time player would simply trounces Trumpeter in detail and
price wise. Both kits were released at around the same time and when it came
out, everyone was kind of surprised. This is because parts wise, Trumpeter
offers 1154 plastic pieces, not including the rail road bedding, tracks and
beds, which contains another 75 pieces since Trumpeter also offers a “cross
track” option in which the piece can be placed on a turntable section that
offers the gun limited traverse. Dragon offers only the straight track option.
Also not counted are all the multimedia parts, the photo-etch, two big metal
rods that serves as heavy duty hydraulic linkage containers, a copper chain, two
sized copper wires and a plastic tubing. Added together, Trumpeter offering
easily tops 1200 parts while Dragon’s only adds up to less than 800.
The reason why is obvious, Trumpeter is far far more detailed. The two rail road trucks for example, on the Trumpeter version, both eventually would swallow up 770 parts in total, Dragon’s, less than 400. Trumpeter one, the trucks bottom have all the hand cranks, separated air brake pads etc. Trumpeter also offers embossed letterings on each of the hub caps, with separated lubricant oil caps. Dragons offer none of those. The cabs are plain with a little nub as the lubricant oil cap. Dragon’s road wheels are also plain while Trumpeter’s wheels are embossed with circular patterns. This goes on and is the main reason why I bought the Trumpeter one in the first place.
Warp 17 years later, the box arrived from Amazon several days ago and it’s still a doozie! It’s still big. The completed model would be over 35 inches in length so it’s gonna be long. Now, the cross track version would be shorter but you gonna need something like 2ftx2ft of space for that one so straight is your only option! There are also three smaller boxes inside. The biggest small box, which can contain a regular Tamiya 1/35th scale tank kit, contains all the railroad beds, rails and accessories. The much smaller box contains the decals, PE fret, a wired mesh (for the bottom of the stand that houses the aiming device), the metal rods, and the rest of the multi-media parts. Finally, the very narrow, long box contains the gondola sides. Dragon offers this as a large single piece molding. Trumpeters are all separate but the buildup is quite logical and easy.
Assembly begin with the rail road bed. You have to make the selection between the straight and cross track. Again, unless you got a 2ftx2ft of space, straight is your only option. From previous experiences, not just this kit but also Trumpeter’s Morser Karl Grat with the rail road transporters, Trumpeter has a unique way of doing rail road beds. The beds are separate from the bedrocks. The bedrocks details are “imbedded” into a series of plastic rectangles that you join together. It works, but it does leave some very unsightly seams on the side of the plastic “containers”. The bed itself, the seams can be easily dealt with as the earth itself. First time around, I didn’t even bother puttying up the seams, this time around, might give that a go to see if I can do it. Afterwards, the wooden sleeper beds are inserted underneath before the rails are slid onto the bed, through the molded on nails. Again, this work but it does leave the individual plastic pieces somewhat “bendy” since this thing is long at over 3 feet so you probably need to reinforce it underneath with plastic sheeting or spare sprues.
The kit assembly begin proper with the two railway trucks. The first five steps deal with this and there are A LOT steps within each individual steps. A lot, and I do mean AAA LLLOOOOTTTT of steps are repeats and there are AAA LLOOOTTT of small parts. The first step open this with a huge BANG as all the support trunnions, the individual hand cranks I mentioned earlier, leaf spring supports etc are all there. Don’t get your eyes crossed. In fact, both sprue G and H deals with nothing but the railway trucks and there are four sprues for each and by the time you finish both trucks, they should be picked clean! That’s again, nearly 800 parts total for both trucks! After you finish with step five, the instructions ask you to go back to step 1 and redo everything all over since both trucks are common to this point. Just a small tip, the six individual road wheels, the nose hub cap assembly, again, use plenty of liquid cement for the lubricant cap G17, not unless you wanna loose these small parts to the carpet monster, but most importantly, insert the entire assembly onto the leaf spring support, DO NOT cement them in. Use the parts H20, the bottom holder pins, to hold the entire wheel assembly in, allowing them to flex up and down. This is because no matter how hard you try, the rail tracks will not be even. You’ll want the wheels to be able to flex up and down to sit on the rails….It’d be weird to see a rail road wheel up in the air here…
After step five, step six starts with the individual “front” and “rear” end trucks top side assemblies. The rear is far more involving so the instructions starts with that. Just be aware, if it looks like carpet monster food, leave it until final assembly! It is here, on the bottom of the trucks, you need to use the thicker brass wire and make it into four “n” shaped supports. You need to cut them into 48mm pieces, then bend them to shape by following the diagram on the instruction.
Next couple of steps deals with a lot of detail pieces, step platforms, the two buffer pads and the manual connector hooks. Germans, and European trains back then uses manual connector hooks. These hooks on here contains no less than 7 individual pieces to make a very detailed assembly.
In comparison, the front truck is a lot easier. The big tripping point again, would be the four n shaped brass wire support you have to bend in shape for the bottom of the truck.
After 10 steps, it’s finally onto the gun itself. Assembly starts with the massive cannon trunnion holder. These parts are big so take your time. There also a lot of details dealing with the massive recoil mechanism. Here, once again, you need to break out the thinner brass wire, and cut them to 15mm and then bend them to shape as the exposed electrical wiring on the top of the gun. I skipped this the first time around but this time, will go to see how difficult this is…
Next step is the breech. It’s very detailed. If you are careful with the glue, the breech block can be made open or closed.
Then a complex assembly follows for the massive hydraulic linkage beneath the gun. This of course, is the gun elevation device. This can be made to be workable so follow the instructions closely.
Next several steps deals with all the supports in between the gondola. Assemble these carefully so when it’s time to close the sides, you can close them without leaving seams. Once the inner sides are closed onto the gun, its elevation assembly, and the side supports, the outer sides are also then put on. Might be a good idea to use superglue in places, especially on the inner surfaces where it will not be seen to reinforce this massive assembly.
Now that the gun trunnion and elevation assembly is done and closed up, the details can follow. First are the gun rotating holders, then the bottom covers and the rail truck connectors are put on the bottom. Do not get confused since the rear connector is different from the front one.
Back to the top, the wooden walkway platforms. Front metal cover, with a nice looking gun lock are now assembled along with the ladders. The first PE occurs here as the top gun rotating covers are in PE.
Then the long massive gun barrel is made and inserted into the gun. Now, there should be a peg inside the gun support that allows you to simply insert the gun into the correct length. I will not cement this since it’s easier to transport the thing with barrel removed. The barrel itself is in three pieces. The main body is halves…As slide molding is not invented at that time (and even if did, can it handle something this big?), with a small tip that contain a small length of rifling…Yes, for those that hate two piece barrels, there is a metal barrel tube offering…But at a cost of $55, it’s nearly half the cost of the entire kit!!!! So yeah, I’ll just work with the kit one.
The loading dolly and loading tray are now assembled. There are some very fine details on the side…Might wanna save those as they are tinnie and look like carpet monster food.
The two side mounted boarding ladders are now made. Two options are given, one extended as if the gun is in operation, the other folded in transport. The side opening containing the aiming device operation station is now made. A wire mesh is provided for the bottom standing platform…Why isn’t this a PE is beyond my guess but it works. It’s not shown in the instructions, but it should be easy to make this folded up.
Now, the four hand guard/rails are now added to the gun. There are two super long ones covering most of the length and two short ones to the rear, with an opening right on top of the two ladders. Careful cutting them off their sprue as they are rather “crispy”.
Finally, the rear end control, power supply, loading wagon is build up. This is incorrectly called as an “ammo wagon” in the instructions. The first to be made up are the sides, with the air filter besides it along with all the other details.
The top, with small triangle supports are not added to the wagon, for the cross track assembly, a small section of the wooden top walkway have to cut off, in order to allow the trucks to swing around.
The major assembly here are the two smoke stacks. This is because two PE sheets are offered for the side mounted stack holders. To help you make them into the proper circle, a circular tube is offered. But from the first time around, you might want to anneal them, then fold them onto a bigger circular object, like an oversized hobby knife, then onto the tool before supergluing them onto the stacks. Here, the two ammo rounds and the ammo loading crane platform are also made. Note the two PE for the platform itself.
The ammo loading crane is now made. It’s a major assembly with many parts and a small wrap of wire. You may want to replace this with thin copper wire if you have access to it. Also, this is also missed by Dragon, the small ammo tong is missing. This is a cross scissor like device that the crew on the bottom can use to grab a shell by open the “scissors” and then wrap it around the round’s body before closing it. A pin is used so it won’t open while the round is being lifted up. Now, no one will notice but if it really bothers you, I think 3rd party now makes detail sets containing this.
Finally, the wheeled ammo and powder bag transport tray is made. Trumpeter do not offer the push handle on top of this tray but they can be easily made with stretch sprue or spare plastic rods.
Finally, the wagon is finished with the two hand grab rails and side mounted details. Then it is put on the main assembly to complete it.
| CONCLUSIONS |
WHEW! What can I say? This is a major major build! Again, I’m gonna finish this this time around since I also promised my IPMS mates that I’ll definitely be bringing this piece to next year’s IPMS Atlanta Con show. Wish me luck! Imma Gonna Need It!
Donald Zhou
October 2021
Copyright ModelingMadness.com. All rights reserved. No reproduction in part or in whole without express permission.
If you would like your product reviewed fairly and fairly quickly, please contact the editor or see other details in the Note to Contributors.