Tamiya 1/35 M47 Patton
| KIT #: | 37028 |
| PRICE: | $55.00 |
| DECALS: | Six options |
| REVIEWER: | Donald Zhou |
| NOTES: | Reboxed Italeri kit with additoinal parts. |

| HISTORY |
The M47 was an evolutionary development from the M46 and then evolved to become the M48. Despite the fact the M46 was a sound tank that cured many of the faults of the M26, mainly mobility and reliability of the engine, transmission and running gears, it was always seen as a stop gap measure until a more capable tank was developed despite the M46’s success during the Korean War. The replacement of the entire M26/46 series would be the T42 medium tank. However, like so many things, the T46 eventually ran into serious development problems that saw its cost balloon out of control. Even before that, the Korean War erupted, despite the M46 showing it can manhandle the T34/85, the Army still wanted a newer tank immediately, rather than the slow crawl of the T42, especially since espionage had glimpsed a series of new Russian tanks, the T-54 which promised to be superior than any American tanks then in service, a project was quickly developed to slap on the T42’s turret onto the M46’s chassis. This would be the M47. An initial 500 was quickly ordered from the American Locomotive Company or Alco.
The M47 featured the lower hull from the M46, the turret was brand new, featuring the improved M36 90mm cannon with the M12 optical stereoscopic range finder. This range finder is “coincidental”, meaning sighting units are two units, each on the side of the turret. By triangulate the distance to the target, it’s far more accurate than the old “straight line” range finder (basically, the gunner have to “merge” the two pictures into one), however, it does require far more experience to use. The nose is elongated to almost a point and the back is also elongated until the rear is halfway across the upper lower hull deck, giving the turret a far more and distinctive lozenge shape. Secondary armament includes two .30 cal machine gun, one co-axel with the main cannon, the other in the usual co-driver/radio operator station and like all American tanks, a M2 .50 cal is mount on the roof of the turret to serve as an anti-aircraft weapon. The M47 would be the last American tank to have a bow mounted machine gun. In fact, improved versions of the M47 was the first to dispense with this piece as it soon proved redundant in tank to tank fighting.
The M47 did not see service until 1952. There were plans to send it to Korea but that plan was eventually shoved since a hydraulic problem that plagued the turret was discovered, sidelining many of the new tank until the problem was licked. By then, the Army soon decided that the M46 was more than good enough to manhandle the T34/85 and sent the new tanks to Europe, always the main TOP priority for the U.S. and NATO back then. The tank would never see action in U.S. service and was quickly declared “Limited Standard” when the M48 was ready in 1953. However, it quickly entered service with many NATO country such as West Germany, Portugal, Italy etc under the Mutual Assistance Program or MAP. By 1957, the tank was declared obsolete and completely replaced by the M48 in late 1950’s. However, the tank did see service with many other nations and saw action with countries such as Pakistan. Today, the tank serves as a recovery vehicle in countries such as Iran.
| THE KIT |
 For many years, the only way to get a M47 kit is
from Monogram/Revel and their 1/32 toy like model kit. For many years, Italeri
is the only company that offered a somewhat halfway decent M47 until Takom blew
the lid off the scene with their super excellent M47, including the M47/M47G and
the M47 E/M kits. Recently, Tamiya released their own version as the “West
German Tank” M47, in other words, a M47G.
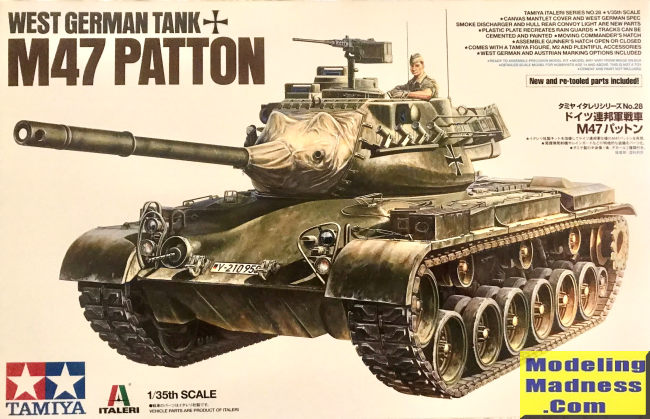
Right on the lid, you can see on the bottom the word “Italeri”…Yep! This is another one of those Italeri molding under the Tamiya brand name so if you built any of the Italeri’s M47, this should be familiar. To compliment this kit and make it into an M47G, Tamiya added three small sprues D, AA, and W That contains parts for the smoke grenade discharger, a platform for the commander figure and two German style jerry cans (D), an accessory sprue with a new multi-piece .50 cal and some ammo cans (AA), and a sprue for the new German commander figure and some boxes (W). These are highly welcome. However, you can instantly notice the differences in detail. The main M47 molds are over 20 years old now while the newer one uses the latest in molding technology so the detail differences are quite noticeable. Beyond that, the same ol’ Italeri warts and faults apply to this kit and being such an old molding, don’t expect clear parts like what’s in the Takom offering.
Construction begin with the running gears strangely enough. There are a lot of stuff, the volute springs, suspension gears, arms and return rollers. There are a lot of parts such as volute springs, hydraulic shock absorbers and the wheel arms. Just a note: with the wheels (both the road wheels and the return rollers), the wheel hubs are separate. If you put on the wheels and be judicious with the cement, you can make the wheels rotate. This of course is not realistic (the real thing, the hubs rotate with the wheels) but should help when it’s time to get the rubber band style tracks. Now, the rubber band tracks, some of the details are missing, such as the pin details on the side of the tracks. This applies throughout the model. Compared with the modern Takom one, various details on the side spoonsons, the turret sides, and front, the details are much softer on the Italeri one.
The top of the hull has the two hatches, the side mufflers and the rear panel. The big detail here is a good casted engine bay that shows the top of the engine, batteries, and transmission that can be put down on the rear of the bay. Some of the grills are separate and you can pose them in the open position to show off this bay if you want to. Now, there are a lot of crispy small parts such as the side spare tool boxes open/close handle bars and the grab handles/”cloth hangers”. Unless you got a dire need to feed the carpet monster, keep it on the sprues until final assembly.
Turret assembly begin with the turret halves being put together. Just a note though, the parts to build the turret without the canvas dust cover is still there and you can find the original Italeri instructions on the net. However, just one BBBIIIGGG HUUUGGGEEE note here, in order to allow the main gun to elevate and move, Italeri cut a huge cut out along the upper cannon slot, this slot is very noticeable if you put on the regular mantlet. At first, I wanted to do the regular gun mount and the mantlet, but upon seeing that huge hole there, I started to ask questions. A comparison with my Takom M47E/M told the tale. The Takom one is correct and do not have the huge hole on the slot, this forced me to split the turret again and pull out the main gun and mantlet and use the canvas covered one by Tamiya instead to avoid this huge detail mistake.
 The rest is just prototypical average armor kit fair.
Another note. If you wanna back date this to a U.S. version (which is what I’m
about to do), just don’t use the smoke grenade discharger and remove the molded
on slot for the rain drain pipe station. Now, decals are provided to cover up
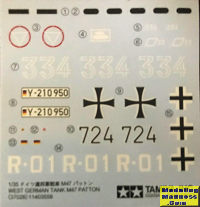
the solid opaque periscopes on the turret but I’ll probably paint them black
instead. Like the Takom one, if you use the glue judiciously, you can make the
commander cupola cover moveable. Also, the original .50 cal is also there if
Tamiya’s multi-pieces one give you trouble. Two versions are provided, a German
and an Austrian one…..You can google to see if the Austrian one belongs to a
certain Austrian former body builder turned Hollywood action movie star with
certain one liners such as “Ah’ll Bee Beack!”
| CONCLUSIONS |
So, yeah, once my Takom M47E/M kit comes online you’ll realize I said I wanted to get the Takom M47/G…Well, I did…But a kit there, several resin figures there, and some procrastination all over = It seems Takom had taken that kit out of productions and the left overs are now well over $100!!! NO GO! So, then, this kit pops up, although not as detailed as the Takom one, certainly still fits the bill and should be a fun build if I can get around to it.
May 2021
Copyright ModelingMadness.com. All rights reserved. No reproduction without express permission.
If you would like your product reviewed fairly and fairly quickly, please contact the editor or see other details in the Note to Contributors.