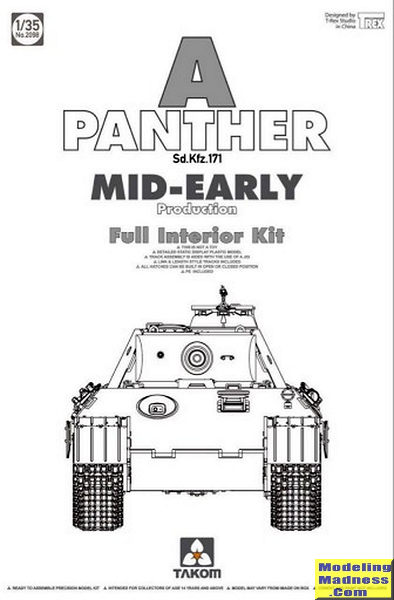
Takom 1/35 Panther Mid/Early w' Interior
|
KIT #: |
2098 |
|
PRICE: |
$65.00 |
|
DECALS: |
Three options |
|
REVIEWER: |
Donald Zhou |
|
NOTES: |
Advantages: Extremely
detailed, contain full interior, includes latest details and parts for
mid production version, in fact, this kit can be built as either
Mid-Early, Mid and Late production A thanks to all relevant parts
included in the kit!
Disadvantages: A LOT of small parts, no clear parts, guide teeth for the
tracks are separate. |
 When WW II started
with the German invasion of Poland in 1939, the Wehrmacht force shocked the
world with their Blitzkrieg tactics (the word was actually invented by the
British believe it or not) of using tanks, or panzers as a shock force to drive
a wedge into the defenders, then the following infantry would mop up the
remaining survivors. Believe it or not, at the time, the Panzerwaffe was
actually not well equipped to really Do this….It’s surprising, but the majority
of Wehrmacht armed forces were still horse drawn, especially to the bitter end
when fuel became chronically short (the fact of the matter is, it’s the U.S.
Army that became the world’s first true mechanized army, thanks in no small part
to the “Arsenal of Democracy”……And that is in thanks to companies like…..As
“Web” in Band of Brothers so eloquently screamed, “Say hello to Ford and General
Motors!!!” These companies, along with Studebaker etc produced trucks and other
vehicles in such numbers that they not only equipped the U.S. Army, but also
were given to the British, the Free French Army, and Russia to the tune that
many Russian drivers simply abandoned broken vehicles, knowing full well there
was another American made truck waiting for them later!). The fact that it was
very successful was simply the Allies at the time didn’t have anything to defend
against this tactic! The sight of Polish cavalry on horsebacks charging against
steel is something of a tearjerker but also brutally shown how warfare has
forever changed. Even as the Panzer force came up against superior French tanks
such as the Suma and the Char B, superior tactics, momentum and general Allied
ineptitude kept the Germans going. All of that, however, was about to come to a
crash halt!
When WW II started
with the German invasion of Poland in 1939, the Wehrmacht force shocked the
world with their Blitzkrieg tactics (the word was actually invented by the
British believe it or not) of using tanks, or panzers as a shock force to drive
a wedge into the defenders, then the following infantry would mop up the
remaining survivors. Believe it or not, at the time, the Panzerwaffe was
actually not well equipped to really Do this….It’s surprising, but the majority
of Wehrmacht armed forces were still horse drawn, especially to the bitter end
when fuel became chronically short (the fact of the matter is, it’s the U.S.
Army that became the world’s first true mechanized army, thanks in no small part
to the “Arsenal of Democracy”……And that is in thanks to companies like…..As
“Web” in Band of Brothers so eloquently screamed, “Say hello to Ford and General
Motors!!!” These companies, along with Studebaker etc produced trucks and other
vehicles in such numbers that they not only equipped the U.S. Army, but also
were given to the British, the Free French Army, and Russia to the tune that
many Russian drivers simply abandoned broken vehicles, knowing full well there
was another American made truck waiting for them later!). The fact that it was
very successful was simply the Allies at the time didn’t have anything to defend
against this tactic! The sight of Polish cavalry on horsebacks charging against
steel is something of a tearjerker but also brutally shown how warfare has
forever changed. Even as the Panzer force came up against superior French tanks
such as the Suma and the Char B, superior tactics, momentum and general Allied
ineptitude kept the Germans going. All of that, however, was about to come to a
crash halt!
At the start of
Operation Barbarossa, the Germans quickly swept all opposition aside. Then the
Wehrmacht came up against the excellent T-34 and the shellshock was supreme!
Simply put, the T-34 was better than all of the German Panzers up to that point.
The mainstay of the Wehrmacht Panzerwaffe was the Panzer III, used against other
tanks with a 50mm gun. This quickly proved very inadequate against the T-34,
with its thick angled hide and excellent 76mm main armament, the T-34 can stand
well off and fire against the Panzer III with impunity. The other was the Panzer
IV. Armed with a short barreled 75mm gun, The Panzer IV mark D was mainly used
to tackle fortifications and pill boxes, not really well suited against other
tanks. The problem became compounded when the heavier KV-1 showed up, and then
there was the monstrous KV-2, one of which blocked the advance and received over
100 hits before the legendary 88mm was able to knock it out! Obviously, an
answer was needed to be found against these new Russian tanks.
The first few
solutions was to quickly adapt a long barreled 75mm and quickly inserted into
the Panzer IV since the Panzer III were too small to adapt this weapon. This
finally allowed the Wehrmacht to fight the T-34 on equal footing. However, what
the Wehrmacht really wanted was something completely superior to the T-34. This
was the Panther and in some respects, the Tiger.
The VK20 project was
actually started back as early as 1938, as a replacement for the Panzer III and
IV. However, as the war progressed heavily in favor of the Germans the project
was slowed to a crawl. All of that went out the window immediately upon the
encounters with the T-34 and the KV-1. A new project, code named VK30.02 were
headed by both Daimler-Benz and MAN to design a replacement with a 30 ton
weight. Lessons learned from captured T-34 examples will be built into the new
design. These include a sloped frontal armor, which proved effective at
deflecting incoming rounds, and thus against penetration, wide tracks to move
over rough and soft grounds, especially in Russia and finally, a well-armed gun
to stand off against enemy armor.
The DB design was
nearly a complete copy of the T-34, featuring well sloped armor, a diesel engine
with a rear drive and the turret near the front. The MAN’s offer is more
conventional, with a Maybach gasoline engine, transmission at the front and
turret in the center. The tank would also features interleaved road wheels very
much like the Tiger with torsion bar suspension and would feature a long 75mm
gun that’s actually superior to the Tiger’s famed 88. Although Reich production
minister Albert Speer and Heinz Gudarian preferred the DB version, it was Adolf
Hitler that made the decision to go with the MAN’s version instead. The final
design weight ballooned to 45 tons and more due to the demand made by Hitler to
increase the frontal armor to 80mm total. Due to the slope and the quality, the
equivalent was actually 150mm on the turret front and up to 110mm for the
glacis! This proved to be nearly impervious to any Allied tank gun except the
122mm in the JS-2, the 76mm in the Sherman Firefly, and the 90mm in the M36
Jackson and M26 Pershing. However, to keep the ballooning weight down, the side
armor and especially the rear was kept at bare minimum. The side armor was
actually so thin, 45-55mm depending on the version, that even a 75mm armed
Sherman could defeat the Panther from the side at standard combat ranges. This
made sure that all Panther commander were made well aware to defend their
flanks. The tank would be powered by a Maybach engine developing initially
650HP, later upgraded to 700. This gave the tank good power to weight ration
compared to the Tiger, which used the same engine but suffered from mobility
problem to its massive 55 ton weight.
The tanks main
armament is a Rheinmetal Borsig 75mm KWK-42 L70 weapon. Due to the ammunition in
having much more powder than competing 75mm shells, and a very long barrel, the
gun have more penetrating power than even the Tiger 88. This also made aiming
easier since the initial muzzle velocity is so high, the trajectory is extremely
flat. The tank was further armed with two MG34 machine guns, one co-axle with
the cannon, the other in the hull at the bow. The initial D and very early A
version had a slit in the hull to fire the bow machine gun. This was later
updated in the Mid A version to a bow ball mounted version. Overall, the Panther
was one of the best tanks to see production, offering one of the best
compromises in its armor, armament, and power.
As soon as the
design was finalized, the new tank was thrown into the fray. Production were
hurriedly sped up in order to allow the new tank, along with the Tiger to
participate in Operation Zitadel, the Battle of the Kursk, where the new tank
failed spectacularly! This was due in no small amount to the fact that the
design was simply too rushed! Over 80% of the tank suffered from one reliability
and mechanical fault after the other. In fact, maintenance and reliability
issues dogged the tank from beginning to end. After the initial battle, several
improvements were quickly made to the D version. These include the
aforementioned changes to the bow machine gun position. The commander cupola was
also changed and mantlet thickened. The new version, the Panther A was the most
produced since a host of improvement were made to its engines and transmission
that solved many of the problems plaguing the initial version. However, some
were never be able to solve. The transmission problems still lingered and this
plagued the tank till the very end.
The final version is the G. The most obvious
change was the vision slit on the driver side was eliminated to prevent the
apparent weak point from taken advantage off. The driver was given a rotatable
periscope. Other changes included both the driver and radio operator hatch are
now designed to swing upwards quickly to facilitate escape. The side sponsons
are less sloped to be in line with the turret. This opened more spaces to allow
the G version to carry more ammo. Because of this, side armor was thickened a
little to an equivalent of 55mm. From the Mid production G onward, a mantlet
with a much thicker lower lip was added. This solved one of the Panther’s
biggest weakness. The rounded mantlet, the downward rounding lip proved to be a
decidedly good shot trap where it bounced rounds right through the very thin
hull roof or right into the turret ring….Both equal the tank being taken out of
the action. The thick, straight lower lip mantlet solved this problem. Overall,
many historians gave the Panther as the best tank of WW II, even better than the
Tiger since it’s far more mobile, reliable and its firepower is actually
stronger and offers the same protection, at least frontally. Over 5000 Panthers
were produced, second only to the Panzer IV in terms of production.
 I actually got this
kit a year ago and it’s been sitting in the box because…umm…well…..UMM!!! Sigh,
what is it with me and kits that contains over a couple billion
parts?!?!?!?!??!?!!? As if that 1/16 King Tiger isn’t punishment enough…Now
this, with parts now much much much much smaller too!
I actually got this
kit a year ago and it’s been sitting in the box because…umm…well…..UMM!!! Sigh,
what is it with me and kits that contains over a couple billion
parts?!?!?!?!??!?!!? As if that 1/16 King Tiger isn’t punishment enough…Now
this, with parts now much much much much smaller too!
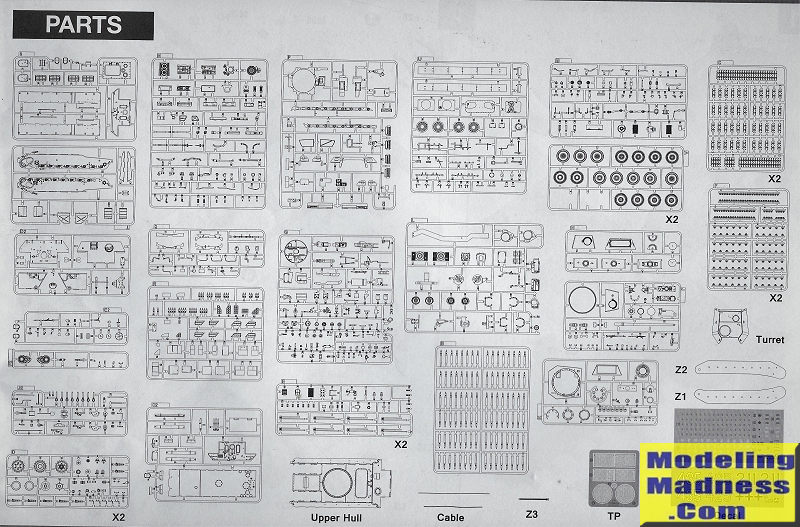
Well, upon opening
the box, there are few surprising things……The first thing is lack of clear
parts. All periscopes are included, but they are all solid plastic so that’s
that…Also, there is a dearth of photo-etch. The only photo etch are the top
engine intake screens. The rest are all plastic, which should make assembly much
much easier!
Looking through the
parts, and examining other versions’ instructions on the net (THANK YOU
How-Amps!!!!), I quickly realized despite the box saying this is the “Mid-Early”
version, you can actually build either this, the Mid, or the Late version since
all three mantlets are in the kit, along with both the double eye aiming scope
and the mid and late version single eye aiming scope. This means, if you check
the net and get the correct instructions, you can build whatever version you
choose! The only thing is with this version, the pistol/submachine gun aiming
hole on the side of the turret are there. The rear one is redundant since the
mid and late version rear plate is in the kit. You just need to fill the two
holes on the sides of the turret that’s all! Otherwise, it’s just a matter of
picking out the right parts for the right version!
Other than that,
it’s just AAAALLLOOOTTT of parts and AAALLLLOOOT of patience. You definitely
need to mark down what goes what and where to jump to make painting easier since
there are a lot of steps and sometimes the instructions don’t make sense, at
least when it comes to painting.
The first thing you
do is rip out the colored interior picture pages in the middle of the
instruction book…Yes, book! I quickly figured you’ll be visiting these pages…A
LOT!
The construction
itself begins with the lower hull. It’s in three pieces. Guess when the scale is
much smaller, it has to be this way since there are a lot stuff that goes on the
bottom plate and the side walls. The major construction is the transmission so
take your time. And no, you can’t assemble it later like my King Tiger since it
get stuck in the middle between the two walls and the bottom plate. After the
torsion bars are assembled in, the two walls are added to the side with the
driver’s operating sticks stuck in the middle. The torsion bar arms are added
afterwards. May save the wheels for later. A helpful jig is used to make sure
all the arms are even.
The next few pages
deal with a plethora of interior details. The batteries, driver and radio
operator’s seats, rear compartment wall, transmission connection rods, box
loaded with ammos, etc are assembled at this point.
Track assembly is
next….May skip this till the end. The tracks are in three pieces. Yes, the guide
horns are in two separated pieces but the tracks are link and length. To deal
with the boredom of assembling all those teeth, Takom has a unique way of doing
this. Each of the guide teeth correspond to their individual length of links.
I.e., Teeth F1 correspond to the longest length of tracks on the sprue. What you
need to do is clip both ends off, then cement ALL of the teeth directly onto the
length of tracks on the sprue itself since the distance between the teeth are an
exact fit on the links themselves. After the cement dries, clip off the “handle”
and Viola! Done…….Have to wait and see how this work out since each of the tooth
has two mold pour spots on each and if cleanup is a hassle, may just bite the
bullet and assemble it the hard way!
Then the completed
tracks are put on the jig, yes, the same jig that help you check the arms is
used to assemble the tracks with the correct sag and tension. What happen is,
you take the sprocket, insert to one end, and the idler, insert into the other
end and assemble the tracks on the top rung only, leave the bottom empty, with
the individual links to wrap around both the sprocket and idler. After paint is
dry, carefully take off the whole entire assembly and put on the hull sides.
Then insert the bottom most length of tracks to finish it off. Notice there are
two of these rigs since one side is slightly different than the other so follow
the instruction CAREFULLY here so you don’t goof! Again, have to wait to see if
this makes it simple…Or another world of pain!
Engine assembly is
now made. This is very detailed, much more so than the Rye Field offering. Take
your time since this is a very good looking engine when done….This time, may not
cement it into the bay like my King Tiger so I can pull it out to display it!
The side sponsons
are now made. Again, I don’t know why these manufactures have you insert all the
assemblies on the sponsons, THEN have you attach it to the hull since that’s
just asking the prior assemblies to break off and feed the carpet monster! Hence
why I’ll cement the sponsons first, THEN add in the details! The details are
complete with the rear gas tanks and radiators.
The rear plate is
now made. Again, for the exhaust pipe, the three pipes for the mid and late
version is included. Visit how-amps for those instructions if you must. The
lower hull is complete at this point.
Upper hull begin
with the engine and air intake panels. The only photo-etch in the kit used at
this point. The engine maintenance hatch, if you are careful, should be able to
move when done. May leave off the pioneer tools till later. The interior
features a well-appointed bow machine gun and the radios. I definitely will not
cement the top to the bottom as to reveal that interior whenever it is needed!
The “schurzen” side armor plates are added next. Just be aware these things in
real life were only 5mm thick and were not that well attached….So any even
slightly battle worn Panthers will have several missing so cutting them up and
only place some pieces is perfectly fine! In fact, some Panthers were missing
these completely!
Turret begin with
upper interior assembly. Again, for mid to late, fill up the side
pistol/submachine gun holes. The rest is straightforward for all versions.
Exterior is next.
May leave this till last until all interior are complete. But here, you assemble
the rear escape/ammo loading hatch. Use the plate without the hole for mid to
late version. Read the instruction carefully and be judicious with the glue will
result in the hatch being operable when done.
The lower turret
plate is done next. Again, check the color call out page for the correct colors.
The main 75mm cannon
breech assembly is next. For the aiming scope, for early-mid to mid, use the
double eye sight one G6. For late and some mid versions, use the piece G13, with
part G75, the eye piece cemented on as the aiming device. The rest of the
assembly are the same.
 The turret
assembly is complete with the basket. Again, refer to the color call out for the
right colors. Notice here, a vinyl exhaust pipe piece is used to attach the
turret exhaust port to the vent on the turret. May not cement the pipe to the
exhaust port so
The turret
assembly is complete with the basket. Again, refer to the color call out for the
right colors. Notice here, a vinyl exhaust pipe piece is used to attach the
turret exhaust port to the vent on the turret. May not cement the pipe to the
exhaust port so
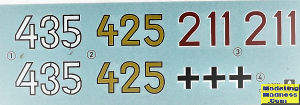
 I can pull the turret apart for show. Three markings are given,
all mid-early but laymen may not able to tell….Especially if you got plenty of
German decals in the spare decal box! The first is a Panther A early-mid of the Tokenkof division, the infamous Skull heads in Poland 1944. The second is a tank
of the 23rd
Panzer Regiment, 23rd
Panzer Division in the Ost Front, 1944. The final version is a tank of the 26th
Panzer Division, Italy, 1944. Overall color are various. The first one has a two
tone camo of overall Dark Yellow with dark green patches, the second a three
tone with dark yellow, dark green and red brown. The last one overall Dark
Yellow, with the schurzen carrying some red brown stripes.
I can pull the turret apart for show. Three markings are given,
all mid-early but laymen may not able to tell….Especially if you got plenty of
German decals in the spare decal box! The first is a Panther A early-mid of the Tokenkof division, the infamous Skull heads in Poland 1944. The second is a tank
of the 23rd
Panzer Regiment, 23rd
Panzer Division in the Ost Front, 1944. The final version is a tank of the 26th
Panzer Division, Italy, 1944. Overall color are various. The first one has a two
tone camo of overall Dark Yellow with dark green patches, the second a three
tone with dark yellow, dark green and red brown. The last one overall Dark
Yellow, with the schurzen carrying some red brown stripes.
WHEW!!!! Finally
done. Sorry if it takes too long cause this is a complex kit……Hence why it
stayed in the box this long and I got a Tamiya 1/35 Panther G instead! I will
one day make it cause it’s begging to be built! I also decided not to do the
mid-early version but a Late version instead since all you need is fill the
turret holes, use the correct parts and I got PLENTY of leftover German decals!
The only other big tripping point is that nearly all the Panther A, save for a
few dozen wore the Zimmerit coating….This is not Takom’s fault since they do
have offerings with the coating but me being a cheap skate bought this one cause
it was at least $20 off the asking price of the one with the coating! Sigh, may
break down and buy a 3rd
party coating decal or something….. But still, this won’t be awhile since I got
a long train of project waiting to be completed and I still got that Sturmtiger
to do first! One thing at a time….One thing at a time!
Donald Zhou
December 2019
Copyright ModelingMadness.com
If you would like your product reviewed fairly and fairly quickly, please
contact
the editor or see other details in the
Note to
Contributors.
Back to the Main Page
Back to the Review Index Page
Back to the Previews Index Page