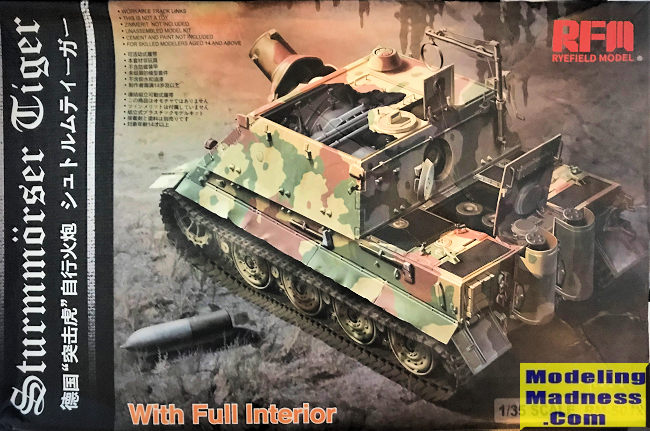
Ryefield Model 1/35 Sturmtiger w/Interior
| KIT #: | RM5012 |
| PRICE: | $85.00 |
| DECALS: | None. Three paint schemes |
| REVIEWER: | Donald Zhou |
| NOTES: |
Advantages: Extremely detailed and accurate, Full interior included, lots of options. Disadvantages: Assembly sometimes complex, A LOT of small parts, and pesky multi-piece track assemblies. |
| HISTORY |
In the yearlong slog of a bloodbath that followed Stalingrad, the Wehrmacht was bled nearly to its knees with the loss of over 300,000 men, nearly 1 million casualties and too many machines and materials to count. What the Wehrmacht found out mostly was that a heavy machine was needed to breach city blocks and able to destroy blocks at a time to root out defenders and eliminate hidden threats. At the time, the Sturmgeschutz III and the Panzer IV D were used for infantry support and these were found to be generally lacking and 14 Stug III’s and other such similar vehicles were lost in Stalingrad. Afterwards, a crash program was launched to produce an assault gun that could support infantry while under good armor protection. The first of these was the Sturmpanzer IV Brummbar, or “Grizzly Bear”. Mounting the same basic weapon as the Panzer IV D, but with a fixed casemate with greater armor protection, it was designed specifically for this role. However, it was felt that an even heavier vehicle, mounting a much heavier gun that could shatter city blocks at a time, under much thicker armor was needed. To this end, it was quickly decided to take a Tiger I chassis, and then mounting a 280mm weapon on it. However, when that weapon was not available, the Wehrmacht quickly adapted a Kreigsmarine 380mm rocket propelled weapon, based on a depth charge throwing gun instead.
The design was very much like the Sturmpanzer IV in which the entire upper front of the vehicle was removed, including the upper deck and turret. Instead, a heavy frontal casemate like shell was added to contain both the fighting, driving and the main weapon and 14 380mm shells. All of this was fixed upon the lower hull of the late Tiger I with the steel road wheels. The Tiger’s transmission, running gears and engine are kept. Due to this, the Sturmtiger is much shorter length wise than the original Tiger since it did not have a long barreled cannon and not as tall due to lack of the turret. However, its weight is more comparable to the King Tiger! At a full up weight of some 75 tons (68 tonnes), its one ton shy of a fully loaded KT! The reason isn’t just its massive 380mm shells, which 14 can be carried (even though one have to be in the breech and one on the loading tray), with each one weighting in at a massive 896lbs, but also its armor. The Germans felt under urban conditions, heavy armor was needed. To this end, the Sturmtiger was designed to carry a frontal armor of 150mm at the front, 82mm at the sides and rear, and 62mm everywhere else except the hull bottom, which is 28mm. This added all up equal to a vehicle that’s approaching a super heavy weight!
Meanwhile, its main armament, the RW 61 rocket launcher could launch an 896lbs rocket shell for up to 6000M/yards. The shell has several versions. The two most important ones are the high explosive, which was used to knock down entire city blocks, and a shape-charged version, used to plink fortifications. This version can penetrate up to 8.2 ft. of solid concrete. However, initially, the weapon ran into some problems. Namely, no rocket fumes or exhaust can be allowed to leak into the fighting compartment….For all the obvious reasons but also the exhaust fumes are deadly if breathed in! However, the exhaust gases are not allowed to stay too long in the barrel and breech either since the buildup of pressure would eventually crack both vessels. This is why the barrel has a ring of ventilation holes around it so that spent rocket exhaust gases can be quickly vented out, giving the barrel somewhat of a pepper shaker appearance. It was intended for the Sturmtiger to operate with a follow on ammunition carrier since it itself can only carry 14 rounds of ammo. The ammo carrier was based on the Tiger too but only 1 was produced before the war drew to a close. Secondary armaments included a bow mounted MG34 machine gun and a mortar to engage infantry and high up and close in targets.
When it finally entered production however, Germany was well on its way to being defeated. So the vehicle was hardly used in its intended role. The only real action it saw was the Warsaw Uprising in which two vehicles were used to root out the Polish resistance fighters. The vehicle also saw action during the Battle of the Bulge, where 7 vehicles participated. The third and final action was Battle of Remagen, in which 7 Sturmtigers tried to destroy the bridge itself with its main weapon but quickly found out they did not have the accuracy to do so. It was here that one chanced upon a village full of Shermans and fired a shell at it before retreating. The end result was the 380mm round flattened the village and knocked out all of the Shermans, wounding and killing many of their crews. Other than that, the war closed out before the Sturmtiger could see any other action.
Only 17 Sturmtigers were produced before it was all over. Today, two of them still exist, including one at Kubinka Tank Museum, Russia. The other is at Deutches Panzermuseum, Munster. This vehicle is an captured example and was shipped to the States, where it was on display at the Aberdeen Proving Grounds Tank Museum until that was closed and the display vehicles scattered to the four wings. The Sturmtiger is on loan to the Germans.
| THE KIT |
 Over the years, there have been
various companies that tried to produce a Sturmtiger in kit form. Tamiya was
first and their effort was not half bad. Then Academy, AFV Club etc all tried to
do their own version. The reason why is that, well, anything to do with any
German KittieKat tanks, especially the Tiger is always welcome in the modeling
community, especially the Panzer-philes! Several years ago, new company Rye Field
Models announced they will attempt their own Sturmtiger based on their very
successful Tiger kits. It was even more exciting when RFM announced they would
attempt to include the entire interior like some of their Tiger kits! I wanted a
Sturmtiger forever, but just couldn’t get around to it….Then a company in China
was selling this at a rock bottom price of $56 on evil Bay and I quickly jumped!
It took a month for the kit to get
Over the years, there have been
various companies that tried to produce a Sturmtiger in kit form. Tamiya was
first and their effort was not half bad. Then Academy, AFV Club etc all tried to
do their own version. The reason why is that, well, anything to do with any
German KittieKat tanks, especially the Tiger is always welcome in the modeling
community, especially the Panzer-philes! Several years ago, new company Rye Field
Models announced they will attempt their own Sturmtiger based on their very
successful Tiger kits. It was even more exciting when RFM announced they would
attempt to include the entire interior like some of their Tiger kits! I wanted a
Sturmtiger forever, but just couldn’t get around to it….Then a company in China
was selling this at a rock bottom price of $56 on evil Bay and I quickly jumped!
It took a month for the kit to get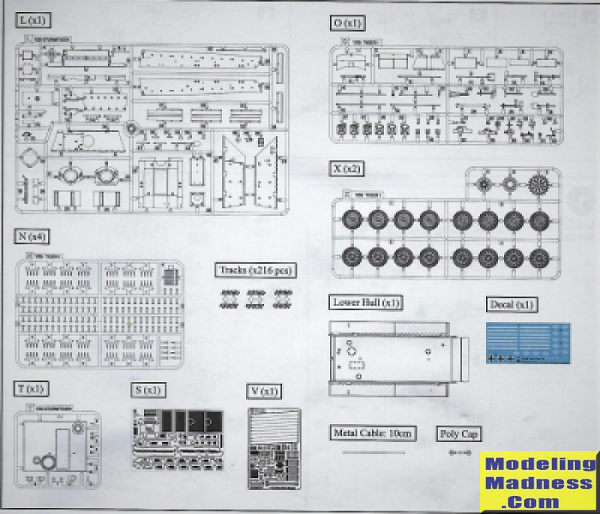 here and the box was wrecked due to the long
trip...But AHH!!!! SO WORTH IT!
here and the box was wrecked due to the long
trip...But AHH!!!! SO WORTH IT!
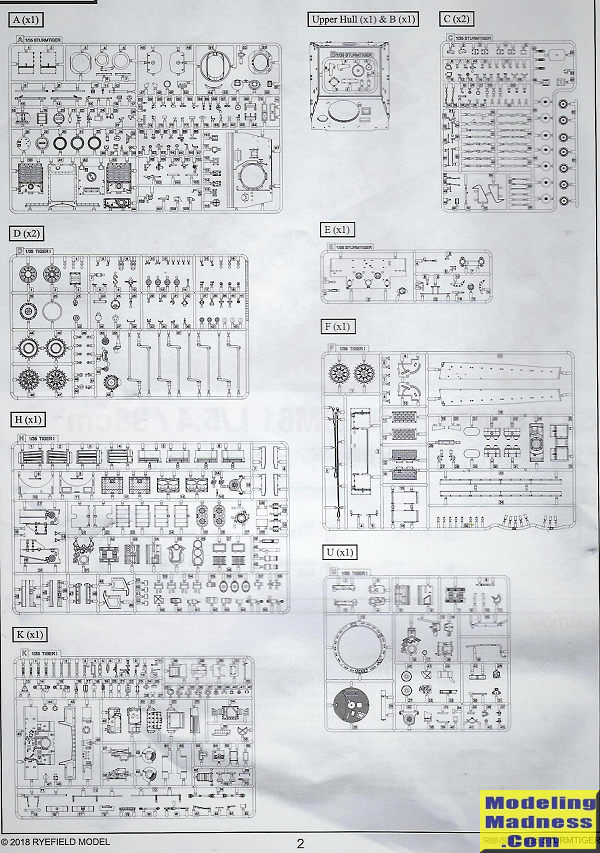
So, what comes in that deep end box that could contain two regular armor kits? Well, there are AAAAAAAAAAA LLLLLOOOTTT of parts! WTH?!?!?!? I thought I got away from models that contains a billion parts…But nope! Here goes another one! And yes, as you may have guessed, about half a billion of that are the pesky multi-piece tracks. RMF though, has a unique way of at least making the assembly of these tracks slightly less painful. A holder jig is provided. You put multiple tracks on the jig, then clip off the guide tooth, with the handle and cement them on the tracks, then clip off a single piece of the track pins, which contains multiple pins, and insert directly into the tracks. Then clip off the handles….I’ll need to see how this works in real time to make a judgement whether it is easier…Or another whole world of pain. And no way in dodging this unlike some other vehicles like the Abrams with a huge side skirt to hide the upper rung, which you can left off! Tigers, like always, don’t have much of a side skirt to speak off so you gonna have to make all of that 96 pieces per track side!
Assembly starts, strangely enough, with the casemate assembly. Details such as the barrel wheel, hand crank and ammo brackets are now made…Notice at least one of the ammo bracket holder arm is photo-etch, which means bending it to shape.
The brackets are then cemented to the side walls. Be sure the holder arms are movable or else it will make it real tough to get the shells into place. A bunch of details for the rear wall are now added.
The front of the casemate include extra machine gun barrels, driver station, a detailed bow machine gun etc. The main cannon is assembled next and this is a detailed assembly with a rotatable ball joint. Notice a massive photo etch is now rounded to make the rifling for the barrel….Wonder how tough it is to fill that centerline seam…..
The breech and the shell themselves are now made. However, notice the shells themselves are not added till much later. Do not add the shells now since when it comes time to mate the casemate to the lower hull, that weight will certainly cause problems.
The hull assembly begin after. The first problem is notice there are two lower hulls! The parts diagram only shows one hull, but two lower hulls are in the kit! Do not, repeat, DO NOT use the hull with the side walls. That’s for the regular Tiger kit. If you use that, well……you will definitely run into problem later on with the mating of the casemate! Safe to say, I immediately tossed that into my spare parts bin after finding out! The first step is to add in the torsion bar holders….Notice ALL of them are in photo etch so stay patient, bend where it is needed and try not superglue your fingers together. The bars themselves, with the wheel shafts molded on, are also added
The radio station and other details are added next, followed with driver station and transmission. This is a detailed assembly so take your time.
The kit now moves on to the engine. Again, detailed but not nearly as many parts as the Takom’s Panther engine but since most of it will be hidden in the bay, it should be ok. The forward wall and drive shafts are added afterwards.
This is where the assembly strays away from the regular Tiger. The floor board with the main shell loading trunnion are now added. The trunnion can be made so it can move into folded and loading position so take your time.
The hull ammo storage brackets are now added. Again, one of the ammo holder arm is photo etch and again, they are all movable to facilitate the ammo loading later on. The cooling fans and fuel cells round out the rear bay.
The rear plate is now made. A lot of photo etch so do take your time. They are added to the end of the vehicle after assembly.
Pioneer tools are now added. Notice all the brackets are photo etch and need to be rounded or bend to shape……Consider how small these brackets are……I would like it if RFM made a plastic substitute. Purest will immediately scream “TOO THICK!!!!!” but messing around with such small parts and super glue is just plain headache inducing!
The drive wheel and sprocket housing are added next. Again, be sure which are the inner wheels and which is the outer. Thank goodness the Germans, with the steel wheel version dumbed it down to “only” 16 wheels per side…..Not the completely insane 52 wheels in total on the early and mid-production version!
The engine maintenance hatch is now made. Again, plenty of photo etch to keep you on your toes. It can be made to open to display your engine.
All of the shells are now added. This is where it is absolutely important that the holder arms are made to be movable or else you won’t be able to insert the bottom row shells. The engine deck and casemate is lowered into position afterwards. Depending, I may not cement these shut so the interior can be opened to be displayed.
 The roof is now made, with the
commander viewing port and ventilation fan. The outer crew entry hatch, if you
are judicious with glue, can be made to be operable. The entire roof is made so
it can be removed to show off the interior so you may not need to cement it
shut. The tracks are now assembled….Maybe a good idea to keep the casemate off
since you will need to man handle the model when it comes to this point.
The roof is now made, with the
commander viewing port and ventilation fan. The outer crew entry hatch, if you
are judicious with glue, can be made to be operable. The entire roof is made so
it can be removed to show off the interior so you may not need to cement it
shut. The tracks are now assembled….Maybe a good idea to keep the casemate off
since you will need to man handle the model when it comes to this point.
Finally, the model is finished with the rear deck details, including a nice exterior loading crane. A thin piece of copper wire is provided as the winch string.
| CONCLUSIONS |
Well, this is…ummm…yeah, another kit with a couple of billion parts into the stash…..I want to get started…But with a freight train line worth of projects on the waiting to complete line, pulled by Big Boy 4014 (give three cheers to Union Pacific for restoring a Big Boy to operating condition), it may have to wait until I kick out a few projects, especially since next year’s Atlanta Con. my IPMS club special is “get yer model off of the shelf of doom” project so yeah, I better get my kisster in gear! But this kit is begging to be built, despite the pesky parts count and I always wanted a model of this esoteric and mean looking vehicle so yeah…..My angst may get of better of me…..We shall see!
If you would like your product reviewed fairly and fairly quickly, please contact the editor or see other details in the Note to Contributors.
Back to the Main Page Back to the Review Index Page Back to the Previews Index Page