Italaerei 1/35 Panzer IV ausf H
| KIT #: | 218 |
| PRICE: | $Currently OOP |
| DECALS: | Six options |
| REVIEWER: | Ray Mehlberger |
| NOTES: |
| HISTORY |
The
Ausf. H, began production in April 1943 and received the designation Sd. Kfz.
161/2. This variant saw the integrity of the glacis armor improved by
manufacturing it as a single 80-millimetre (3.15 in) plate. To prevent adhesion
of magnetic anti-tank mines, which the Germans feared would be used in large
numbers by the Allies, Zimmerit paste was added to all the vertical surfaces of
the tank's armor. The vehicle's side and turret were further protected by the
addition of 5-millimetre (0.20 in) side-skirts and 8-millimetre (0.31 in) turret
skirts. During the Ausf. H's production run its rubber-tired return rollers
were replaced with cast steel; the hull was fitted with triangular supports for
the easily-damaged side-skirts. A hole in the roof, designed for the
Nahverteidigungswaffe, was plugged by a circular armored plate due to shortages
of this weapon. The Nahverteidigungswaffe was a smoke candle discharger for
German panzers which could also be used as a close defense weapon to combat
close assaulting infantry. It was a 92mm rotating launcher for smoke candles,
mounted in the roof of the turret or superstructure, which also allowed the
occupants to fire a flare pistol through it. The flare pistol could fire flares,
smoke rounds or small calibre fragmentation grenades.
Other methods of close defense involved attaching electrically fired s-mine
launchers at the four corners of the tank, or pistol ports.
These modifications meant that the tank's weight jumped to 25 tonnes (27.56
short tons), reducing its speed, a situation not improved by the decision to
adopt the Panzer III's six-speed SSG 77 transmission, which was inferior to that
of earlier-model Panzer IVs.
| THE KIT |
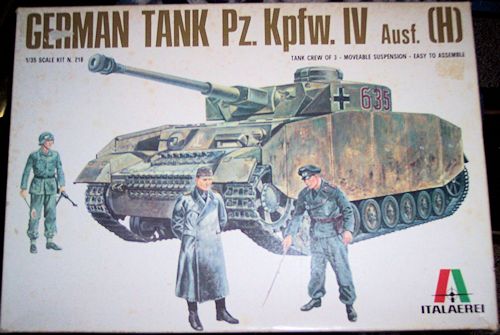
The kit comes in a shrink-wrapped tray and lid type box. The box art shows a
Pz.Kpfw. IV Ausf. H posed against an all white background similar to the way
that Tamiya does their art works. The tank is in overall panzer gray and heavily
spattered with mud. It is in the division markings for the Panzer Lehr div. with
the turret number 635 in red with white outlines. Standing next to the tank are
3 figures. One is a Feldgendarm (field policeman) with the metal gorget insignia
hanging from a chain around his neck and carrying a traffic signal wand in one
hand and a MP-40 machine pistol in the other hand. A second figure looks to be
an officer wearing a long great coat with his arms behind his back. The third
figure is dressed in the all black paner crewman uniform and he is drawing in
the dirt with a stick. Although the box art says there are 3 tank crew figures
in the kit, only one could really be posed in the turret hatch after much
surgery to him. That’s the figure with the stick. Obviously, the field policeman
is not a tank crewman and I doubt that officer would be wearing that great coat
in the tank either.
Inside the box are 4 loose trees (no cello bags) of black-gray parts, a tree of
black vinyl rubber-band type treads, the decal sheet and the instructions.
The instructions consist of a large sheet that is accordion folded into 8
pages.
Page 1 of the instructions begins with a black and white photo of the model made
up in the markings of a tank with the 1st SS Panzer Division “Adolf Hitler” with
the turret number 626, Italy 1943. This is followed by the history of the tank
in Italian and English.
Page 2 is the parts trees illustrations, which partially spill over onto page 3.
Half of page 3 to page 5 give a total of 9 assembly steps as very busy exploded
drawings.
Pages 6 and 7 begin with decal application instructions and a list of 4 colors
suggested to use to complete the model. This is all in 4 languages: Italian,
French, English and German.
Three 3-view illustrations are shown for camouflage variants. The bottom of the
page has a black and white photo of the top and side of the model made up in the
marks of a tank number 823 with the 2nd Panzer Division, Normandy 1944.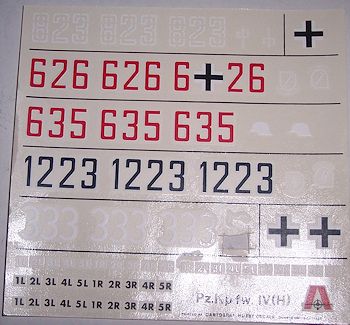
Page 8 begins with explanations of 6 different panzer markings:
1. 12th SS Panzer Division, Ardennes 1944.
2. Panzer Lehr Division, Normandy 1944
3. German national cross markings.
4. 2nd Panzer Division, Normandy 1944
5. 1st SS Panzer Division, “Adolf Hitler”, Italy 1943
6. Grossdeutschland Panzer Division, Eastern Front (no year given)
Below these is a second black and white photo of the model made up in 2nd Panzer
Division marks. This time with the side skirts added. Next is the history of
the tank, this time in German and French.
The parts trees are not alphabetized and do not have part numbers molded on them
next to the parts. So careful study of the parts trees illustrations will have
to be done to find parts needed. Bad move italaei!
The black-gray parts tree with the lowest part numbers shown on the parts tree
illustrations holds: road wheels, the 3 figures, return rollers, bogies, one
stype of drive sprockets, radio aerial, jack, axe, cable cutters, fire
extinguisher, turret hatch lid, machine gun, main gun barrel halves, fighting
compartment front armor plate etc. (147 parts)
The figures parts are alphabetized in the assembly step for them. However, these
letters refer to colors to use. Also, the figures are shown completed and these
drawings do not show their separate parts that they are on the actual parts
trees. So it is going to be tricky to get the right arms etc. on the right
figures. Another bad move Italaerei!
The second black-gray parts tree holds: a second style of drive sprockets, final
transfer covers, glacus plate, front fighting compartment wall, mantle parts,
main gun breech, idler wheels, shovel, stowed tow cable, another machine gun,
fenders, side air intake vents, muffler etc. (115 parts)
The third black-gray parts tree holds: hull side skirt panels and their supports
and some turret armor plates (53 parts)
The fourth black-gray parts tree holds: the turret top and base, the hull bottom
tub, the fighting compartment roof, turret rear storage bin, engine deck grill
plates and a few more turret armor plates etc. (17 parts)
The dark gray vinyl track tree is next. It holds 2 long lengths of track and 4
small short lengths as spares.
The instructions want you to hot-weld the running gear wheels onto the model
using a heated screw driver. I’ll use cement…thank you! Also, the vinyl tracks
are shown to be connected into a loop using a heated screw driver to weld the
ends together. I have had this procedure become a total disaster in years past
when I tried it. I would recommend getting a set of after-market individual
track links to use instead of these vinyl ones.
| CONCLUSIONS |
This kit has a few problems, as already mentioned above. However, it is
state-of-the-art for the early 60’s and was considered very good back then. Only
the turret has a bit of interior detail with a very rudimentary main gun breech
in there. The top and side hatches can be posed open or shut on the turret.
Nothing else can be posed open.
This kit has been re-released several times over the years:
In 1960 as kit no. 218 (this kit)
In 1976 as kit no. H-2111
In 1983 as kit no. 774
In 1985 as kit no. 236
October 2013
If you would like your product reviewed fairly and fairly quickly, please contact the editor or see other details in the Note to Contributors.