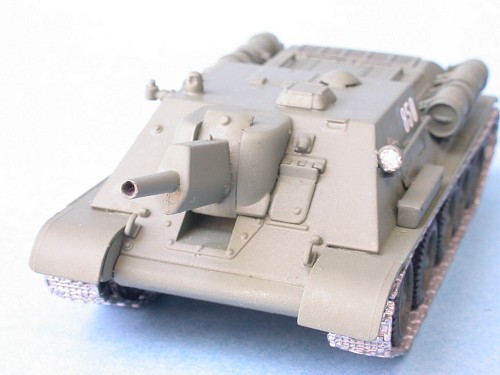
UM 1/72 Su-122
| KIT #: | 332 |
| PRICE: | $10.98 (9.96 at Squadron) |
| DECALS: | Three options |
| REVIEWER: | Ryan Koschatzky |
| NOTES: |
| HISTORY |
 Stolen from Scott’s preview and
copied here to give the article more fluff and so you don’t have to follow
a link to get it. Based on the T-34/76 chassis, the SU-122 entered
production in late 1942. The 122mm M-30 gun could pierce 100mm armor at a
distance of 1 kilometer, not bad by current standards and enough to wreak
havoc with any enemy tank that got in its way.
Stolen from Scott’s preview and
copied here to give the article more fluff and so you don’t have to follow
a link to get it. Based on the T-34/76 chassis, the SU-122 entered
production in late 1942. The 122mm M-30 gun could pierce 100mm armor at a
distance of 1 kilometer, not bad by current standards and enough to wreak
havoc with any enemy tank that got in its way.
It was relatively fast with a top speed of 55 kph in perfect conditions, but rarely are conditions perfect in the field! The biggest draw-back of this and other self-propelled guns is that there was little actual azimuthal variation allowed once the gun was in position. Regardless of this, it was quite successful and over 600 were built during the war.
| THE KIT |
Please visit the preview for a look at what is in the box.
| CONSTRUCTION |
Let me start by saying I think of myself as a beginner modeler. I have
started lots of kits but very few make it to completion for one reason or
another (operator error mostly). This kit is very similar to all the other
Eastern European small scale kits I have seen and failed at….I believe it
is because I am not part octopus. I broke the kit down to four smaller
sections to make it easier for me to handle and finish: Lower hull, Upper
hull, Gun mantle and tracks.
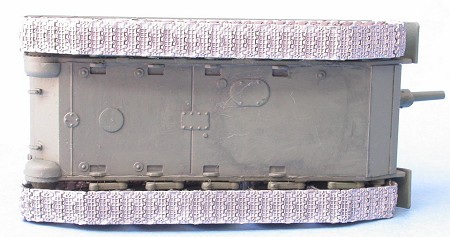
 Lower Hull:
Made up of four basic parts, I glued the sides to the bottom piece and
added the ends to hold it up. I like the guides giving (is there a word
missing here?) but could have used one in the middle to help out better.
Picky I know, but I sometimes enjoy the little things in life. The
glue had almost a small melting action on the soft plastic, something I had
not seen on other harder plastic like Revell, Haseagwa, Tamyia and others.
I think it helped in some areas, whereas with other parts would have need
to be reglued after I hacked away at it. I attached the road wheel arms,
added paint and set aside till I finished the upper hull. The road wheels
were a little different -- they have rubber rings for the outside. I
slipped them on and sanded around the wheel. I didn't do anything
different, though I have flashbacks to the AMT Tigercat problems, we shall
see what happens.
Upper Hull:
I attached the two major pieces together and put it aside thinking all was
good (famous last words). My first clue of a problem was when I put the
fenders on. It did not all line up right. Test fitting it to the lower
revealed a big problem. A bow was created when gluing the two halves
together and it didn't fit well on the lower hull. I hacked and chopped
away like a madman on the inside of the halves till it all fit together. I
attached the small parts to the kit. I would have liked to have some
attachment points to line up the hand rails on the side and rear. Next came
the PE part, my first time trying with PE. With no attachment points for
this I made it flush with the back deck. I guessed and te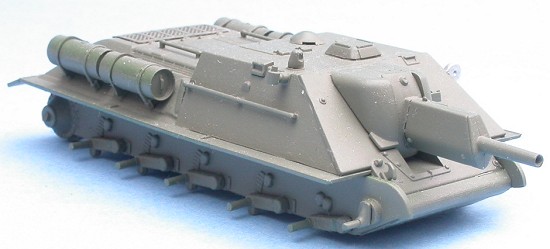 st-fitted the spot
to bend the PE with tweezers until it looked good to me. After that section
was finished I built the four gas tanks. The instructions showed the front
and rear clamps faces parallel to the ground, but when built, one side was
parallel and the other side was perpendicular to the ground. The only way I
know how to fix it is with major cutting, which at this time I don't want
to do.
st-fitted the spot
to bend the PE with tweezers until it looked good to me. After that section
was finished I built the four gas tanks. The instructions showed the front
and rear clamps faces parallel to the ground, but when built, one side was
parallel and the other side was perpendicular to the ground. The only way I
know how to fix it is with major cutting, which at this time I don't want
to do.
Gun Mantle:
I never thought three pieces would give me such fits. I glued the two
barrel pieces together and drilled out the end a little and set it aside.
As I tried my best to test fit the mantle halves together with the
elevation mechanism (one piece of plastic to make the gun go up and
down), I grew impatient with trying to have multiple fingers and plastic
occupy the same space at the same time. I dabbed on some glue and threw the
pieces in the hole and let them work themselves out. I attached the barrel,
than came back later and sanded the top down and added putty to fill the
trench that was there.
Track:
I painted them on the spruce with MM buffing Aluminum Plate (1451). I cut
off and trimmed edges. I had waited till the hull was together before
attaching the track. I attached the individual links to the return and
sprocket, then slid the long section on top between the road wheels and
fender, then rotated the "wheel" back until they joined. I then laid the
two smaller sections along the bottom of the road wheel and added the
longer section, adjusting the "wheel" back and forth until the fit looked
good, giving more presence to the exposed sections.
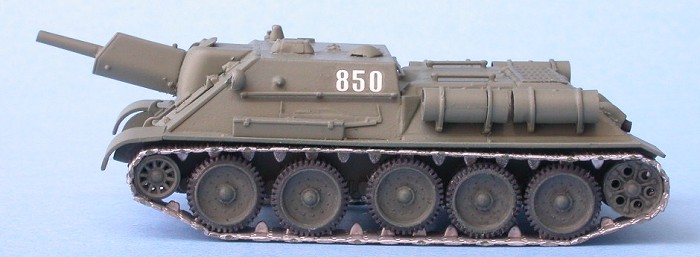
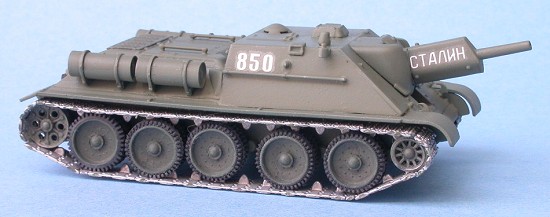
| COLORS & MARKINGS |
 I used MM SAC Bomber Green (FS34159), sprayed from a rattle can. I did a
few coats along the way in building -- no more than 2 or three coats
total. I brushed the model with a coat of Future, and then added the white
850 decal and slogan. I had no problems with the decals. I sealed the
markings with another coat of Future. I followed up by my first attempt at
adding a wash to a kit. I had a homemade bottle of something - I am still
not sure what the paint color is, but it was dark. At any rate, I added the
wash to the track with what I think are good results. I also tried it on
the bottom of the tank as a test, except I didn't add Future to the bottom
of the model first, which was pointless as it didn't work at all. I also
applied the wash to the top, which had been Futured, but I didn't like the
results and wiped it off. I definitely need a lesson on how to apply a
wash to a tank, something I will do soon with one of the armor pros in my
club. Frustrated with the whole affair I sprayed a coat of Flat Clear
Lacquer.
I used MM SAC Bomber Green (FS34159), sprayed from a rattle can. I did a
few coats along the way in building -- no more than 2 or three coats
total. I brushed the model with a coat of Future, and then added the white
850 decal and slogan. I had no problems with the decals. I sealed the
markings with another coat of Future. I followed up by my first attempt at
adding a wash to a kit. I had a homemade bottle of something - I am still
not sure what the paint color is, but it was dark. At any rate, I added the
wash to the track with what I think are good results. I also tried it on
the bottom of the tank as a test, except I didn't add Future to the bottom
of the model first, which was pointless as it didn't work at all. I also
applied the wash to the top, which had been Futured, but I didn't like the
results and wiped it off. I definitely need a lesson on how to apply a
wash to a tank, something I will do soon with one of the armor pros in my
club. Frustrated with the whole affair I sprayed a coat of Flat Clear
Lacquer.
| CONCLUSIONS |
 I am happy I did build the kit and it was not as bad as thought. I tried
out a few new things on a kit: PE and a wash/weathering. The result is
good enough for me, but I would like to know more about the wash part. I
would recommend this kit to anybody that has built a few kits with
fiddly parts.
I am happy I did build the kit and it was not as bad as thought. I tried
out a few new things on a kit: PE and a wash/weathering. The result is
good enough for me, but I would like to know more about the wash part. I
would recommend this kit to anybody that has built a few kits with
fiddly parts.
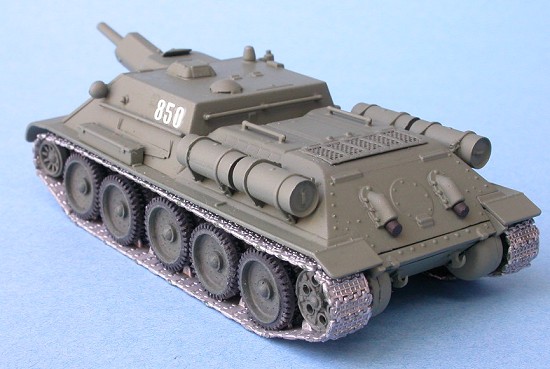
Upon further review, it’s amazing what you see in a picture that you didn’t
see before……ughhh the tracks. I need to go back and repaint the spruce
attachment points on the tracks. I am know there is a million other things
I could also do, but I think the most would be a wash on top and
drill out the exhaust. She is no contest winner, but she is good enough for
me.
I would to thank Scott for the kit and Lee Kolosna for the pic's.
April 2005
| REFERENCES |
None, built out of box and blindly went with UM's information.
If you would like your product reviewed fairly and quickly, please contact me or see other details in the Note to Contributors.