Hasegawa 1/72 Toyota Starter Truck
| KIT #: | 31117 |
| PRICE: | $10.00 |
| DECALS: | Two Options |
| REVIEWER: | Joe Essid |
| NOTES: | Actually a type KC. Easy build, decent detail |
| HISTORY |
This distant ancestor of the 2019 Toyota Tacoma sitting in my garage did work for Japan’s military throughout the Second World War. The truck was a variation on the G1, the first truck produced by the “Toyoda” company. The family changed the company name to “Toyota” later, legend has it, because the word “Toyota” is associated with the lucky number 8. It takes eight strokes to write “Toyota” in Japanese, though a news account cited in the references does cast doubt on this clever story. A more likely explanation for the name “Toyota,” adopted in 1936, is that the company held a competition for a new name and “Toyota” won. Whatever the truth, it makes for an interesting tale from industrial history.
 Far
more than eight of these early Toyotas rolled off the assembly line; nearly
20,000 GBs were built from 1938-42, when production shifted to the KB, a
heavier version needed by the military.
Far
more than eight of these early Toyotas rolled off the assembly line; nearly
20,000 GBs were built from 1938-42, when production shifted to the KB, a
heavier version needed by the military.
With a curb weight of just under 6000 LB and powered by an inline 6 cylinder of 74 horsepower, the GB was likely no speed demon. It may have had good low-end torque, however, which matters more for working vehicles like the one depicted in the kit. An irony is the Toyota Type B engine was built at first under license from Chevrolet, as a metric copy of the famous Chevy “Stovebolt” motor. Earlier GB trucks used a Type A engine based on the Chevrolet, but in that case, the motor was reverse engineered from the American original.
Aircraft-starter versions of the GB employed a device called a Hucks starter, named for Captain Bentfield Hucks of the Royal Flying Corps. This ingenious device allowed ground crew to safely spin a prop for a plane that lacked its own starter, a feature quite useful as larger aircraft were increasingly hard to start by hand. A power-takeoff shaft (or PTO) like the ones on my farm tractors transmitted power from the truck’s engine to the Hucks Starter’s shaft, spinning the propeller. Within 30 seconds, an aircraft’s engine could be running.
Our editor previewed this kit in 2024 and provides more historical information here.
| THE KIT |
 Hasegawa’s kit, which has been around many decades,
depicts a Toyota KC, a follow-on to the GB built with an angular cab using less
steel and other strategic materials. Except for the engine cover, the KC’s body
panels were made of plywood.
Hasegawa’s kit, which has been around many decades,
depicts a Toyota KC, a follow-on to the GB built with an angular cab using less
steel and other strategic materials. Except for the engine cover, the KC’s body
panels were made of plywood.
I came across my copy while browsing the shelves at my LHS of choice, in fact one of the few locals left in my state, Frontline Hobbies of Staunton, VA. I’d been building kits for a late-war airbase diorama, and this model fit the bill nicely; I had never seen an KC starter truck before and snapped it right up. Frontline’s new owner and I marveled over the old kit, one that he’d taken out of deep storage with many other vintage kits that his predecessor bought from collections or as overstock from other shops. Judging from the Scalemates timeline, I appear to have an original-issue 1974 Hasegawa-Minicraft example.
Two sprues of flash-free tan plastic and one clear windshield come in a side-opening box with interesting box-art depicting two pilots near the truck, as it gets ready to start a radial-engined fighter. A flight of Ki-61 Hiens roars overhead.
| CONSTRUCTION |
 The old
kit was a breeze to build, though I did lose the front axle during assembly.
Stretched sprue replaced it. The sprue-gates are thin, so I did not need to sand
or trim much after detaching parts. I went old-school with Testors’ tube cement
applied with toothpicks to get a strong bond on several small parts.
The old
kit was a breeze to build, though I did lose the front axle during assembly.
Stretched sprue replaced it. The sprue-gates are thin, so I did not need to sand
or trim much after detaching parts. I went old-school with Testors’ tube cement
applied with toothpicks to get a strong bond on several small parts.
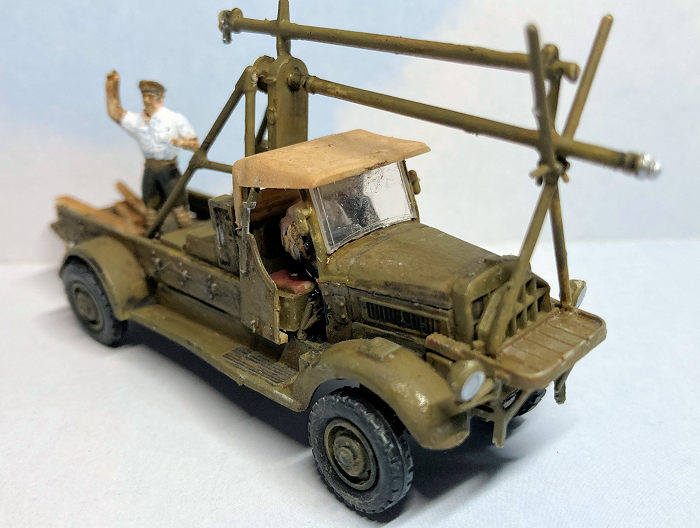
The chassis has two major pieces and no engine to display. The hood (or bonnet, to some of you) consists of 3 pieces and a grille. Take care here to align the pieces well. I’d recommend not installing the tiny steering column and wheel until the driver is in his seat. There’s a gear shift lever as well, but that can be put in at any point. The part for the canvas top, which includes back-of-seat cushions and cab’s rear wall, go on later.
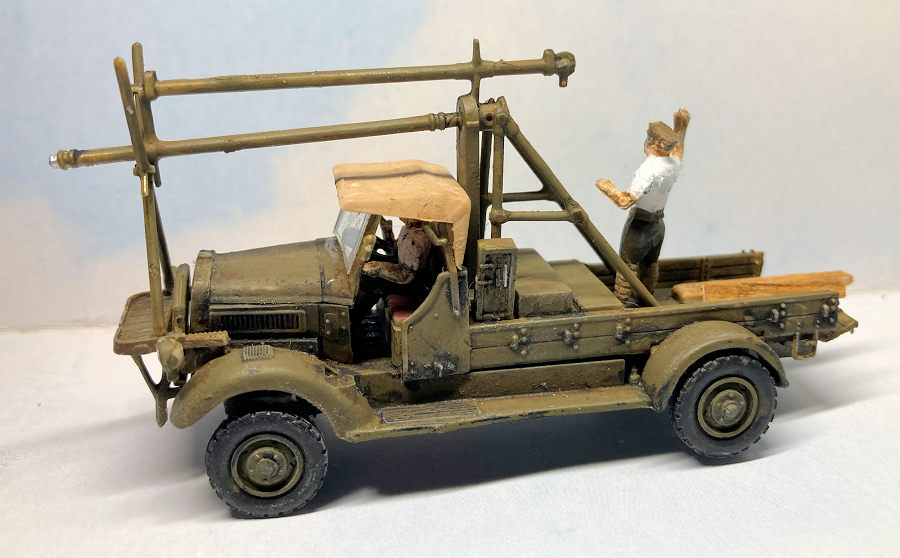
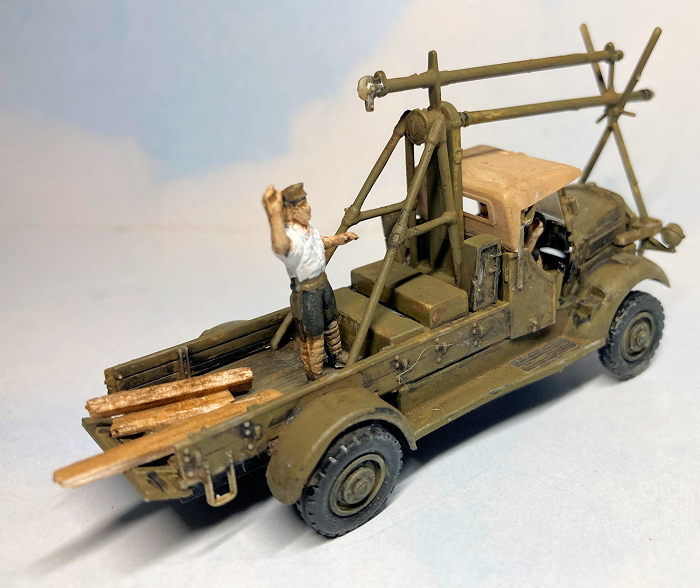
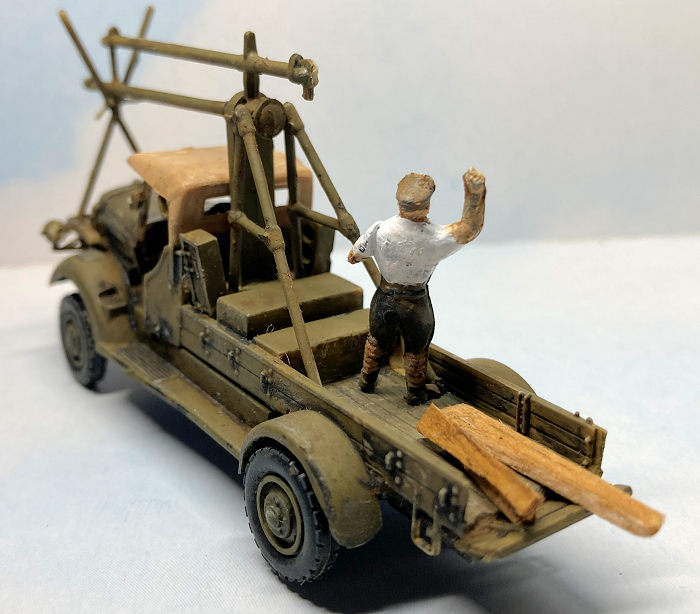
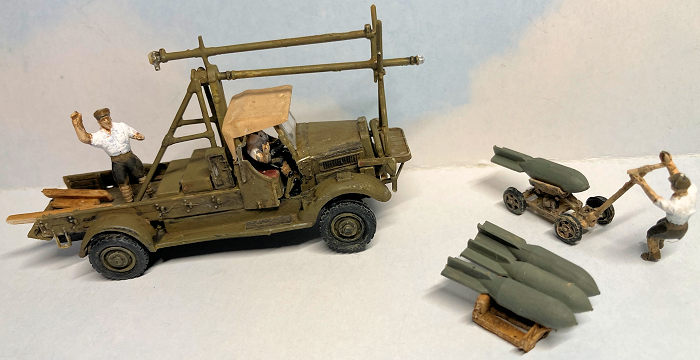
The bed and Hucks starter are built up in several pieces atop the chassis. I opted to have the tailgate down. I will display the remaining bombs on a pallet build out of balsa left over from a different diorama project. A few strips of balsa “lumber” and one of the ground crew went into the truck’s bed, behind the starter.
| COLORS & MARKINGS |
I opted to paint the bottom of the truck’s bed to represent wood, with other parts a dark olive color. Images of a surviving KC show the bed sides as unpainted wood, but I opted for green to “camo” them. For the sheet-metal-and-plywood body, I wanted something other than tan, since I was seeking contrast to the aircraft, uniforms, and other details in my diorama. Hoping to go old-school again, I brushed on Testors OD from a vintage square bottle, as their shade had enough brown in it to match images online.
 Despite
much stirring that made the paint mix well, the old Testors would not cure
uniformly. Into the trash it went and I stripped paint from parts that remained
sticky. Luckily for me, a “gone bad” bottle of Mission OD acrylic, too thickened
to airbrush, brushed down well with a brush, leaving no strokes on the finish.
When it dried I used a wash of brown oil paint to tint the model’s finish and
highlight details. Pin-washes of Lamp Black oil paint brought out more detail.
The bed was brushed in Tamiya Deck Tan and then given its own oil wash and dry
brushing.
Despite
much stirring that made the paint mix well, the old Testors would not cure
uniformly. Into the trash it went and I stripped paint from parts that remained
sticky. Luckily for me, a “gone bad” bottle of Mission OD acrylic, too thickened
to airbrush, brushed down well with a brush, leaving no strokes on the finish.
When it dried I used a wash of brown oil paint to tint the model’s finish and
highlight details. Pin-washes of Lamp Black oil paint brought out more detail.
The bed was brushed in Tamiya Deck Tan and then given its own oil wash and dry
brushing.
Hasegawa calls for the cab’s interior to be black, so that was it plus oxblood cushions on the bench seat. Using a Prismacolor silver pencil I picked out details on the instrument cluster, a truly minimalist setup so unlike those of modern vehicles. Some 50 (!) year-old dark gray Humbrol went on the bombs and once again proved how great those original oil-based Humbrol enamels were; their newer solvent-based enamels do not last long in the tin. The 1970s paint self-leveled and dried flat, unlike the Testors now on its way to the landfill. Two small kit decals got saved for another kit; one was not shown in the instructions and the other is not visible with the tailgate down.
The cart was painted Tamiya Deck Tan with brown and black oil washes. I brushed Tamiya rubber black on the tires of both truck and bomb-cart, as the instructions indicate. I’m not certain bomb-carts got rubber tires, but I know that if I were pulling around high explosives, I’d want tires that would absorb rather than transmit bumps!
When all was done, Flory Grime wash gave the truck some weathering for the look I sought, especially for the windshield to show wiper-marks. The driver and other ground crew got painted with serval Tamiya and Vallejo colors, brushed on, with a wash of brown oil paint to bring out details.
| CONCLUSIONS |
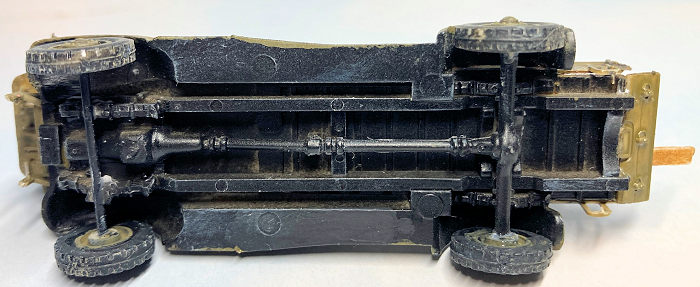
 It took
only a couple of stress-free hours to put this kit together and paint it. I
didn’t bother to clean up some ejector-pin marks on the chassis I only spotted
when taking photos. The truck will sit on its wheels and no one is the wiser,
save for you readers.
It took
only a couple of stress-free hours to put this kit together and paint it. I
didn’t bother to clean up some ejector-pin marks on the chassis I only spotted
when taking photos. The truck will sit on its wheels and no one is the wiser,
save for you readers.
I don’t know of other kits for Toyota G-series trucks out there. So if you want one for a Japanese airbase, here you go. Without the Hucks starter you might fab up a cargo truck for an armor diorama. The kit is readily available in many Hasegawa reissues through the 1990s, as is an Isuzu fuel truck. A firm called Beaver Corporation appears to have reissued it in 2022.
This little truck was a lot of fun to build. I’ve got the Isuzu tanker-truck on the way as I write this review.
| REFERENCES |
Hucks Starter, https://en.wikipedia.org/wiki/Hucks_starter
Toyota G1 Truck, https://en.wikipedia.org/wiki/Toyota_G1
Toyota Type B Engine, https://en.wikipedia.org/wiki/Toyota_Type_A_engine#Type_B
Westcott, K. “Why is the Car Giant Toyota Not Toyoda?“ http://news.bbc.co.uk/2/hi/asia-pacific/8534294.stm
30 June 2026 Copyright ModelingMadness.com. All rights reserved. No
reproduction in part or in whole without express permission from the editor.
If you would like your product reviewed fairly and fairly quickly, please
contact the editor or see other details in the
Note to
Contributors.