| KIT #: | 213 |
| PRICE: | £9-99 |
| DECALS: | Four options |
| REVIEWER: | Frank Reynolds |
| NOTES: | Test for Ammo acrylic paints |
| HISTORY |
The ubiquitous Kubelwagen dates from the German rearmament period of 1938 and was an ideal lightweight battlefield taxi for an army that at the time still made extensive use of horse-drawn transport. With a rear-mounted air cooled 4-cylinder engine of 956cc producing 23hp it was a reliable vehicle and its torsion bar suspension gave a degree of off-road capability. Over 51,000 were built and they could still be found all over Europe employed as cheap utility transport long after World War 2 had ended.
 THE PROJECT
Even after more than 50 years in the business my LHS has the ability to spring surprises with new products, in this case Ammo by Mig Jimenez from Spain My LHS is also a specialist model railroad vendor and initially stocked a range from Ammo of washes, powders and oils relevant to railroad landscapes. Later came sets of 4-pack and 6-packs of subject specific paints for military subjects, aircraft and armour. They are acrylics, so it was not too much of a leap for me to try a sample rather that my go-to brand of Tamiya Acrylics.
My LHS sells Tamiya Acrylics at £1.80 for a 10ml bottle, which works out at 18p per unit. The Ammo paints seem to more expensive at £9-99 for an assorted 4-pack, but the flexi bottles contain 17ml of paint, so that works out at a fraction under 15p per unit.
Yellow topped bottles in the range have a rattle ball inside making shaking and stirring much easier, the paints are also marketed as airbrush ready yet capable of being brush painted as required. I was rather impressed with Ammo’s 114 page high gloss full colour product catalogue which sells at a mere £3-50 and lists an almost bewildering variety of over 200 paints, primers, varnishes, filters, brushes – they have made a serious effort to provide a comprehensive model finishing system. A five page chart cross references their paints to RAL/RLM/FS colours, Hobby Color, Mr Color, Tamiya, Model Color and Model Air/Vallejo.
I needed an inexpensive test mule for experimentation with the paintwork and finish and the well-priced Tamiya Kubelwagen was ideal.
It soon became clear after some trials that the paints need to
be applied at a slightly greater airbrush pressure than I have previously been
used to, about 17psi and above, and higher still for the varnishes. The primer
has a recommended pressure of 20-30psi. These figures are approximate and will
no doubt vary with individual air brushes. When the manufacturer says that the
paints must be well stirred before use and frequently during painting
operations, this is no exaggeration. Fully five minutes of agitating the bottle
with the rattle ball is
 required – two will not do. I found myself performing a
sort of modeller’s samba dance around the man cave with two or three bottles in
each hand – but you have to get your exercise some way.
required – two will not do. I found myself performing a
sort of modeller’s samba dance around the man cave with two or three bottles in
each hand – but you have to get your exercise some way.
The paint must be lightly misted on in at least three coats, allowing each to become touch dry. A helpful hint from the manufacturer is to use the airbrush as a drier and I found that about one hour between coats produced the satisfactory result of deep creamy colour. The paints are slow to dry completely, about 24 hours is needed and if any shading or blending is required with a paintbrush a retarder can be added to stretch the drying time to three or four days. The paints are sold as airbrush ready and I found this claim to be true. I also discovered that the flexible dropper-type bottles enable the smallest amount of paint to be deposited in the airbrush cup, so I was using dramatically less paint than my usual process of decanting and thinning Tamiya paint into a shot glass. Ammo stresses that, being water-based, the paints have a very fine pigment and it is essential to lay down a good quality primer that is left at least 24 hours to dry. Paint must them be built up in the three finely misted coats about 5”” from the surface.
A few years back I was gifted a 15-bottle set of Vallejo/Model Air late war Luftwaffe colours and this would also provide me with a source of browns, greens and greys useful for shading the figures and the canvas hood.
| THE KIT |
 Tamiya’s legacy armour kits – those over 20 years old – are
sold in the UK market at very reasonable prices.
Tamiya’s legacy armour kits – those over 20 years old – are
sold in the UK market at very reasonable prices.
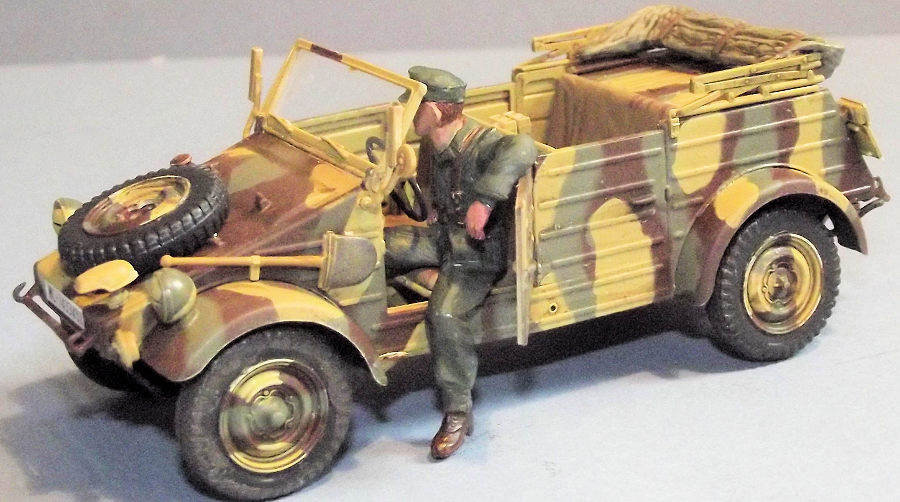
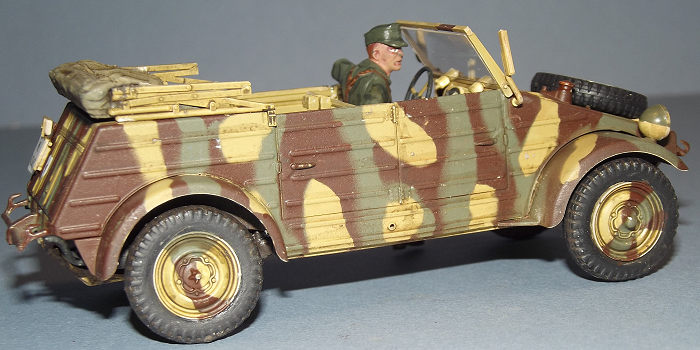
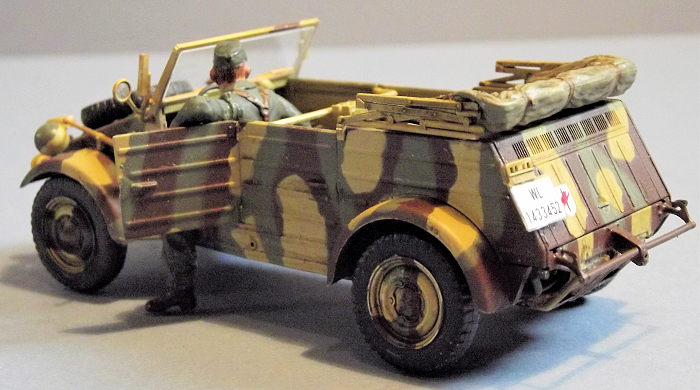
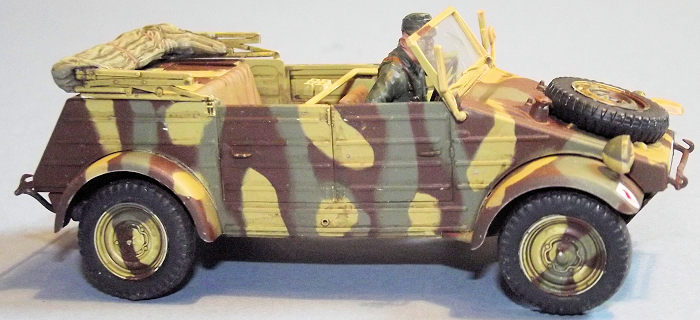
The kit was apparently first issued in 1997. There is not a lot to it and that suited my purpose. Tamiya’s standard tray type box contains the plastic parts crisply moulded in sand yellow with just three parts frames, the car’s upper body builds up in flat sections and a full length floor pan that incorporates the mudguards – known to others as fenders, I believe. There is a small decal sheet giving a choice of four finishes, one on overall Wehrmacht Grey and three in variations of Sand Yellow overlaid with Green or with Red/Brown and Green. A small sheet of die cut windscreen glazing is provided. This version of the kit can only be completed with the canvas roof folded. All four doors can be posed open and there is a single figure that can be placed lounging in the driver’s seat.
The instructions consist of Tamiya’ standard multi-fold sheet in grey scale and show 13 stages of assembly. Three three-view drawing show the paint finish options, with one further choice shown in colour on the box art.
| CONSTRUCTION |
 In traditional car kit format I elected to build and paint the
body shell at an early stage, then add the interior and external details. The
parts were all primed while still on the frames, using One Shot Sand/flesh base
primer (Coded A-Mig 2027). I had also purchased a starter pack of colours “Smart
Set” no 7148 labelled as “ German Standard Colours 1939-44”. Consisting of A.Mig
002 RAL 6003 Olivgrun option 2; -008 RAL 7021 Dunkelgrau; - 010 RAL 7028
Dunkelgelb (early) and -912 Red Brown Shadow. This is a starter pack to enable
early to mid-war military vehicles to be finished in traditional Dark Grey or
the very distinctive Sand Yellow/Green/Red Brown camouflage.
In traditional car kit format I elected to build and paint the
body shell at an early stage, then add the interior and external details. The
parts were all primed while still on the frames, using One Shot Sand/flesh base
primer (Coded A-Mig 2027). I had also purchased a starter pack of colours “Smart
Set” no 7148 labelled as “ German Standard Colours 1939-44”. Consisting of A.Mig
002 RAL 6003 Olivgrun option 2; -008 RAL 7021 Dunkelgrau; - 010 RAL 7028
Dunkelgelb (early) and -912 Red Brown Shadow. This is a starter pack to enable
early to mid-war military vehicles to be finished in traditional Dark Grey or
the very distinctive Sand Yellow/Green/Red Brown camouflage.
The upper body parts are principally self-aligning flat panels and they almost clicked together aided by a flow of liquid cement along the inner corners. Three of the four doors were glued shut. The floor pan and rear body section was glued together but the two major assemblies were kept separate for painting. I also kept back the add-on details since I wanted the exterior to be as uncluttered as possible while the camouflage pattern was built up.
| COLORS & MARKINGS |
There is a learning curve required with this product although
good guidance is available in on-line tutorials, the company’s own range of
“how-to” books and various internet chat rooms. Individual products also have
some guidance in miniscule lettering on the label and it is important to follow
this since the basic paints are water-based acrylics while the washes and
weathering products are enamels. I stumbled along until I worked out that if you
follow the manufa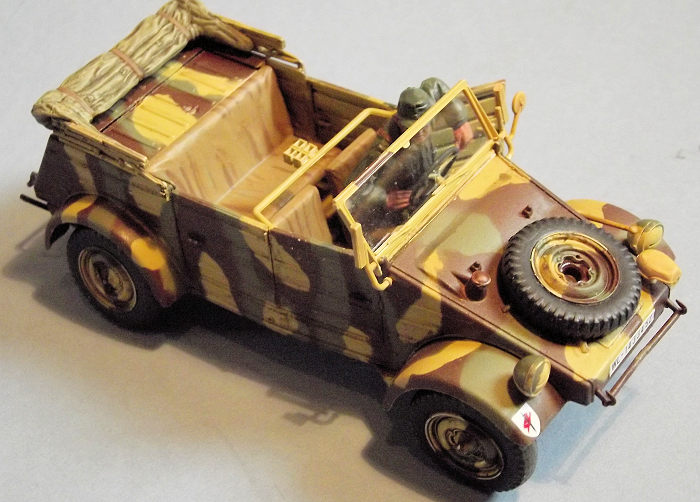 cturer’s advice, particularly as to air brush pressure settings
then satisfactory results can be obtained,
cturer’s advice, particularly as to air brush pressure settings
then satisfactory results can be obtained,
My only airbrush is my ever-faithful Iwata HP-C with a 0.3mm tip and I was relieved to find that it did the job.
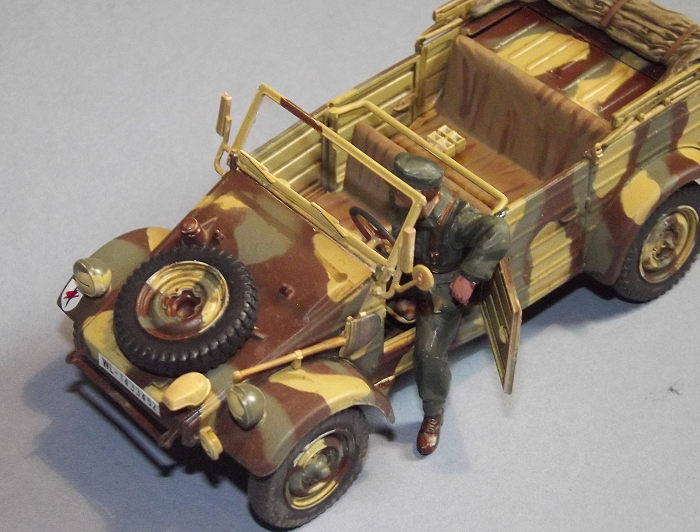
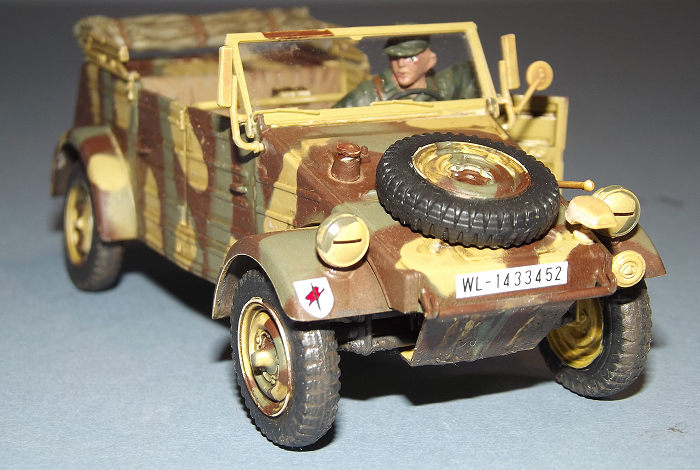
Effectively, it took a little over a week to paint the body shell components, the wheels and the ancillary parts that were still attached to the parts frames. After a thorough degreasing and drying of all plastic, everything was primed with Mig’s One Shot Primer in their sand/flesh base which is coloured just as it says on the bottle. After two days of drying all parts were then sprayed up with the sand yellow and this was left for two days to stabilise. The areas of the body and wheels that were to remain sand coloured were masked off with Blue-Tack low tack reusable putty. I formed little flapjacks of thin putty cut roughly to shape on my cutting mat with a scalpel blade and pressed these into place on the body work. The exposed areas were sprayed in the Olive Green and again left for two days, then further putty masking left just the exposed areas that were to be sprayed Red Brown. As soon as this was touch dry overnight the putty masking was removed to reveal the three-colour camo scheme. The tyres were carefully hand brushed with Tamiya XF-85 Rubber Black.
Attention now turned to the interior and the seats were hand painted in medium brown with lowlights of a darker brown. The moulding for the folded hood was base painted in Khaki with contrasting high and low lights.
| CONSTRUCTION CONTINUES |
The basic painted components were touched in where needed and the underbody assembly completed with the engine block painted in dull aluminium and the running gear in black.
The simple interior is little more than canvas seats, basic driving controls and an instrument panel which were glued in without fuss. The upper and lower body parts almost clicked together and needed just a hint of glue, useful since there was little risk of glue spills scarring the paintwork.
 The whole body shell received a faint mist of acrylic varnish
which was left to settle for two days, then the underside of the body shell was
washed over with Mig’s Engine Grime enamel wash and the upper bodywork received
a trace of enamel based filter sold as A.Mig -1510 “Tan for 3 tone camo” and
once again it does exactly what it says on the bottle. I must admit that I have
always been wary of the Acrylic-over-Enamel or Enamel-over-Acrylic conundrum but
it seems to work so far, providing that the Acrylic is completely dry and that
the enamel wash or filter is applied sparingly, just to dampen the surface . A
Dark Earth wash was carefully applied with a fine brush to the nooks and
crannies of the body and the wheel hubs.
The whole body shell received a faint mist of acrylic varnish
which was left to settle for two days, then the underside of the body shell was
washed over with Mig’s Engine Grime enamel wash and the upper bodywork received
a trace of enamel based filter sold as A.Mig -1510 “Tan for 3 tone camo” and
once again it does exactly what it says on the bottle. I must admit that I have
always been wary of the Acrylic-over-Enamel or Enamel-over-Acrylic conundrum but
it seems to work so far, providing that the Acrylic is completely dry and that
the enamel wash or filter is applied sparingly, just to dampen the surface . A
Dark Earth wash was carefully applied with a fine brush to the nooks and
crannies of the body and the wheel hubs.
The figure was painted according to a quick method that was recently recommended to me. It is first primed in white, then the exposed skin painted in first Dark Flesh, then a medium tone, then a light tone, leaving the eyes white. The uniform is painted in Tamiya XF-65 Field Grey with shadows of darker grey and highlights of pale grey green.
The Kubelwagen’s body was finished with the attachment of lights and tools, the figure being positioned at the driver’s door and glued into place to match. The windscreen and supports completed the build. The tyres received a smear of Mig’s Wet Mud applied with a spatula and paint brush. This took fully four days to set but adds to the finished look.
| CONCLUSIONS |
This was an interesting exercise for it took nearly four weeks to complete a simple model that is barely 110mm long. With more practice I can maybe improve on the more subtle aspects of Mig products, the shading, filtering and pigments.
 It is astonishing that, by their own admission, Ammo by Mig
has come from nowhere to a major manufacturer of model finishing products in
just five years. Yet it so much more than a range of 200 plus paints. I am not a
great fan of the so-called Spanish Style of heavily weathered finishes when it
comes to aircraft subjects but with military vehicles I am more comfortable with
the idea of some mud, dust and dirt on display.
It is astonishing that, by their own admission, Ammo by Mig
has come from nowhere to a major manufacturer of model finishing products in
just five years. Yet it so much more than a range of 200 plus paints. I am not a
great fan of the so-called Spanish Style of heavily weathered finishes when it
comes to aircraft subjects but with military vehicles I am more comfortable with
the idea of some mud, dust and dirt on display.
My problem is that I have become hooked on the product and in the course of about 6 weeks I have spent over £80-00 on paints, lotions, potions, powders, thinners and brushes from the Mig range. Here is a manufacturer that has studied the market and brought out a range of products of excellent quality, backed up with detailed information on how it can be used. I am quite bowled over by this product, regrettably I am not a stockholder in the company nor on its payroll, I can only report my own experience.
The Tamiya kit is simple enough to build and is a classic example of a well-engineered shake and bake model that can be much more fully detailed if required.
Kit, all paints and potions courtesy of my wallet. Advice and encouragement from my LHS, Spot on Models and Games of Swindon, England.
29 October 2019
Copyright ModelingMadness.com If you would like your product reviewed fairly and fairly quickly, please
contact the editor or see other details in the
Note to
Contributors. Back to the Main Page
Back to the Review Index Page
Back to the Previews Index Page