
| KIT #: | 35050 |
| PRICE: | £20-00 |
| DECALS: | Six options |
| REVIEWER: | Frank Reynolds |
| NOTES: | Replacement etch used for the grilles. |
| HISTORY |
German forces in World War 2 are synonymous with the use of half tracks and with flak artillery. The four gun “flakvierling” has a near-mythical status as a weapon to be respected and avoided where possible.
In the 1920s and 30s Germany developed six distinct families of half trucks through the country’s automotive industry and Krauss-Maffei of Munich built the distinctive 8-ton type as a versatile medium tractor capable of towing artillery. Over 1,200 were built by the end of World War 2.
| THE KIT |
 The first release of this kit was in 1975, itself a
partial retool of a kit of the standard personnel carrier released in 1972. It
betrays its age by the fact that the wheels and sprockets are retained with
external poly caps so that the running gear can move and features an articulated
and posable front axle.
The first release of this kit was in 1975, itself a
partial retool of a kit of the standard personnel carrier released in 1972. It
betrays its age by the fact that the wheels and sprockets are retained with
external poly caps so that the running gear can move and features an articulated
and posable front axle.
The parts frames were neatly moulded in dark grey slightly brittle plastic that is typical of Tamiya. A few lines of flash were present and some rather obvious ejector pin marks on the inside of some of the flat panels. Vinyl tyres and tracks are included, two metal axles and a random metal nut and bolt to enable the track assemblies to be tensioned. A small piece of thin glazing is provided for the windshield.
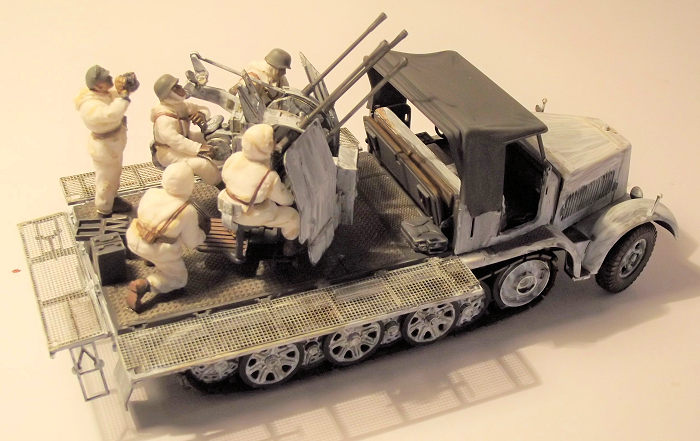
A separate parts frame provides five figures moulded in dense white plastic, depicted in winter uniform. There is a selection of jerry cans, rifles, water bottles and gas mask cases to detail up the figures and the vehicle. Instructions are in half tone on a single multi-fold sheet setting out 18 stages of construction
| CONSTRUCTION |
Every 5 years or so I reset this modeller to default settings by building a few 1/35 scale armour kits. I like to keep it simple and cheap so the go-to range is Tamiya’s legacy armour kits that sell in the UK for £25-00 or less – some of the smaller subjects for as little as £12-00.
Usually I go for a Panther or Jagdpanther as a straightforward build but lately my aircraft modelling strayed towards a P-47 and P-51 in the European Theatre of Operations in World War 2. Mulling over their ground attack missions led my mind to a German flak installation. On such flights of the imagination are modelling subjects chosen in my World.
Since this was intended to be a simple fun build I
decided to essentially trust Mr Tamiya in all matters, assuming that the kit was
reasonably accurate and that the decals and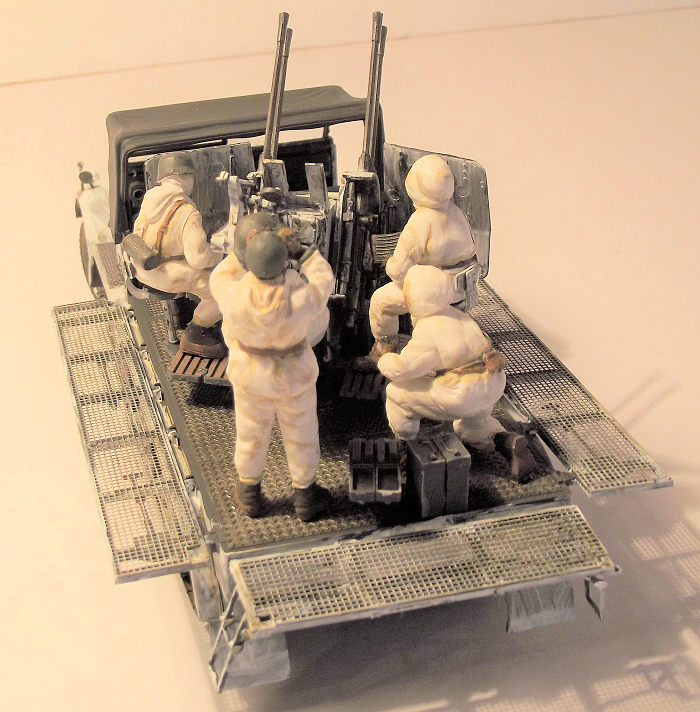 colour finishes described in the
instructions were OK. The only exception was the replacement of the mesh panels
to the folding sides of the flat bed by some etch panels salvaged from a
scrapped uncompleted Trumpeter kit of the same subject that I had attempted a
few years ago. The Trumpeter kit was considerably more complex than the Tamiya
version and my ambition exceeded my talent on that occasion. For some reason I
had kept the etch parts and the detail of the etch seemed better than the
plastic mesh in the Tamiya box.
colour finishes described in the
instructions were OK. The only exception was the replacement of the mesh panels
to the folding sides of the flat bed by some etch panels salvaged from a
scrapped uncompleted Trumpeter kit of the same subject that I had attempted a
few years ago. The Trumpeter kit was considerably more complex than the Tamiya
version and my ambition exceeded my talent on that occasion. For some reason I
had kept the etch parts and the detail of the etch seemed better than the
plastic mesh in the Tamiya box.
The build can be conveniently split into sub-assemblies consisting of: The chassis and running gear; the upper bodywork from the hood to the rear platform; the flak gun and the figures. Where Tamiya specifies moving parts to the running gear, gun and folding windscreen I elected to keep the joints mobile for as long as possible during the build to ease access for weathering and finishing.
The parts frames were washed in a mild detergent solution and the vehicle parts all sprayed dark grey from a Humbrol rattle can while still on the parts frames. The figure parts were sprayed with Tamiya Fine Surface primer.
Construction of the flak gun and the figures proceeded in parallel so I could juggle and fettle both the seats and the figures’ limbs to get the best fit around the gun.
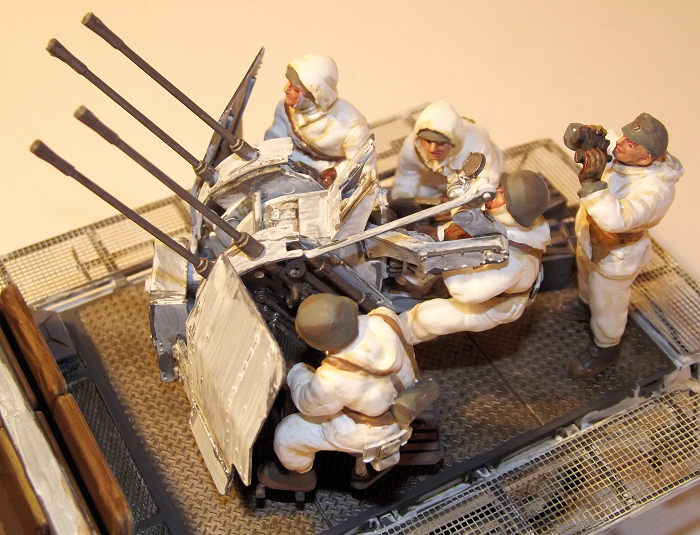
I painted the faces of the figures using a technique passed on to me by a fellow modeller, who in turn got it from our local fantasy gaming shop. “Face painting for novices”.
The entire figure is first painted white. Three flesh colours are selected, dark, medium and light. I used paints from the Citadel range – Bugman’s Glow, Cadian Fleshtone and Kislev Flesh. Leaving the eyes White, the rest of the face is painted over with the dark flesh. When dry, the medium flesh colour is applied with a small brush over most of the face but stopping short of the edges around the eye sockets, the hair line, the ears and any straps or headgear. The lightest flesh colour is lightly applied to the eyebrow area, the ridge of the nose, tip of the chin and ears and gently blended in. Using a cocktail stick or length of wire, the iris to the centre of the eye is picked out in black, dark blue or dark green to taste. That’s it. Make sure that the eyes are lined up correctly and you have a face of sorts. The paint box came out to decorate the figures with brown boots and webbing, field grey headgear and khaki gaiters. The creases in the white uniforms were picked out in a dirty cream colour and the brown leather lightened with streaks of light brown.
 The flak gun is a kit in itself and is in fact
available from Tamiya in a dedicated boxing that includes a small trailer. It
builds up as a central box and floor section to which the pairs of gun trunnions
are attached. Tamiya makes provision for them to be moveable and I built them up
with the necessary mobility to give me a chance to paint them and juggle the
figures into place. The instructions were found to be clear and logical and the
assembly went without fuss. At this stage I had a dark grey gun assembly with
gunmetal weapons and gunmetal magazines. The grey sections of the flakvierling
were sloshed over with hand brushed Tamiya White, well thinned, to try and give
the impression of hasty hand painting by the crew. The gunner and two loaders
are grouped around the weapon on saddle-type seats which are fixed to the gun
assembly. I found it easier to glue the seats to the figures first then juggle
them into position on the gun so that their hands and feet could be located at
the controls. This unit can be set aside while the build switches to the
tractor.
The flak gun is a kit in itself and is in fact
available from Tamiya in a dedicated boxing that includes a small trailer. It
builds up as a central box and floor section to which the pairs of gun trunnions
are attached. Tamiya makes provision for them to be moveable and I built them up
with the necessary mobility to give me a chance to paint them and juggle the
figures into place. The instructions were found to be clear and logical and the
assembly went without fuss. At this stage I had a dark grey gun assembly with
gunmetal weapons and gunmetal magazines. The grey sections of the flakvierling
were sloshed over with hand brushed Tamiya White, well thinned, to try and give
the impression of hasty hand painting by the crew. The gunner and two loaders
are grouped around the weapon on saddle-type seats which are fixed to the gun
assembly. I found it easier to glue the seats to the figures first then juggle
them into position on the gun so that their hands and feet could be located at
the controls. This unit can be set aside while the build switches to the
tractor.
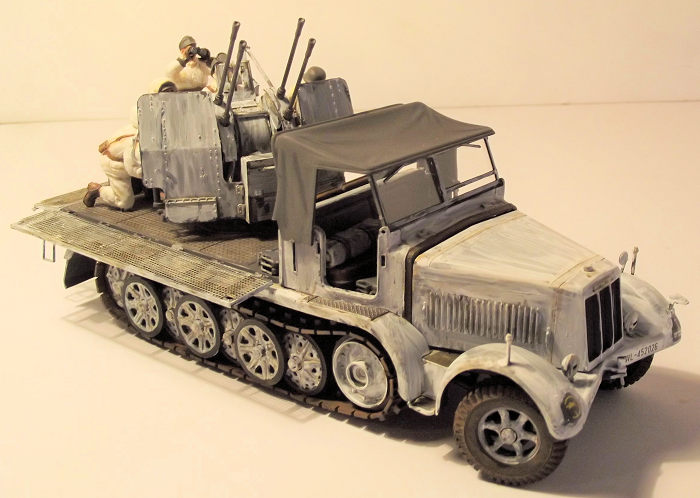
The beauty of this kit is the substantial chassis moulding that runs the full length of the vehicle. It covers the front fenders and steps, chassis rails and cross braces and the gear box, all in one well moulded section. No alignment problems here. Tamiya have made a good job of engineering the running gear and tracks, possibly with some compromises to scale fidelity but it sure makes it easier to build. I found it helpful to tackle all 24 wheels plus the drive sprockets and idlers in one building session. The tyres are well enough defined with mould lines so they were brush painted with Tamiya XF-85 Rubber Black, then the hubs finished in the thinned White. It just takes time.
 The underside of the chassis has parts for simplified
representation of the gearboxes and transmission, together with exhaust pipes
and they were glued into place. Thanks to Tamiya’s use of poly caps the entire
system of interleaved wheels and sprockets can be push fitted and juggled into
place without the need for glue initially. The front drive sprockets and rear
idlers are fitted onto strong metal axles, an adjuster frame for the rearmost
axle has a small amount of movement to enable the tracks to be tensioned. The
one-piece vinyl tracks were sloshed with some runny red-brown paint to give a
rust effect and then juggled into place. Two or three trial fittings were needed
before I was satisfied that the running gear was correctly aligned, so the
wheels were secured with a little liquid cement on the ends of the axles before
the poly caps were finally installed.
The underside of the chassis has parts for simplified
representation of the gearboxes and transmission, together with exhaust pipes
and they were glued into place. Thanks to Tamiya’s use of poly caps the entire
system of interleaved wheels and sprockets can be push fitted and juggled into
place without the need for glue initially. The front drive sprockets and rear
idlers are fitted onto strong metal axles, an adjuster frame for the rearmost
axle has a small amount of movement to enable the tracks to be tensioned. The
one-piece vinyl tracks were sloshed with some runny red-brown paint to give a
rust effect and then juggled into place. Two or three trial fittings were needed
before I was satisfied that the running gear was correctly aligned, so the
wheels were secured with a little liquid cement on the ends of the axles before
the poly caps were finally installed.
The front axle and steering wheels are articulated and with careful assembly can be left moveable and poseable on completion of the build. The tracks were tightened down with cotton thread hand stitched through from top to bottom around the axles of the middle row of wheels.
 The now quite chunky chassis and running gear was
turned right way up and the driving compartment and engine hood installed to the
upper bodywork. Again, Tamiya keeps things easy with a one piece load bed from
the cab rearwards complete with fenders. The cab interior, sides and hood build
up onto positive locations on the load bed.
The now quite chunky chassis and running gear was
turned right way up and the driving compartment and engine hood installed to the
upper bodywork. Again, Tamiya keeps things easy with a one piece load bed from
the cab rearwards complete with fenders. The cab interior, sides and hood build
up onto positive locations on the load bed.
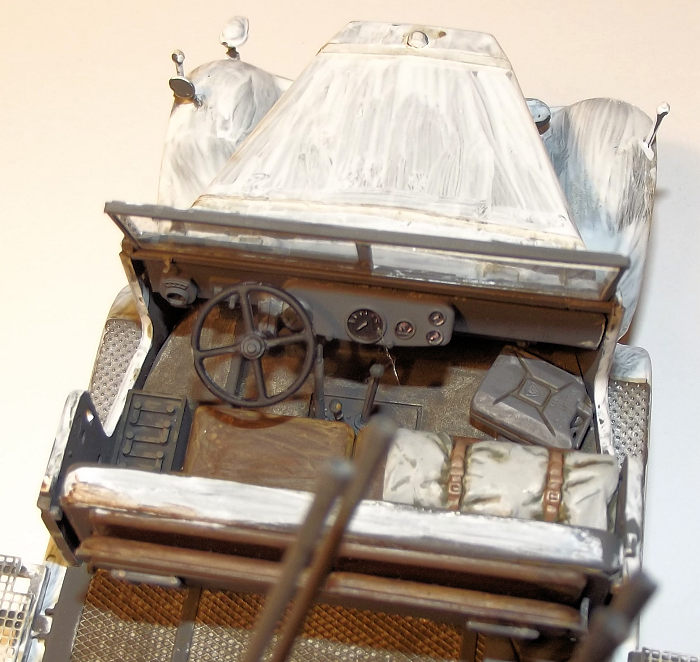
A simple instrument panel is provided but no decals, so the speedometer was picked out with the flick of a small brush. The seats were finished in Tamiya Red Brown with a wash of dirty thinners.
The drop-down sides to the gun deck were furnished with the recycled etched mesh glued in place with cyano. Tamiya provides some vinyl mesh to be cut to shape, which would probably serve well enough.
The three major sub-assemblies can now meet up. The upper works click into place on the chassis, the gun onto the rear deck and it only remains to add small details such as the running lights, mirrors, number plates and whatever small accessories are required to clutter up the vehicle. Decals are minimal and consist of number plates and unit badges
Out came a range of paintbrushes and light washes to dirty up the vehicle. The cab canvas roof simply clips in place and can be removed to suit and the folding windshield positioned accordingly.
| CONCLUSIONS |
Tamiya is to be commended for offering their older toolings at relatively low prices. There is a great deal that could be done to super detail this 45 year old kit but it delivered what I asked of it. I found it to be a lot less complex to build than its shape suggests and I enjoyed the experience.
1 October 2019
Copyright ModelingMadness.com
If you would like your product reviewed fairly and fairly quickly, please contact the editor or see other details in the Note to Contributors.
Back to the Main Page Back to the Review Index Page Back to the Previews Index Page