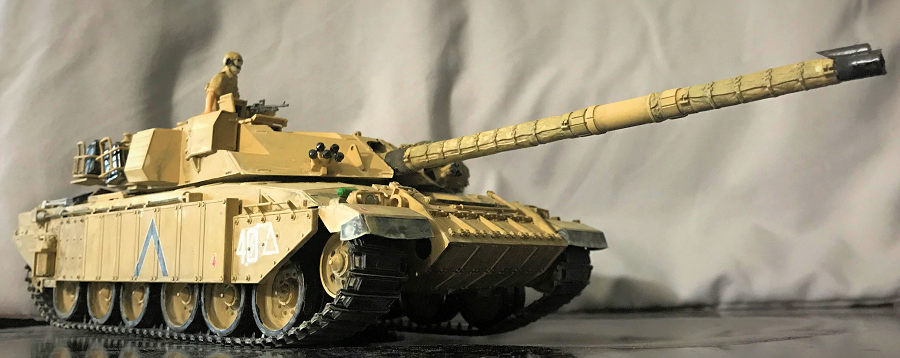
Tamiya 1/35 Challenger I Mk.3
| KIT #: | 35154 |
| PRICE: | $50.00 |
| DECALS: | Two options |
| REVIEWER: | Donald Zhou |
| NOTES: |
Advantages: Extremely detailed, simple to build, nice fit. Disadvantages: details somewhat simplified, wire mesh for bustle racks, lower hull parts from early 80’s |
| HISTORY |
The original Challenger I was built as a result of a Royal Iranian request to replace their own Chieftain tanks using the then latest Chobham armor. Unfortunately, before the “Chally I” was fully developed, Iran fell under the Islamic Revolution and the order was shelved. By late 70’s, the British Ministry of Defense decided to adapt the new vehicle to supplement and replace the aging Chieftain.
The brand new feature for the tank was the Chobham
armor, which was developed in Chobham England. The armor features new ceramic
plates that greatly hardens and improves the armor. The new armor was also
adapted by the Americans for the M1 series of Abram tanks. The vehicle also
features a long 55 caliber 120mm c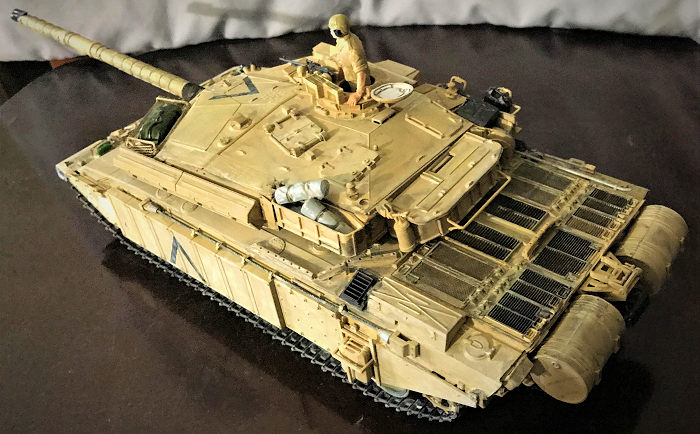 annon that’s rifled bored, unlike the American
or the German 120mm cannon, which was 44 caliber in length (Although later on,
the Leopard II A6 adapted a 55 caliber 120mm cannon) and smoothbore. The tank
entered service in 1983.
annon that’s rifled bored, unlike the American
or the German 120mm cannon, which was 44 caliber in length (Although later on,
the Leopard II A6 adapted a 55 caliber 120mm cannon) and smoothbore. The tank
entered service in 1983.
However, despite the newest nature of the tank, it soon proved to be not up to speed to the American M1 and the German Leopard II. This was proven in 1987 Canadian Trophy Shoot (CAT ’87) competition held in West Germany. The competition course offers many difficult to “prosecute” targets held in real combat situations and the competition is usually fierce between the Germans and the Leopard II’s and the Americans with their M1 series of Abrams tanks. The British was left out since the old Chieftains could not even hope to begin to contend with the brand new tanks that’s a whole generation ahead of it. Despite the excuse that it still had some teething problems and somewhat new, the Challenger I finished dead last in the competition. This is mainly due to the fact that its fire control system is at best, equivalent to a M60A3. During the Gulf War, one Challenger I took out a T-55 at 4KM, still the longest engagement distance for a modern MBT. However, it was obvious that the tank was long in the tooth, especially its ancient fire control system. To this end, a call out was issued for a new tank. These include the Germans, which will offer the latest Leopard II A5, the Americans with their M1A2 Abrams and Vickers, which will design a new tank based on the Challenger. Vickers won and the Challenger II was rolled out in 1993. By 1998, all Challenger I’s has been pulled out of service. It is still in service with the Royal Jordanian Army but with many features of the Challenger II included to bring it up to speed against modern opponents.
| THE KIT |
 I bought this kit alongside my Challenger II kit
actually. There are not much to say about this kit. Like all Tamiya kits, it’s
easy to assemble, filled with enough details to satisfy most, even though some
are skipped for ease of assembly. The bottom of the hull comes from the original
1983 Challenger kit. In fact, the kit can still be built as the original and all
the original parts are still included, including the original commander figure.
To bring it up to the Mk. 3 standard, a new side skirt with add on armor blocks,
new bustle racks, frontal ERA blocks are included. I bought this mainly for the
desert scheme so will be doing that version.
I bought this kit alongside my Challenger II kit
actually. There are not much to say about this kit. Like all Tamiya kits, it’s
easy to assemble, filled with enough details to satisfy most, even though some
are skipped for ease of assembly. The bottom of the hull comes from the original
1983 Challenger kit. In fact, the kit can still be built as the original and all
the original parts are still included, including the original commander figure.
To bring it up to the Mk. 3 standard, a new side skirt with add on armor blocks,
new bustle racks, frontal ERA blocks are included. I bought this mainly for the
desert scheme so will be doing that version.
| CONSTRUCTION |
The construction begins with the hull. Now, as stated,
the hull is basically the hull from the Challenger I released back in 1983 I
think. However, Tamiya did plug up the battery power holes on the bottom and
improved the details. The hull build up is essentially the same as the
Challenger II kit I built previously except I gave the wheels a good spray of
British Light Stone since on this version, there are no canvas boots. Again,
little details such as the fire extinguishers, pioneer tools, spare tracks etc
were left off until later. The only problem is again, both versions are offered.
Be sure to mark down which is which and what is what since for exa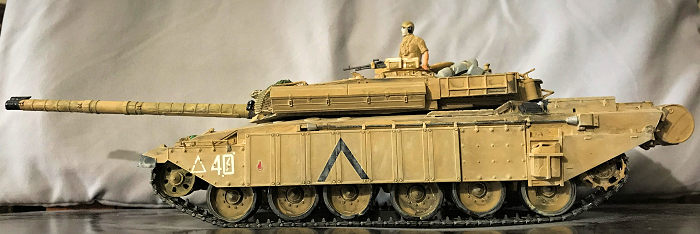 mple, the tow
ropes, placement of some frontal items are all different in respect to their
versions. So mark it down so you don’t get confused.
mple, the tow
ropes, placement of some frontal items are all different in respect to their
versions. So mark it down so you don’t get confused.
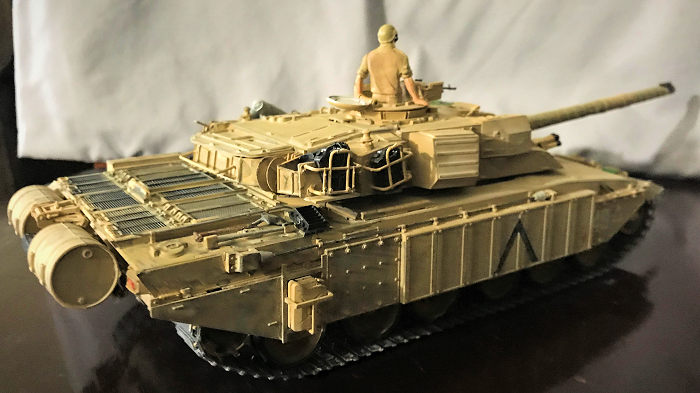
Turret is slightly more complex. The main cannon again is in two halves since slide mold technology was not invented at the time. I left off the commander machine gun until later. The cannon, at this point, is inserted into a plug that is trapped by a screw. From my experience, do not screw the screw on too tight as eventually, it will wear a grove into the plastic plug, causing the gun to forever hang downward. The hardest part of all this is the bustle racks. The side one has two versions, a long solid storage box or a long bustle rack you have to make with plastic parts and a black mesh. I guess at that point in time, photo-etch technology is still too new and expensive? Cause that would help greatly with this. I chose the long solid box to save me the headache.
However, the front bustle rack can not be avoided. I took the relevant page and copied it before cutting the relevant paper backing. Then using a color marker, drew the inprint onto the mesh before cutting them off. I still miss some and had to cut them off and use extras to try and cover them. The end result is a superglue mess! This was NOT fun at all! Glad these days, kit makers just use photo-etch to replace this idea! The rest is straightforward. Onto to the paint shop we go!
| COLORS & MARKINGS |
 Painting starts with my usual jet black and Tamiya
flat black, heavily diluted and then slobbered on, especially heavily in the
rear engine panels. This is overall sprayed with, again, Testor British Army
Light Stone. After the first coat is dried, more diluted black were brushed on
before a third coat is blasted. If you read any of my armor build, you should
know how this goes by now. Again, running gears are a little bit heavier than
usual cause this area gets pretty dirty.
Painting starts with my usual jet black and Tamiya
flat black, heavily diluted and then slobbered on, especially heavily in the
rear engine panels. This is overall sprayed with, again, Testor British Army
Light Stone. After the first coat is dried, more diluted black were brushed on
before a third coat is blasted. If you read any of my armor build, you should
know how this goes by now. Again, running gears are a little bit heavier than
usual cause this area gets pretty dirty.
Weathering is very similar to my M1A2 build. Namely, I used acrylic cream to simulate the sand dust and peach as an off set. These were slobbered on to the running gears and drive section especially. Overall, it should create a dusty and battle worn tank. Testor Metalizer Burnt Metal and acrylic burnt umber were used to on the exhaust pipes to simulate the heat in this area.
For markings,
the choice was obvious since there are only two. One is the desert version and
the other the regular Chally I Mk. 3…..Since I built the tank as the desert
version, I have to go with the desert markings……One thing I hate about Tamiya
arm or kits is the lack of markings. Great kits, but you only get two choices.
Their M40 kits for example, a homerun of a kit but only two marking choices and
both are included in the AFV offering! Is it that hard to make more? Especially
since tanks are spartan in markings anyways.
or kits is the lack of markings. Great kits, but you only get two choices.
Their M40 kits for example, a homerun of a kit but only two marking choices and
both are included in the AFV offering! Is it that hard to make more? Especially
since tanks are spartan in markings anyways.
Finally, all the tools and accessories were added. These include the antenna, smoke dischargers, tow cables (be sure to use the right one), and the muzzle. I also used green to color the front fire extinguishers. The final piece is the commander figures. Fortunately, he is covered in a white towel to ward off the sand. I used British Light Stone for the main clothing color, dark earth for the cammo, flesh for the arms, black for the goggles and white for the towel that covers the figure’s face. After done, I put the figure into the commander’s hatch along with his machine gun.
| CONCLUSIONS |
Again, these Tamiya kits are just piece of cake to build. The only thing that will take some time will be the painting and weathering. They are great practice for those who just got a few snap kits under the belt and need a harder challenge or those who just came off of an agonizing hard build or a long slog and need something far far easier and more relaxing. These kits are certainly that. They are fun, fit well, not a whole lot of parts and just fall together. Then you can practice all sorts of weathering technique on them and they all will turn out looking nice since, hey, they are tanks, and tanks are dirty things and no weathering will look wrong on them!
26 February 2019
Copyright ModelingMadness.com
If you would like your product reviewed fairly and fairly quickly, please contact the editor or see other details in the Note to Contributors.
Back to the Main Page Back to the Review Index Page Back to the Previews Index Page