Airfix 1/76 Male Tank
| KIT #: | A01315V |
| PRICE: | 8 Euros |
| DECALS: | One option |
| REVIEWER: | Frank Spahr |
| NOTES: |
| HISTORY |
I will gladly leave a competent presentation of the subject (and the kit!) to my friend Spiros Pendedekas.
| THE KIT |
 These are
my personal motivations and observations: To me, this is a cheap and short trip
down memory lane. I am sure I built the kit when I was around 11 or 12 years
old, not so sure whether that was the only time I did. Back then, the kit was
marketed as the „Dragonfly“, and it sure looked weird compared to more modern
armour. But then it stood at the beginning of 100 years of weapons development.
Humble beginnings, for sure.
Being thoroughly uninterested in armour, I only learned from Spiros´ preview about the origin of the kit, and that it is no accurate representation, but rather that of a reconstructed specimen at Bovington in the 1960s. But the preview combined with the memories, and a really affordable price led me to revisit the kit and give it a go.
Having time on my hands on my main project whilst putty cured, I dragged the small box from the shelf where it had been sitting for exactly four days, and opened it. The contents were still quite familiar to me, with surprisingly petite raised detail, some ejector pin marks but hardly any flash. Upon first sight, I found no short shots or sink marks. There is one scheme to build, and one very small decal with the name Dragonfly on it.
| CONSTRUCTION |
 As
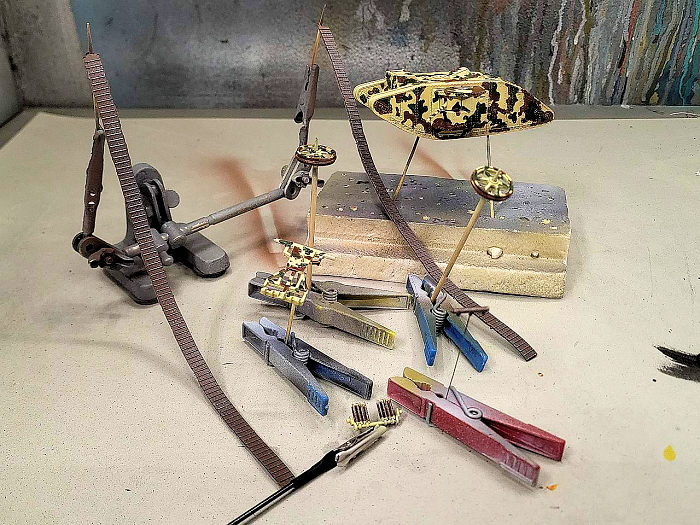
the first thing, I drilled out the gun barrels, as I think that makes a real
difference. I then assembled the two side sections, and next addressed the gun
mountings as per instructions.
Assembly in all took about 90 minutes. Some parts are small and fiddly, and sure were really frustrating to young me without proper tools and magnifiers. Overall fit was very good, and I ended up with only some minor seams to fill with Vallejo putty. I somehow lost the end of the exhaust pipe and replaced that with a piece of tubing. Everything (sub-) assembled, with the wheel assembly left off, I let things cure for a while before priming.
| COLORS & MARKINGS |
 I primed
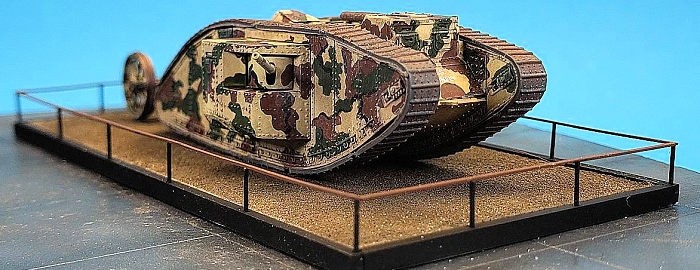
the model with Stynylrez Grey primer, and then gave it a coat of a beige shade I
had, substituting the linen colour specified in the instructions. I gently
sprayed a light and varying coat of the next camo shade, a rust red, to make
things a bit less uniform. From that on it was brushpainting. Trying to
replicate the camo scheme, but failing, I first used rust red and then a shade
of green.
That done, I took a smaller brush and applied the black streaks. Again, trying to come close to the camo scheme, but failing. Some touchups and adding a bit more green and rust red areas followed. I then applied a black wash, and later drybrushed the model in grey. The tracks were primed in grey, then unevenly sprayed dark red, and finally drybrushed with Iron metalizer.
I was quite happy at that stage.
| FINAL CONSTRUCTION AND THE BASE |
Things got iffy when the vinyl tracks needed to be applied. A glue I had successfully used before wouldn´t stick to the tracks this time, but resisted my attempts at getting it off the model. Moreover the tracks were a tad short. So I used CA glue, applied sequentially, and decided I had to live with a slight track gap on the underside.
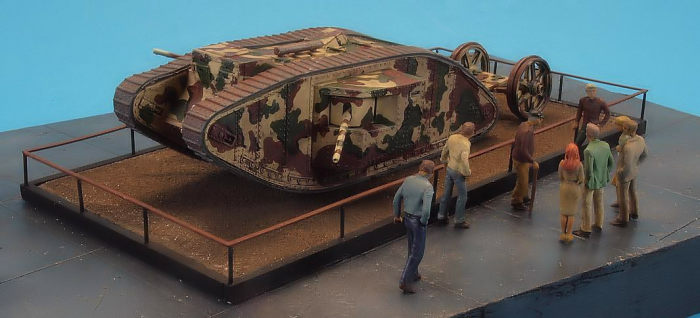
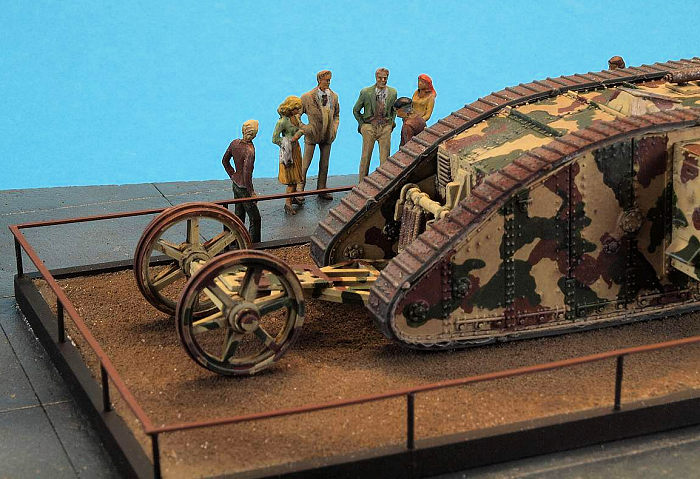
That out of the way, and my enthusiasm consequently dampened, I added the quite silly-looking and most probably ineffective tail-dragged wheely contraption. I have to admit, though, that it lends the tank and the model quite considerable appeal and interest. The last thing to add was the exhaust mounted atop the tank.
 Well,
there was only one decal. I applied Future to the model preparatory to applying
it, still fuming inside after the track disaster. After having taken a
stress-relieving cycling trip in fine early autumn weather, I applied the decal,
and it went on well. More Future was applied over it to blend it in and render
an even surface.
The next morning I added a generous flatcoat and called the model done. I did not further weather or grunge it up because I had had an idea about the presentation.
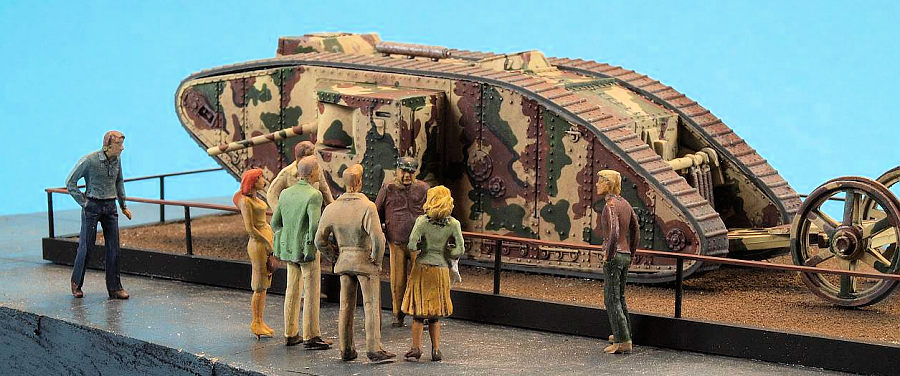
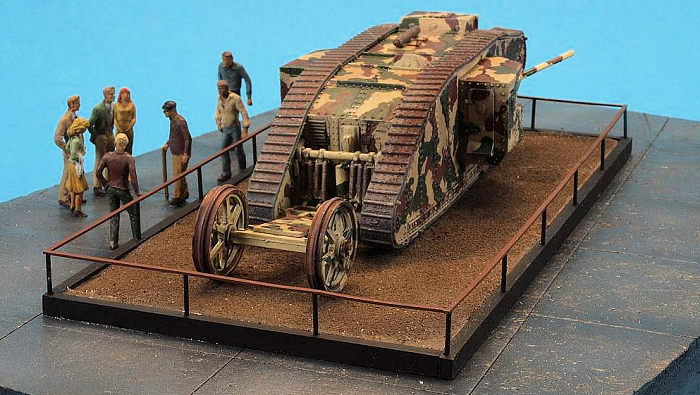
Having read that the model was based on a restored specimen at Bovington Tank Museum, and not a real Mk.1, I decided to present my model as a museum exhibit. Not Bovington, though. Their tank is heavily coated in mud and sits in a very evocative diorama of trench warfare. Just a fictitious museum in the ´sixties.
I made a frame from styrene stock and cut a piece of foam board to size to fit into it. Another, larger piece of foam board was engraved with square „floor tiles“ and sprayed a glossy dark grey.
I then added a railing from styrene stock to the frame, sprayed it all in black primer and painted the handrail reddish brown. I wasn´t happy with my first attempt at coating the display space with „gravel“, as the tank wouldn´t sit properly on it. So I redid that with finer material, and was satisfied.
I had envisaged some kind of explanatory
chart/illustration/whatever next to the tank. To get material for that, I
liberated/copied/half-inched
material from the tank regiment´s very fine website on the Mk.1 tank. The one in
the list of sources below. In the end, I did not use them at all as my printer
could not print fine enough to make them look right.
 Meanwhile,
I had found a fitting set of unpainted Preiser figures that might do as „museum
visitors“ in a former decade. Having them in my grubby mitts, I was able to
continue.
I just did very basic stuff with them. Cleaned them up as best I could, mounted them on thin steel pins, primed them in grey and then brushpainted them in available shades I found fitting. A thin black wash augmented details a bit, same as some light drybrushing with grey. Finally, a flat coat was sprayed.
Having an old gentleman with a walking stick amongst the figure set, I assumed he might have been a veteran who told his story to museum visitors. I therefore gave him a black cap/beret, as the British Royal Tank Regiment has. The other visitors are supposed to listen to him. I pinned the figures to the base in hopefully credible relations and called things quits. In the end, I found flaws in several sets of photos I took, and tired to correct them as best I could, but at some point gave up. Those figures were anything but seamless, and the macro showed those flaws up to perfection. Moreover, the tracks had worked loose (again!) partially, and the museum display base also wasn´t flush with the floor anymore. Well, you win some, you lose some.
| CONCLUSIONS |
It was great to revisit this old and classic kit. It still fit very well, the detail is quite nice, the only gripe I had were the blooming tracks which were too short and very resistant to glues. Nonetheless a kit still worth building in my book!
| REFERENCES |
https://modelingmadness.com/review/misc/previews/airfix/a76510.htm
https://en.wikipedia.org/wiki/British_heavy_tanks_of_the_First_World_War
27 October 2026
Copyright ModelingMadness.com.
All rights reserved. No reproduction in part or in whole without express
permission from the editor. If you would like your product reviewed fairly and fairly quickly, please
contact the editor
or see other details in the
Note to
Contributors. Back to the Main Page
Back to the Review
Index Page
Back to the Previews Index Page