Tamiya 1/48 scale British Light Utility Car 10hp
|
KIT #: |
32562 |
|
PRICE: |
$21.95 MSRP |
|
DECALS: |
Four options |
|
REVIEWER: |
Bill Michaels |
|
NOTES: |
WW2
British “Tillie” |
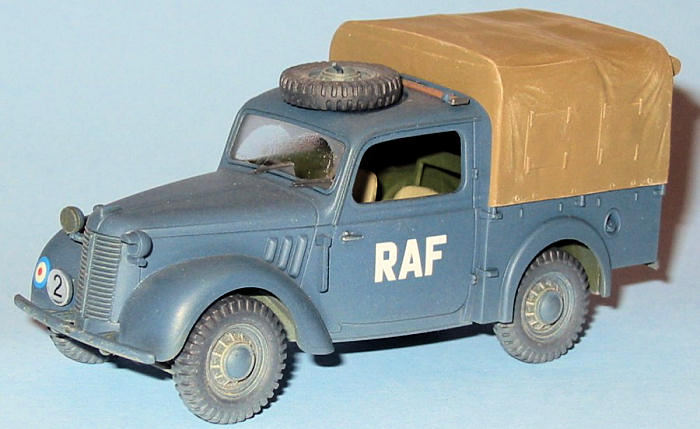
I’ll quote and paraphrase Tamiya’s
instruction sheet:
During WW2, British forces used
passenger car chassis as a basis for various pick-up style military vehicles.
They were produced by several manufacturers, but rather that identify them with
specific names, the soldiers called all the vehicles of this
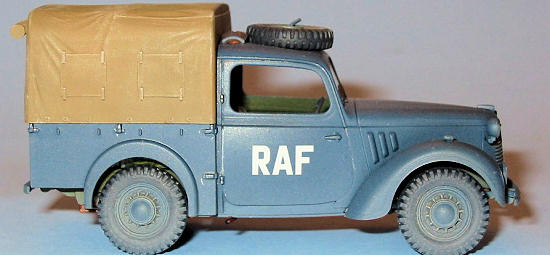 type
a “Tilly”. The vehicles generally featured a 10- 30 hp engine and rear wheel
drive. Because they were only 2WD
vehicles, they couldn’t really be used off-road, so they were primarily used in
rear areas, while the 4WD vehicles were used by troops at the front.
While it doesn’t say so in the
instructions, a perusal of British WW2 vehicle sites will show that the subject
of this kit was built by
Austin—so
it is a model of the classic “Austin Tillie”.
Tamiya also says that they “were
used at many airbases”; a fact that may have led them to erroneously conclude
that the RAF used them. (More about
that later on.)
Now, the Tillie wasn’t built in the
numbers that the American Jeep was, but for a British vehicle, there were a lot
of them produced—over 38,000 during the 1938-45 period. There are a number of
them still around— especially in the
UK.
This is a brand new kit—number 62 in the 1/48
series, released in early 2010.
The kit is molded in the standard
light gray plastic most Tamiya aircraft are molded in.
It is a small model— it is only about 3 inches (75mm) long. The
moldings are very good, no flash or troublesome ejector pin marks.
The few marks that are on the parts are in places that won’t be seen
after assembly.
One oddity is the way that Tamiya
chose to mold the canvas cover for the cargo area.
The tarp cover is molded in two parts, on the clear parts sprue.
There is no benefit to the modeler in
doing it this way, as the canvas covers over the “windows” are molded in the
closed position, so there is no reason you’d mask off part of the cover to leave
it clear while painting the rest. The only thing I can figure is that it was
more efficient for Tamiya to mold it this way- to include some additional parts
on the otherwise small clear parts sprue. On
the plus side, Tamiya give you optional parts so that you can build your model
with the rear tarp in place or rolled up.
The kit also includes a driver
figure— an unarmed man in an Army uniform. Like many of the Tamiya 1/48 figures,
the detail on the face and hands is the weak point.
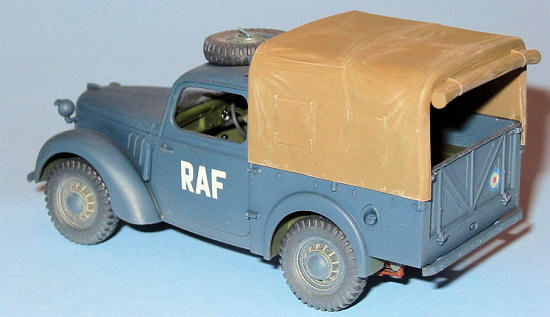
The instructions are like those
included in all of the new 1/48 scale armor kits, printed in English and
Japanese. Colors are called out
with Tamiya colors, as you’d expect.
This is not a very complicated vehicle, so neither is the instruction
sheet.
The kit includes painting
instructions and decals for four vehicles:
-
Unknown unit, British Army, northern
Europe,
1944. This is the vehicle on the
box art, in green with black overlapping circles.
-
An overall green vehicle from the Polish 4th
Infantry Division, from
Britain
in 1944.
-
A generic British Army vehicle, in overall
green.
-
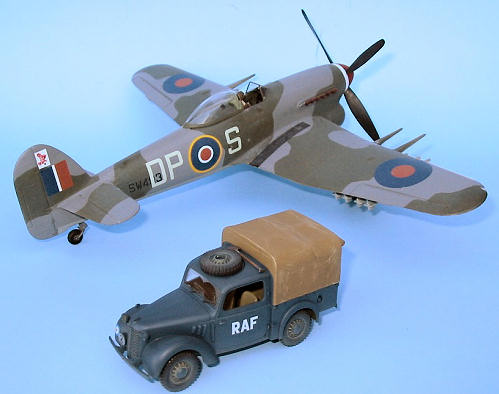
An RAF vehicle in RAF blue.
(No interior colors are specified, so I
went with the army green.)
The same green is used for all the
vehicles—Tamiya calls for XF-58 Olive Green. Additionally, the instructions give
a chart of generic painting instructions for vehicles used in the
UK
and
Northern Europe,
as well as in the
Middle East.
The chart calls out the colors for each region for 1941-42, 1943, and
1944 onwards.
I did a little web research after I
bought my kit—I bought it intending to do the RAF version, and I was trying to
figure out what color to use. I
discovered that Tamiya made an error—none of the vehicles of the type this model
represents were delivered to the RAF—they were all army vehicles.
(The RAF apparently used different vehicles that were produced by other
manufacturers.)
This left me with a dilemma—what to
do with my kit? I had bought it
with the intention of doing the RAF vehicle, and now I knew that painting it RAF
blue was “wrong”. In the end, I
decided to build it using the RAF decals anyways- I decided that it wasn’t too
far-fetched to think that somehow, somewhere, an RAF unit got their hands on an
Army vehicle, and repainted it blue. Besides, this was supposed to be an easy,
OOB build—no sense in getting bogged down in
AMS!
I built my model OOB, basically following the
eight Assembly Steps in the instructions.
This kit goes together so well, I don’t see much point in providing a
blow-by-blow description. Rather,
I’ll just provide a few comments/observations from my build:
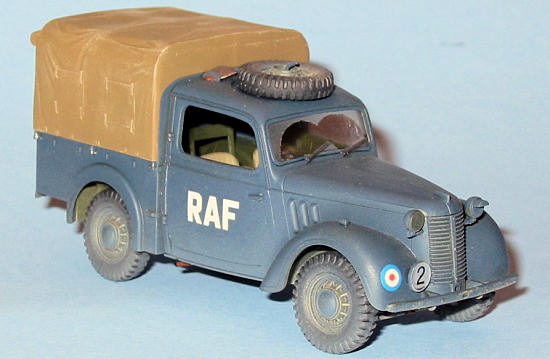 -
I built
my model OOB.
-
Fit was good throughout, I didn’t need filler
anywhere.
-
I did not use the supplied driver figure.
Like most of the Tamiya 1/48 figures, he is a bit “blobby” for my taste,
especially in the face.
-
During construction, I painted the model as if
it was an Army vehicle, using the army green color inside and out.
-
I did not use the clear parts for the side
windows—I only used the windshield.
-
The little front fender lights are molded in
clear and very tiny—I’m not sure they are worth the trouble.
I managed to get them both installed, and then somehow knocked one off
and lost it later on. If I was to
build another Tillie, I’d probably just leave them off and fill in their
mounting holes.
-
Be careful assembling the top—it is in two
parts, and molded in clear. The
brittle clear plastic makes it a little harder to get the two halves joined and
the seam filled.
The body is such a good fit on the
chassis that you don’t need to attach until the very end.
That made painting easy-- after the model was painted green, I masked off
the interior of the body and painted the exterior blue. According to the on-line
sources I found, the blue should be a medium blue, and not RAF uniform blue –
but a color a little darker than PRU blue.
I had some Pollyscale USN intermediate blue that looked good—so that is
the color I used on my model.
While on the topic of color,
there is one other thing that you should be aware of--
the blue used on the RAF vehicles was not used during the war.
Pre-war, a glossy blue is appropriate, while postwar, go with a matte
finish. So, my model is an Army
vehicle that somehow was “appropriated” by the RAF, post-war. (That’s my story
and I’m sticking to it!)
I did make a mistake when I painted
the headlights. They are modled in
clear—I should have painted them silver first, and then the body color over
that. That way, the “inside” of the
lights would be silver, instead of green like it s on my model.
By the time I noticed this error, it was really too late to fix it—I’m
not going to remove the lights from the completed model, strip them and then
repaint.
One question that I have been asked
about is how I did the dirty windshield, with the clean areas under the wipers.
This was very easy to do—here’s how I did it.
 -
Paint
the framework of the windshield blue before installing it.
-
Paint the body.
-
Install the windshield with clear parts cement.
Touch up the blue with a brush as needed.
-
Airbrush the entire body, windshield included
with future in preparation for decaling.
-
Apply the decals.
-
Apply an arc of masking tape to the windshield
to mask the areas that will remain clean. Leave this tape in place until all the
flat coats and weathering has been applied.
-
Remove the arcs of tape as the final step.
The decals went down well over the
clear coat, with no issues. I did
use an application of “Mr. Decal Softener” to help the RAF decal conform to the
compound curves of “Mr. Front Fender”.
To weather the model, I did a
little bit of drybrushing with silver and rust colors.
I then made up a very thin wash using a light tan/dusty color.
I then misted this on the bottom of the model, applying it a little
heavier in and around the wheel wells. I also made a few passes on the lower
part of the body— using the same technique armor modelers use to bring dirt and
dust up the sides of a tank.
The effect is subtle, yet convincing. (But it looks better in person than it
shows in the photos.) The wheel wells
and rocker panels are dirty, and the lower body panels and doors are less so.
Highly recommended to anyone wanting something
a little different, something that will look at home next to 1/48 scale
aircraft. The model was an
enjoyable build—a simple, OOB built that was fun and looks great when finished.
I am really pleased at how this little truck came out.
Just be forewarned that the RAF option is not historically accurate.
Review kit courtesy of my wallet.
Note that while the retail price is $21, you can find it for less.
I got mine from one of Great Models’ recent sales for only $12.
www.britmodeller.com
Bill
Michaels
August 2010
If you would like your product reviewed fairly and quickly, please
contact
me or see other details in the
Note to
Contributors.
Back to the Main Page
Back to the Review
Index Page


 type
a “Tilly”. The vehicles generally featured a 10- 30 hp engine and rear wheel
drive. Because they were only 2WD
vehicles, they couldn’t really be used off-road, so they were primarily used in
rear areas, while the 4WD vehicles were used by troops at the front.
While it doesn’t say so in the
instructions, a perusal of British WW2 vehicle sites will show that the subject
of this kit was built by

 -
Paint
the framework of the windshield blue before installing it.