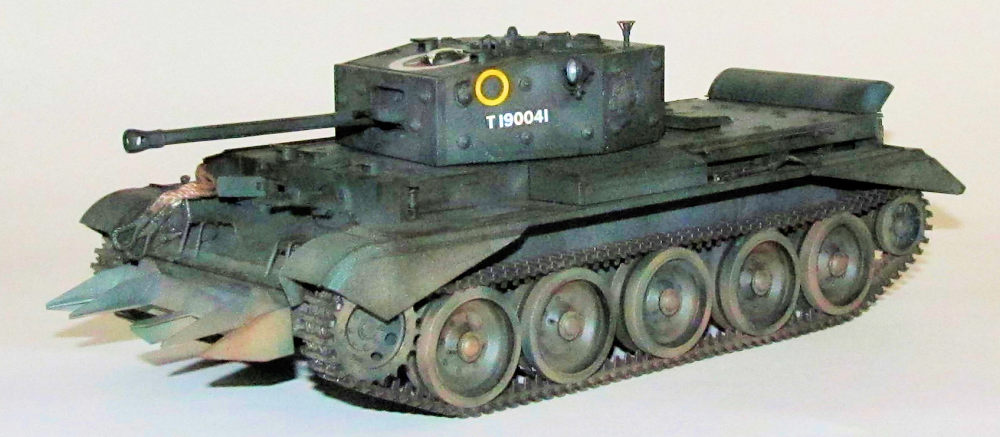
Tamiya 1/35 Cromwell Mk IV
| KIT #: | 35221 |
| PRICE: | $46.00 |
| DECALS: | Four options |
| REVIEWER: | Dan Lee |
| NOTES: |
| HISTORY |
The Cromwell came out of the requirement for a replacement for the Crusader which the British High Command knew wasn't going to be enough. Nuffield's A24 design was originally picked as the basis for the Cromwell, but it was powered by the V-12 Liberty Engine and had a 6 pounder gun. Around the same time, Rolls Royce came up with a ground version of its powerful Merlin Engine known as the Meteor and the Nuffield design could not accommodate the Meteor.
Production and design delays caused the initial deployment to push out beyond the 1942 deadline. At first the Meteor engines were originally made from crashed aircraft engines (many of the original Meteor engines had battle damage.) Eventually, Rolls Royce moved Meteor production to Rover and Morris who made the majority of the required tank engines as Rolls focused on airworthy Merlins till 1944.
 The main gun of the Cromwell was
originally the 57mm/6 pounder gun which had decent (for the time) armour
penetration, but had a rather feeble HE shell. Partially this was due to the
6pdr's shell size which did not pack enough HE to be effective as well as flawed
British armour doctrine which claimed that tanks were to be pigeon holed into
specialized roles such as tanks equipped with an artillery main gun fire HE
rounds and tanks involved fighting other tanks firing AP shells only. Eventually
the British gun designers realized that the US M3 75mm provided both a decent AP
shell (at the time) and an effective HE shell so they rebored the 57mm gun to
fire the 75mm US shell.
The main gun of the Cromwell was
originally the 57mm/6 pounder gun which had decent (for the time) armour
penetration, but had a rather feeble HE shell. Partially this was due to the
6pdr's shell size which did not pack enough HE to be effective as well as flawed
British armour doctrine which claimed that tanks were to be pigeon holed into
specialized roles such as tanks equipped with an artillery main gun fire HE
rounds and tanks involved fighting other tanks firing AP shells only. Eventually
the British gun designers realized that the US M3 75mm provided both a decent AP
shell (at the time) and an effective HE shell so they rebored the 57mm gun to
fire the 75mm US shell.
Thanks to the power of the Meteor, the redesigned suspension and a transmission that allowed differential steering, the Cromwell was the fastest and most maneuverable of the WW2 Allied Tanks.
Despite all the improvements in production, there were only enough Cromwells produced to fully equip the 7th Armoured Division (The Desert Rats) while serving in the recon elements of other Commonwealth Armoured divisions which were equipped with the M4 Sherman.
In combat, the Cromwell had mixed results with British
tankers. The Crom did well against Panzer IVs, but suffered (like all Allied
tanks of the era) against the new German medium/heavy tanks like the the Panther
 and Tiger. Its main gun didn't have the power to stop a Tiger at point blank
range as the Brits found out at the infamous Battle Villers-Bocage where Tiger
tanks led by SS Tank Ace Michael Wittmann slaughtered the Desert Rats' 22nd
Armoured Brigade.
and Tiger. Its main gun didn't have the power to stop a Tiger at point blank
range as the Brits found out at the infamous Battle Villers-Bocage where Tiger
tanks led by SS Tank Ace Michael Wittmann slaughtered the Desert Rats' 22nd
Armoured Brigade.
Later the British designers tried to add a modified 17pdr gun to the Cromwell, but found that the original turret ring was not large enough for the required turret. Further work mating the 17pdr to a Cromwell chassis led to the extremely butt ugly Challenger and eventually the more ascetically pleasing/effective Comet Tank. The Comet later evolved into the famous Centurion tank leading to the less effective (due to a really poor engine) Chieftain and the much better Challenger 1/2 tanks making the Cromwell the common ancestor for all modern British armour (much like the M26 is to modern US tanks.)
| THE KIT |
 Tamiya's Cromwell comes with
around 200 parts including four dark green sprues, one clear sprue, a one piece
lower hull, two rubber band tracks of the glueable variety, poly caps for the
road wheels, string for the tow cables and some mesh for the screens. The parts
are typical Tamiya with minimal flash and excellent detail including a rough
imperfect casting on the outer surface of the armor.
Tamiya's Cromwell comes with
around 200 parts including four dark green sprues, one clear sprue, a one piece
lower hull, two rubber band tracks of the glueable variety, poly caps for the
road wheels, string for the tow cables and some mesh for the screens. The parts
are typical Tamiya with minimal flash and excellent detail including a rough
imperfect casting on the outer surface of the armor.
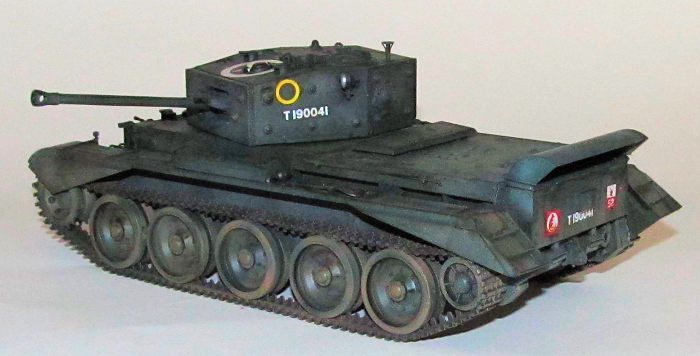
One thing that stood out for me was that the main gun consists of two halves and will require some sanding/polishing to remove the seam which was the style at the time in the late 1990s. I guess I am spoiled by slide mold tech that came out on the late 2000s.
Of course, the kit comes with a painting guide and Tamiya's usual excellent instructions for assembly.
| CONSTRUCTION |
I started off with the cockpit...
uh, wrong model review. I snipped off the main gun parts off the sprue and glued
it together using CA glue. I actually wanted to finish this model quick without
my usual two week wait
 when using Tamiya Extra Thin Cement for visible seams so
I have been using CA glue instead. The glued main barrel parts cured while I
worked on the rest of the turret which went together quite well. The main gun
was sanded and polished smooth before it was added to the completed turret.
when using Tamiya Extra Thin Cement for visible seams so
I have been using CA glue instead. The glued main barrel parts cured while I
worked on the rest of the turret which went together quite well. The main gun
was sanded and polished smooth before it was added to the completed turret.
The upper hull was next. I did cut out the mesh for the rear grill and glued it in place even though it was going to be covered up for the most part. Each part was removed from the sprue gate and cleaned up before being added to the upper hull. It only took a couple of hours to have the upper hull completed.
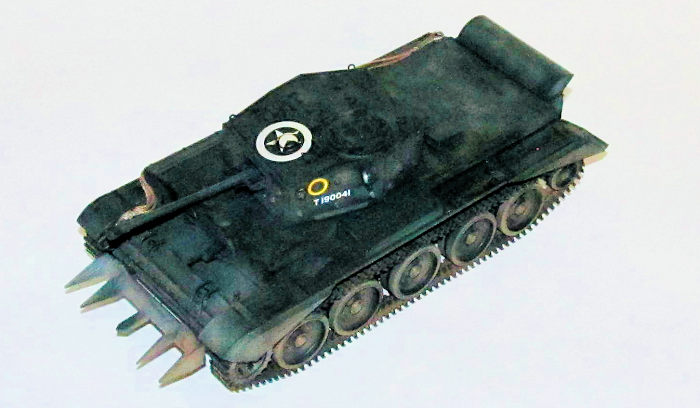
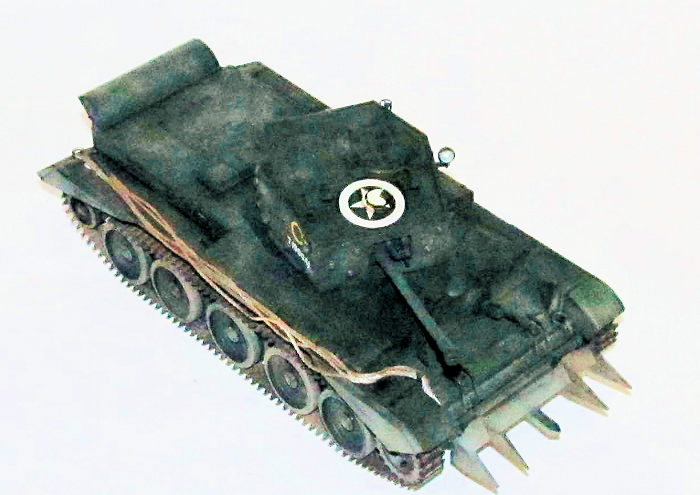
Next up were the lower hulled and road wheels. Each road wheel had the mold seams and sprue nubs sanded smooth. The poly caps were inserted into their wells and the wheels were glued together but left off the tank for painting. The various suspension bits and hedge row clippers were glued in place. Thankfully it was pretty simple because the parts are fixed in place unlike Dragon's moveable suspension which can be awkward to assemble.
A couple of days later, I glued the upper hull to the lower hull and it was time to paint.
| COLORS & MARKINGS |
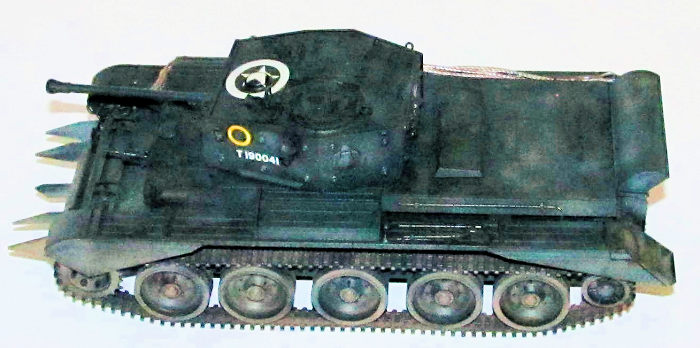
The various parts were painted flat black first for preshading purposes. I sprayed on three different greens for the British Army Green (XF-11 IJN Dark Green, XF-27 Black Green and XF-5 Flat Green.) I went from base color (XF-27) to lightest (XF-5) with each lighter color layer being thinned and misted on more to create the varying tones.
 I brush painted the fine details
such as the rubber on the road wheels (flat black) and the machine guns (gun
metal.) Lastly, the rubber tracks were sprayed metallic grey.
I brush painted the fine details
such as the rubber on the road wheels (flat black) and the machine guns (gun
metal.) Lastly, the rubber tracks were sprayed metallic grey.
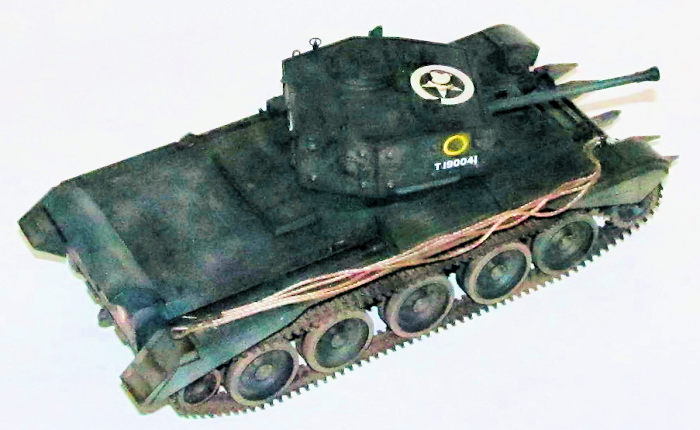
One of the mistakes I've made in the past with armor is adding the decals on after the fact. The gloss coat washes away a lot of my weathering and the decals stand out because they are too clean. This time I just added the decals before I weathered without a gloss coat. I used Solvaset to secure the decals in place (I selected the Desert Rats markings because I enjoyed reading about the history of the British Army's 7th Armoured Division although Villers-Bocage was not their finest moment.) The most difficult decal was the top turret white star which required a couple of soakings in Solvaset and some flat white paint to touch up the areas where the decal didn't cover.
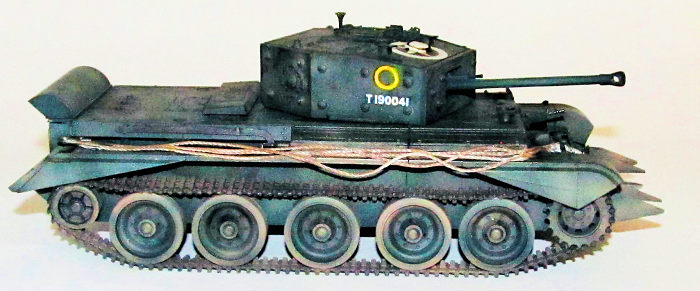
Once the decals were dried, I began to weather it. I first used Tamiya's enamel thinner based brown panel line wash for the turret. Next I used my preferred own watercolor wash to give everything a bit of a grimy look. Then I took a mixture of 80% thinner and 20% Tamiya Buff paint and misted it lightly around the lower hull. I did the same with the same ratio of thinner to Tamiya's NATO Brown because the Buff paint made it look like the Cromwell was driven in Tunisia and not Normandy. This darkened the tones enough for my satisfaction.
I brush painted (using the thinned mixture of NATO Brown) for some finer details like foot prints. Certain areas like hand holds were painted dark grey to show wear on the paint. The tracks were given similar treatment except more dirty. Once the washes had dried out, I sprayed on the top flat coat to seal everything in.
| FINAL CONSTRUCTION |
 I cut the string up to make the
tow cables. I used CA glue to secure the plastic ends to the string then I brush
painted it metallic grey and various light shades of red brown paint for the
rust. Once it was dry, I used CA glue to secure the tow cables in place.
I cut the string up to make the
tow cables. I used CA glue to secure the plastic ends to the string then I brush
painted it metallic grey and various light shades of red brown paint for the
rust. Once it was dry, I used CA glue to secure the tow cables in place.
The tracks were glued in place (I hid the track join by hiding it in the tiny track skirts at the fore and aft of the tank.) I used a dab of CA glue on the wheels to secure the track as necessary to prevent them from moving.
| CONCLUSIONS |
Tamiya did a very good kit of designing the Cromwell kit. It is quite well detailed kit of an important tank in the evolution of British Armor. The ease of construction means one can spend more time weathering, adding detail, building the diorama or another model. It was fun, quick and easy to build with no headaches (or swearing.)
Despite it's 20 year age, the Cromwell is still state of the art to me. I highly recommend this kit for modellers of any skill level.
28 August 2018
Copyright ModelingMadness.com
If you would like your product reviewed fairly and fairly quickly, please contact the editor or see other details in the Note to Contributors.